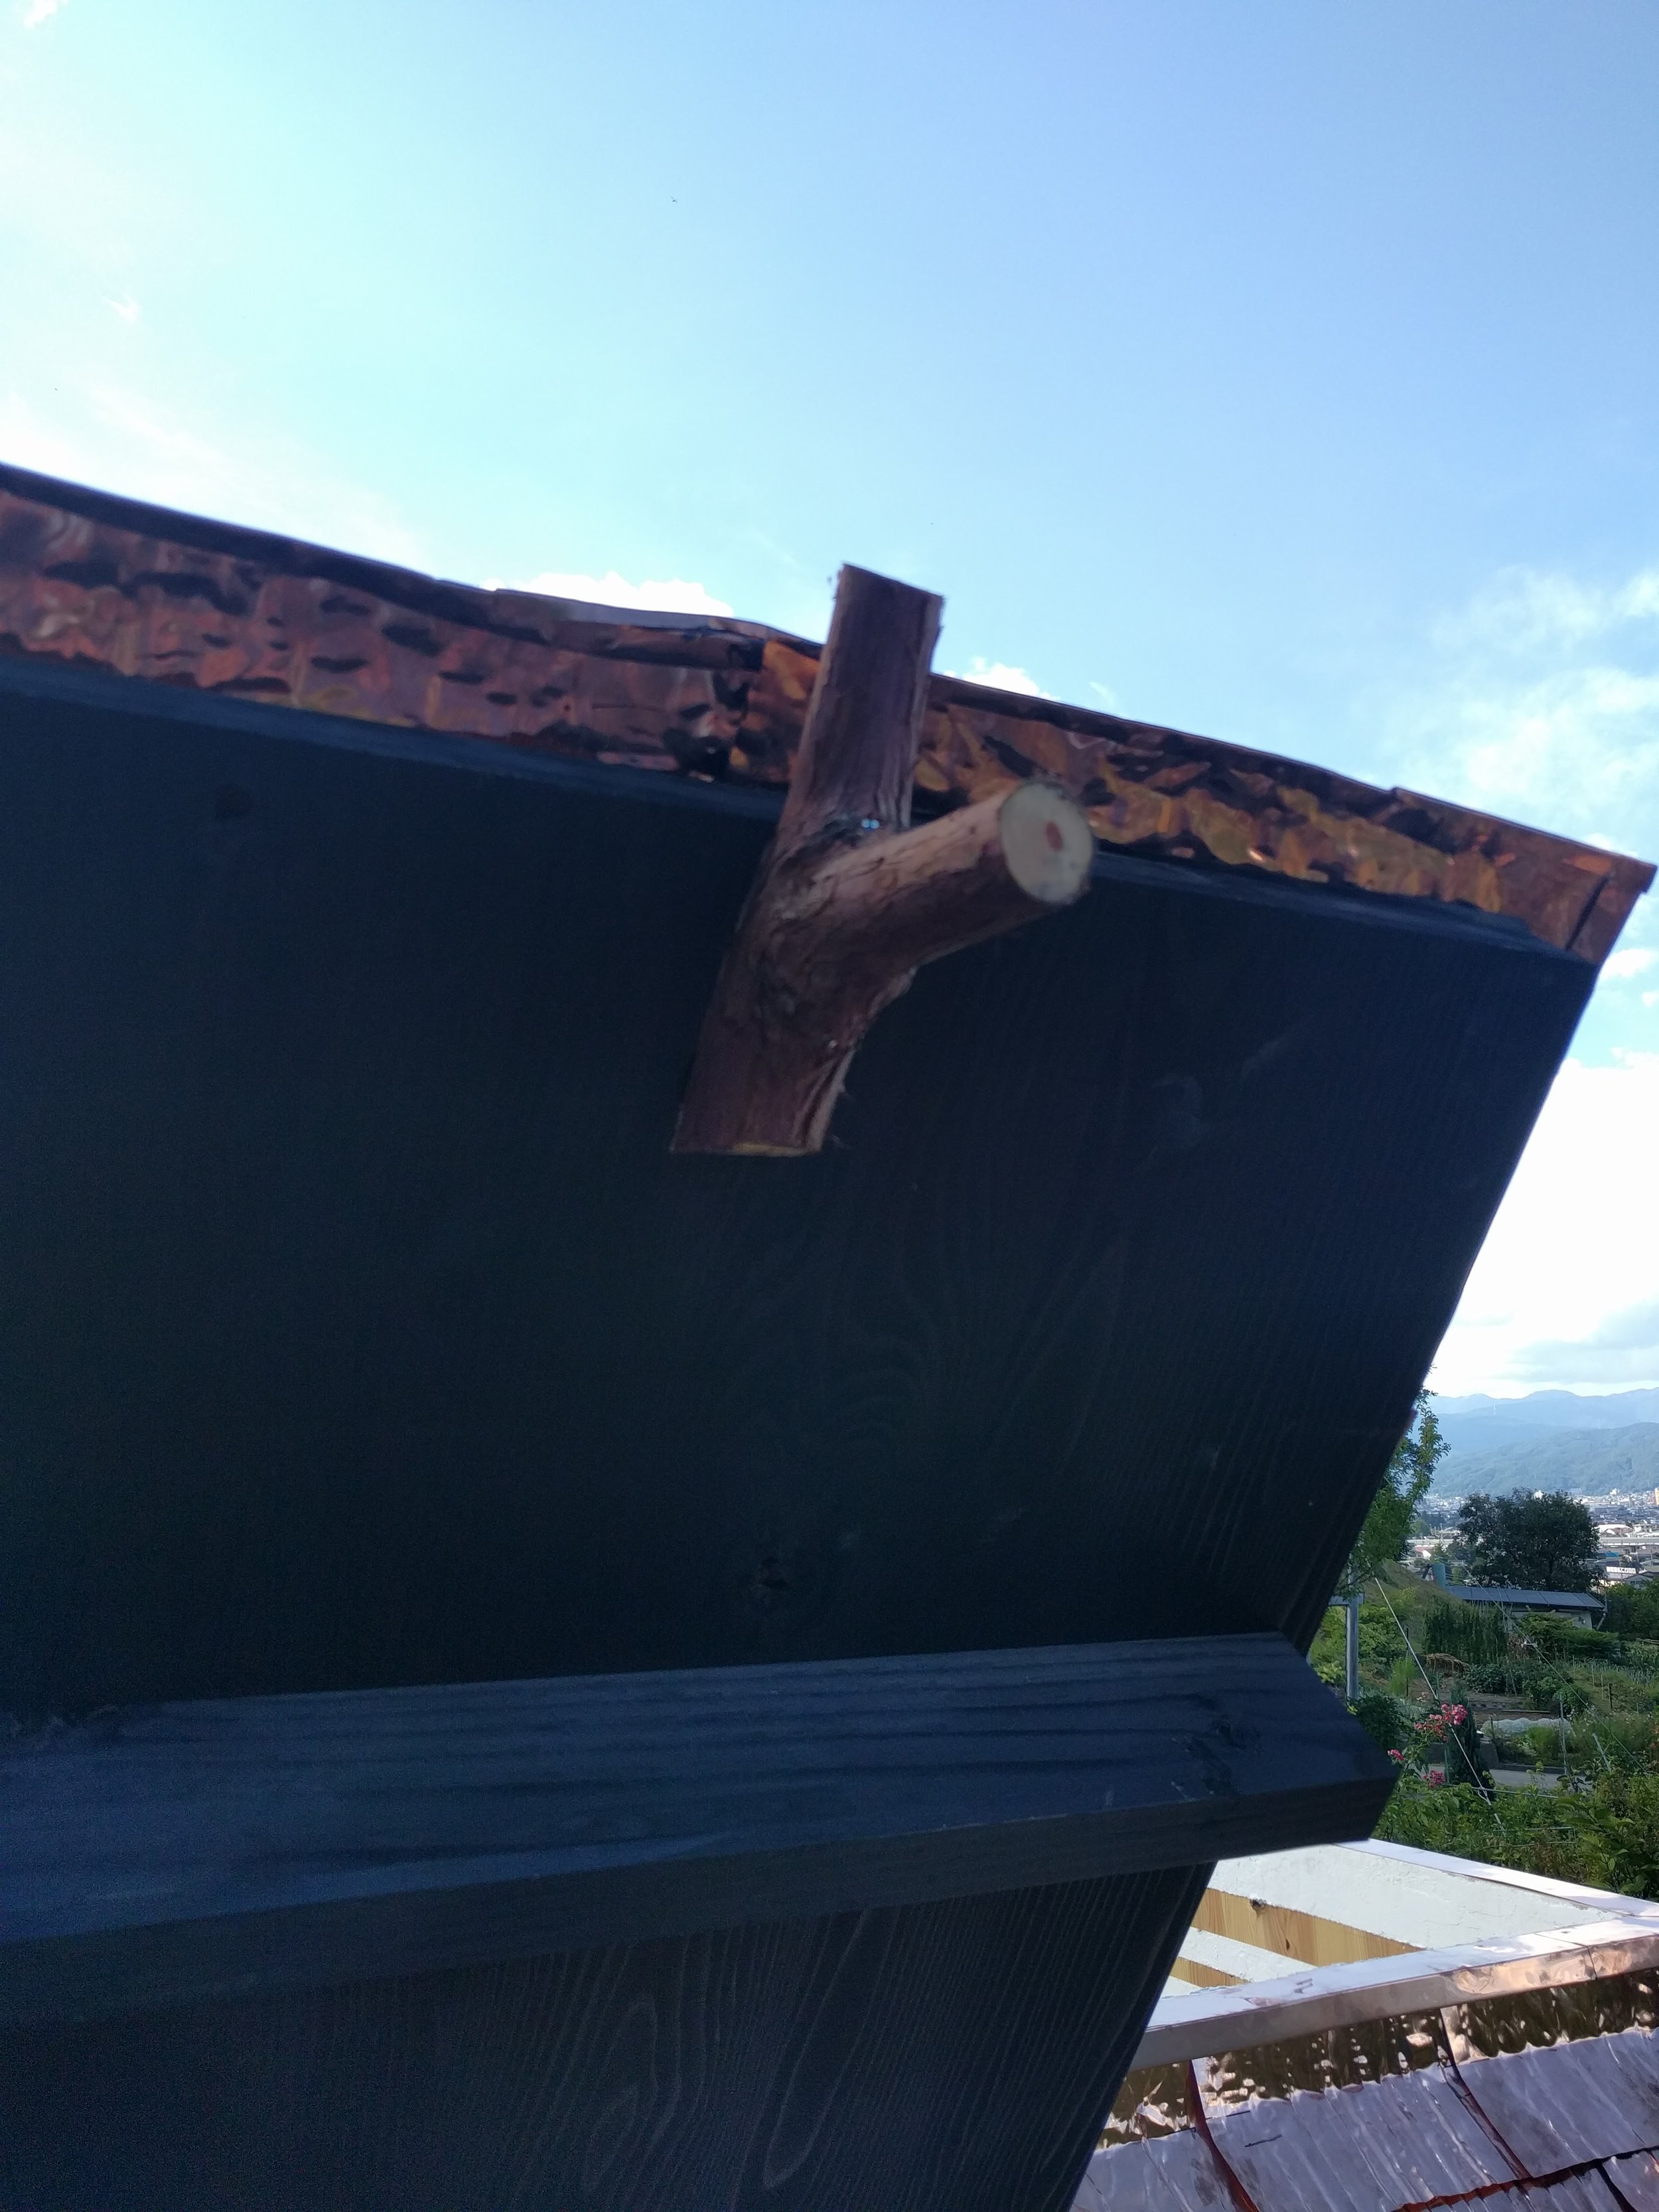
hahahah. Still needed some modification. We cut the rail short, and opened the mouth of the kettle more.
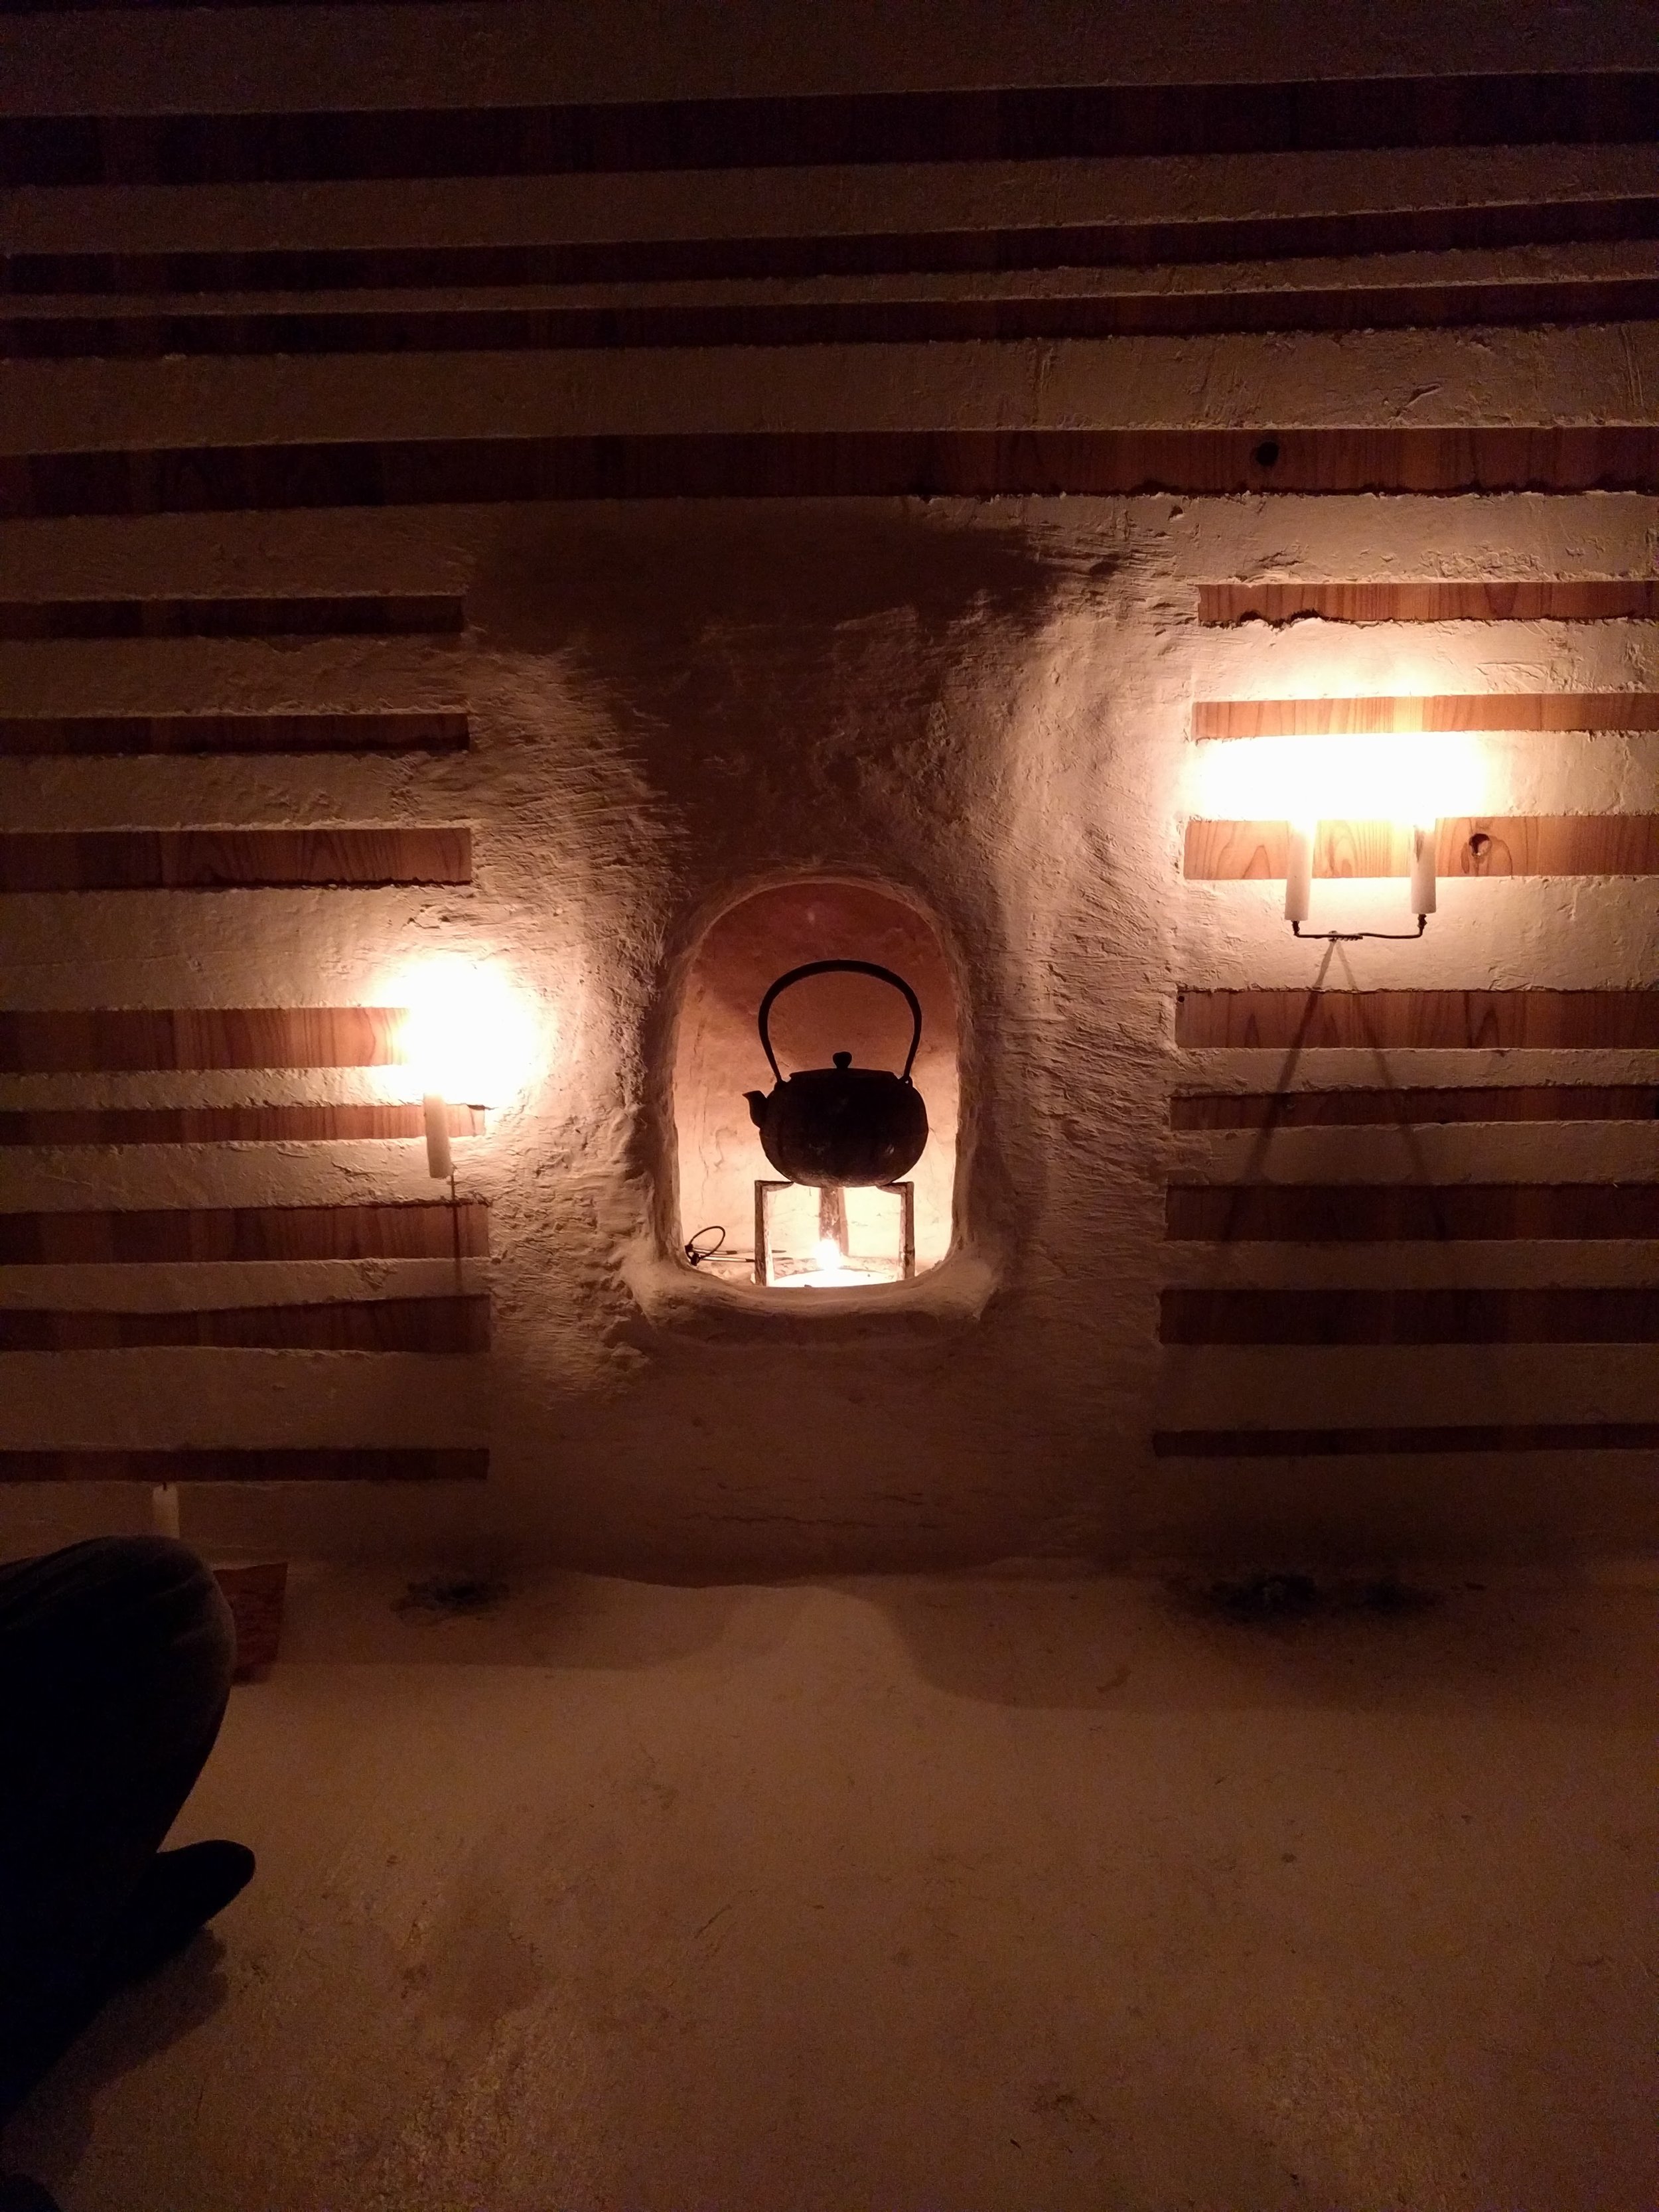
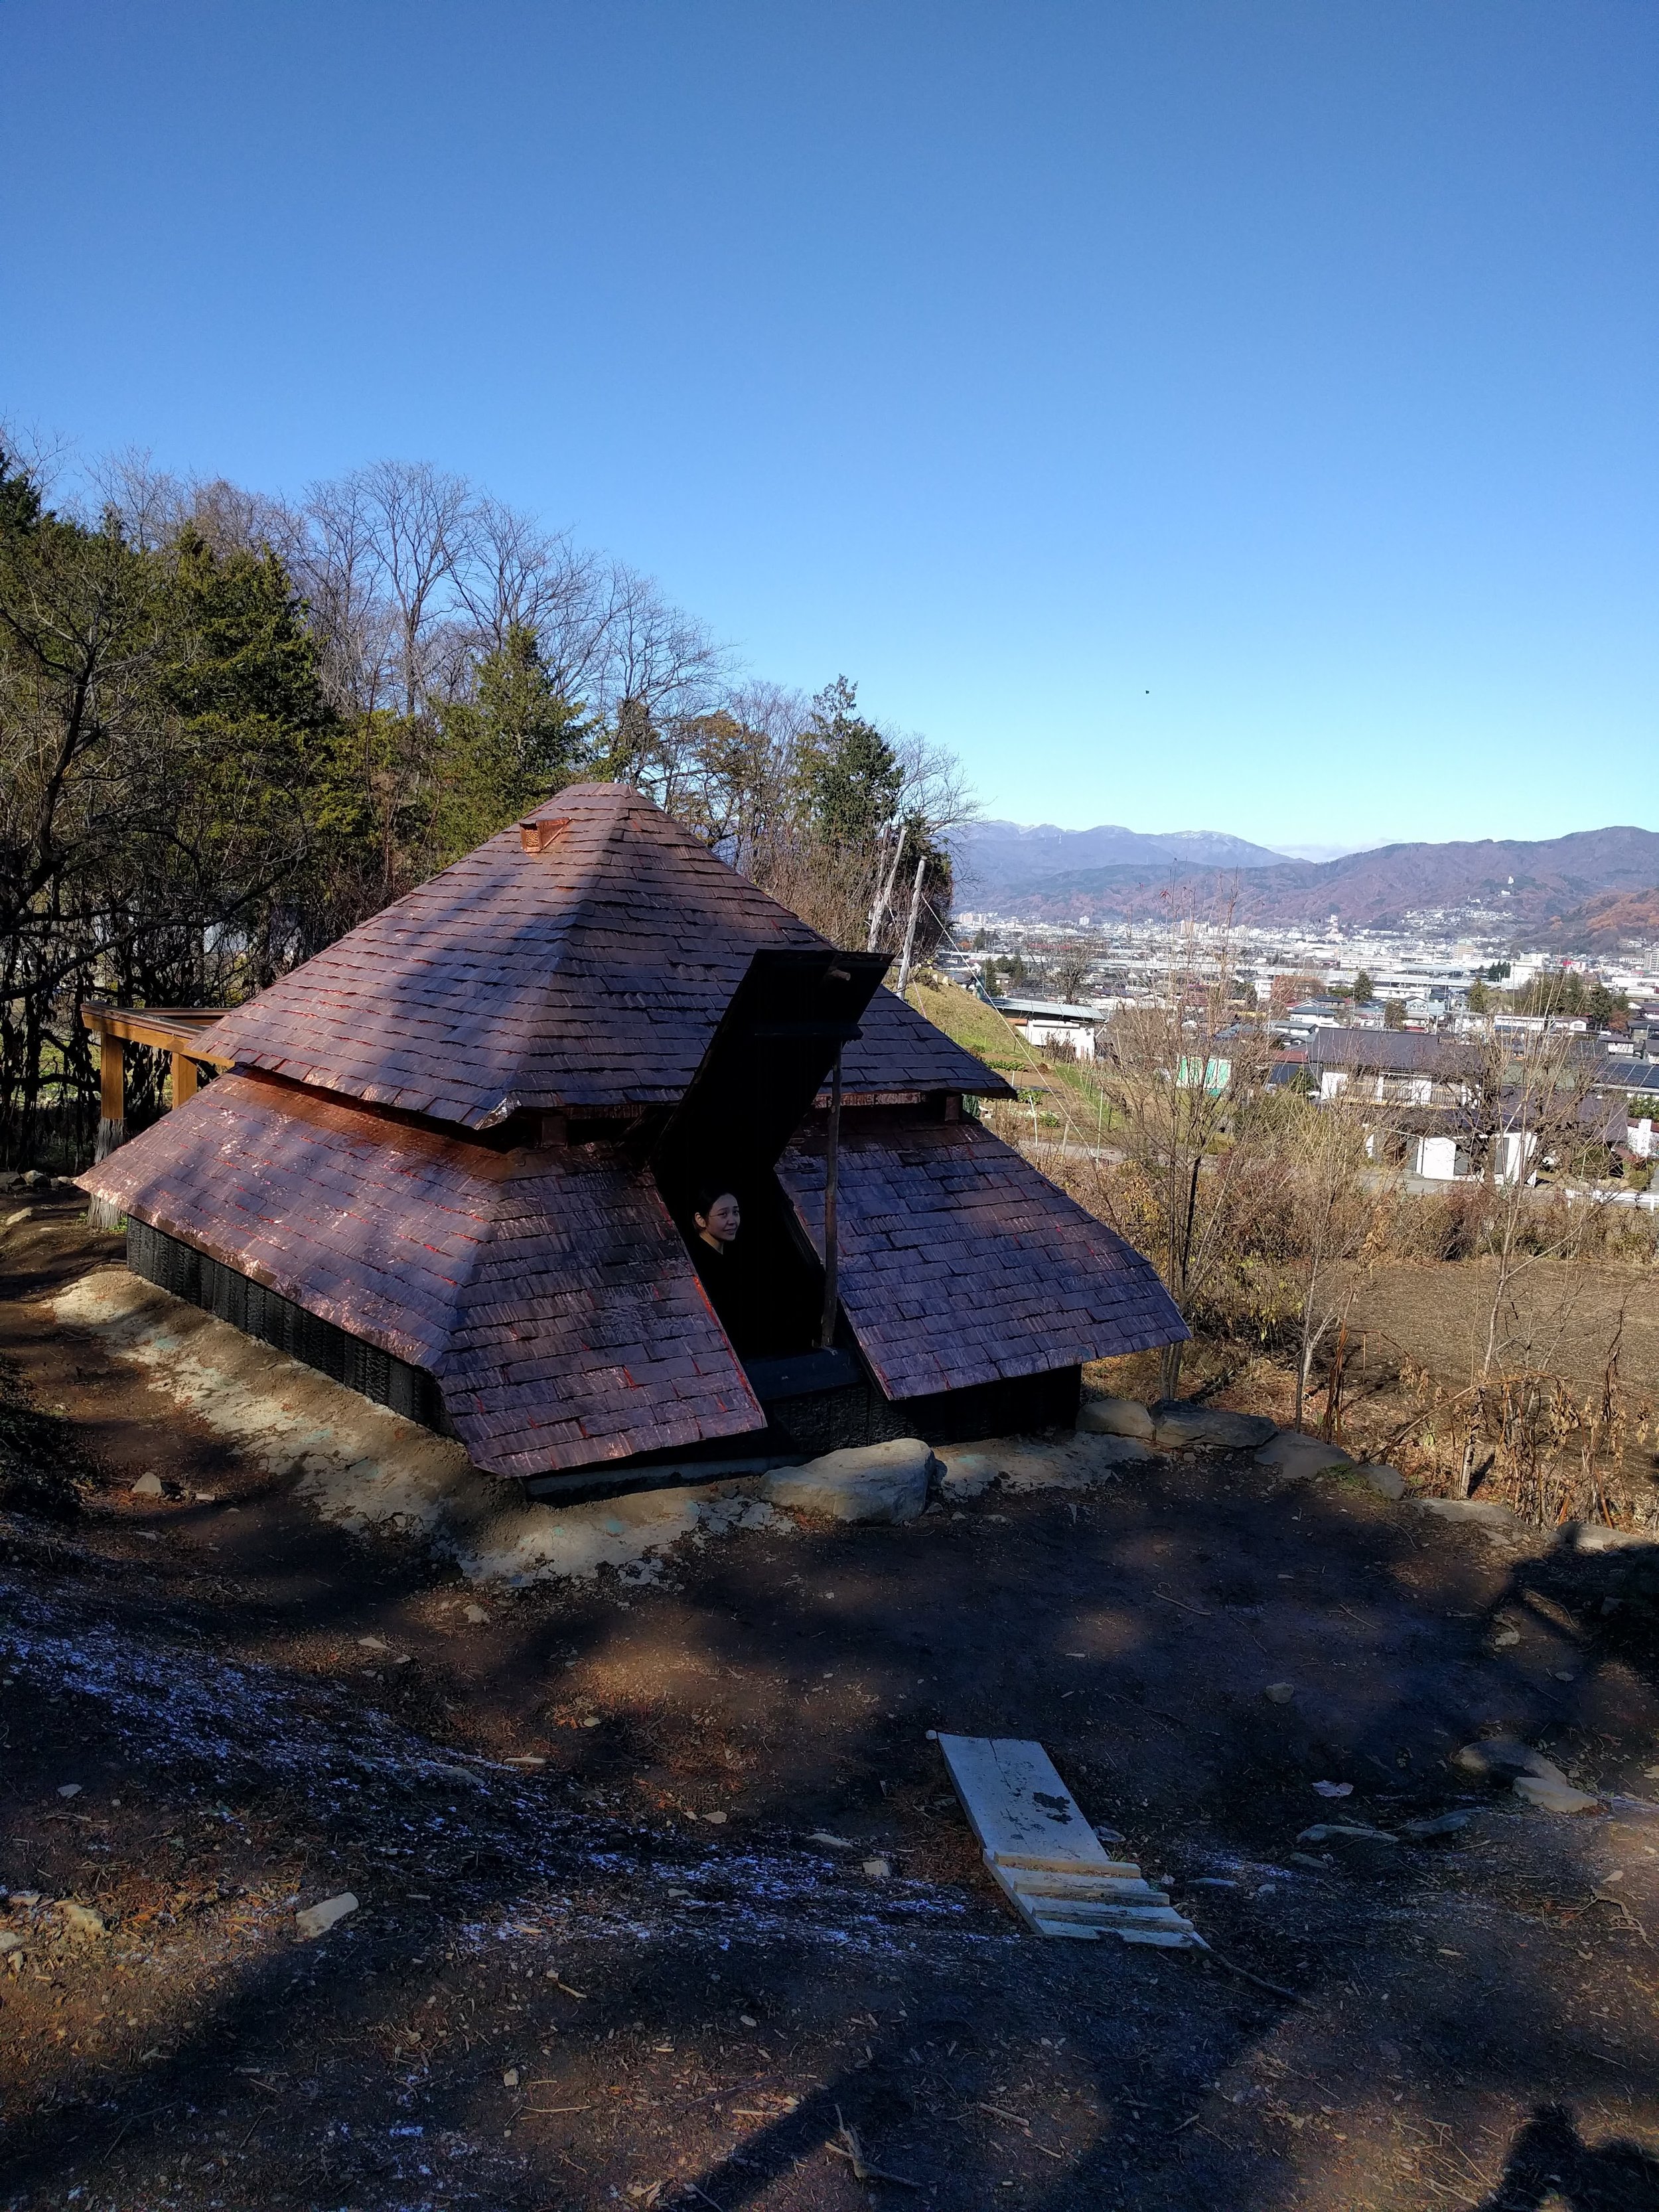

hahahah. Still needed some modification. We cut the rail short, and opened the mouth of the kettle more.
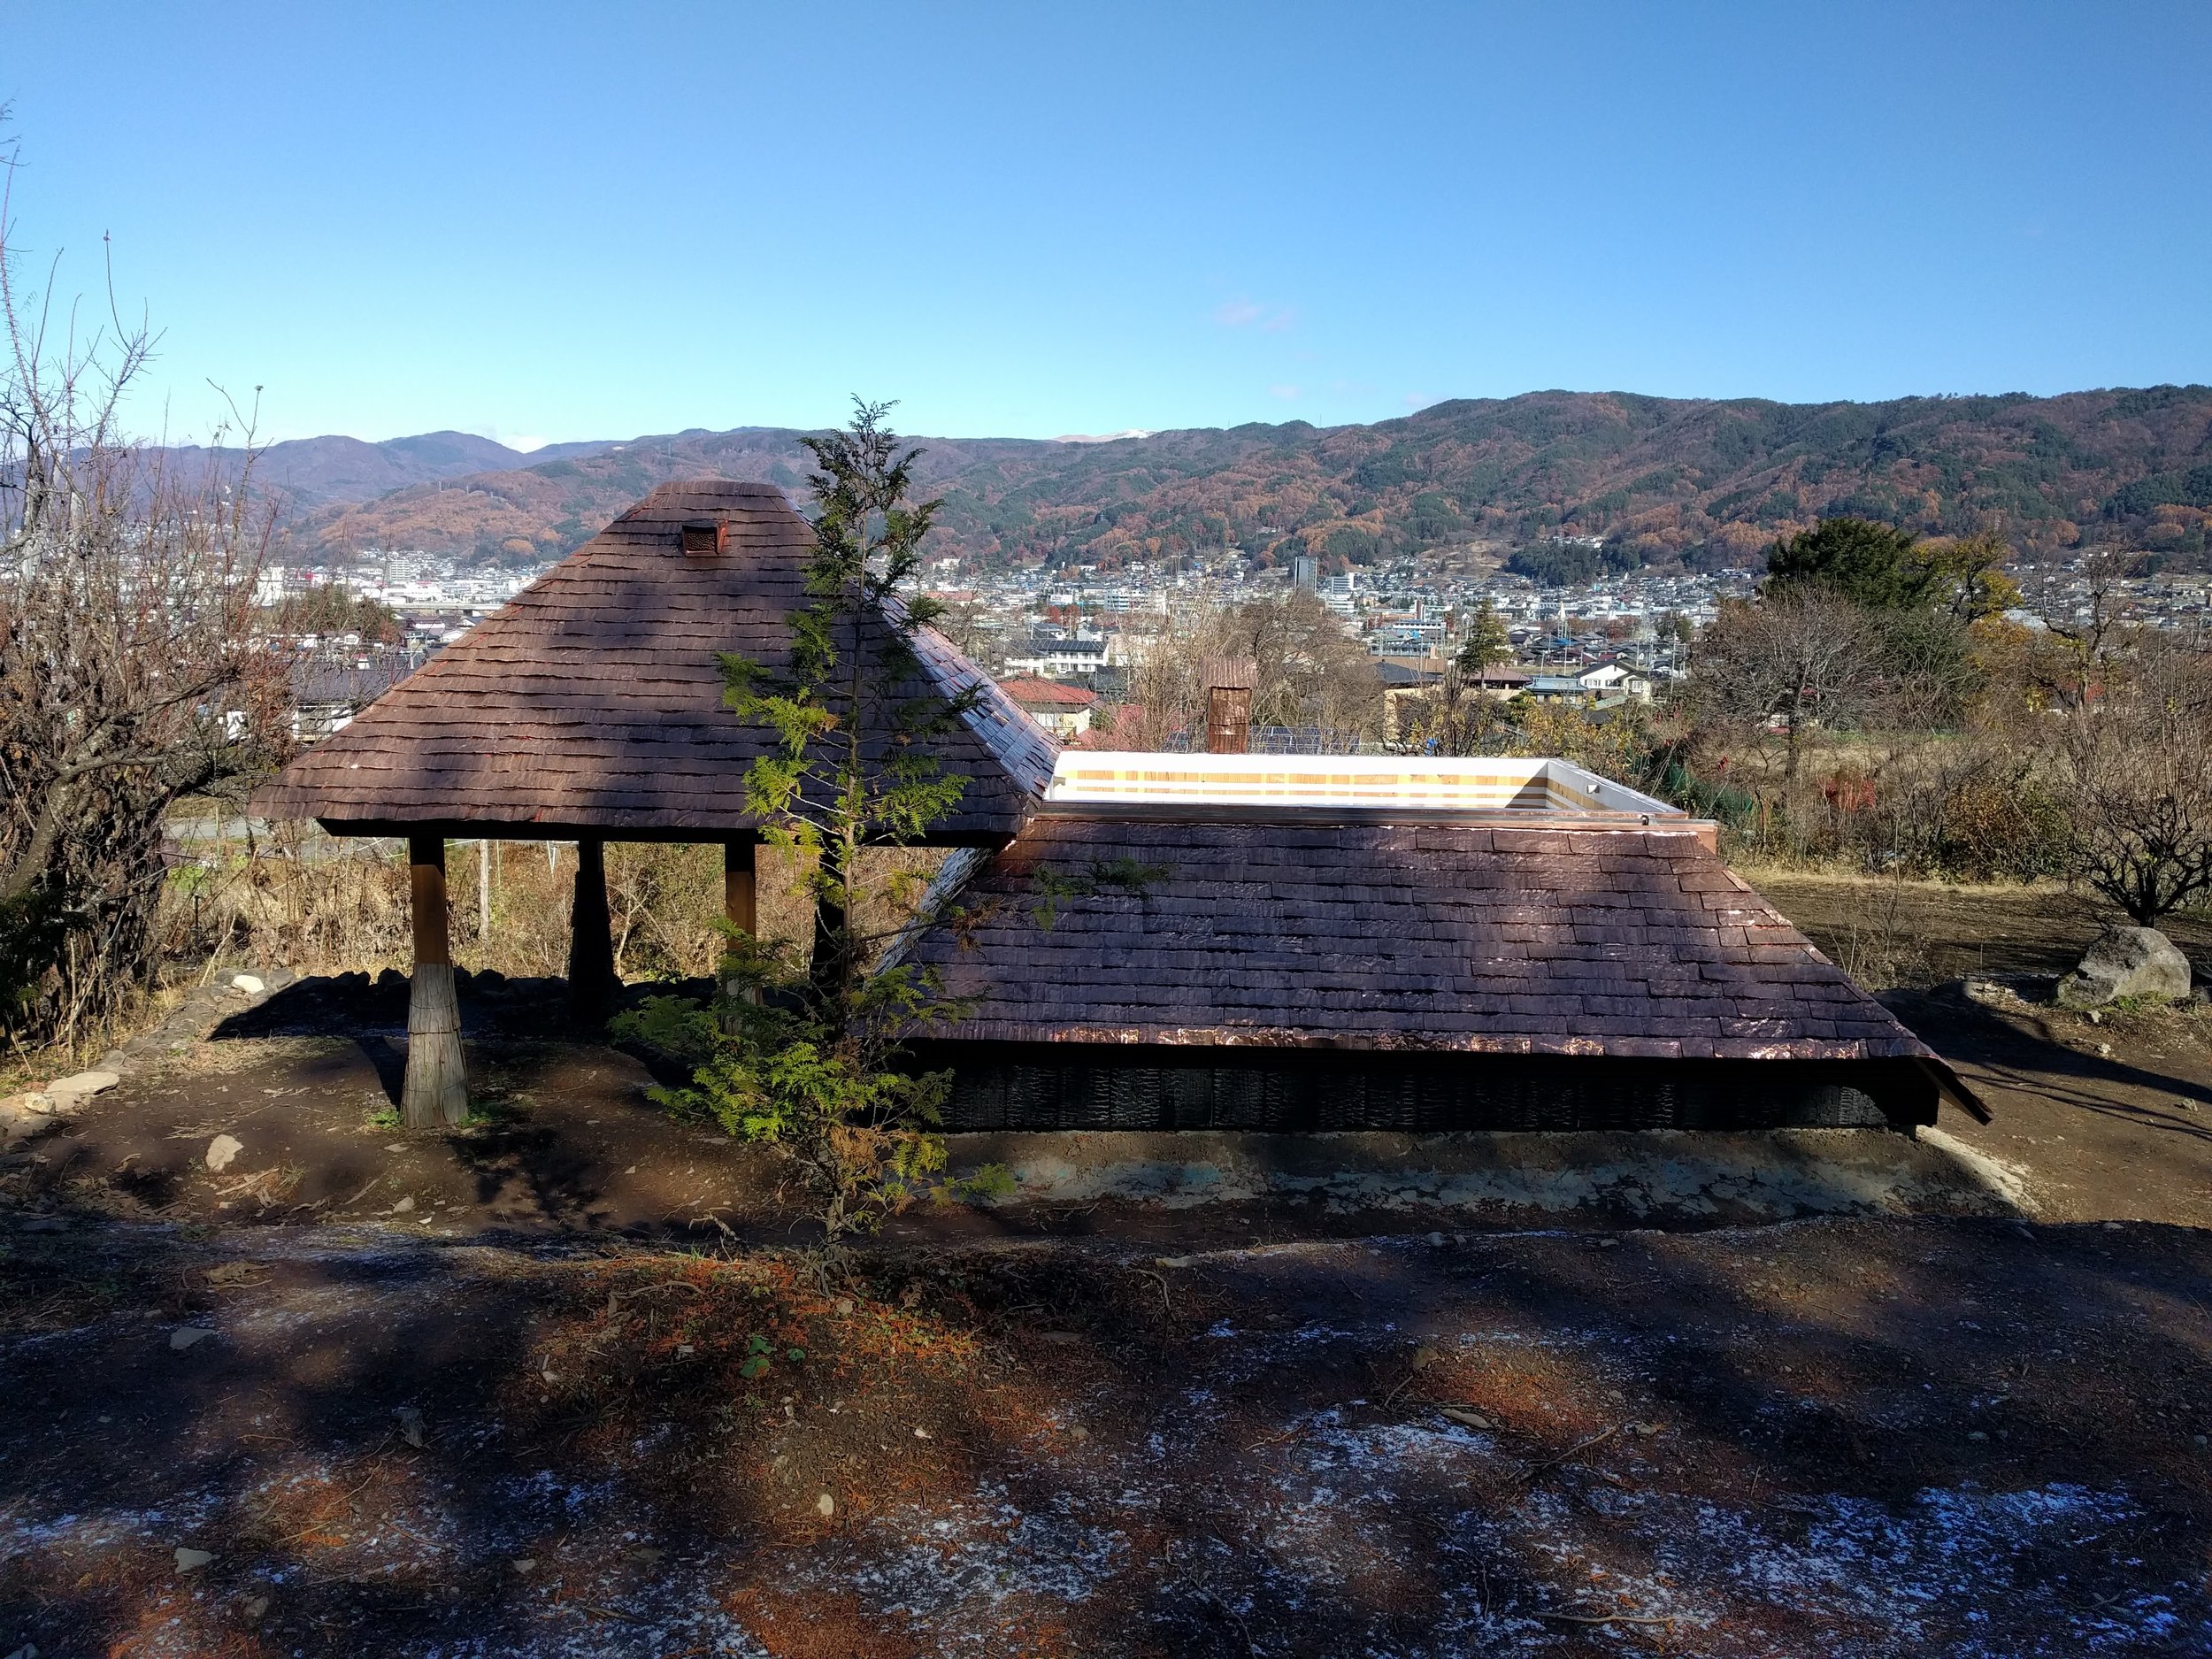
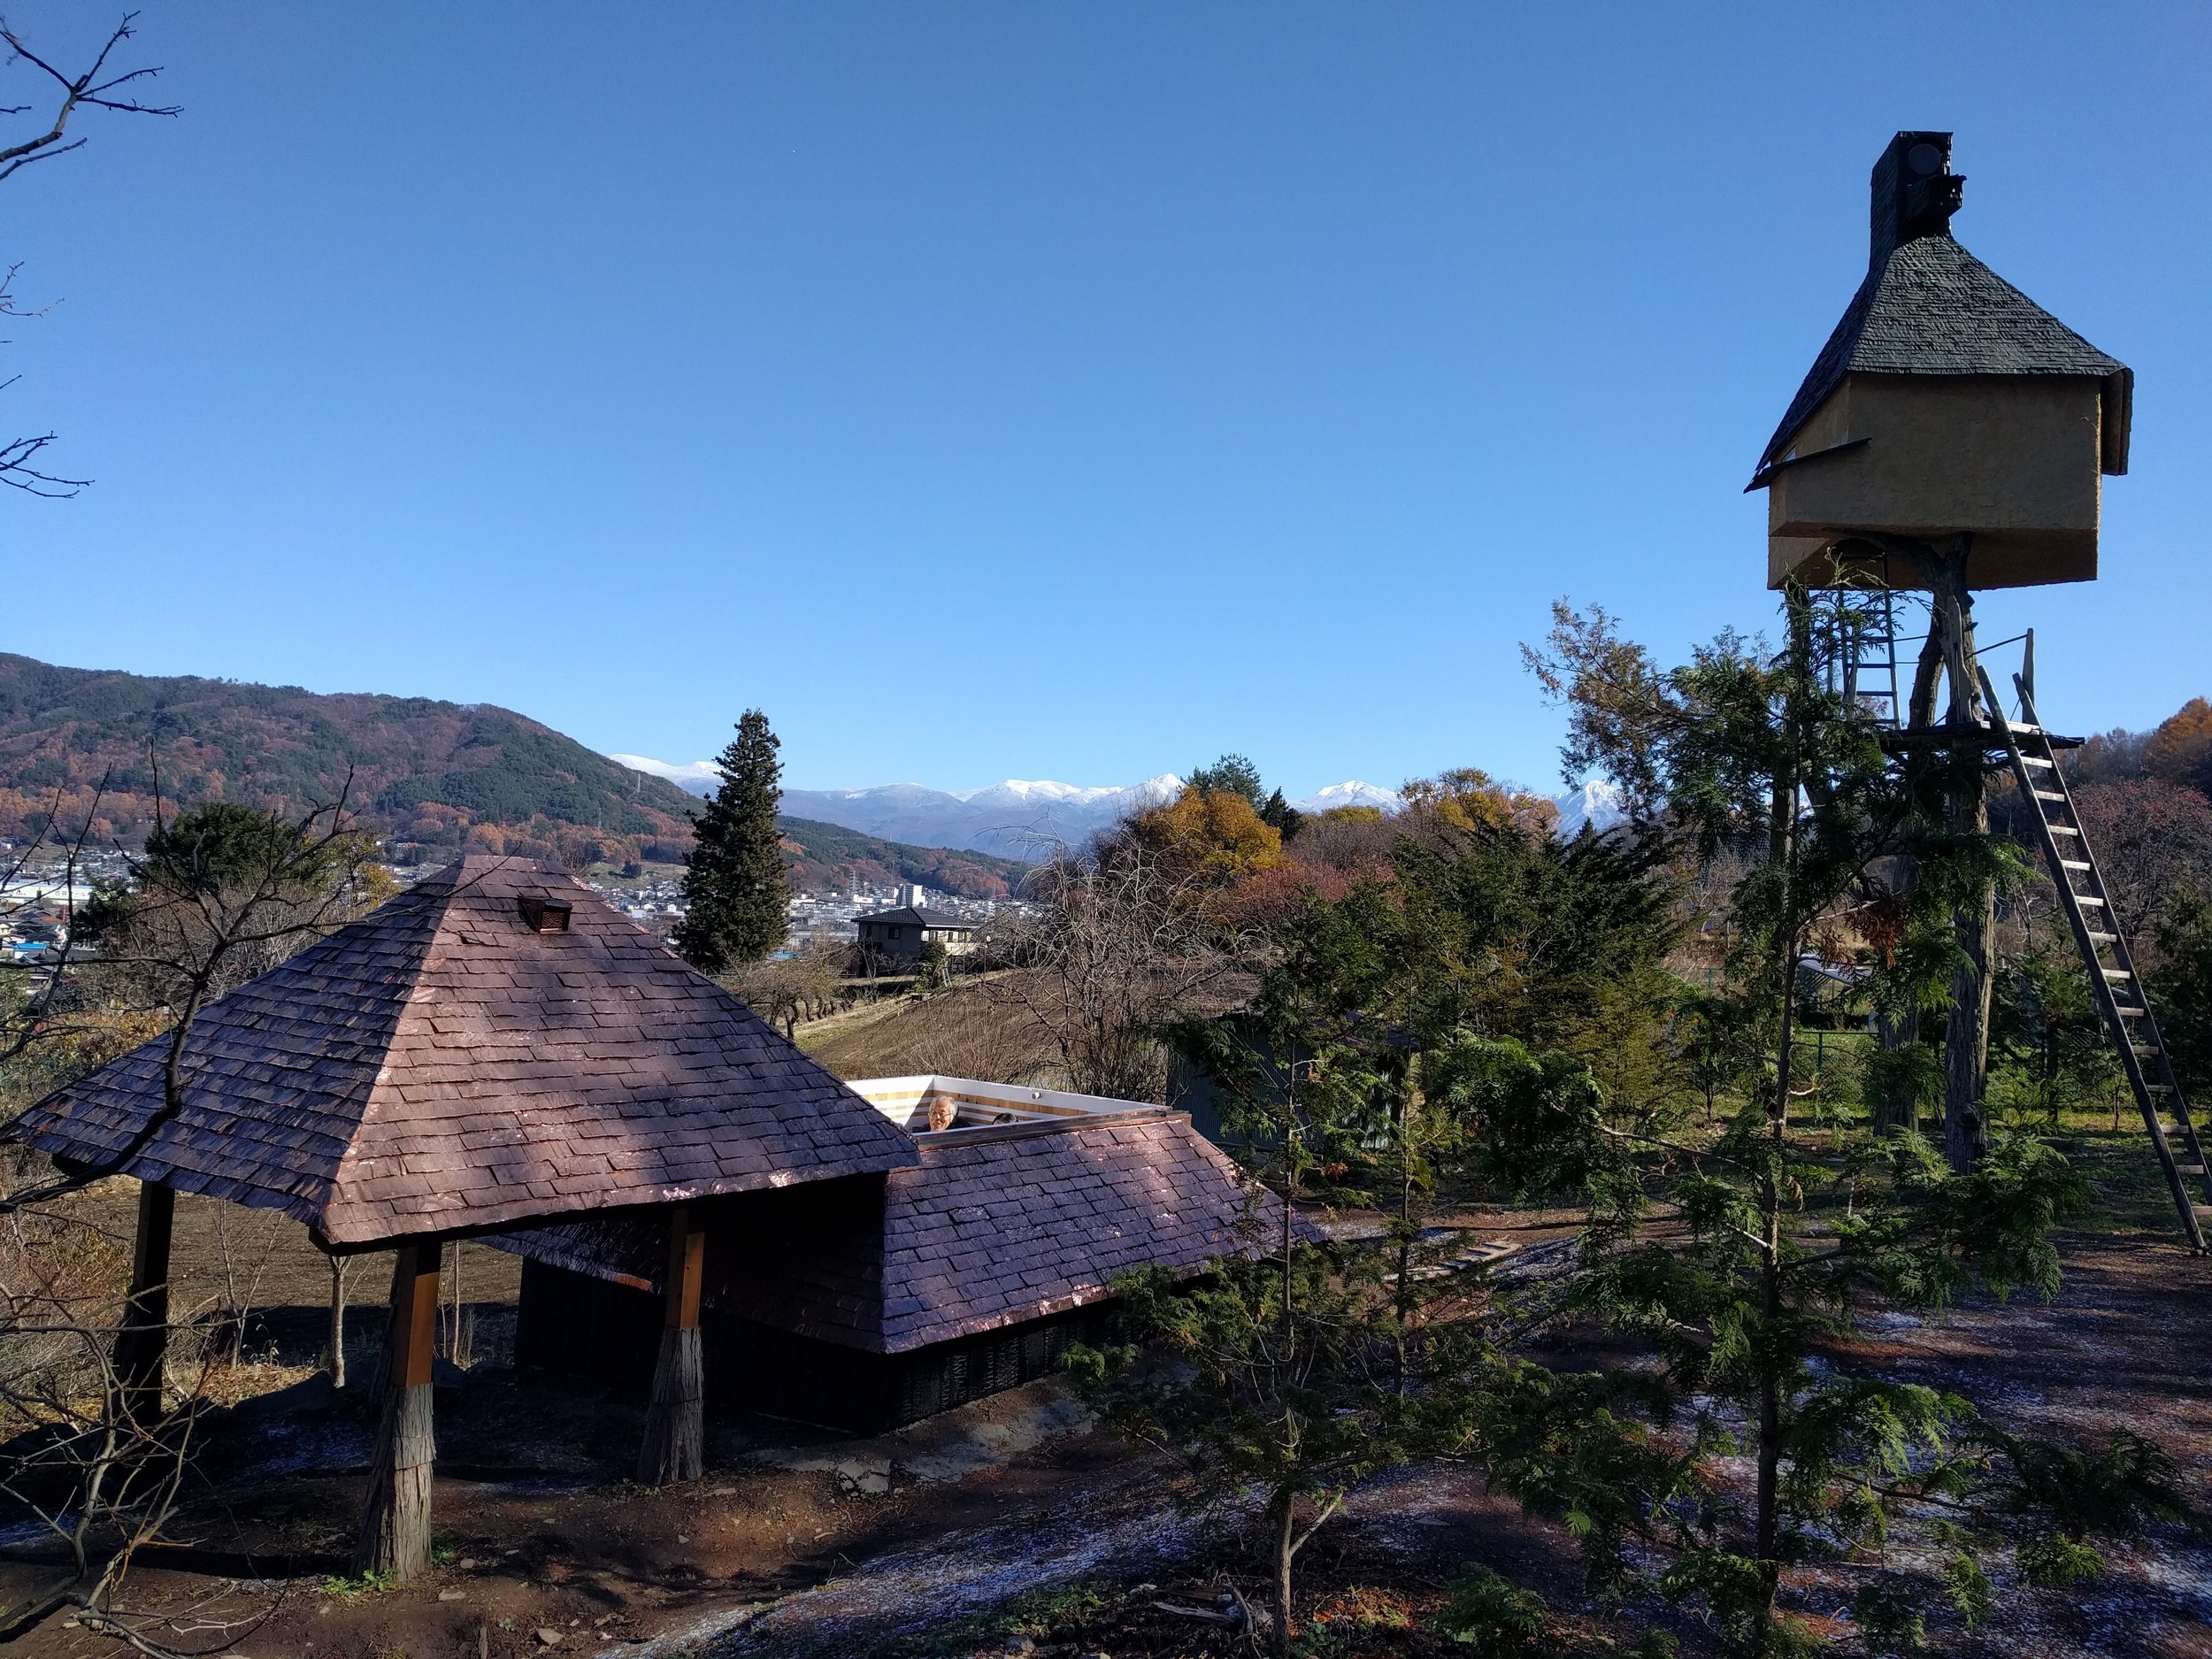
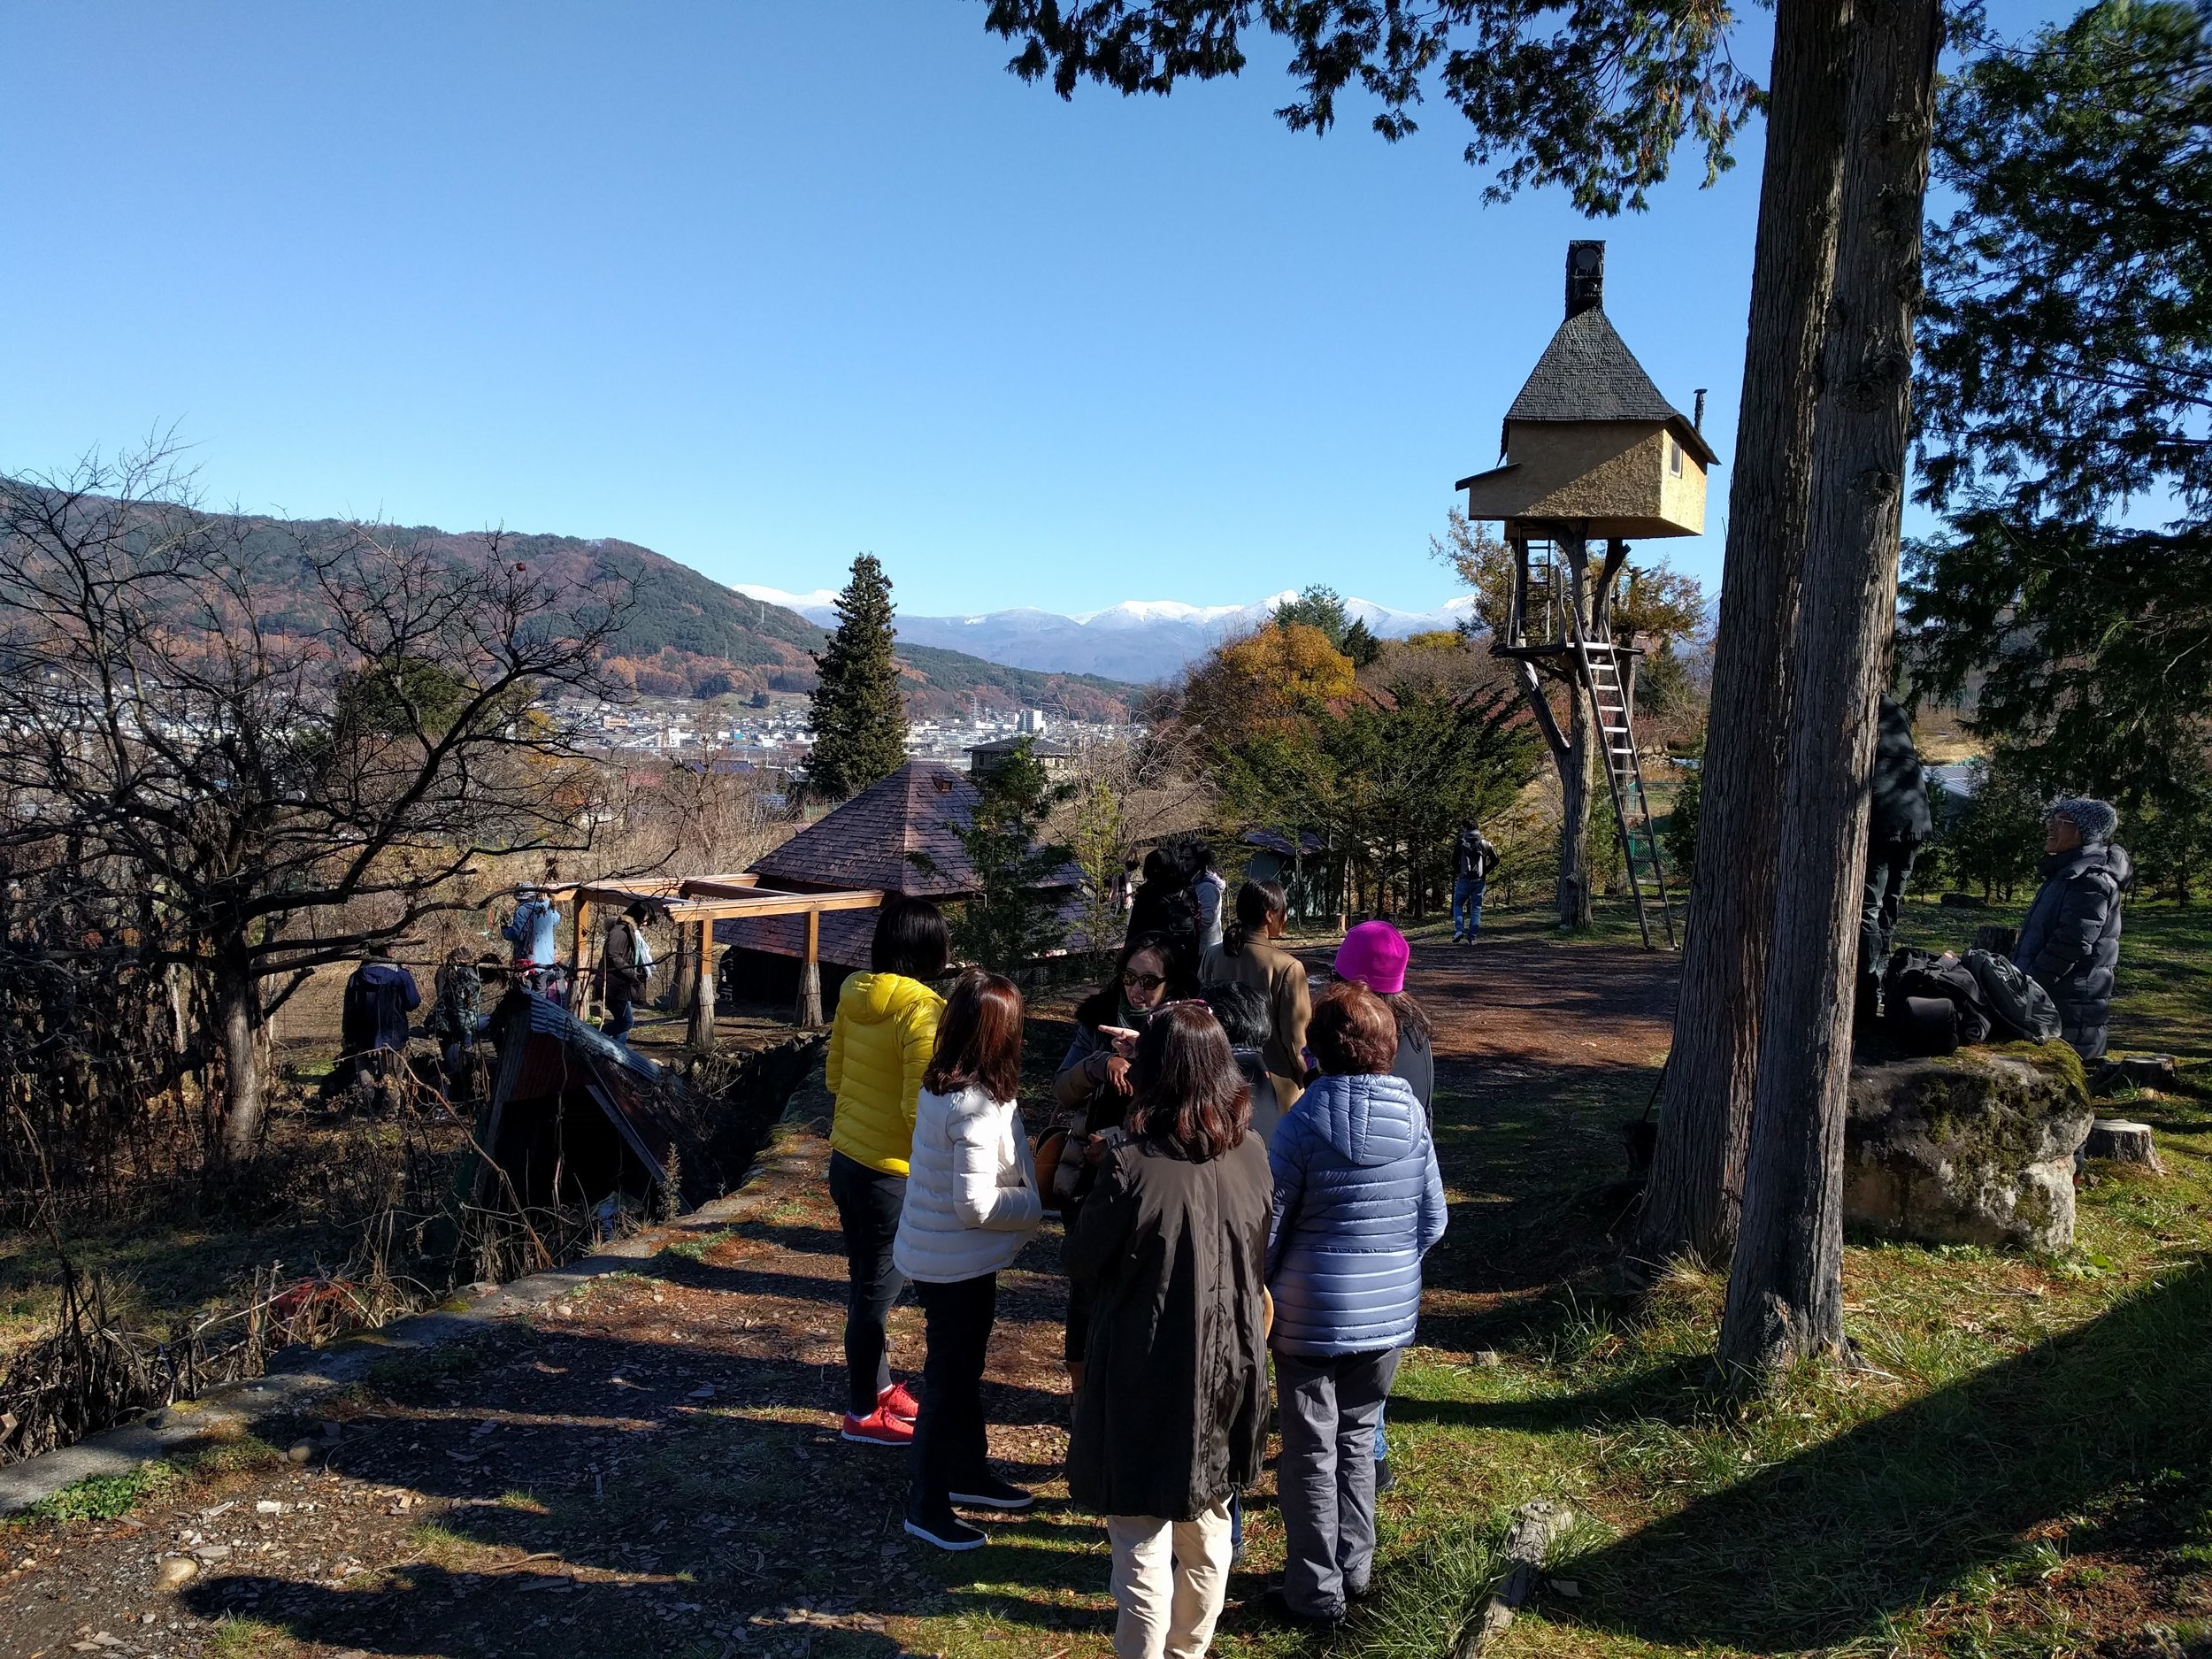
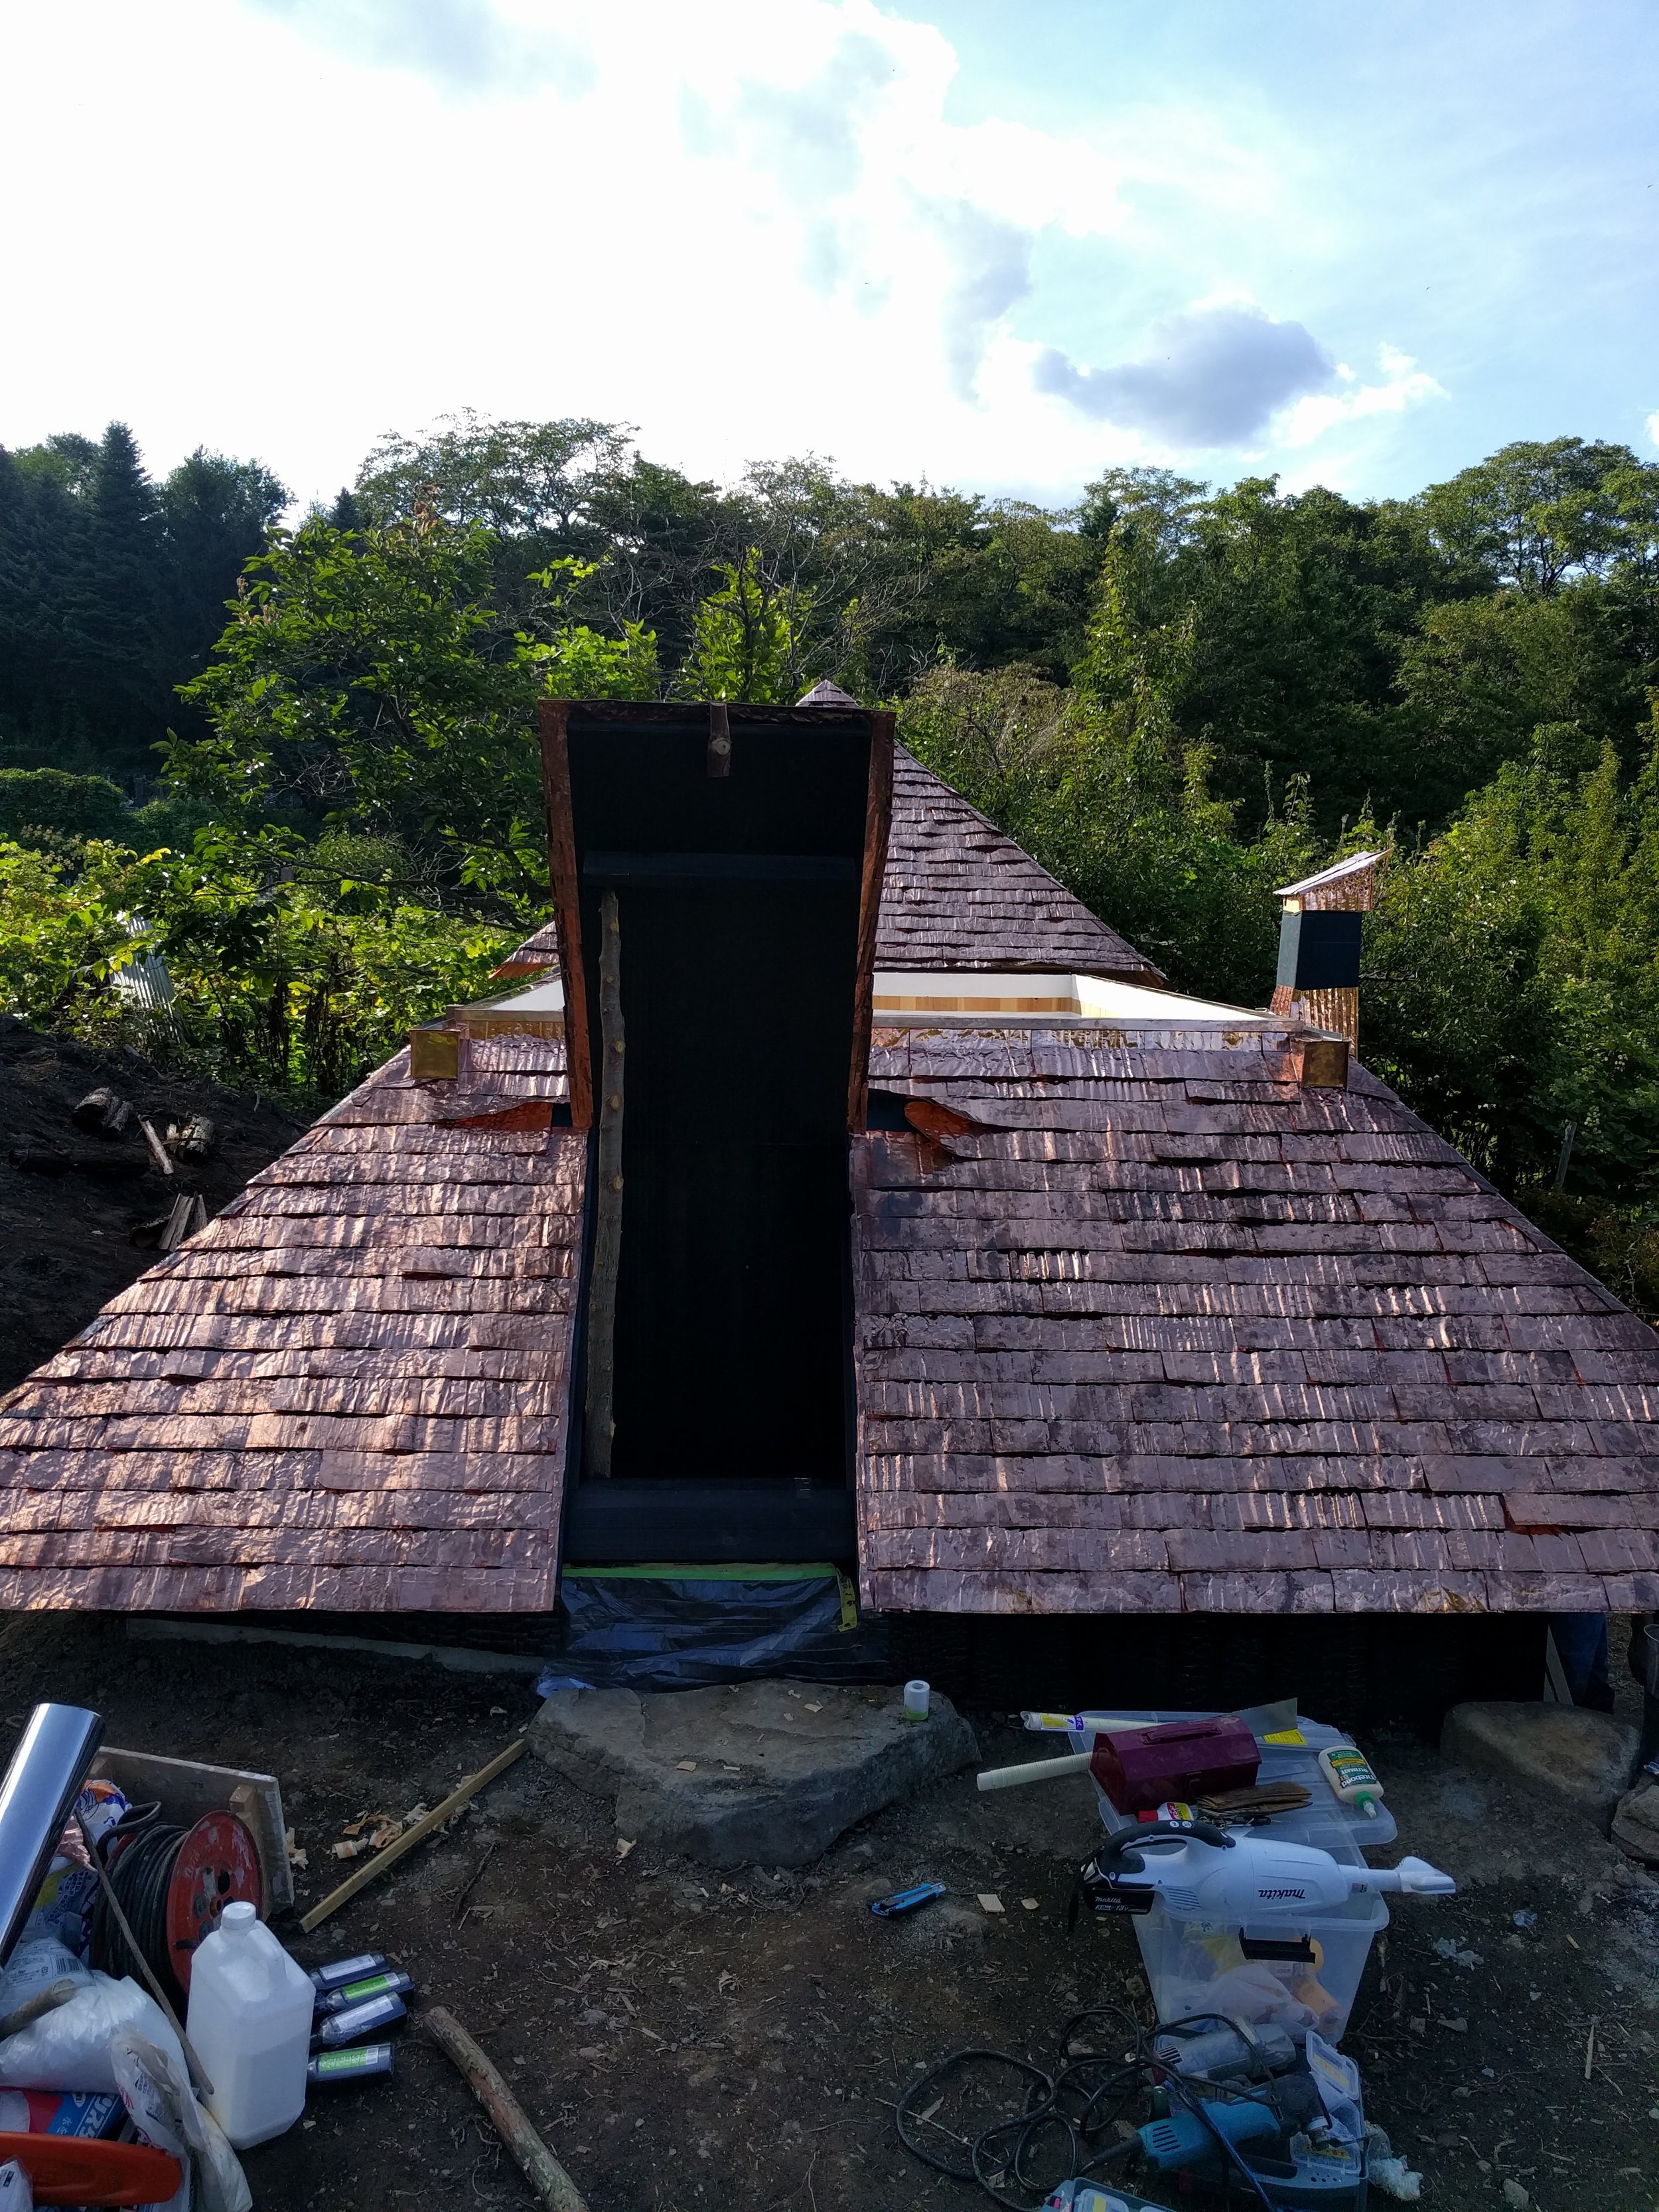
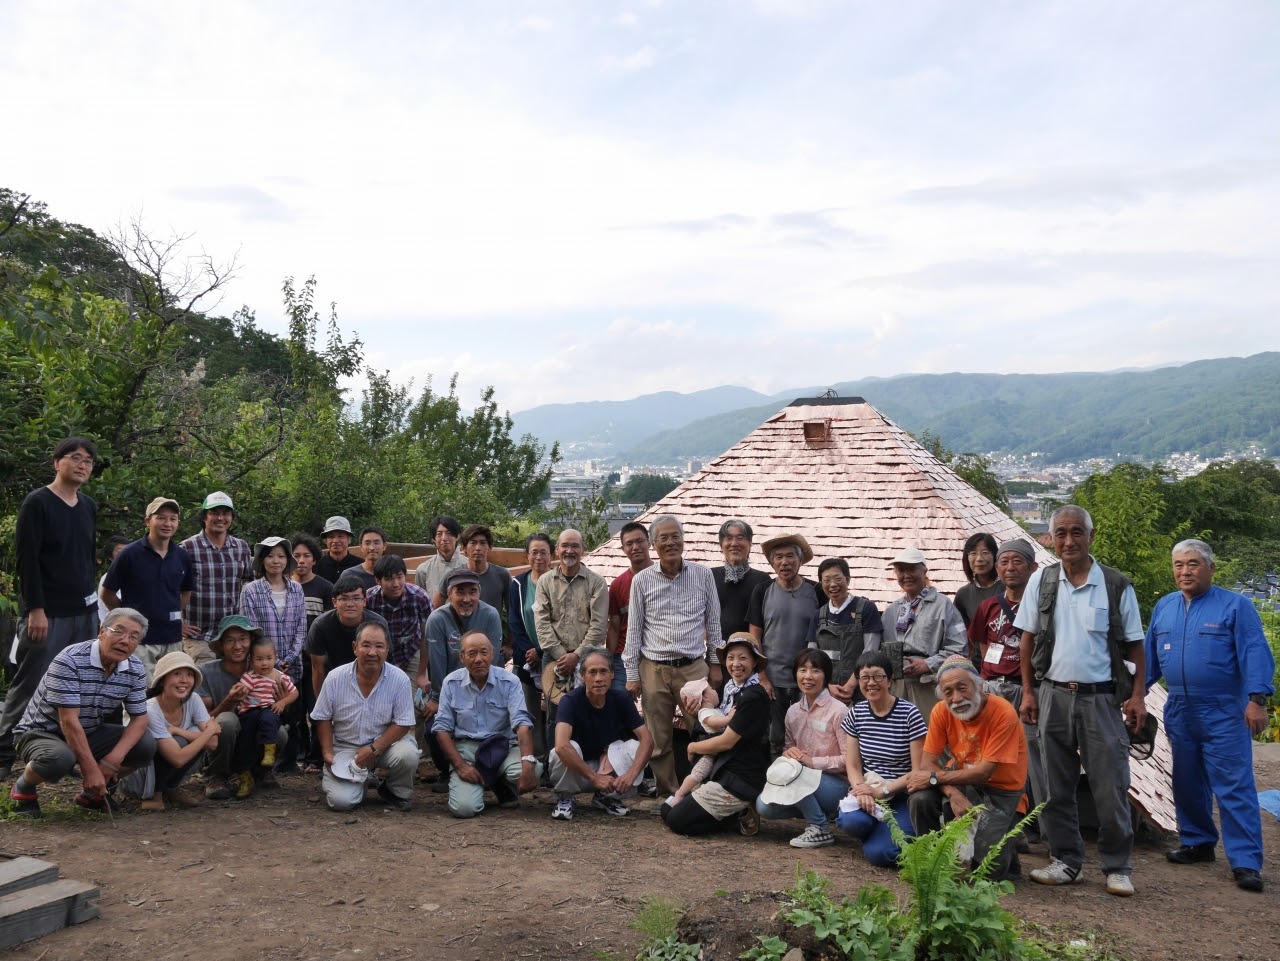
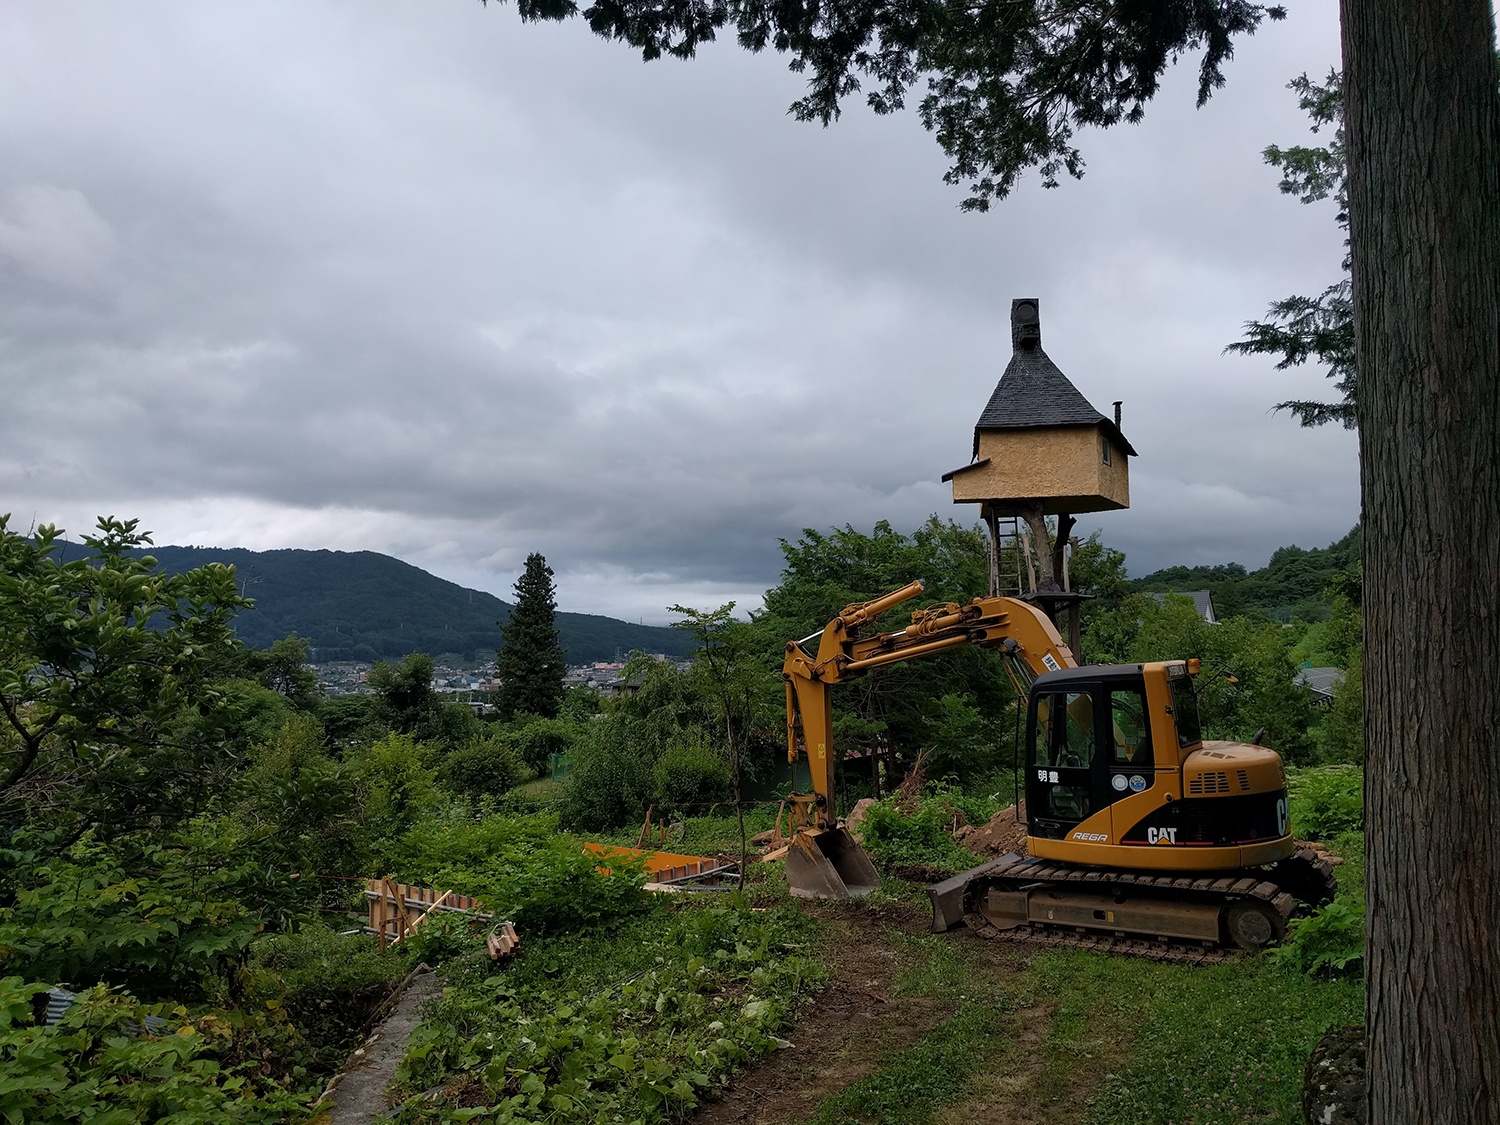
Official opening of Hikusugian - Too Low Tea Hut.
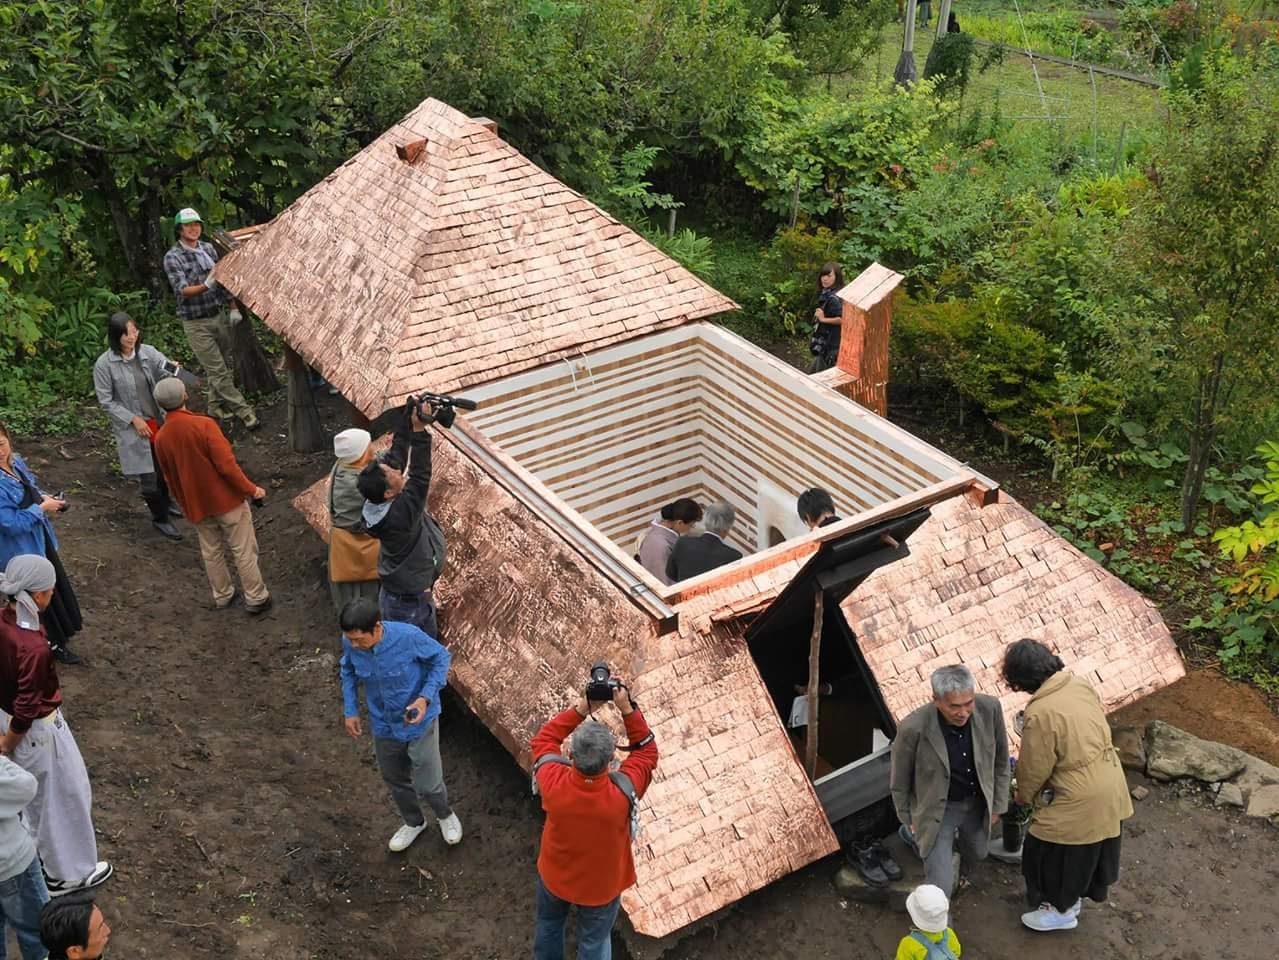
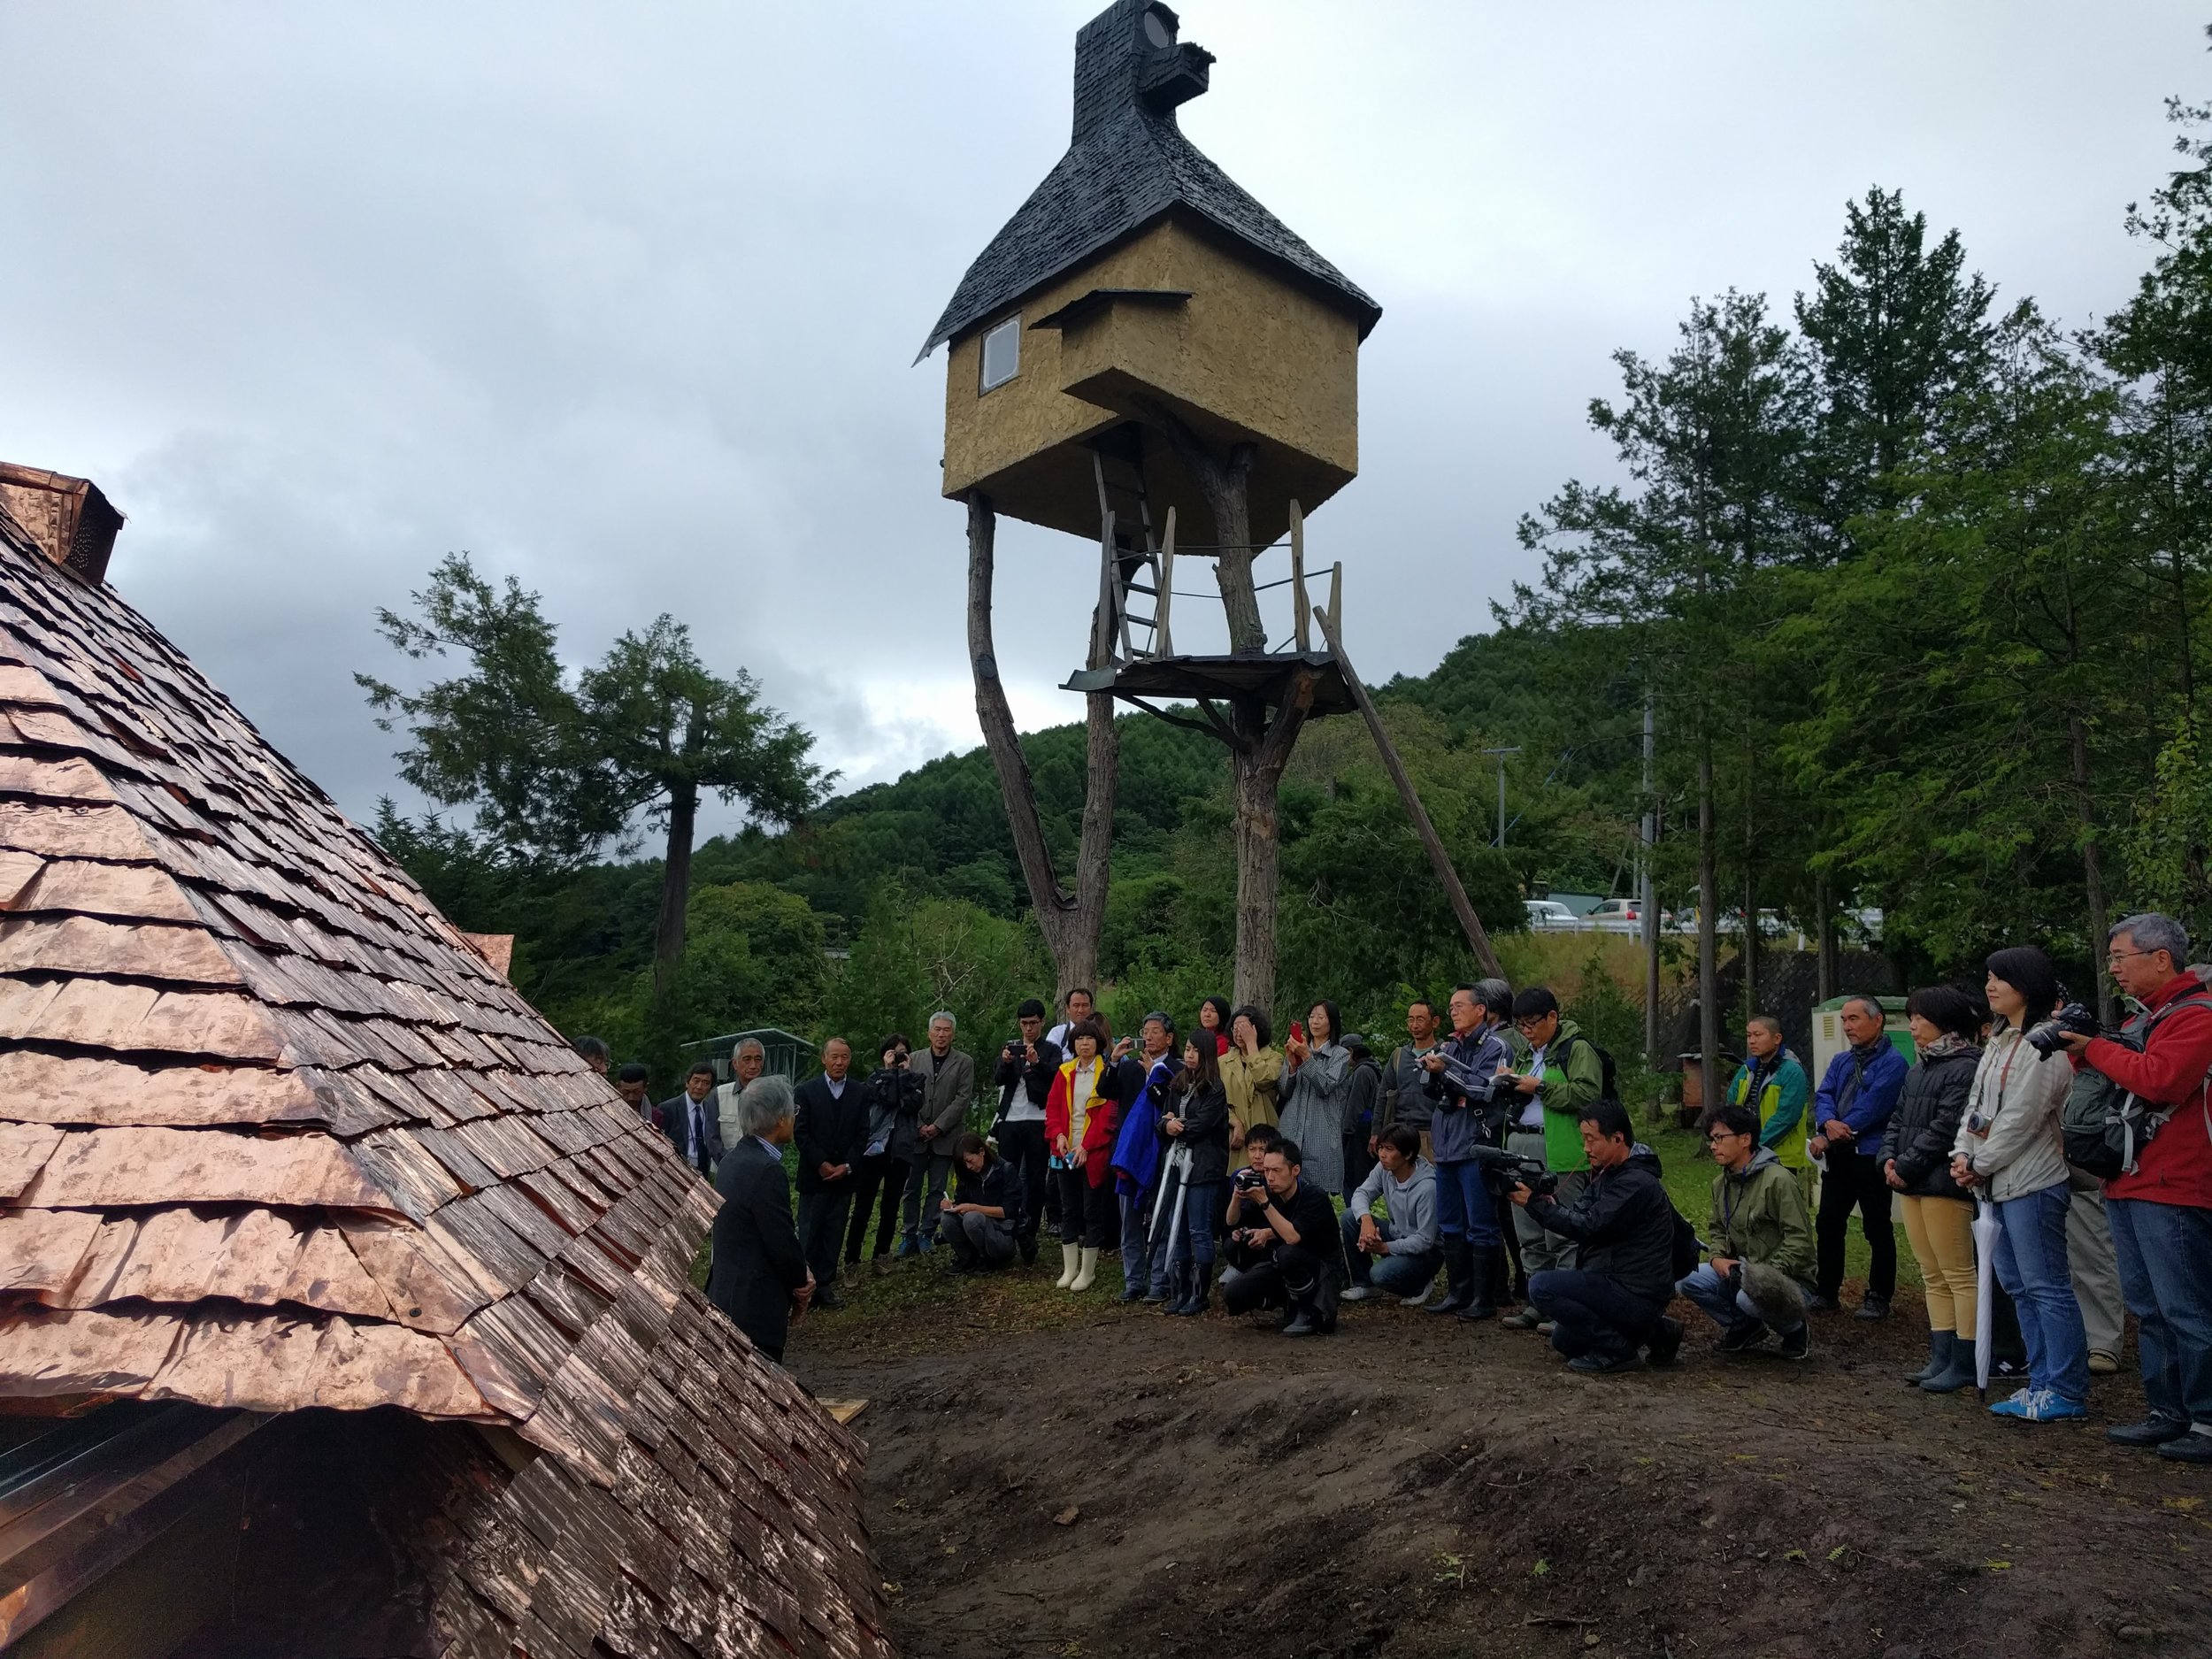
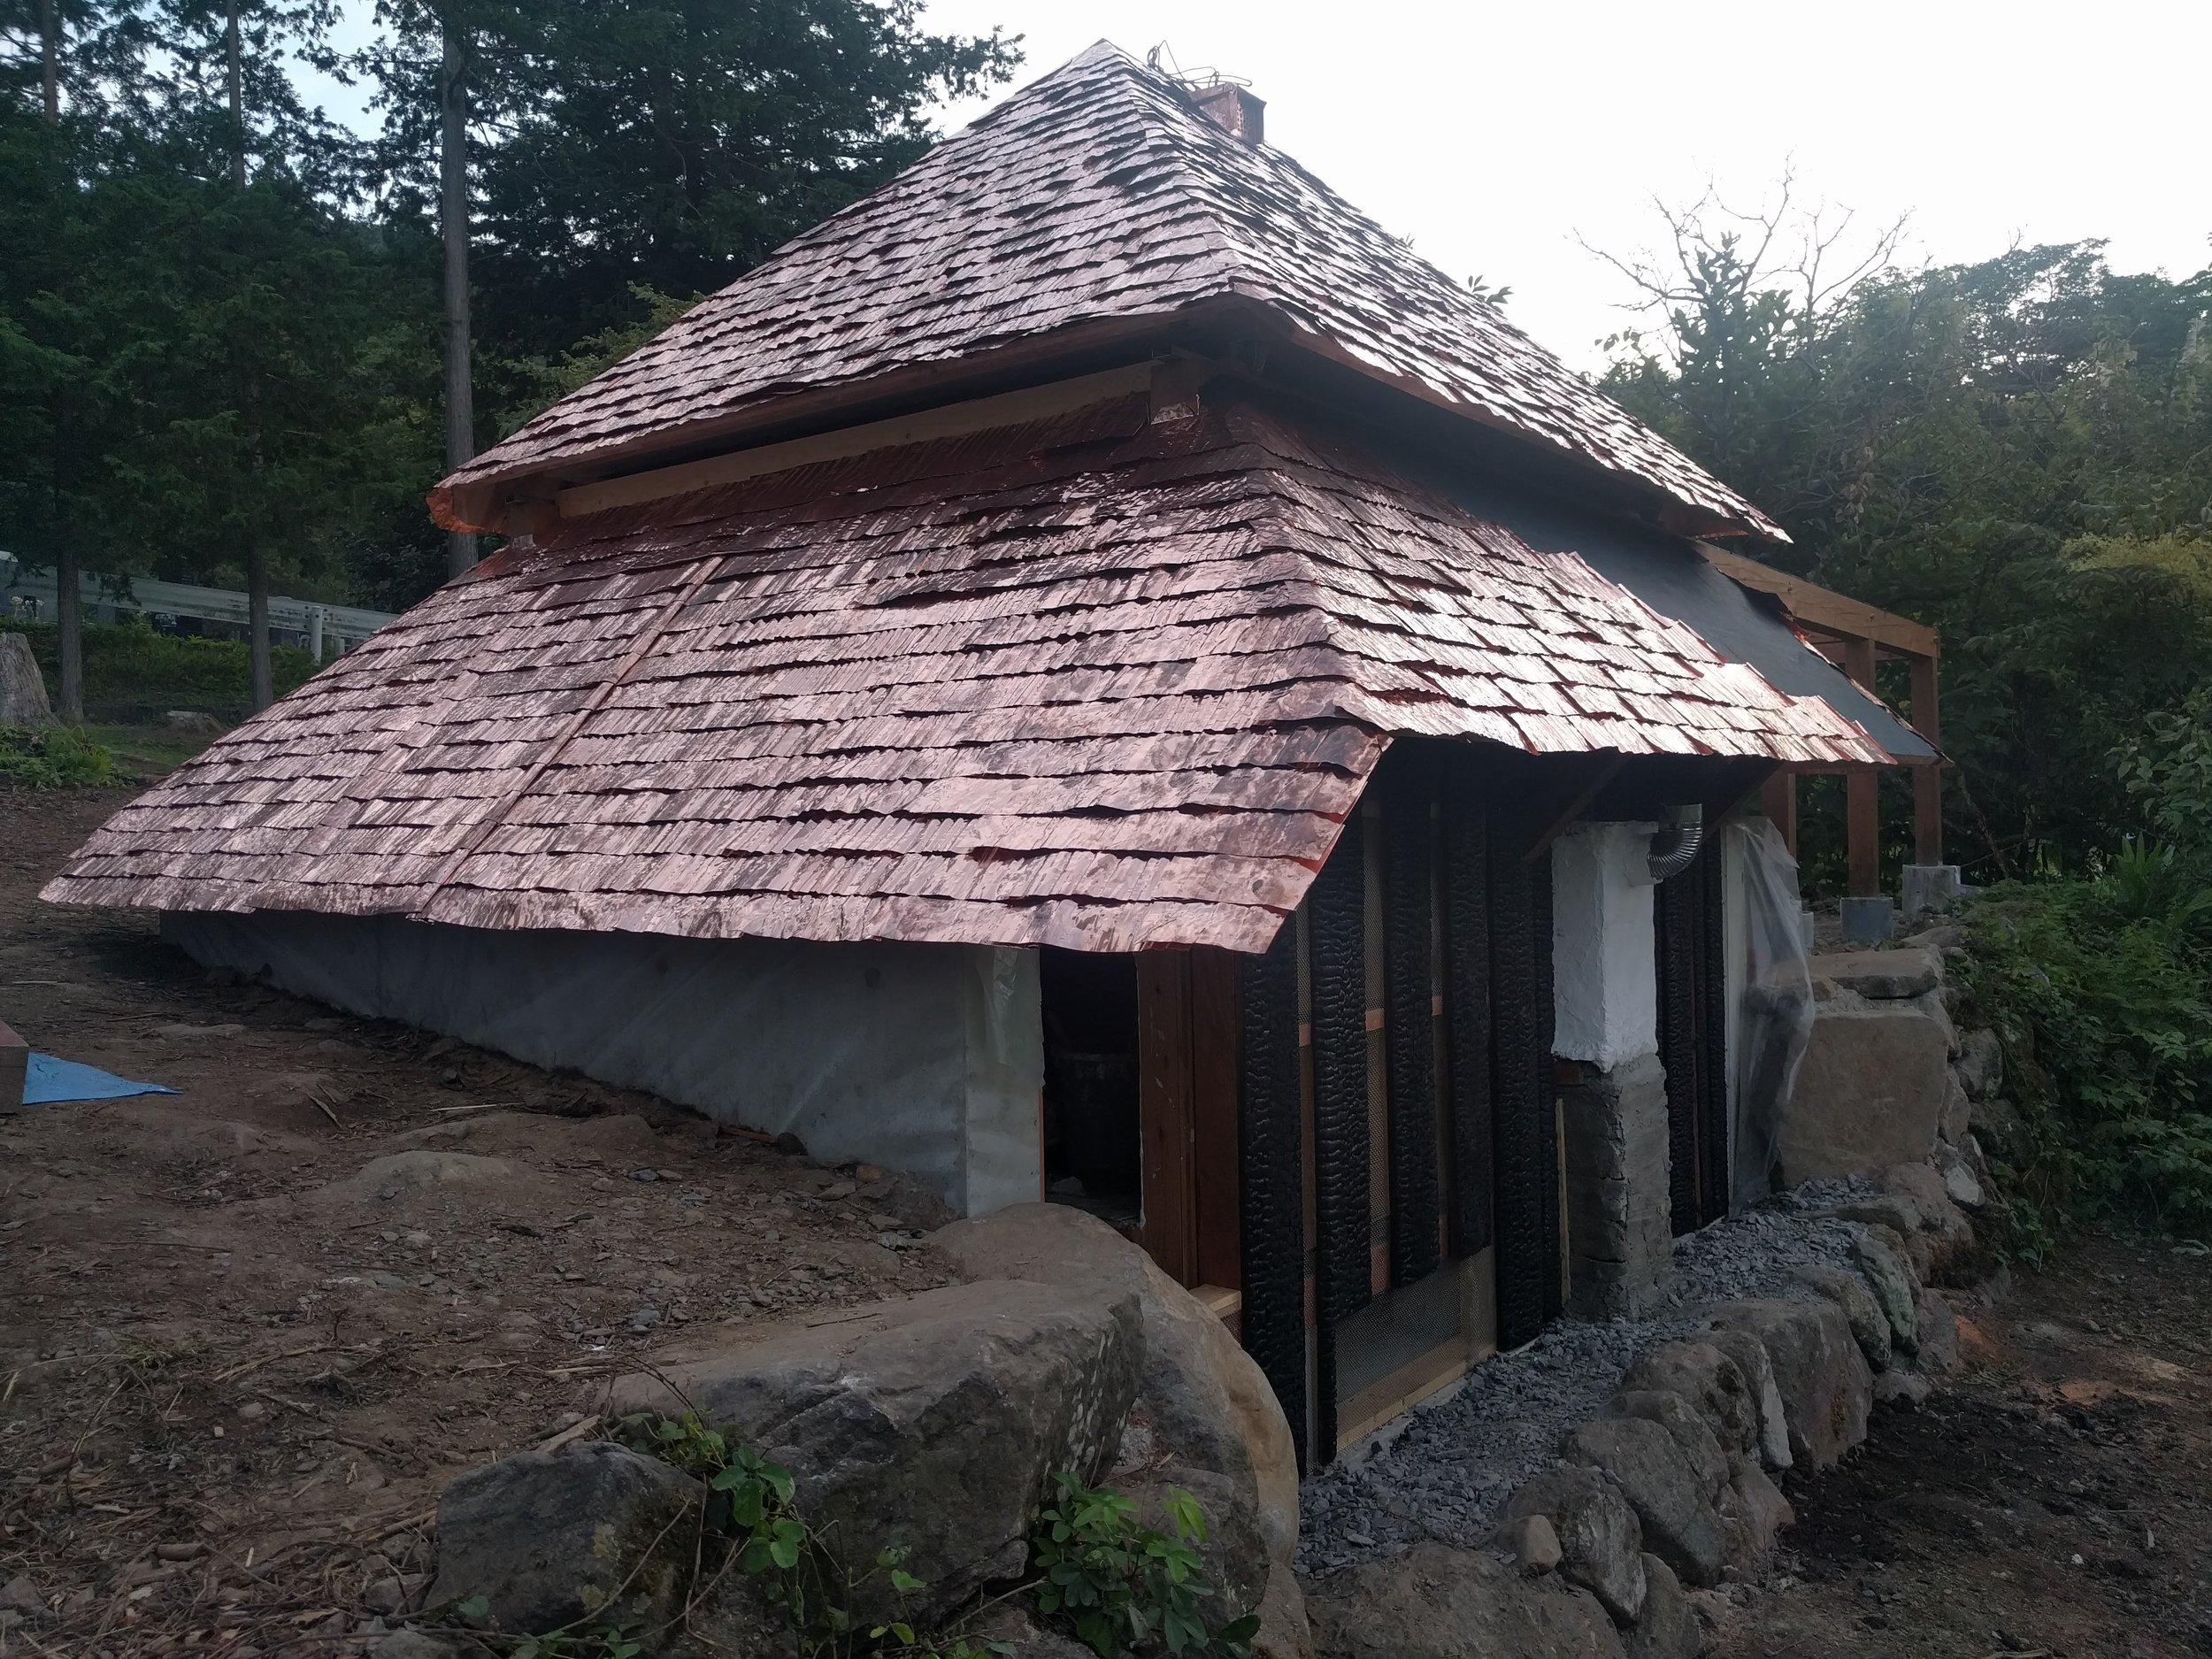
It's finished!!!

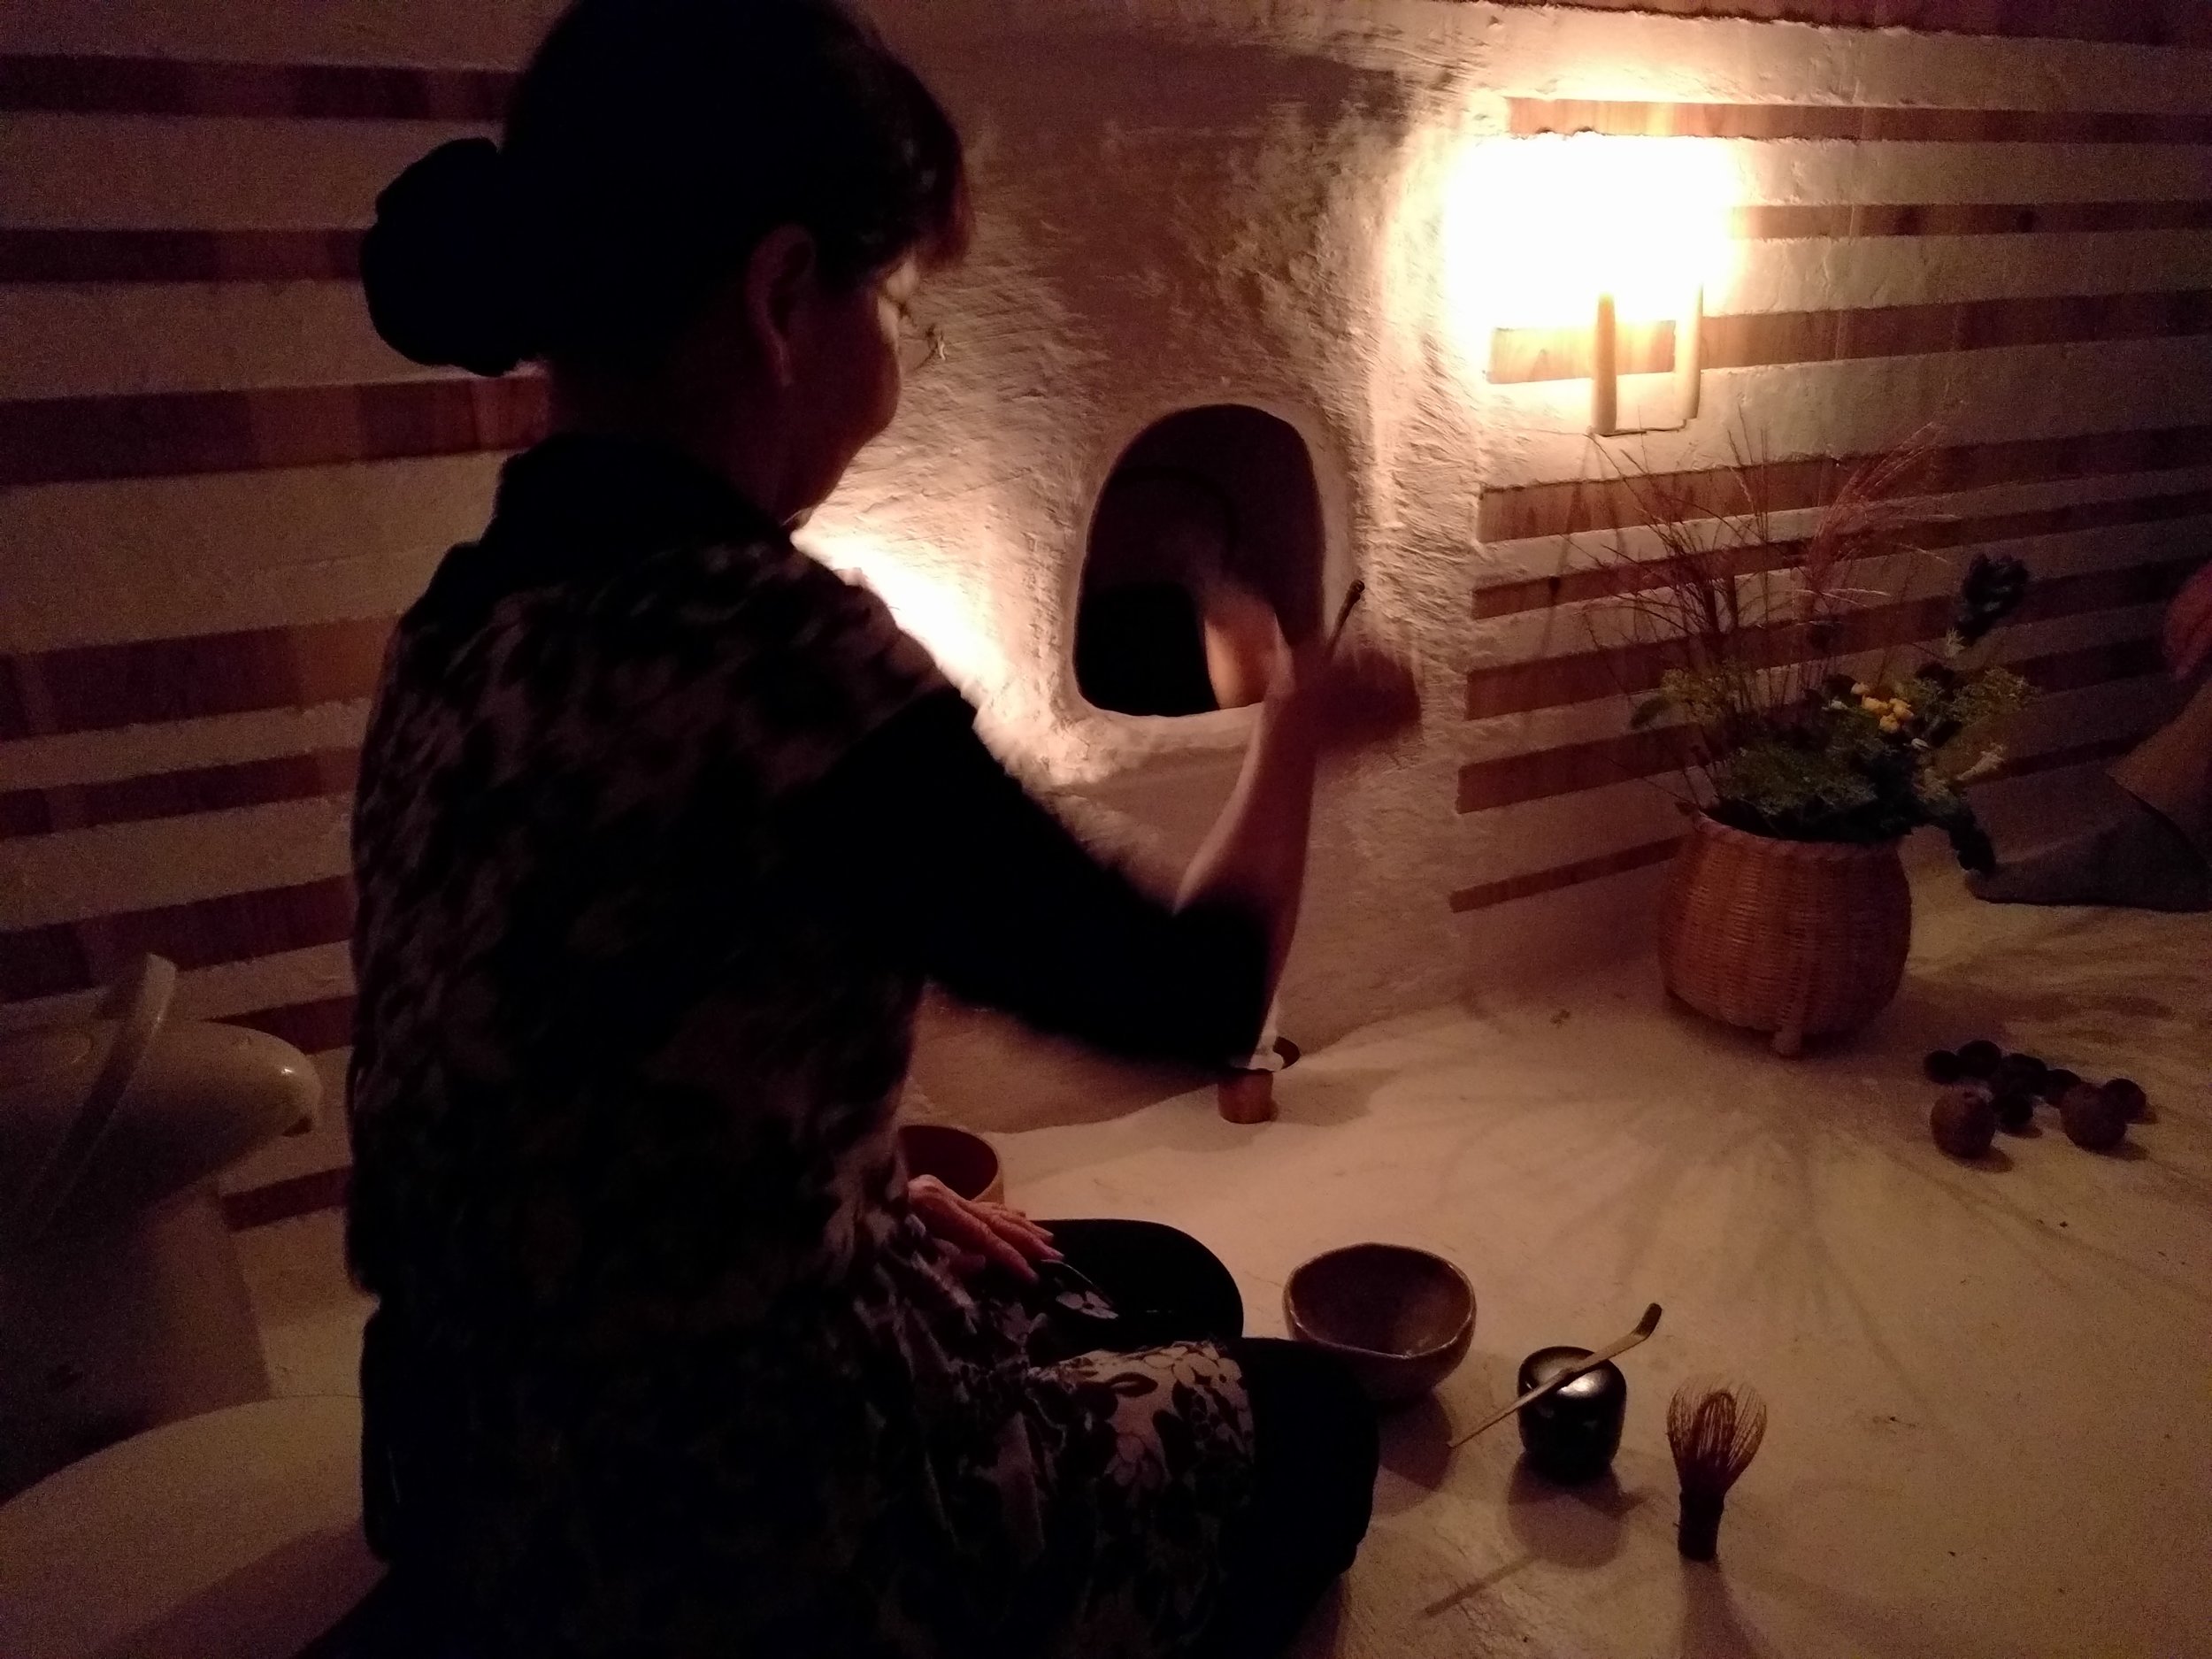
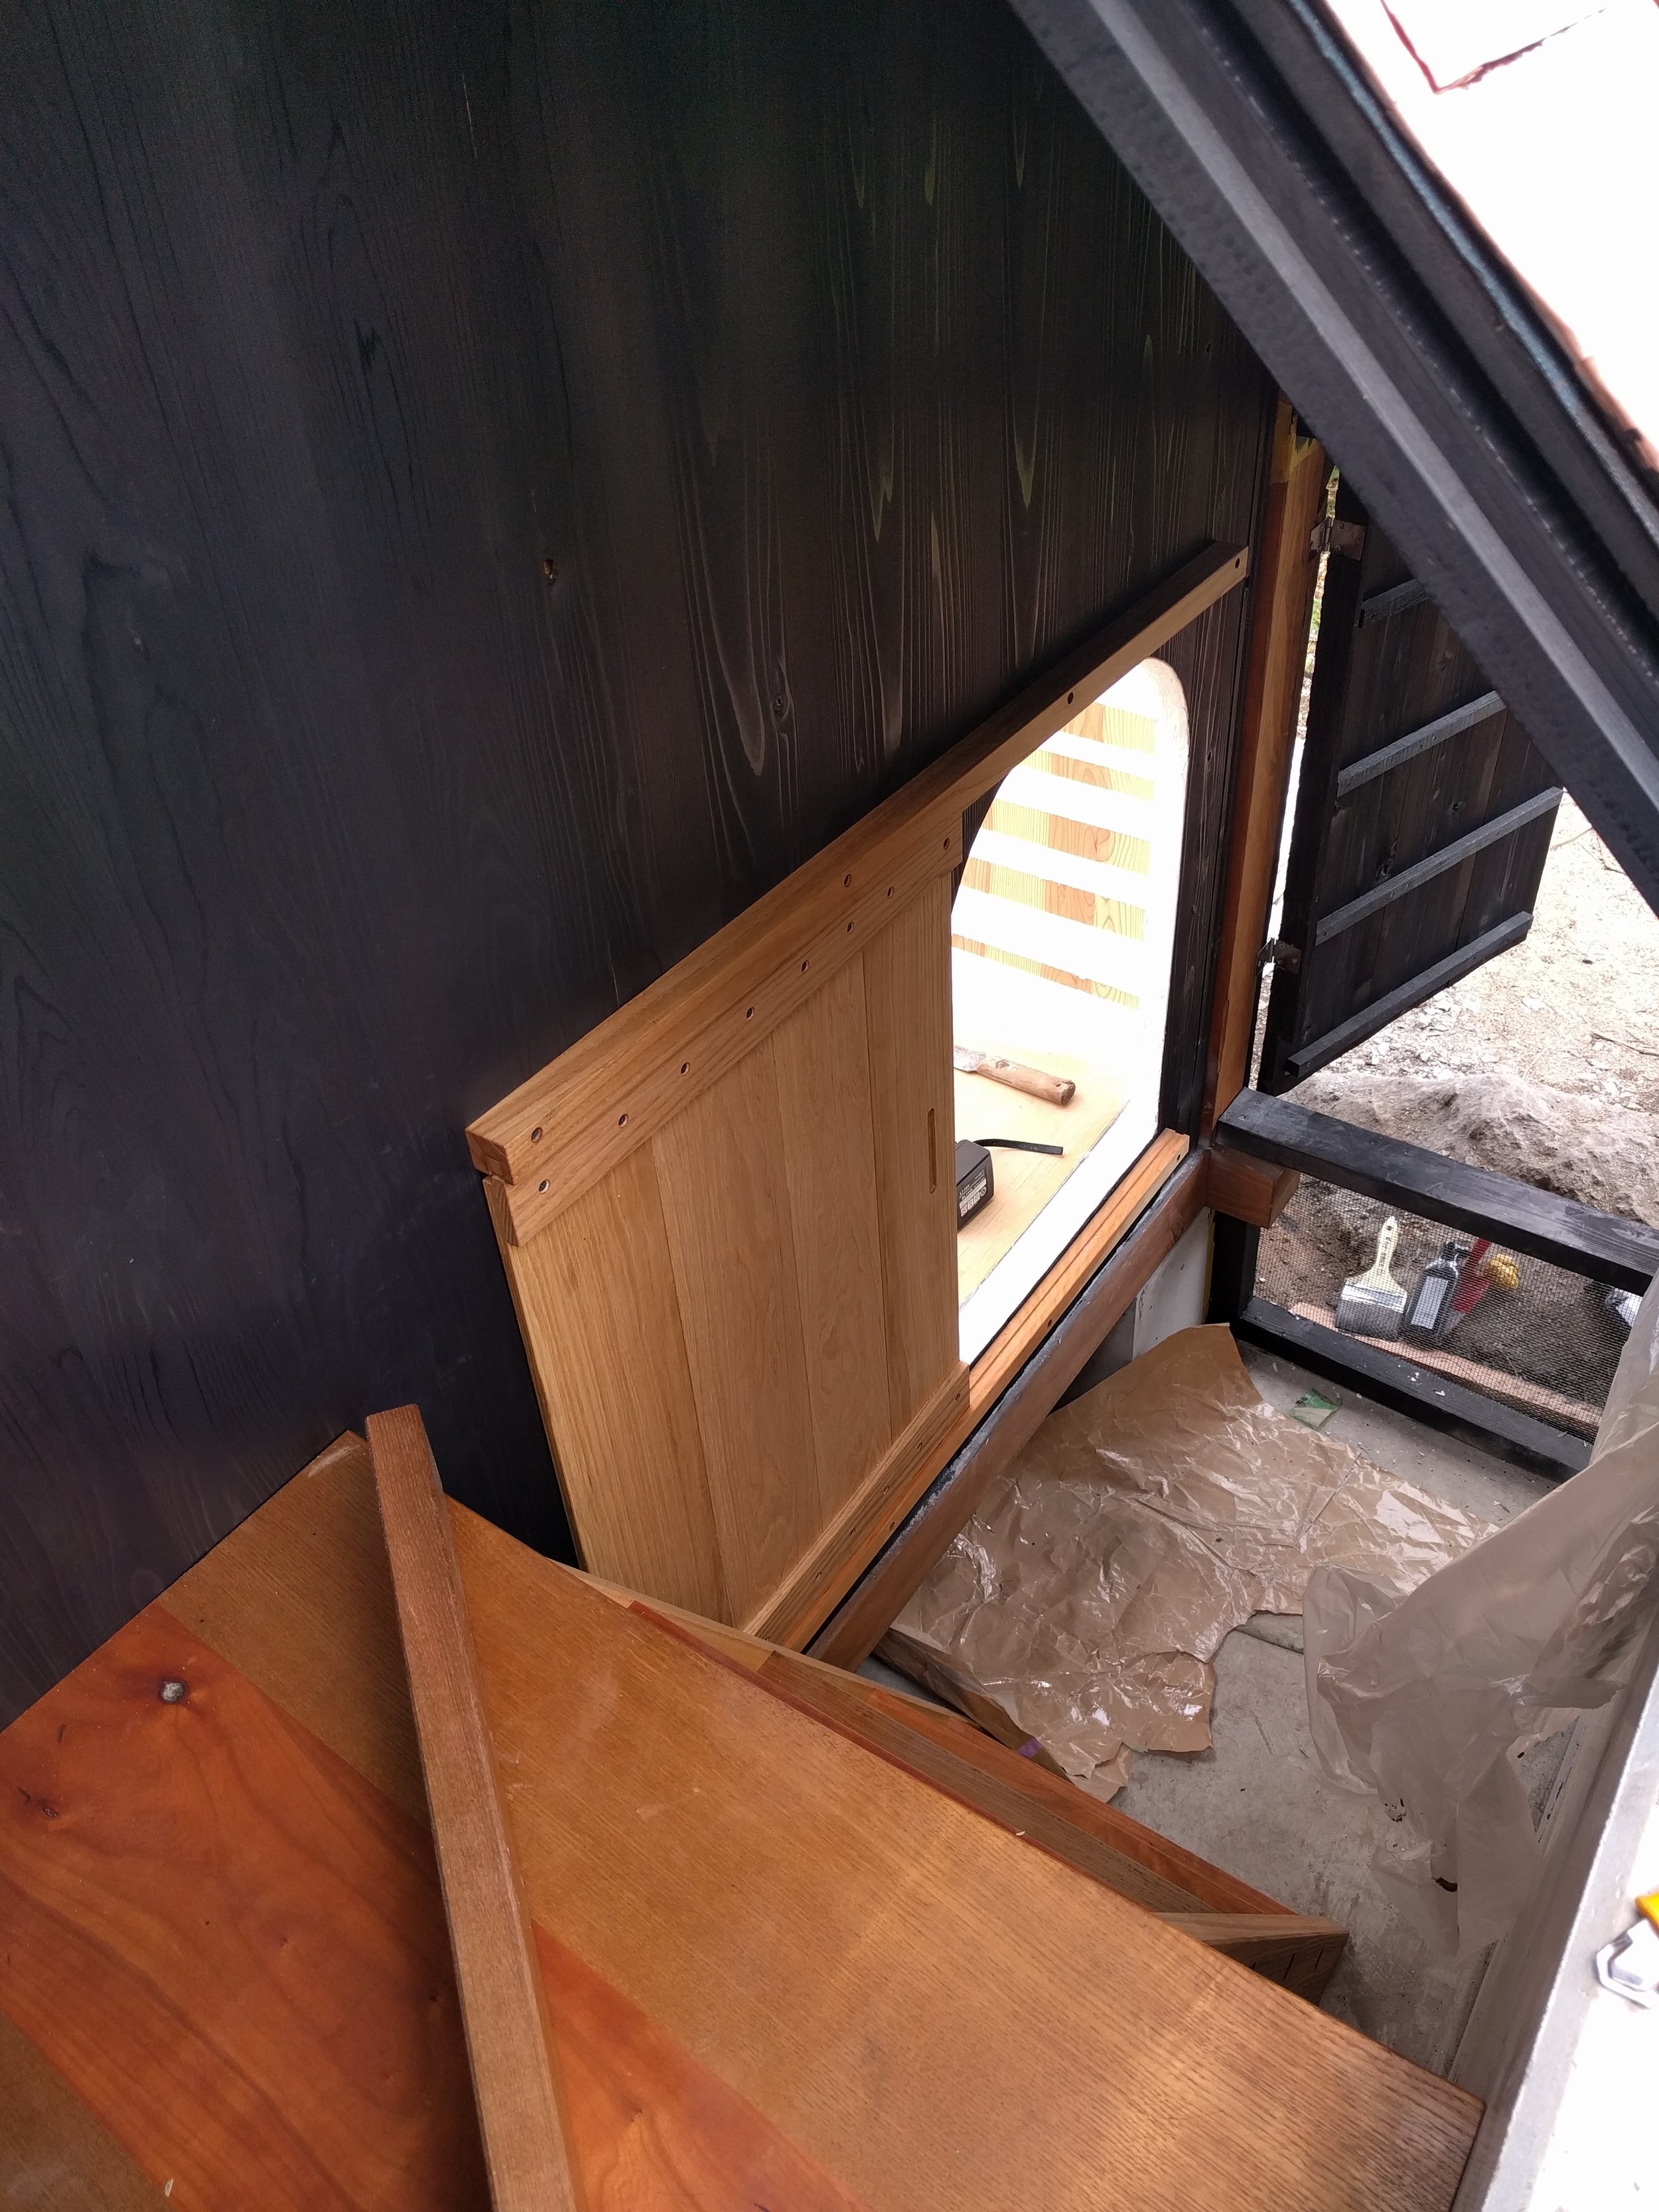
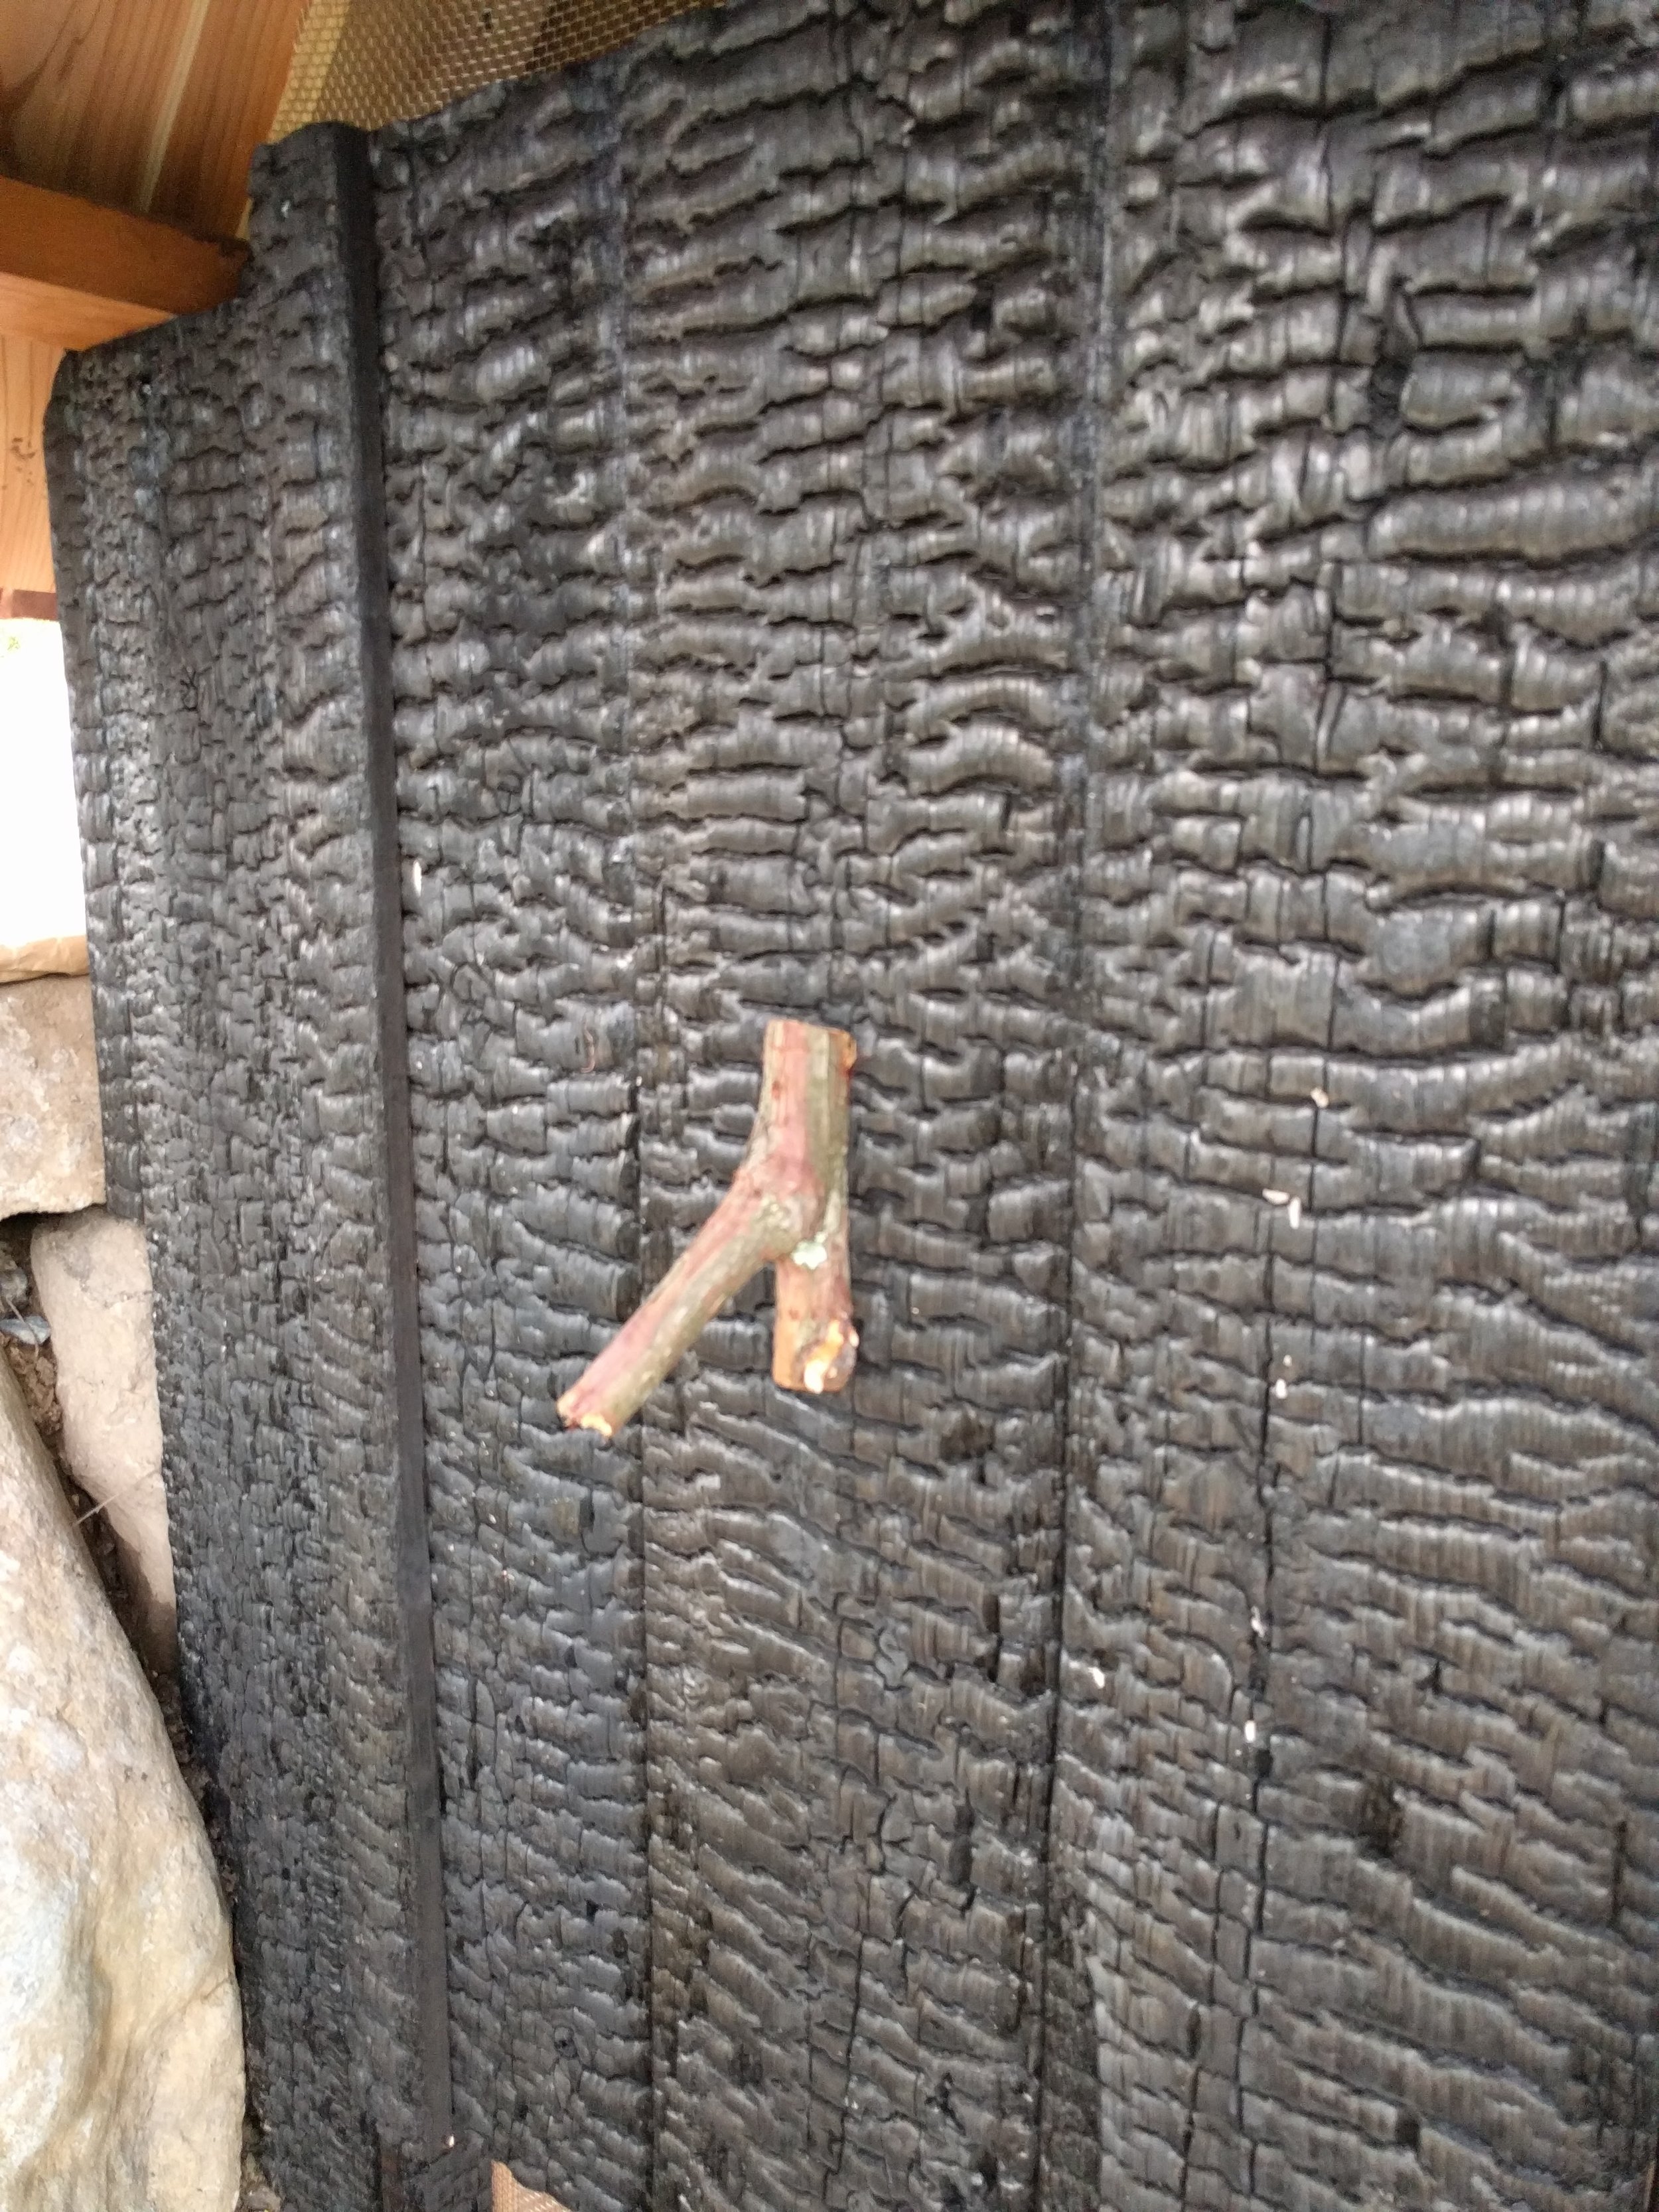
Inside was painted with black ink. Ladder was installed. Then we put fire in the kittle for the first time.

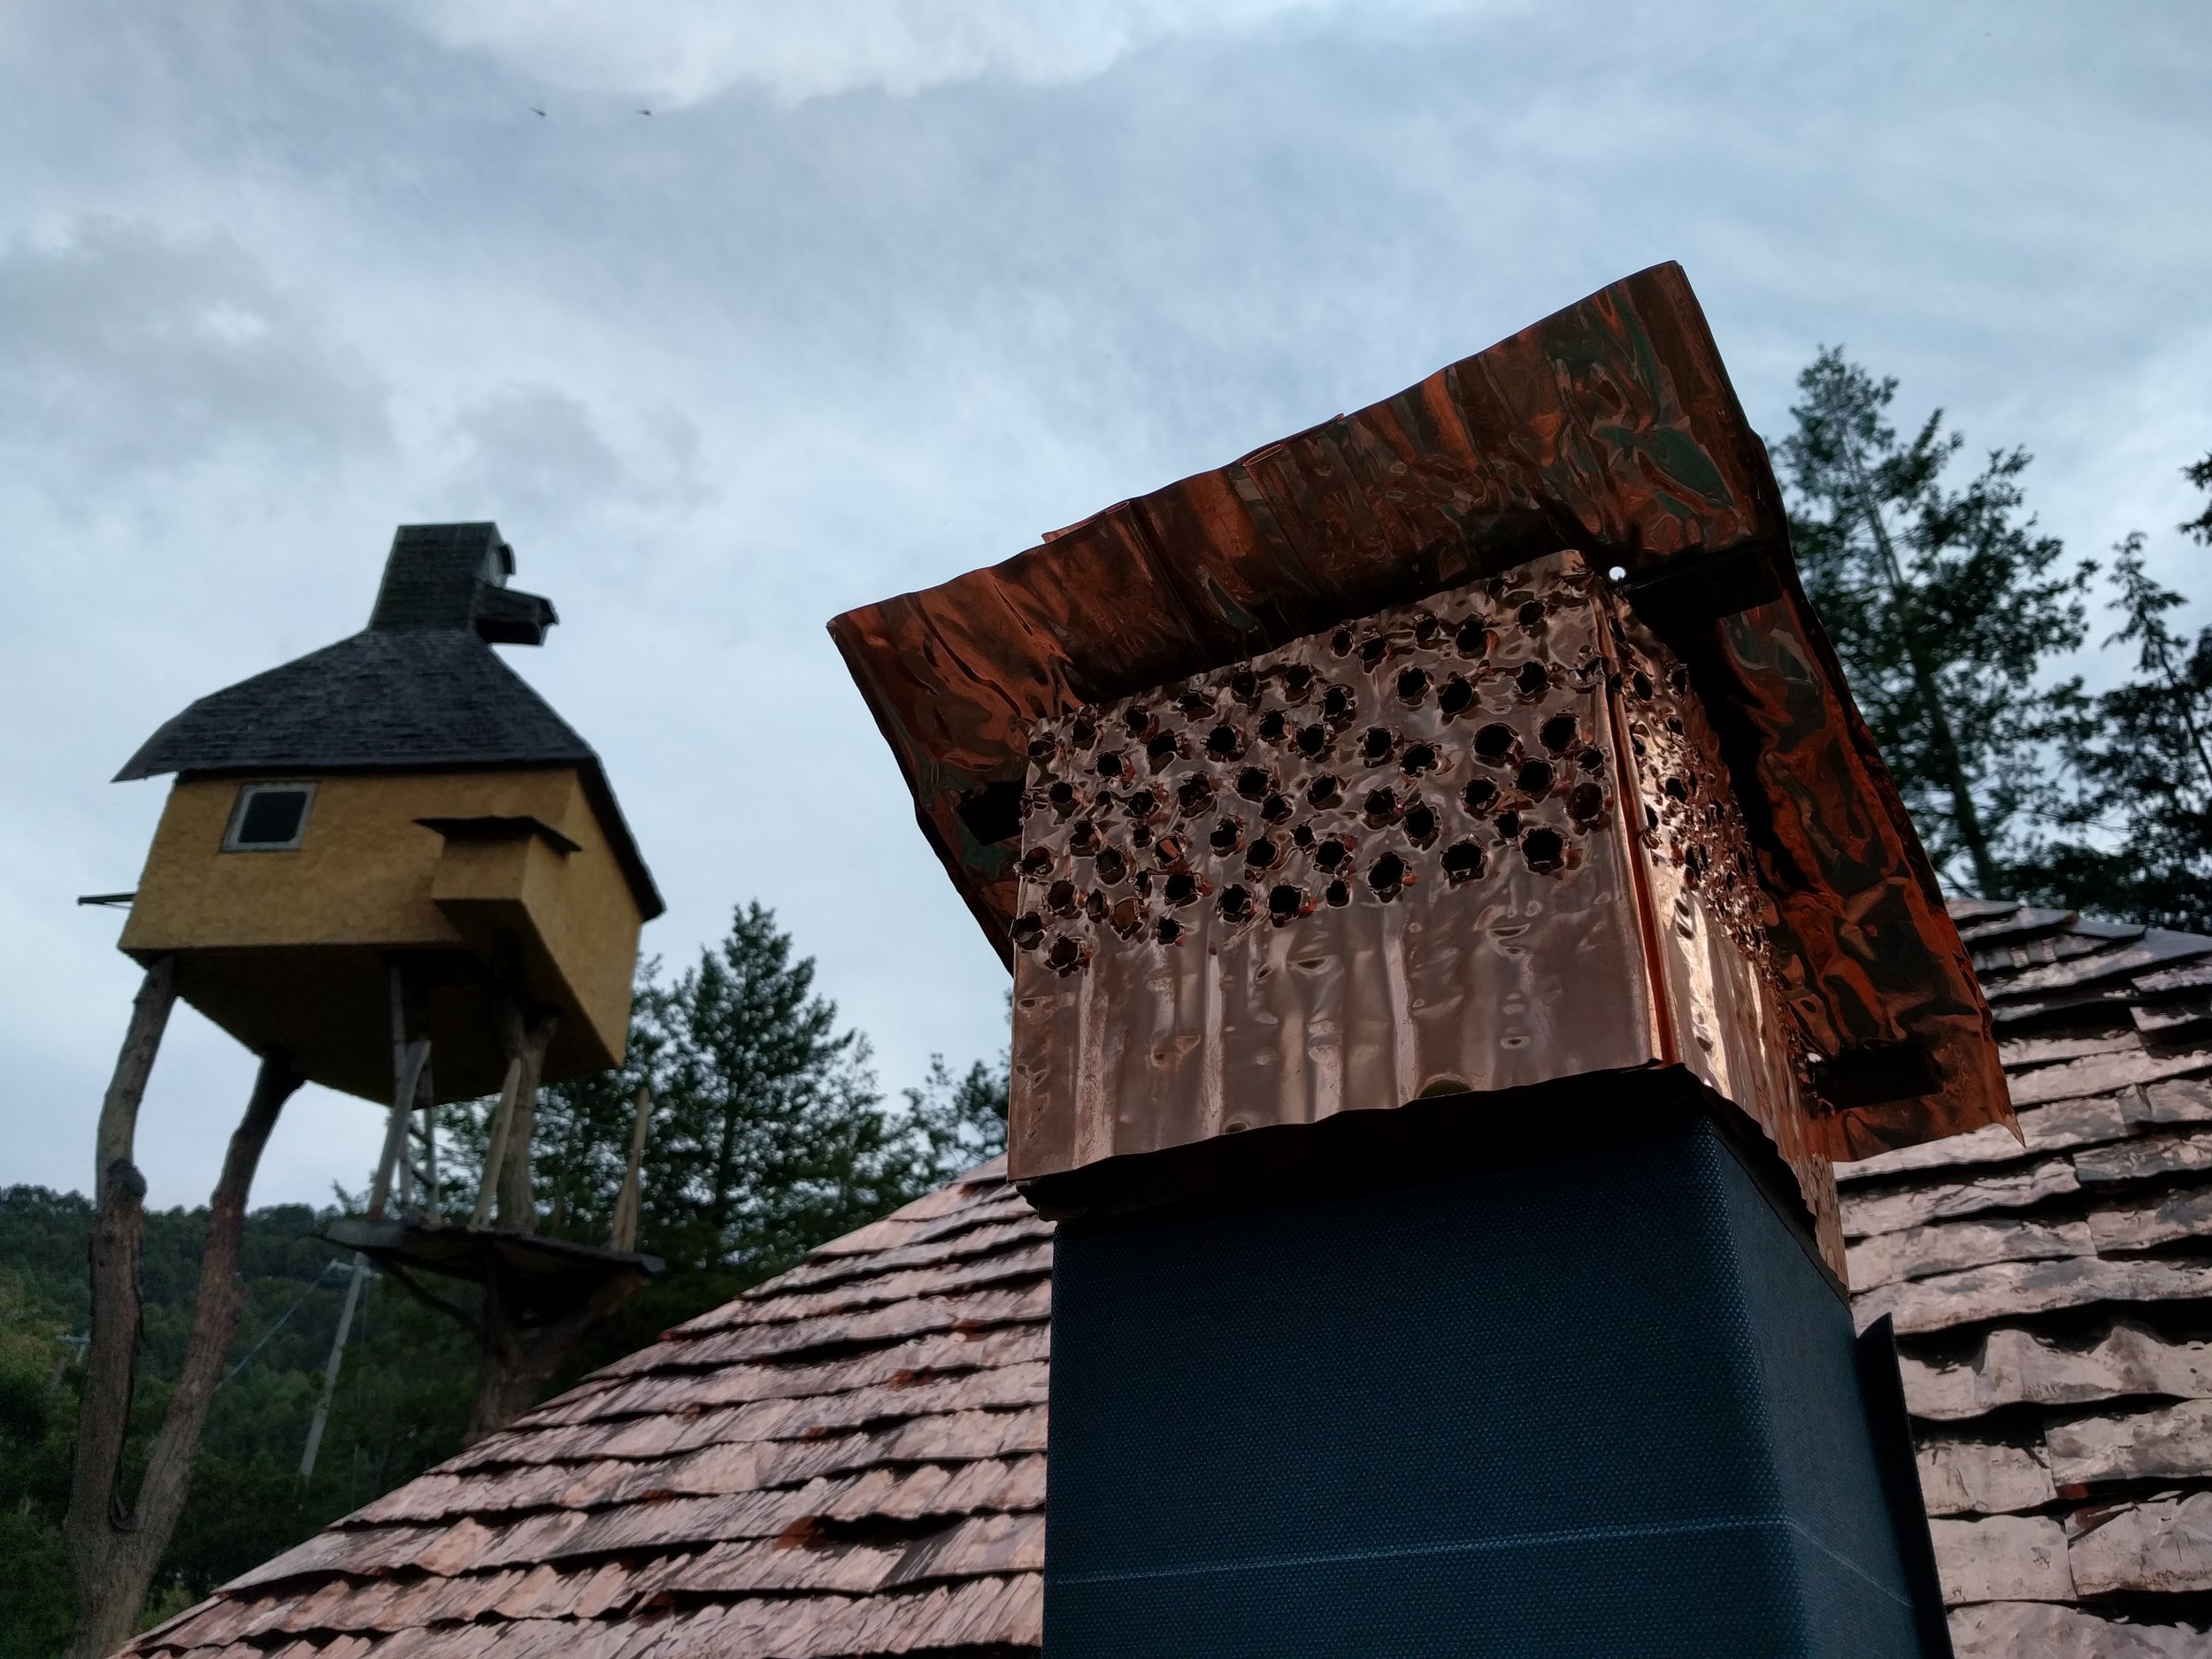
Dr. Fujimori's students came to help !!!!!! Finishing touch by Fujimori really makes the architecture. Love those handcrafted chimney hood and door knobs.

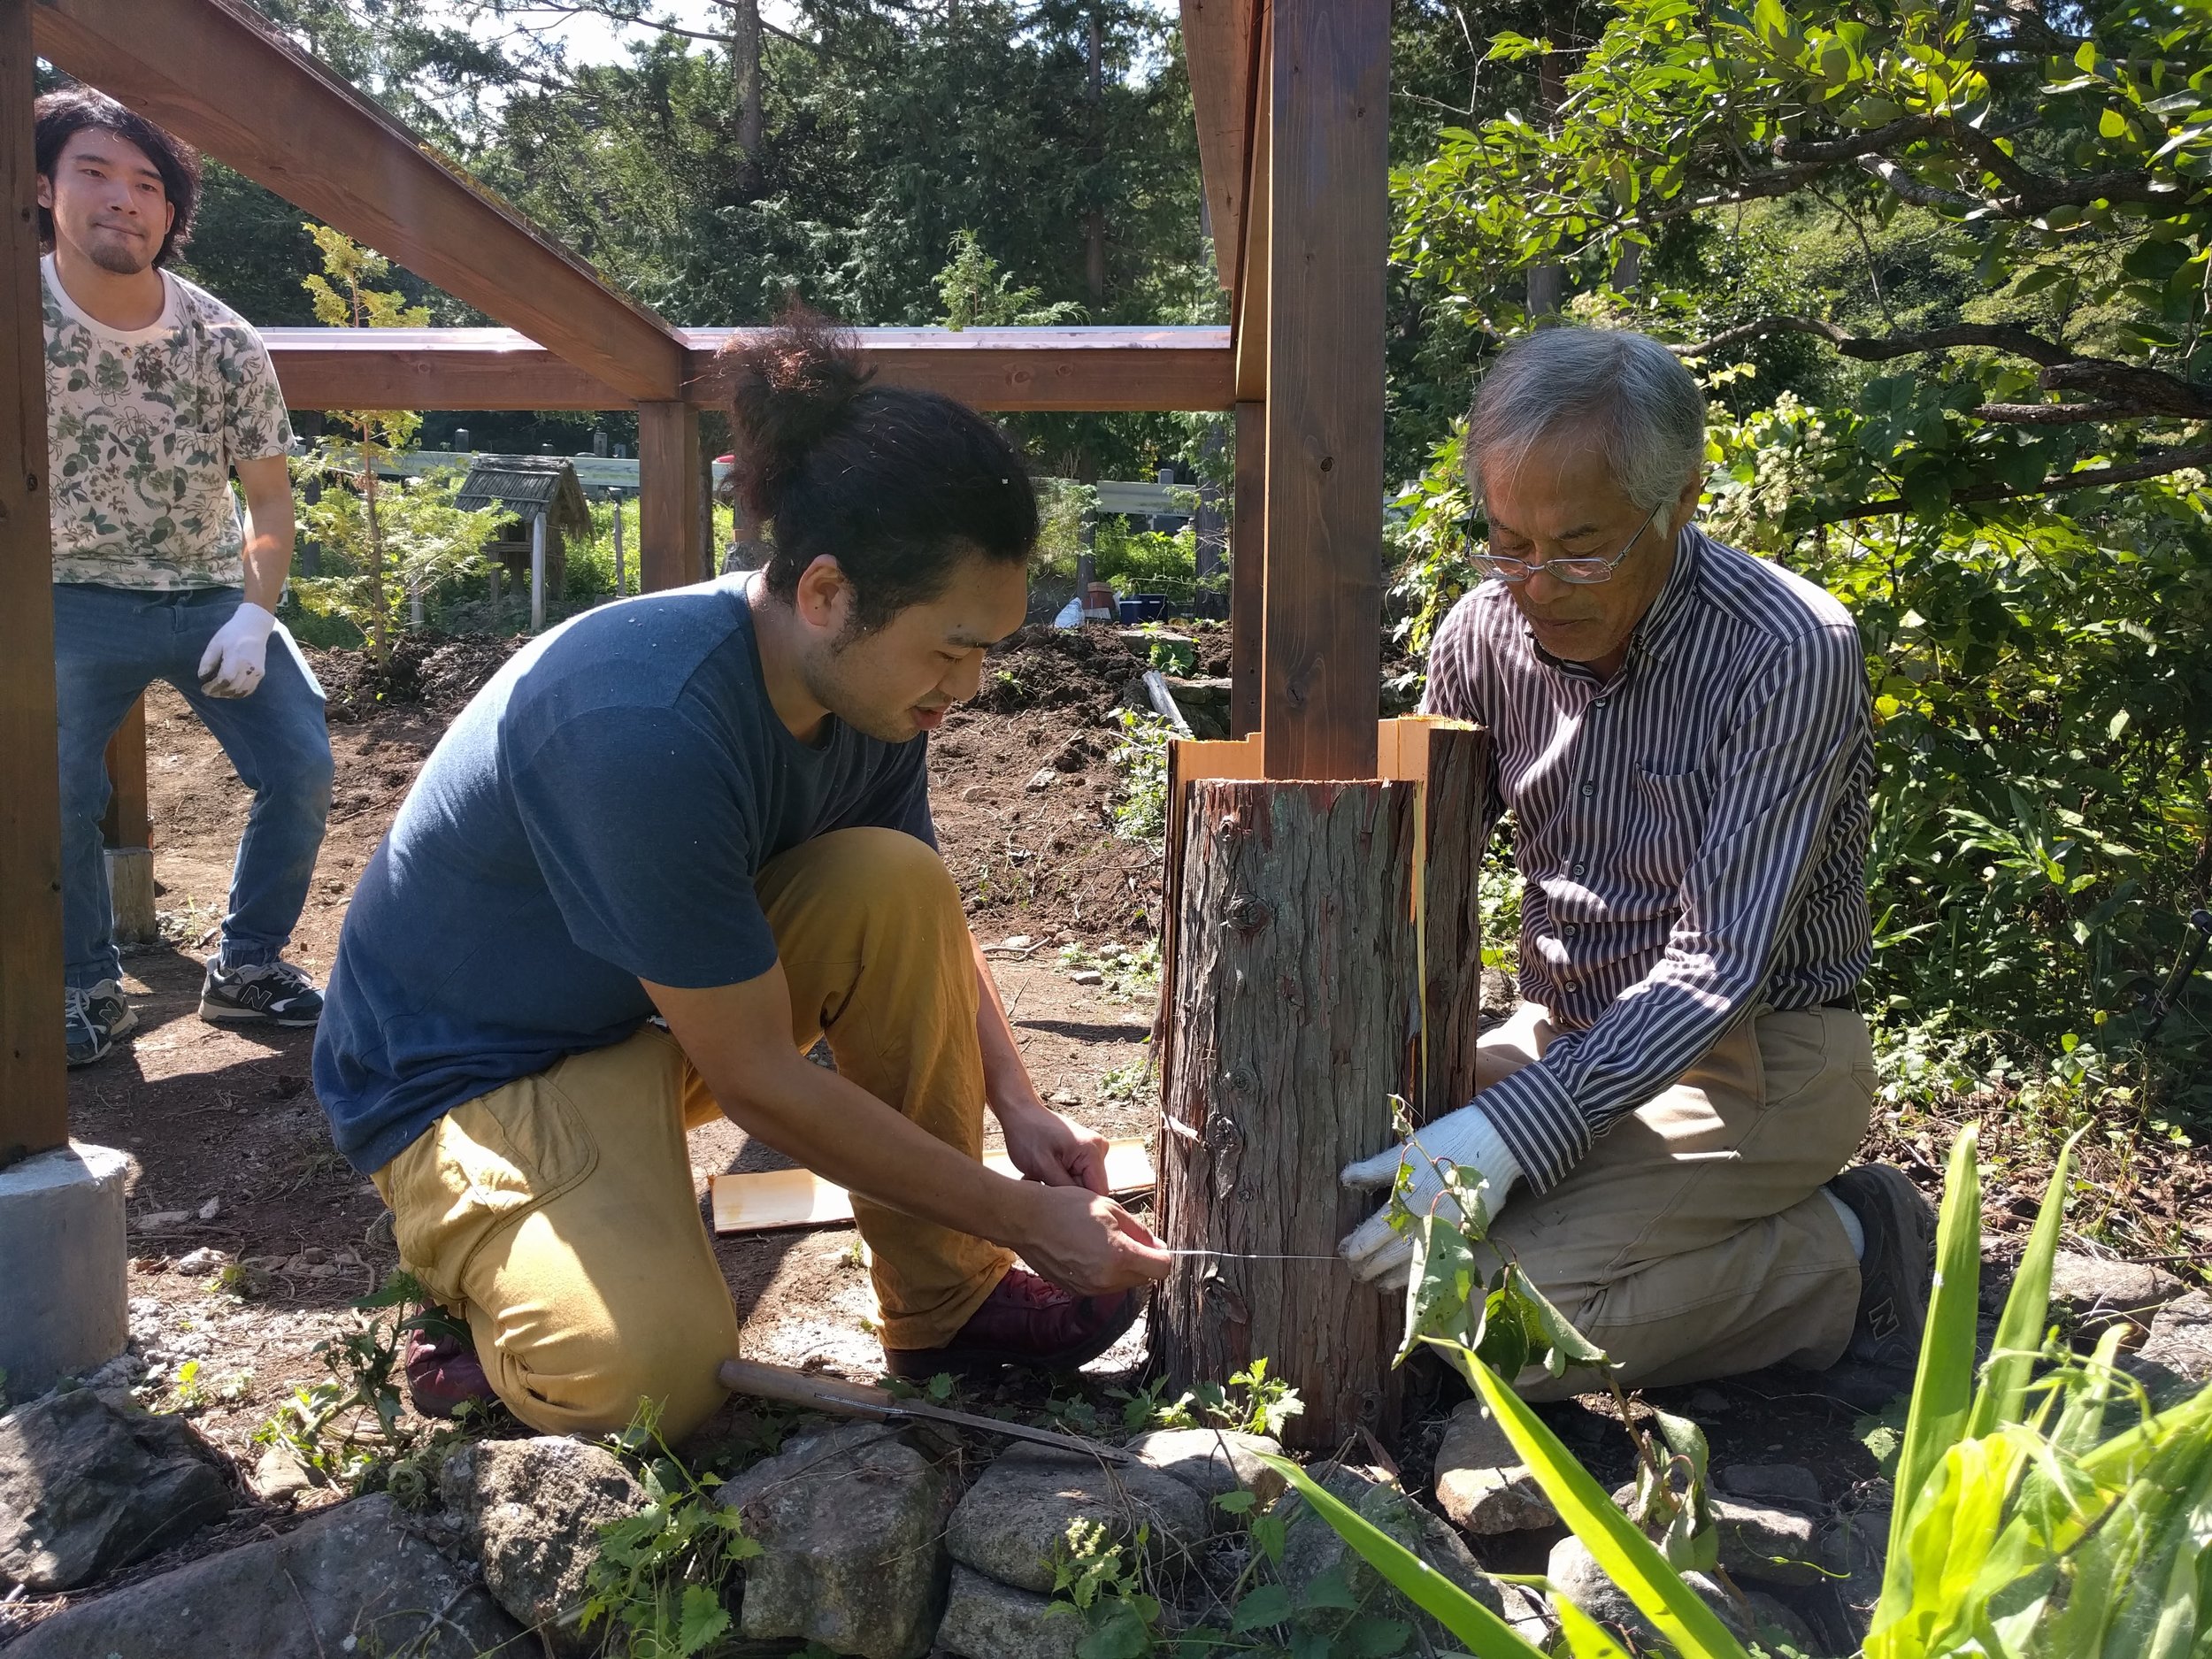
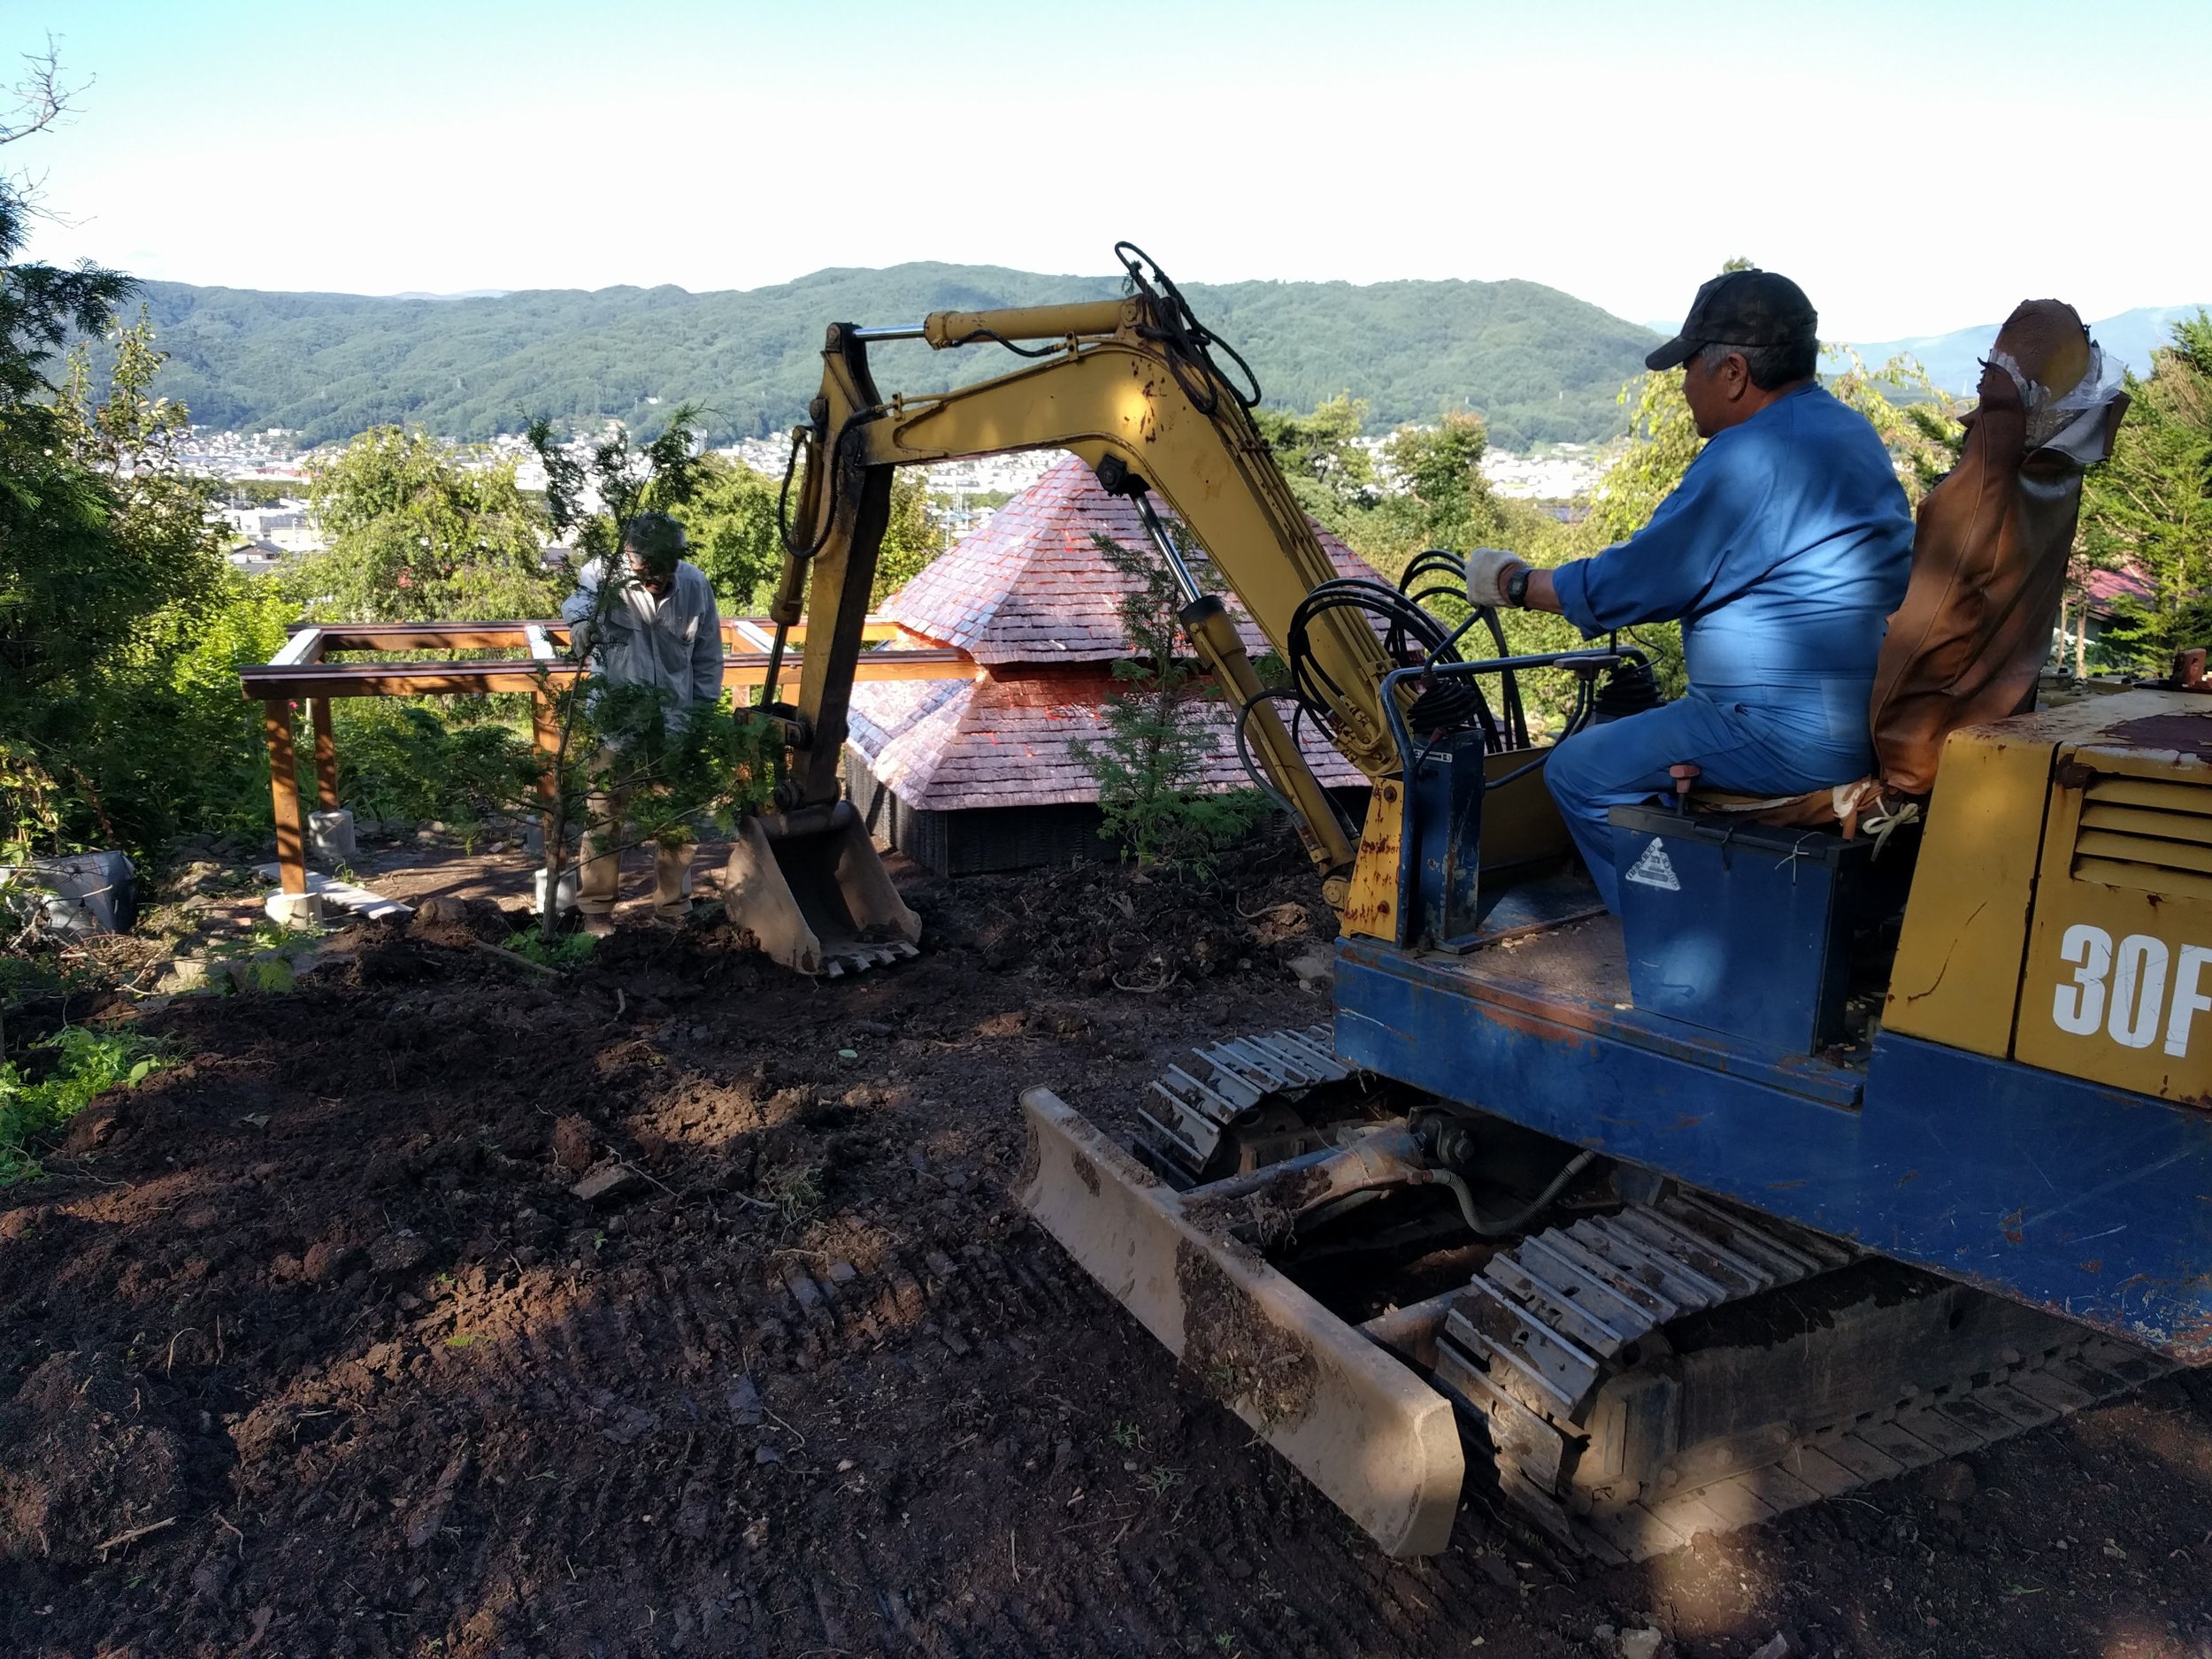
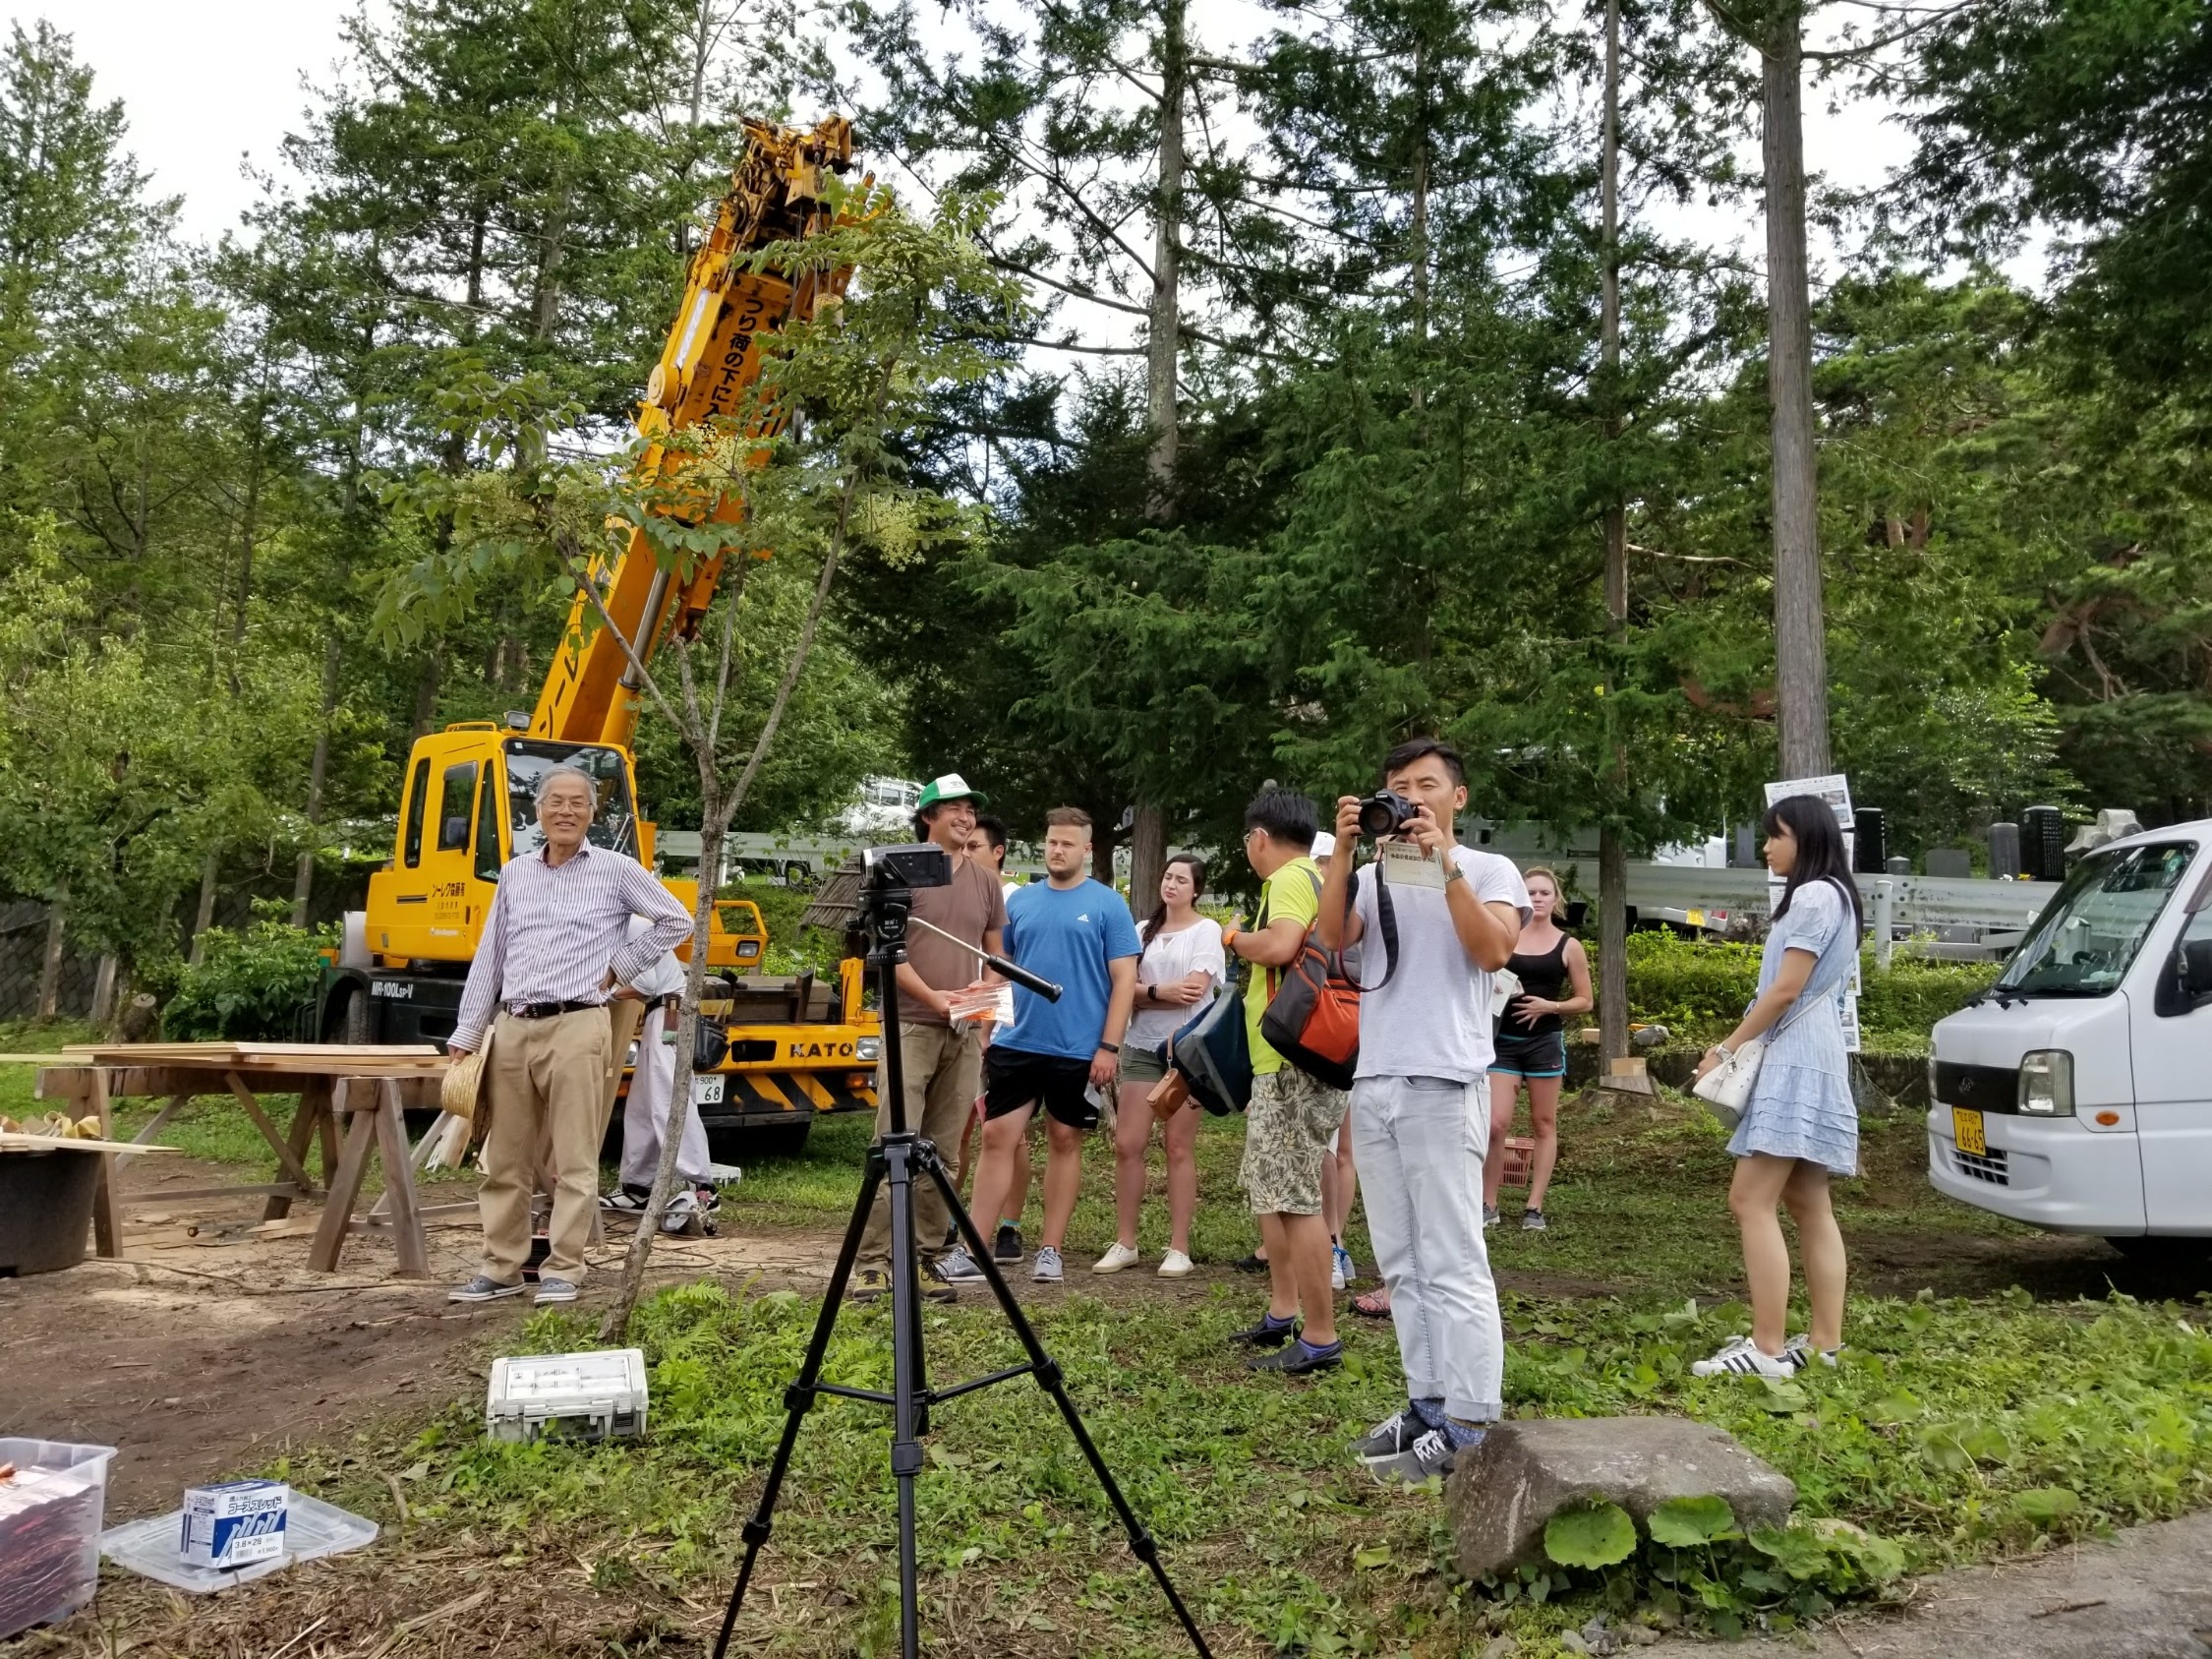
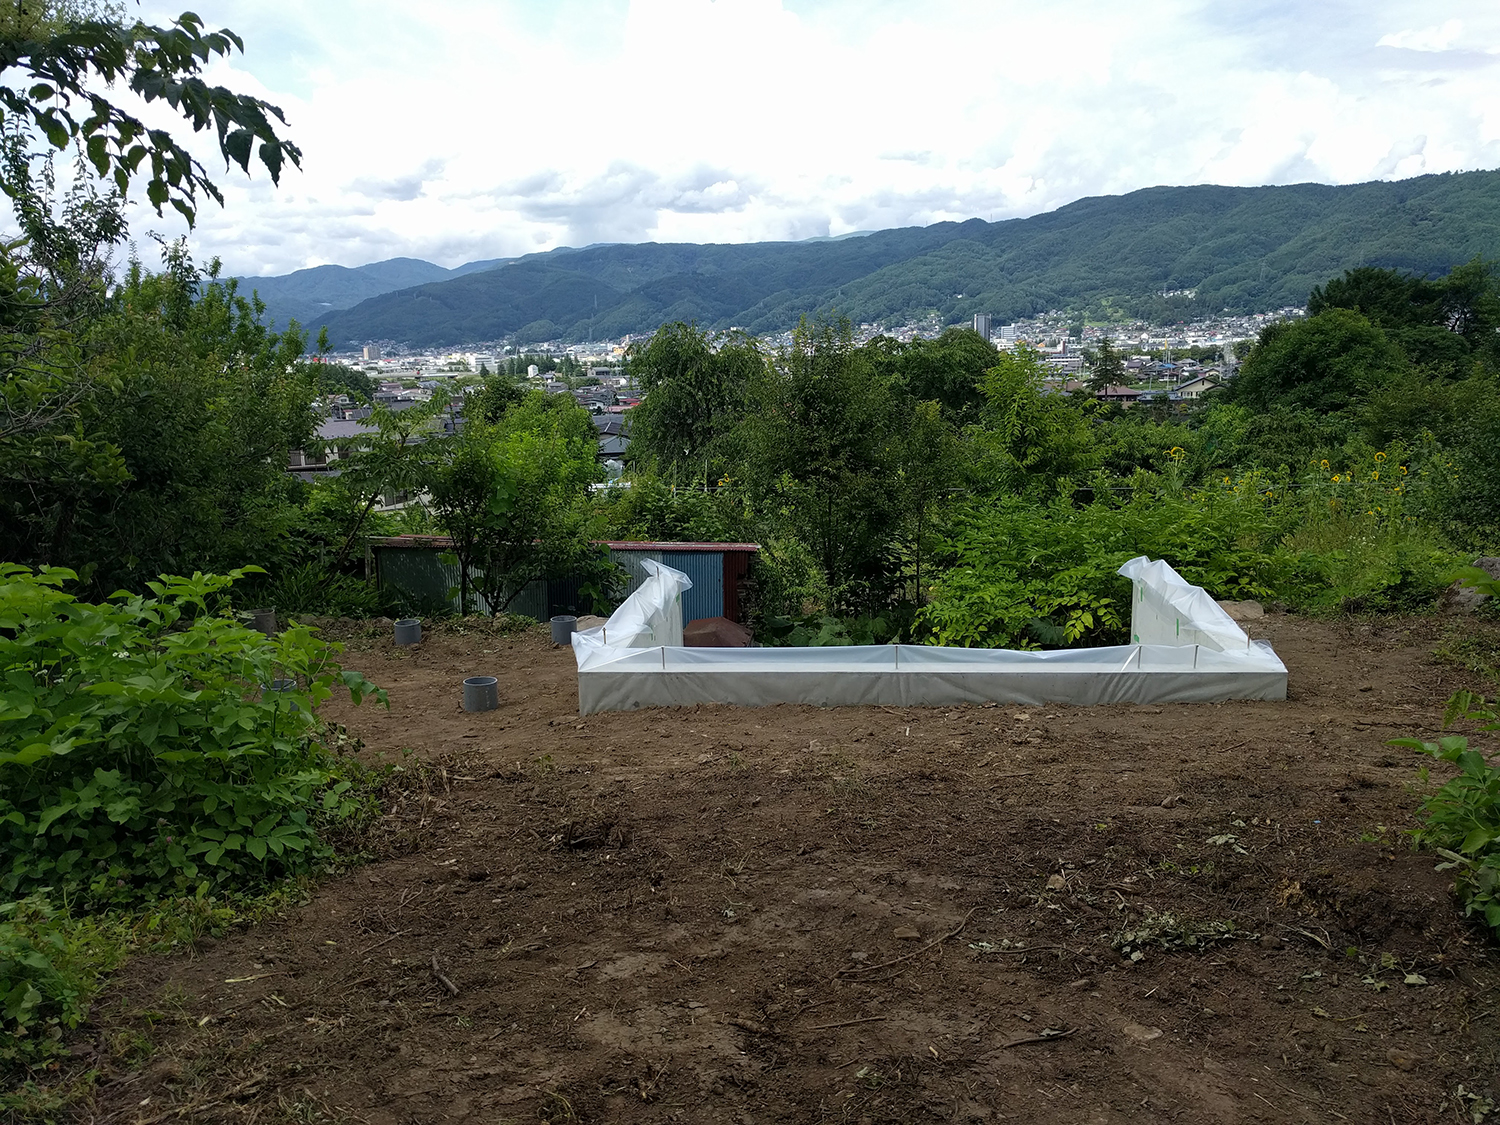
Site clearing day. We chopped a lots of trees , changed grade and moved rocks!!!!
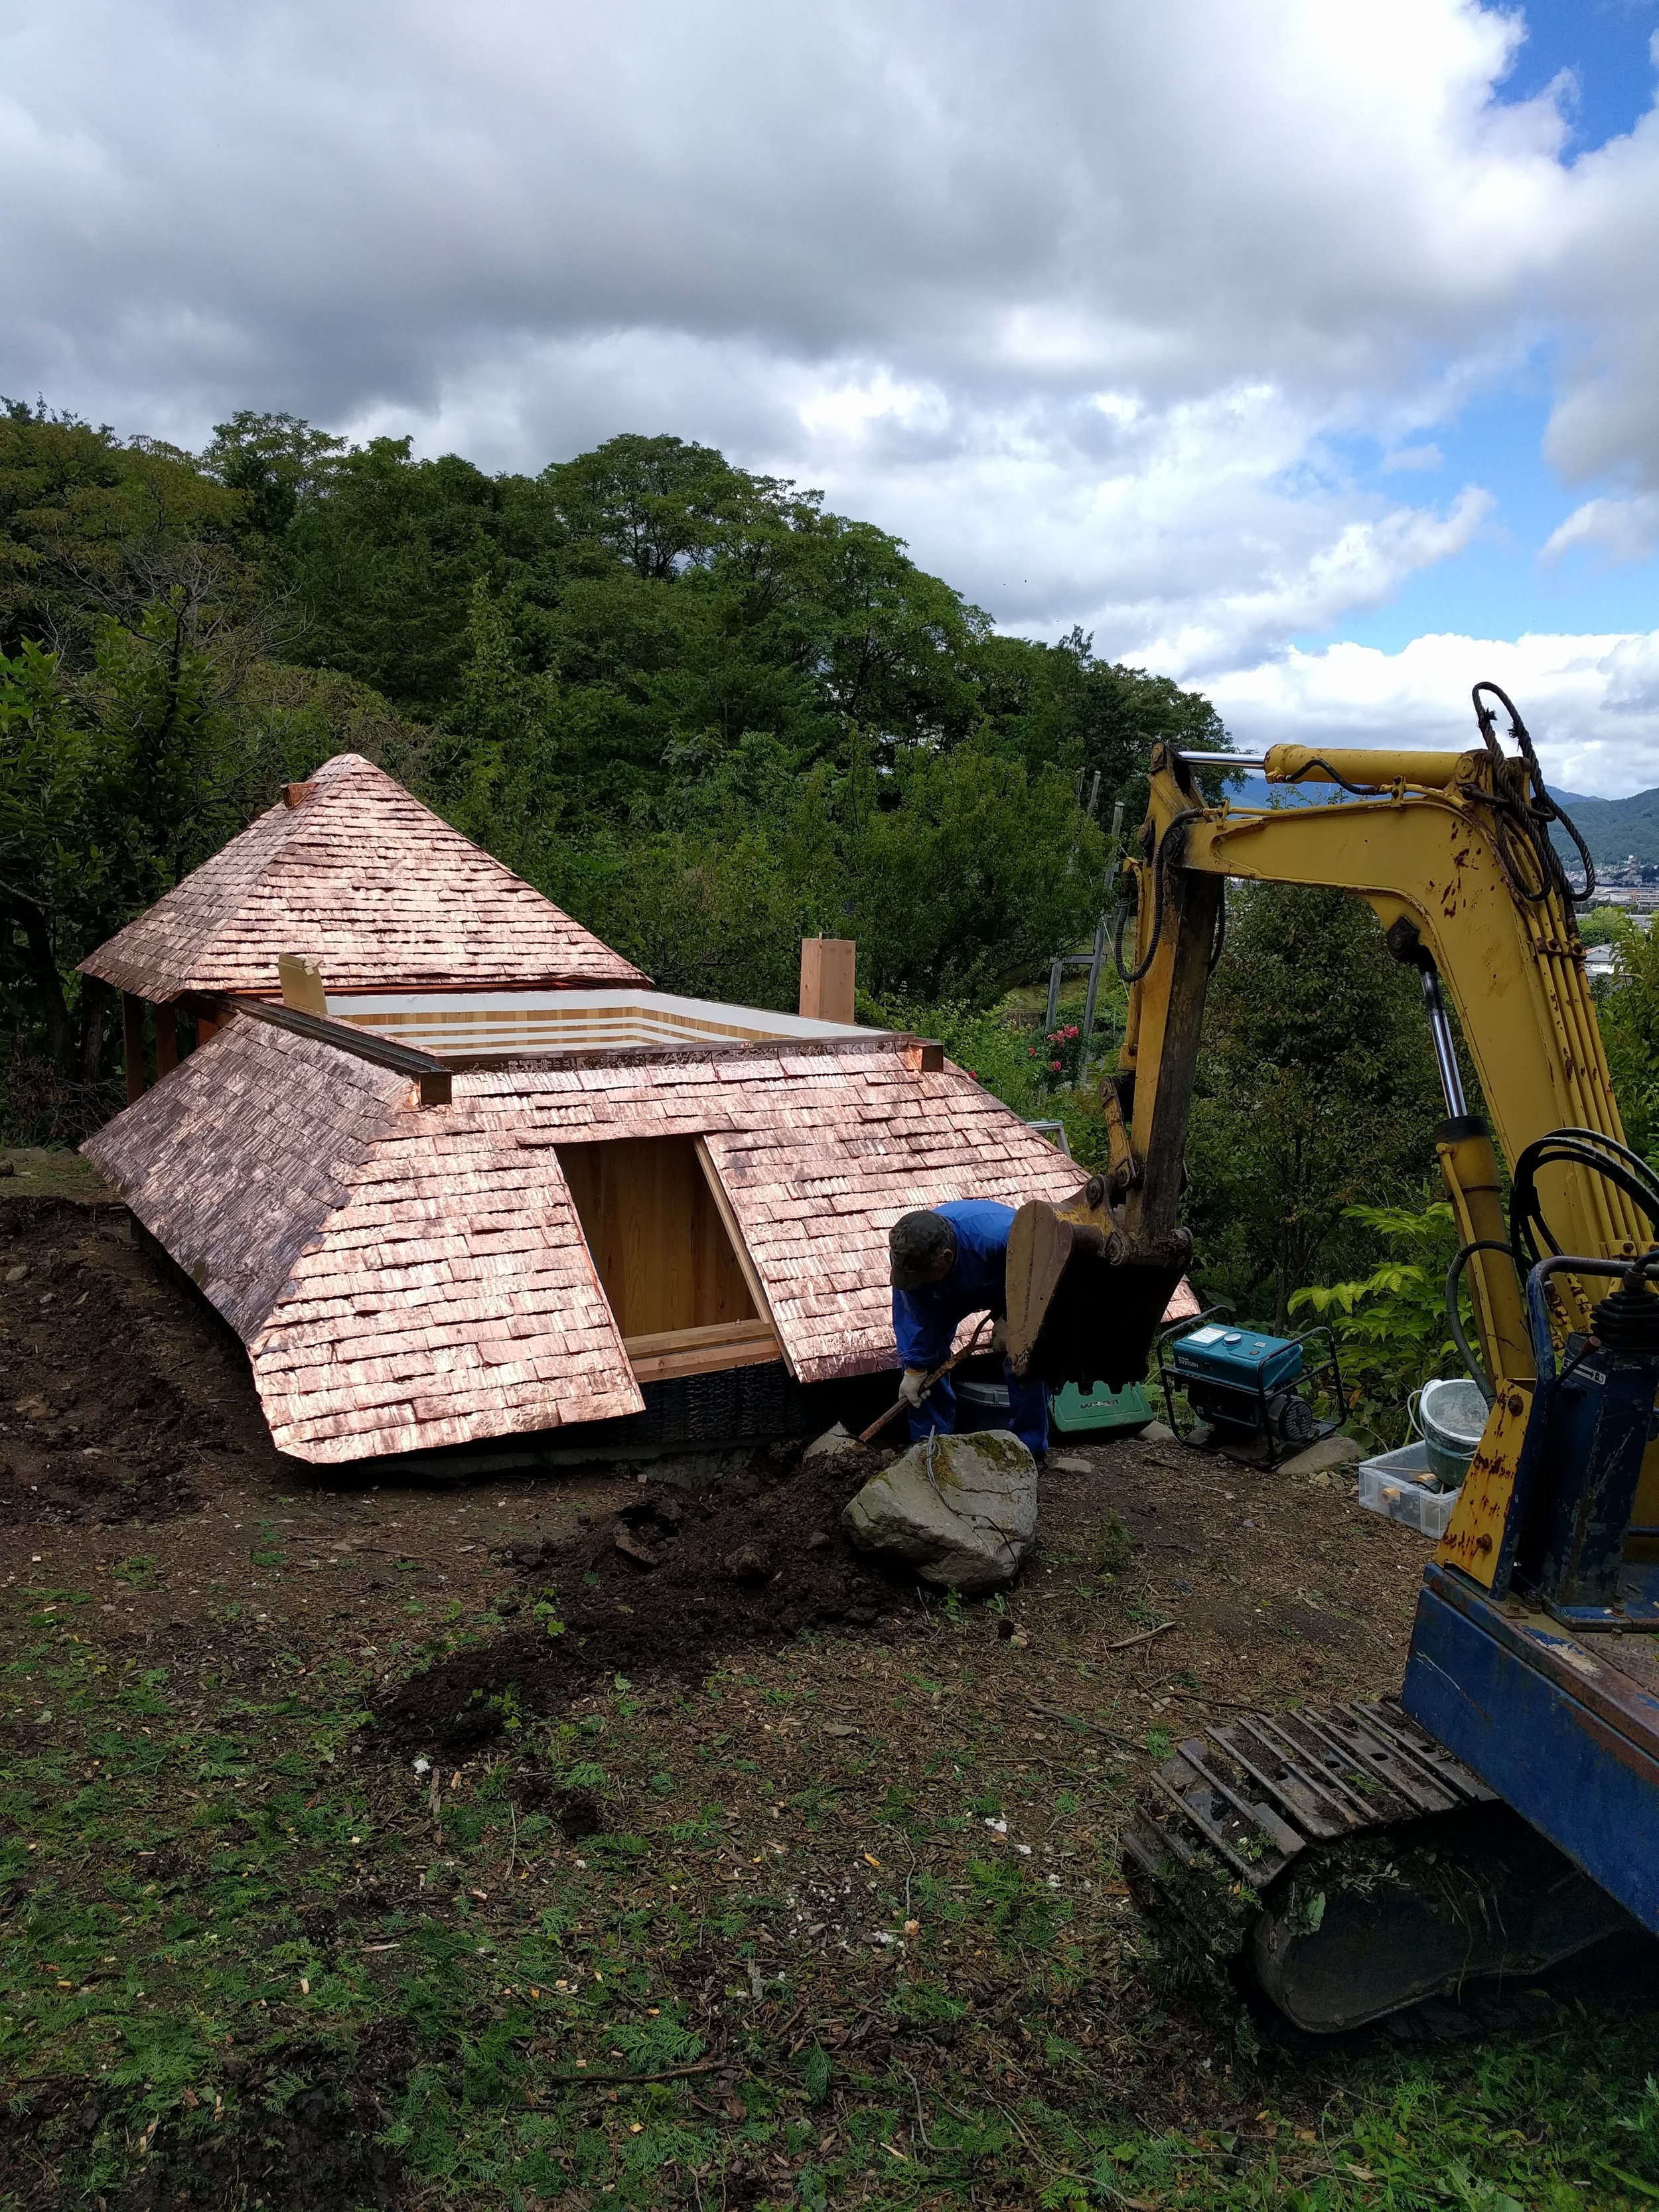

Well, still not finished so some of us volunteered to finish... Need to put finish material on the kettle.
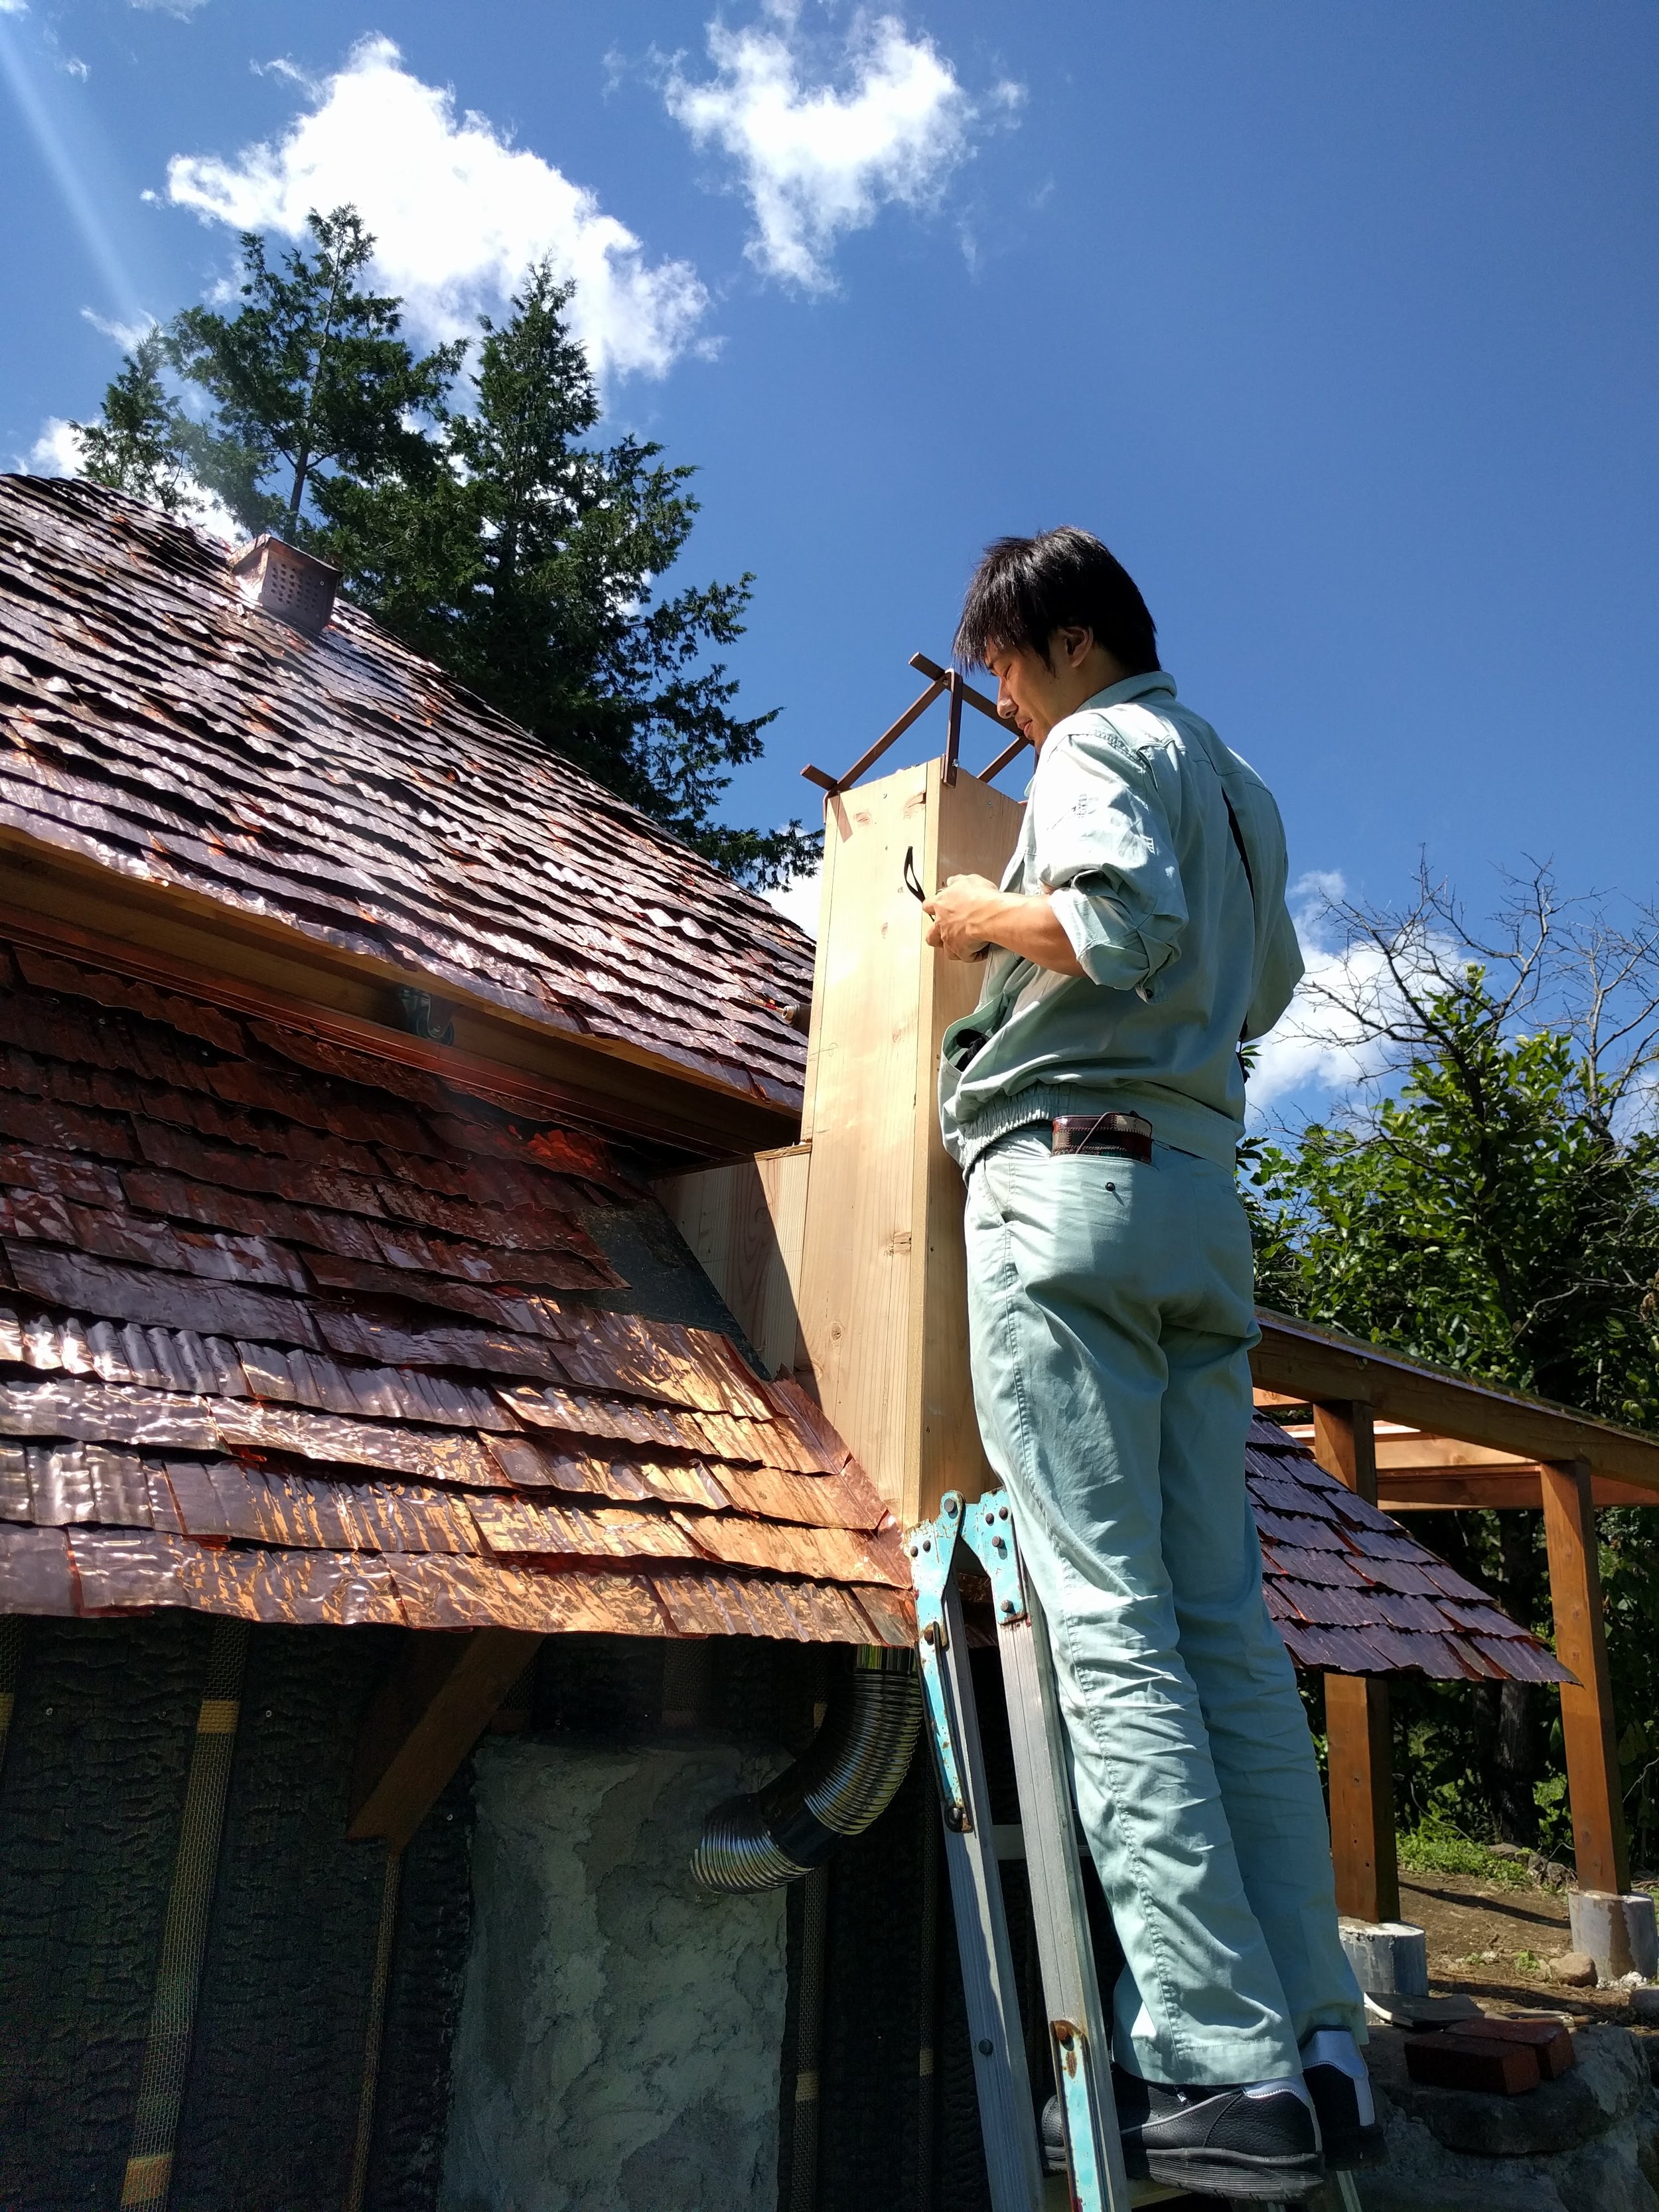
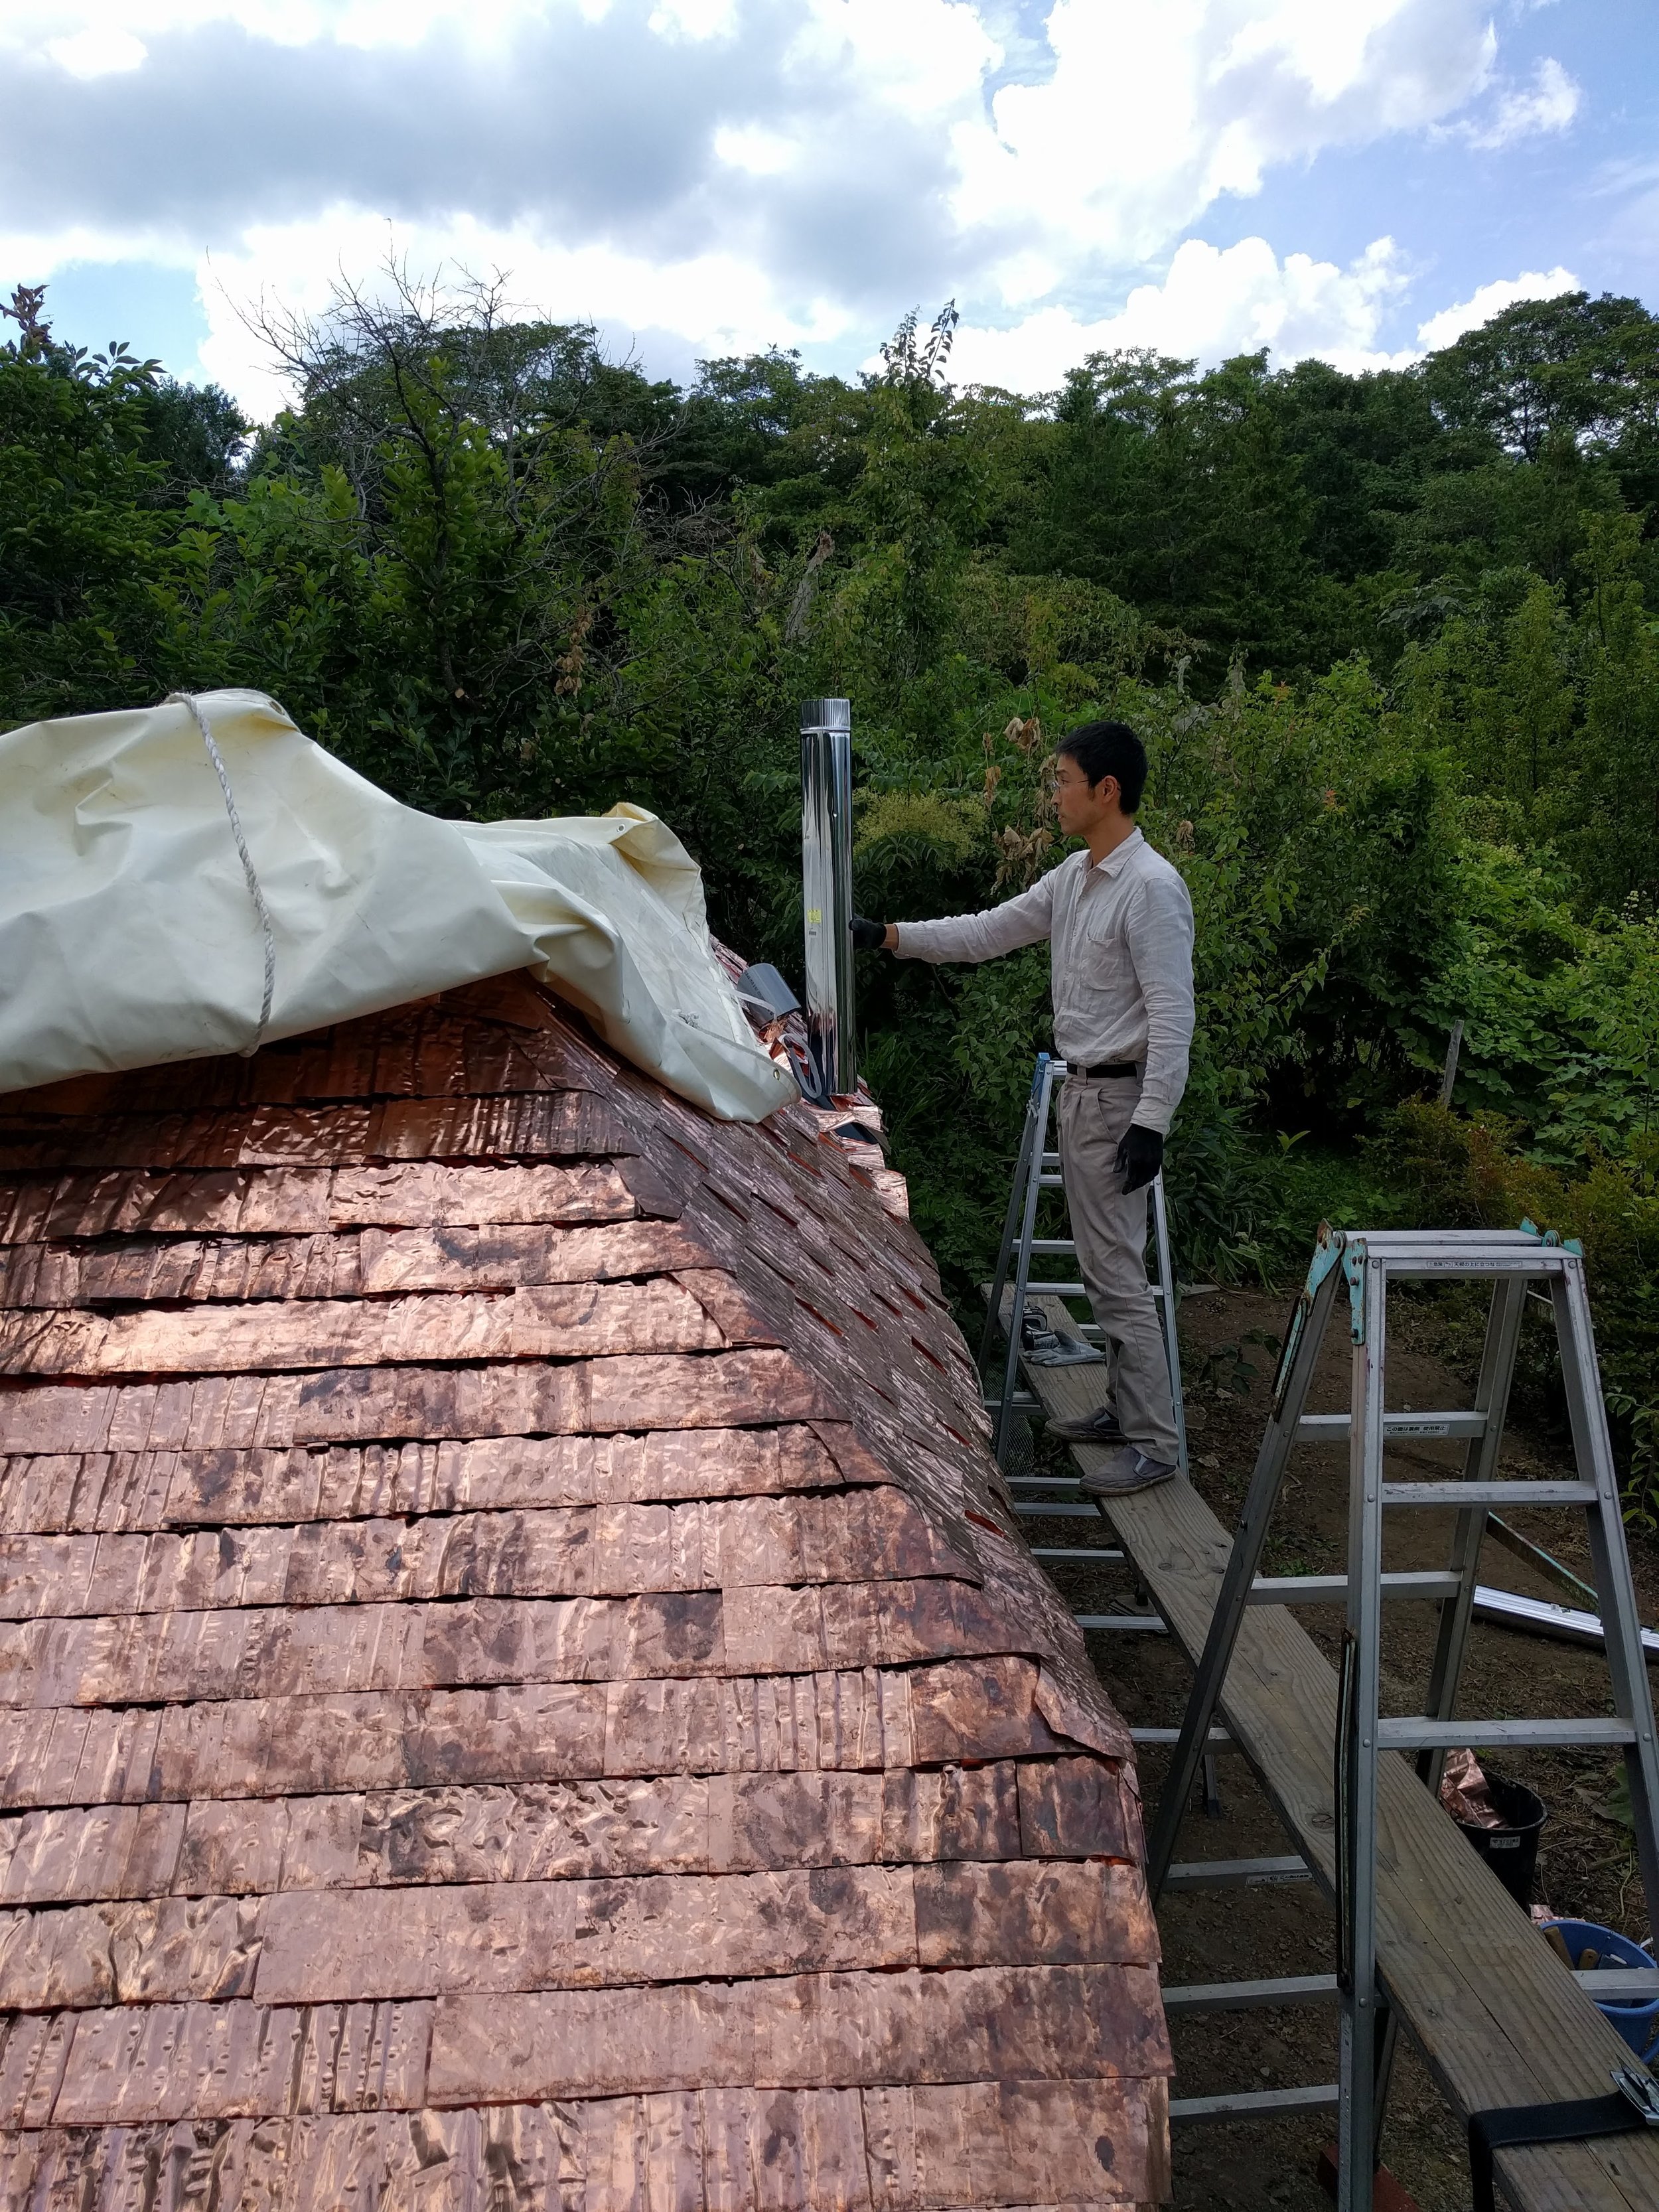
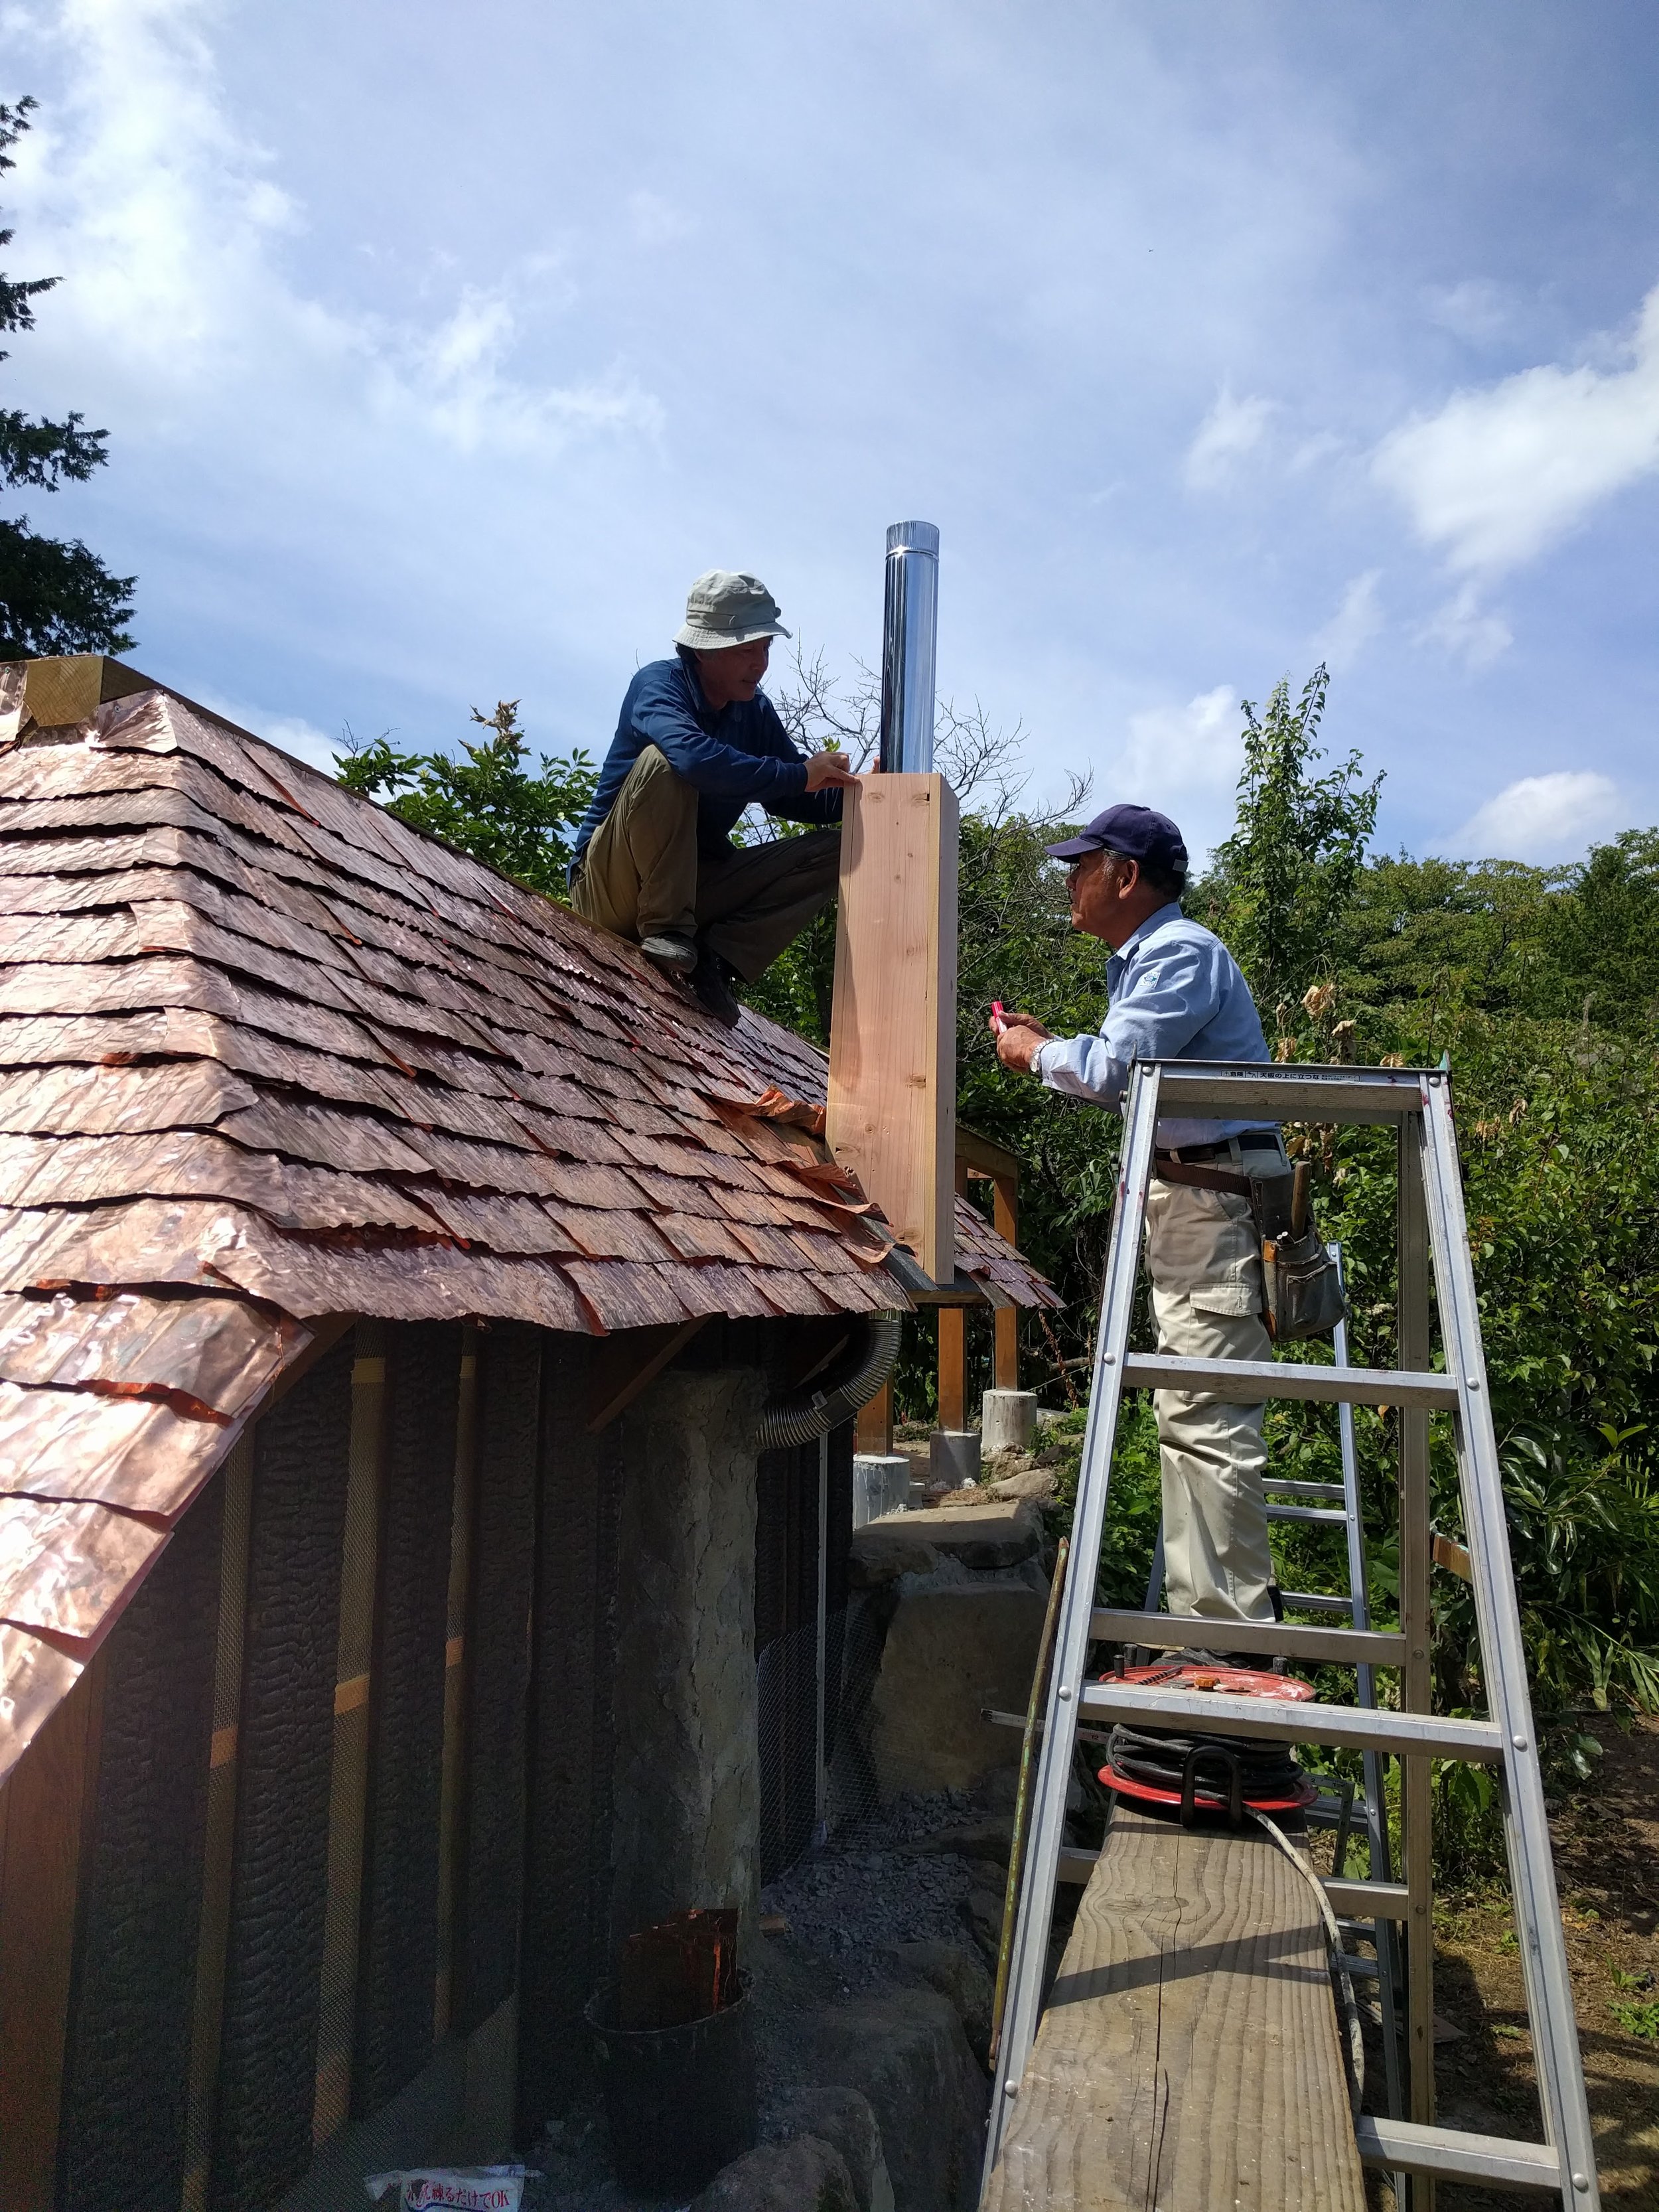
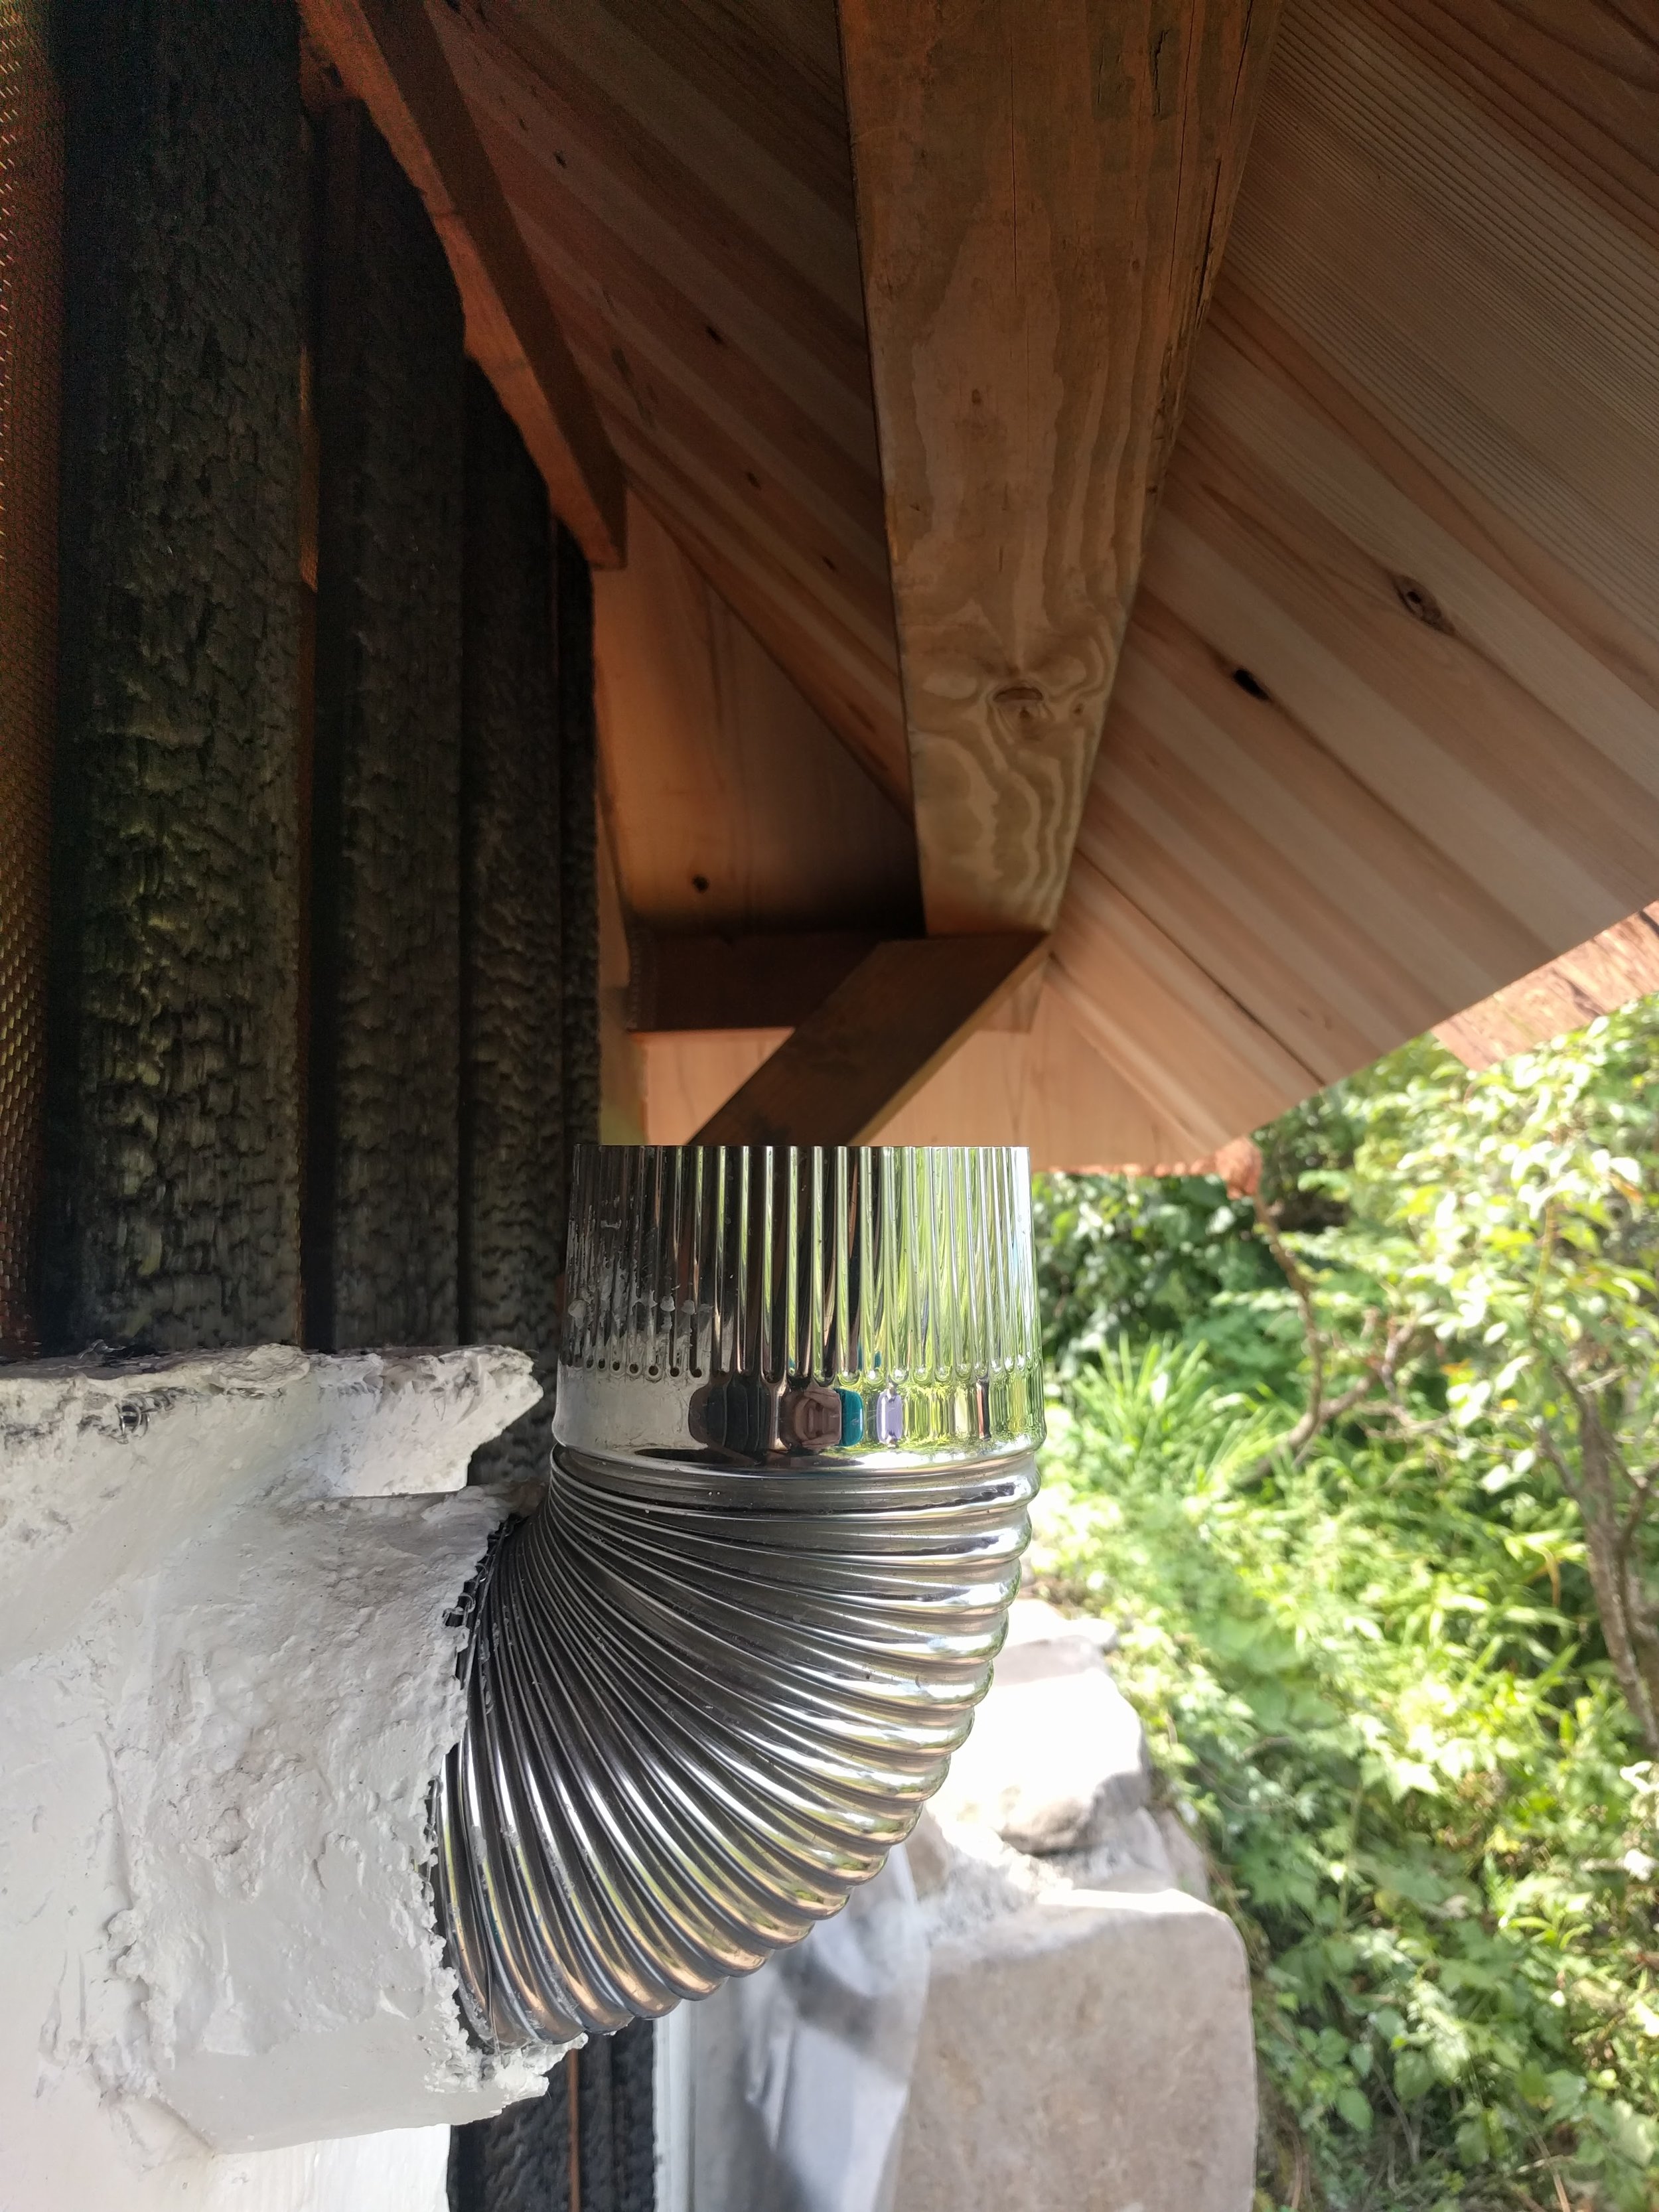
And we need to install chimney.
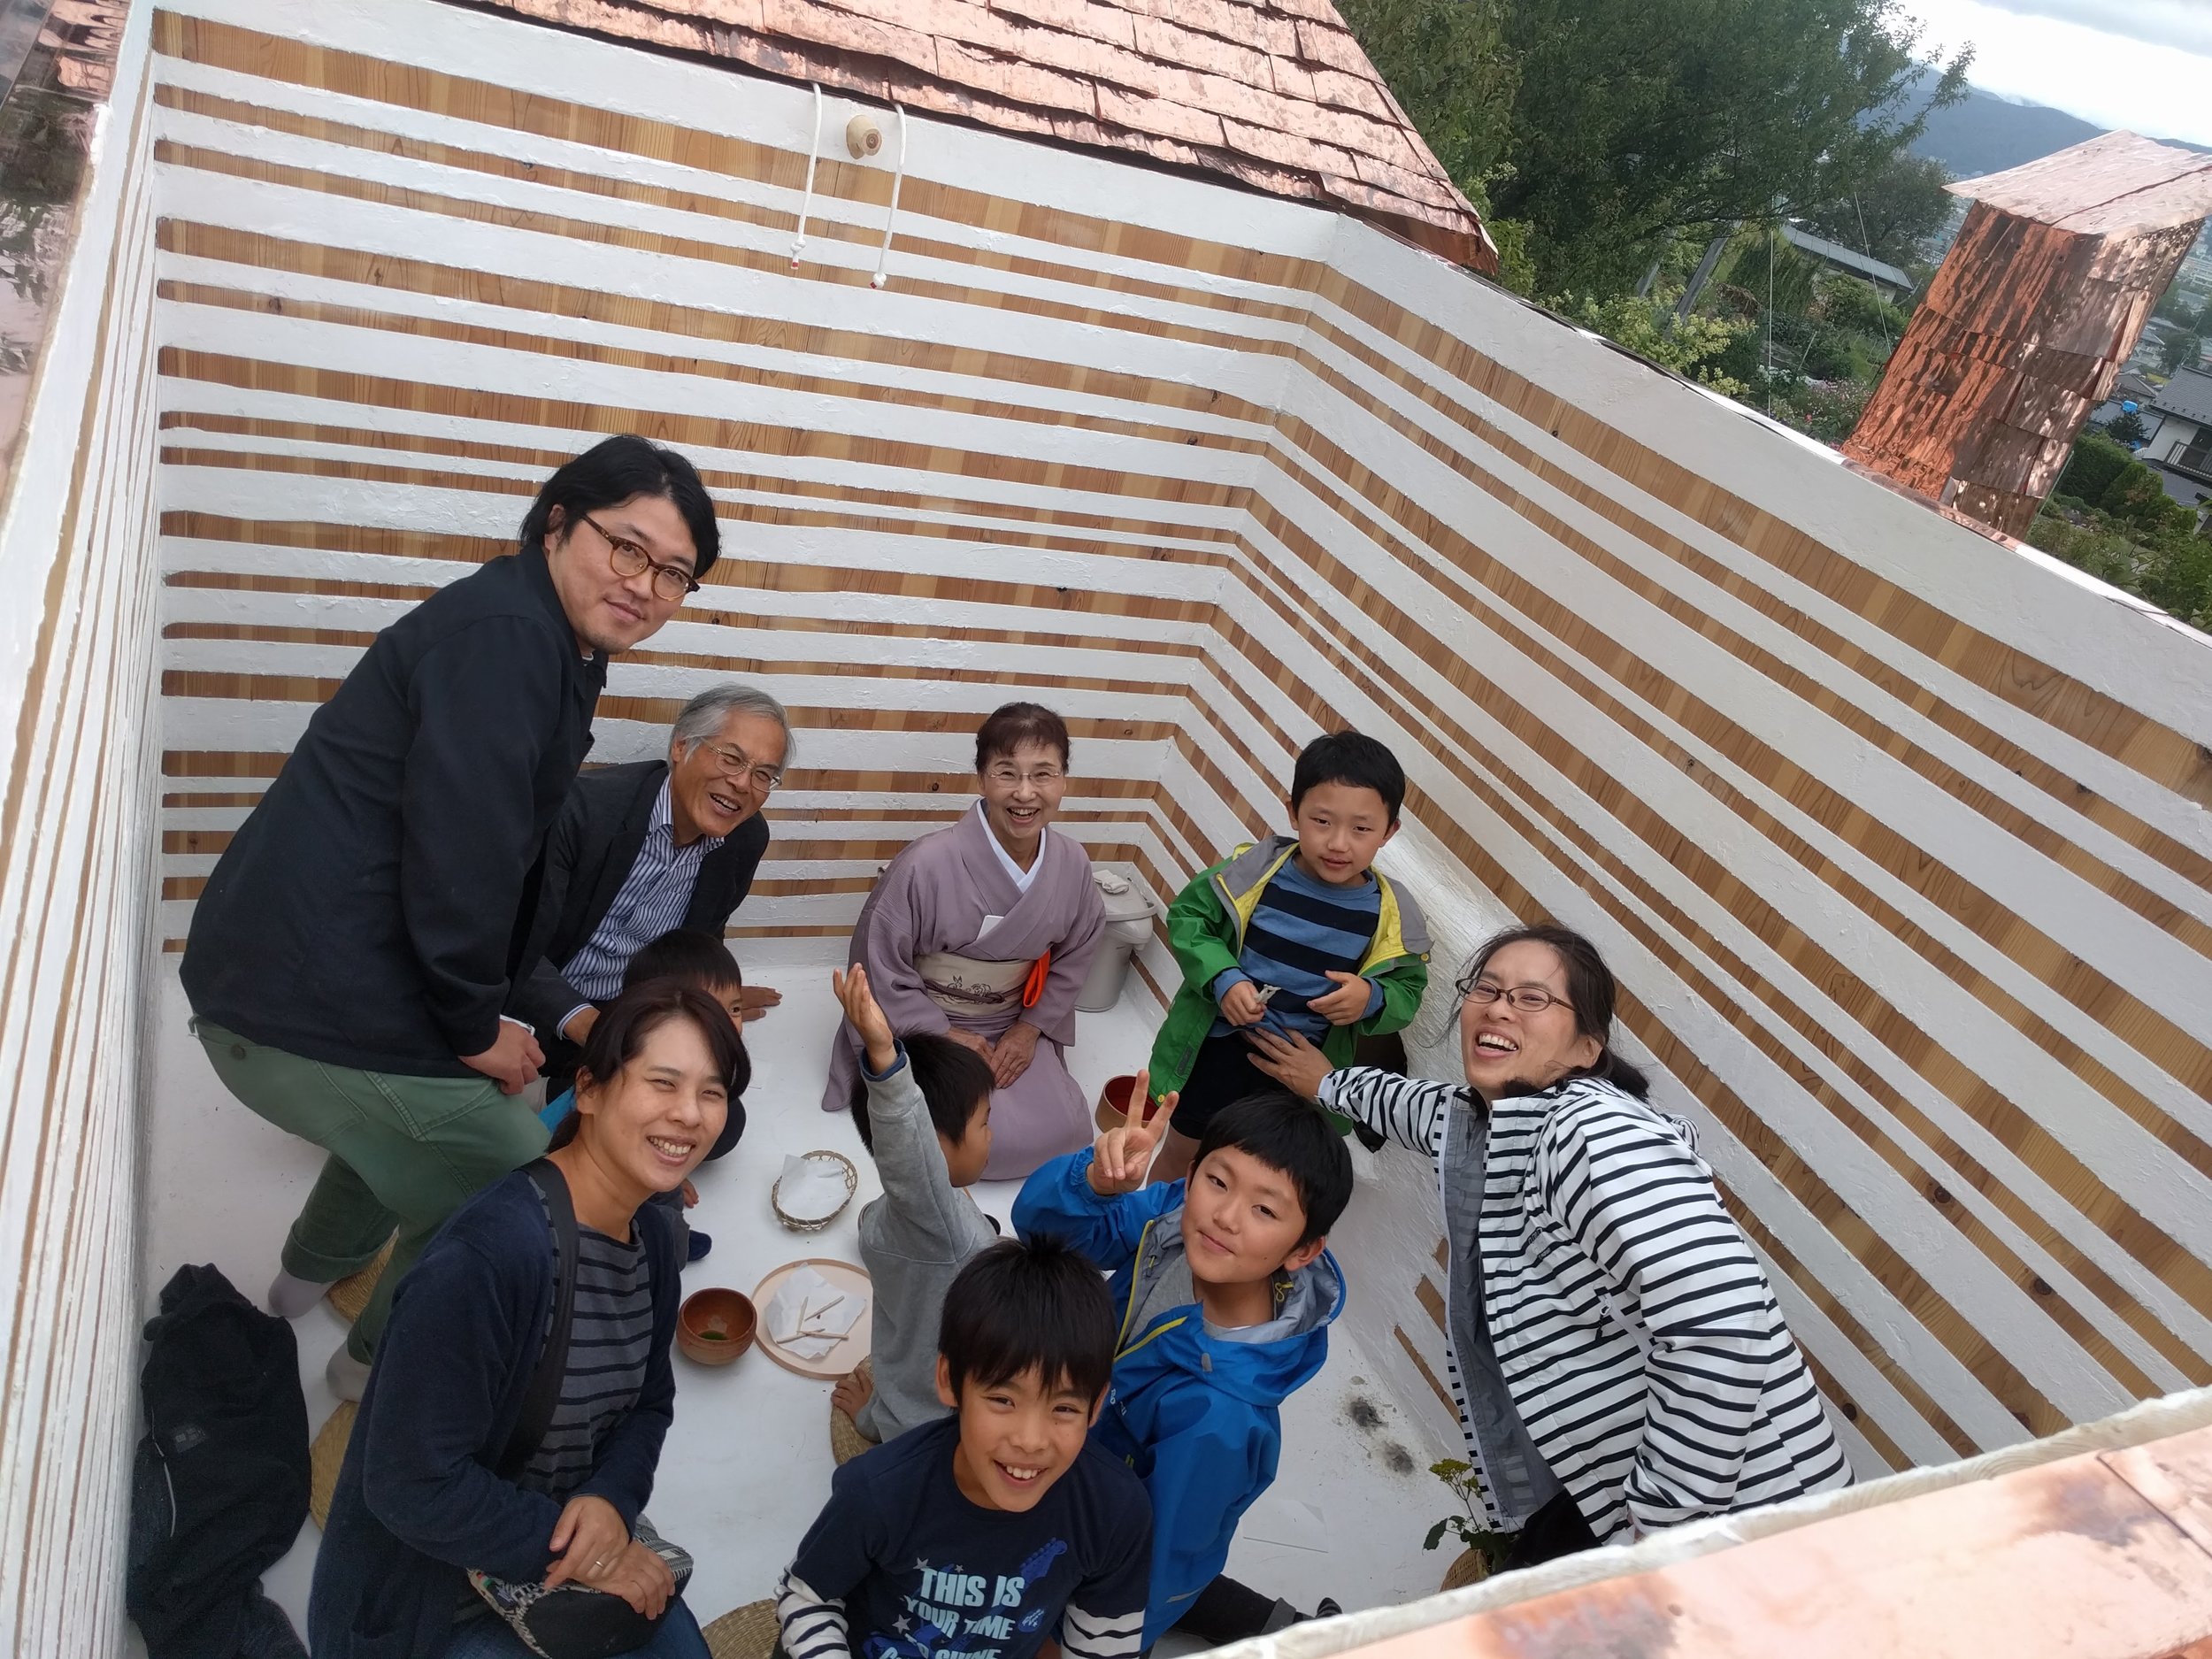
So this is the end of workshop. We had to say goodbye to each other......
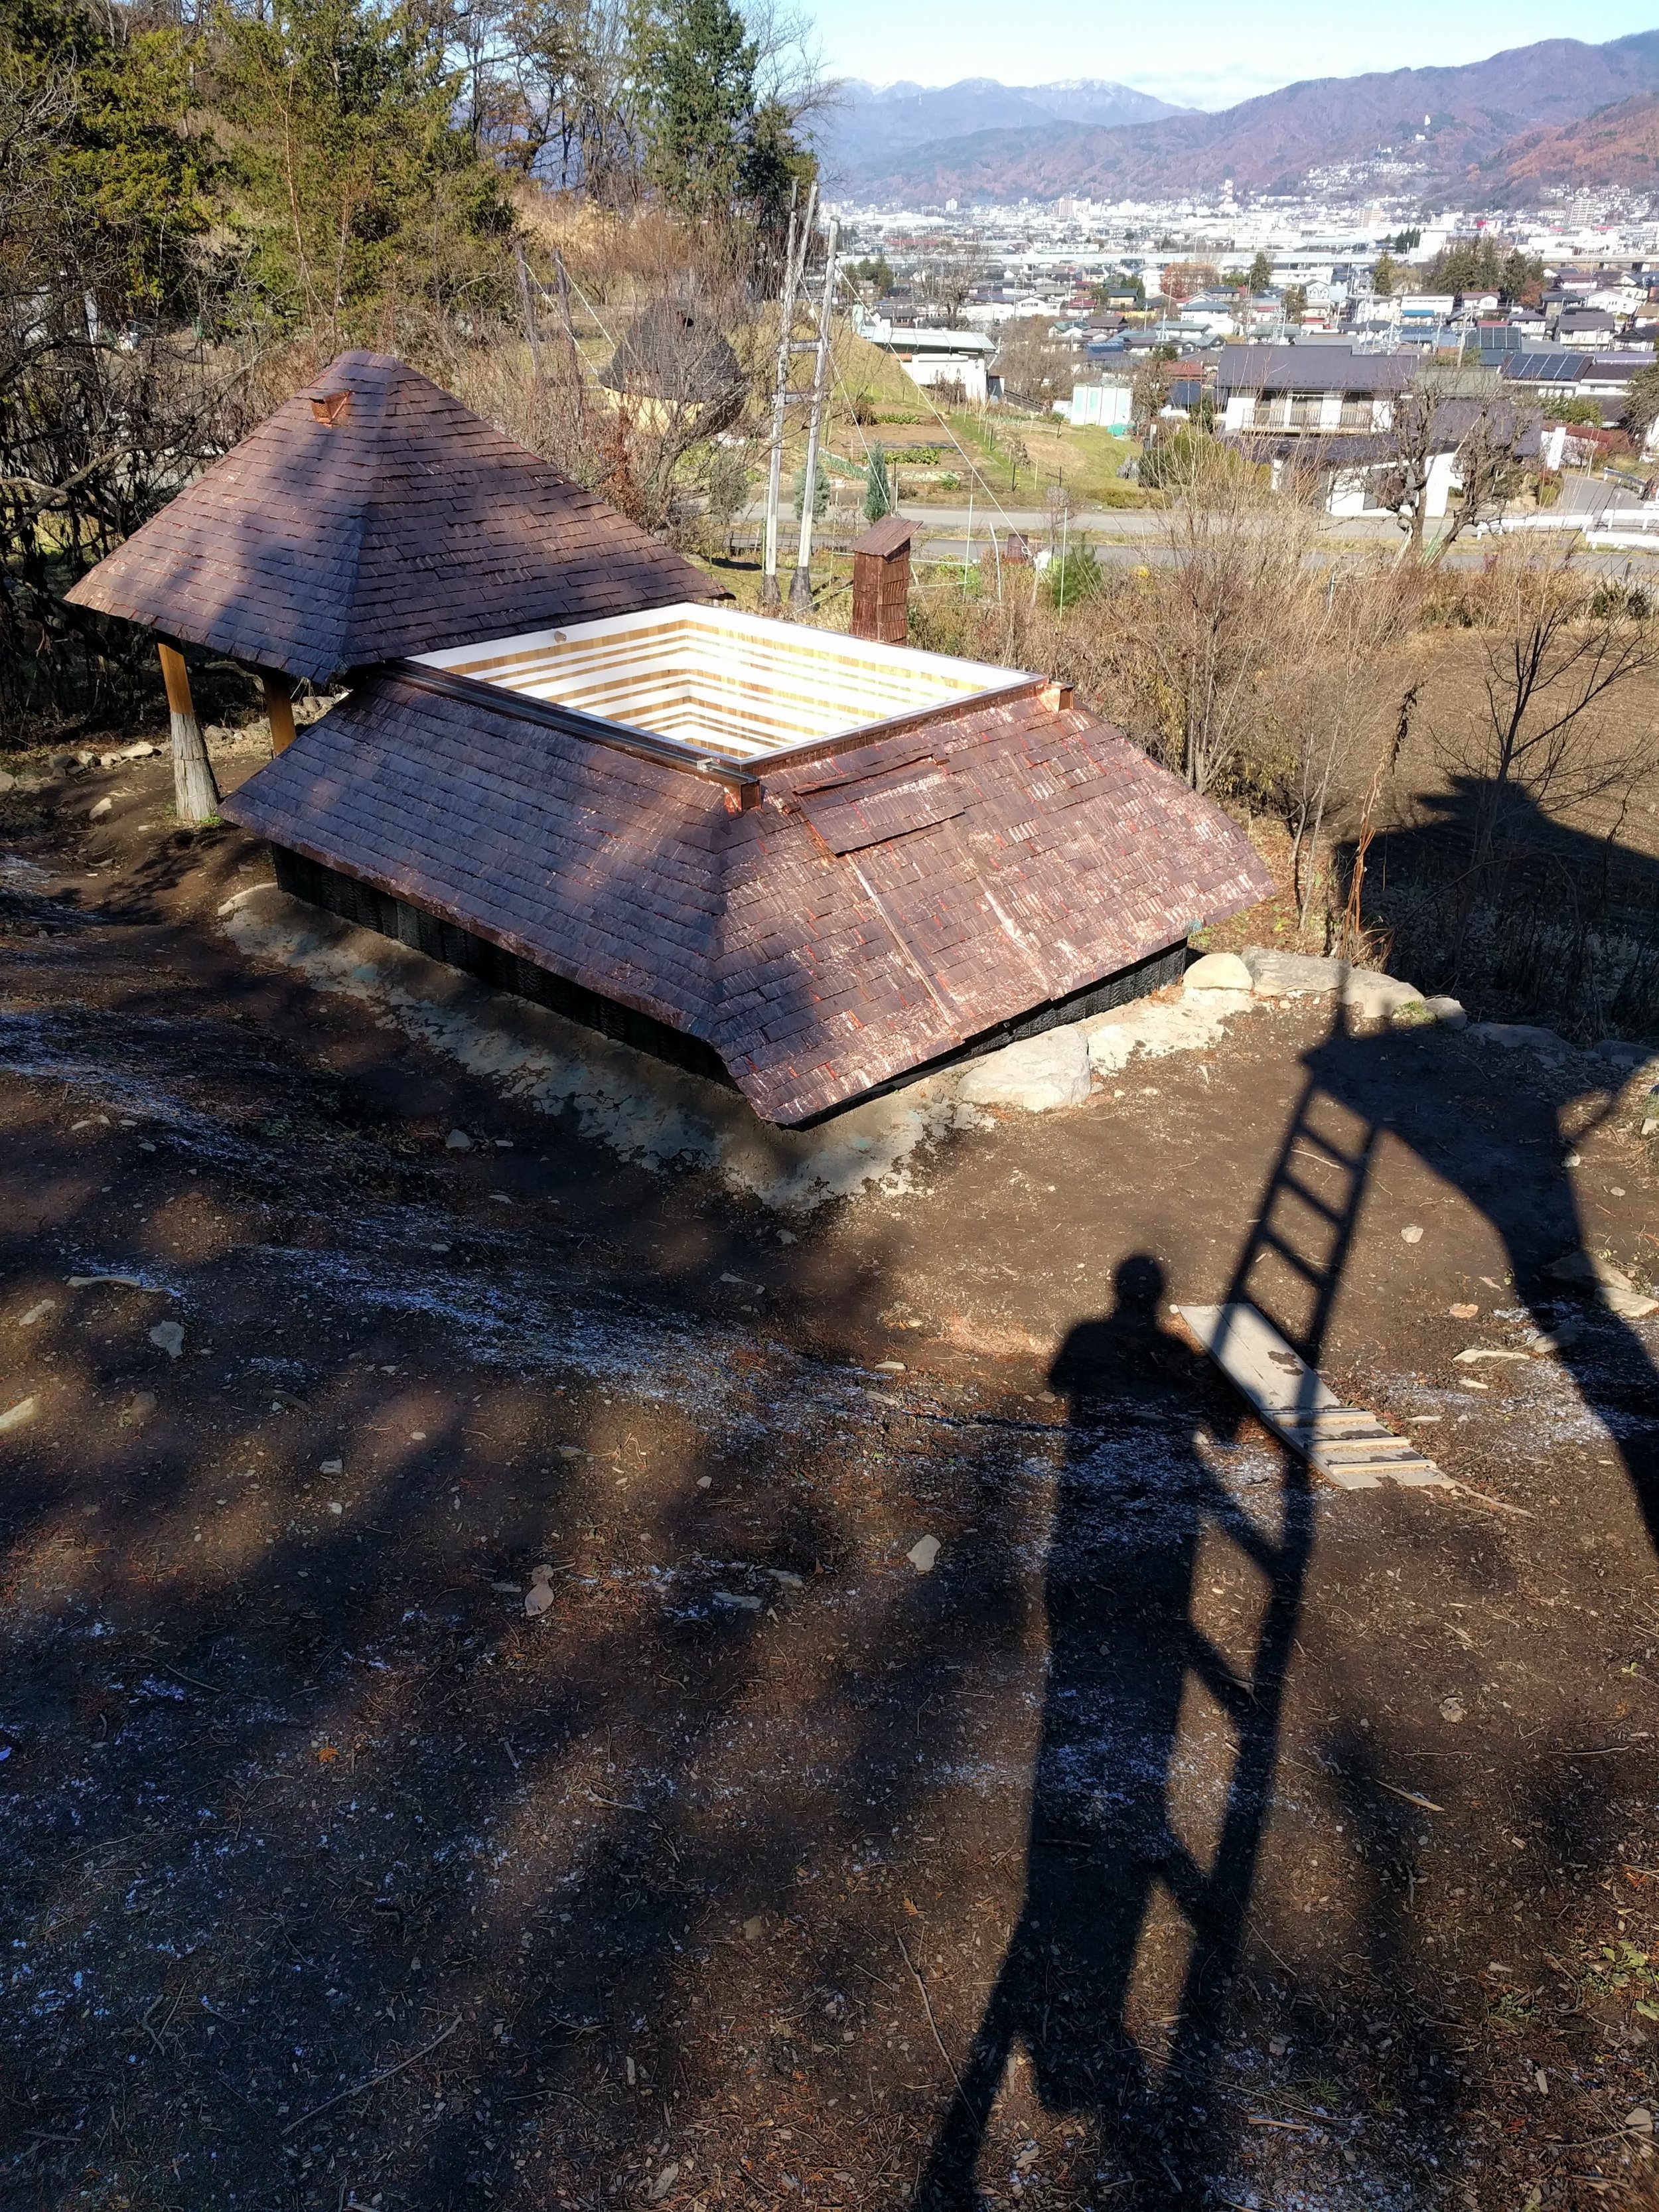
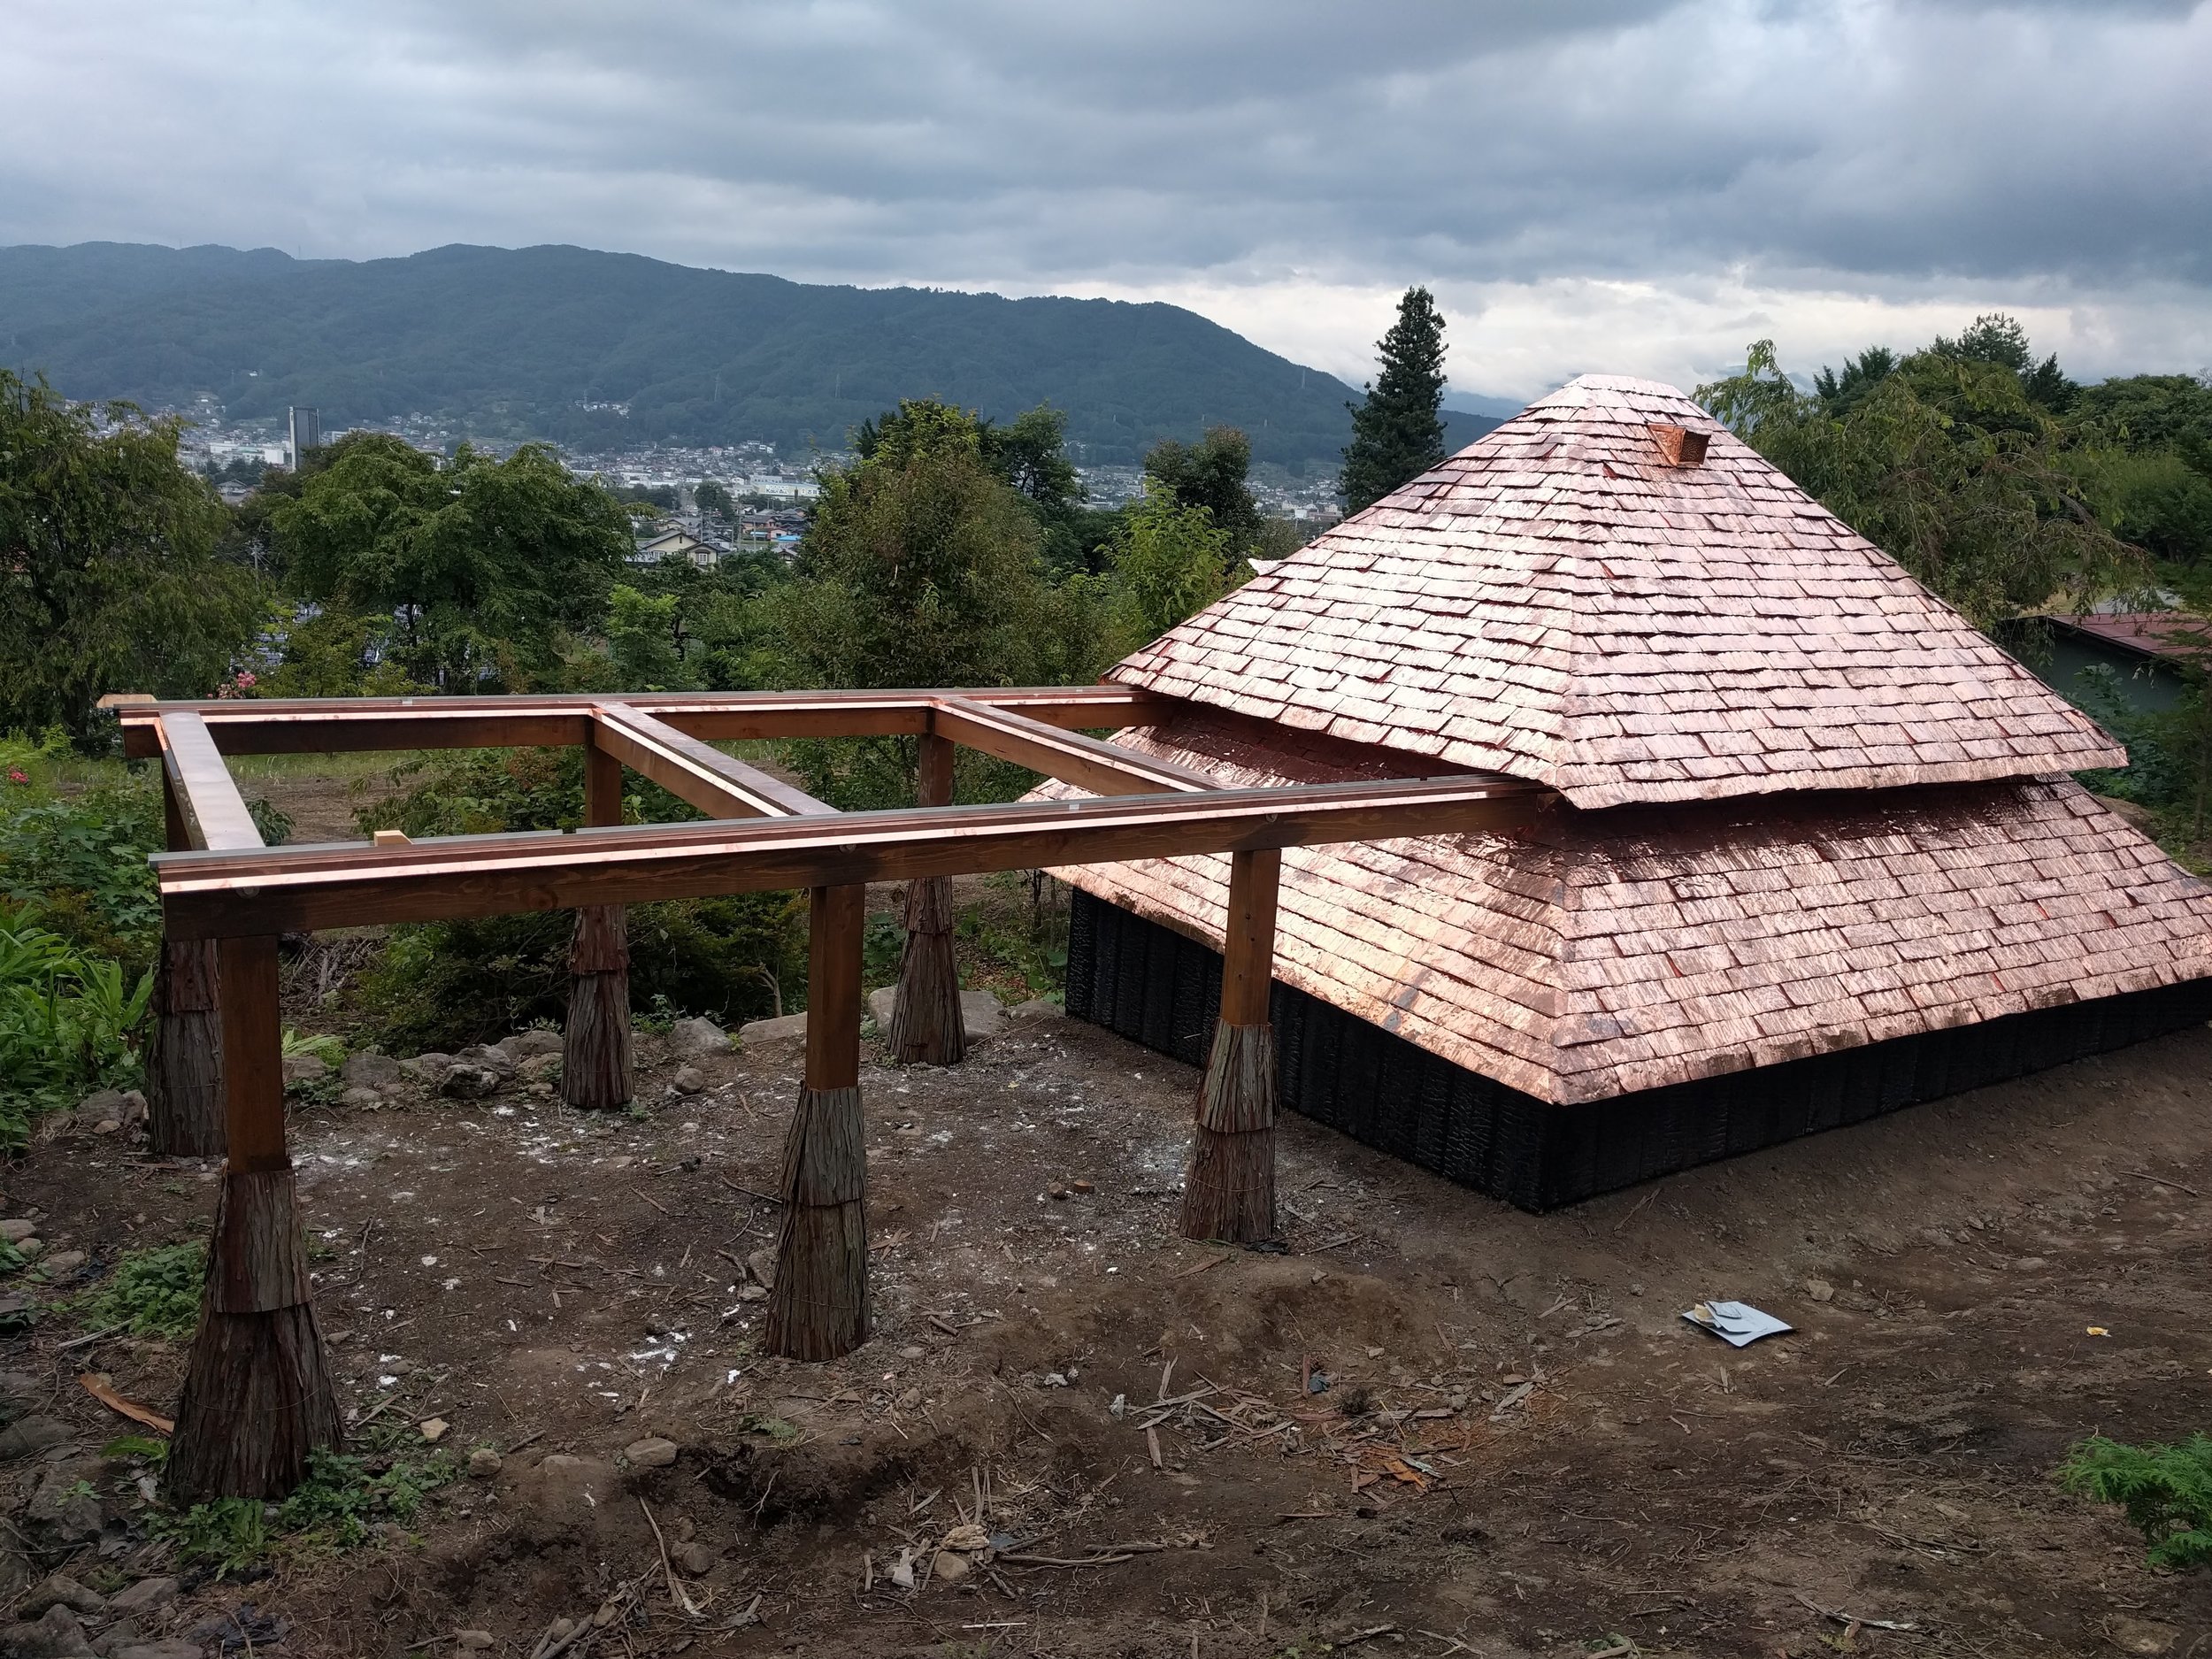
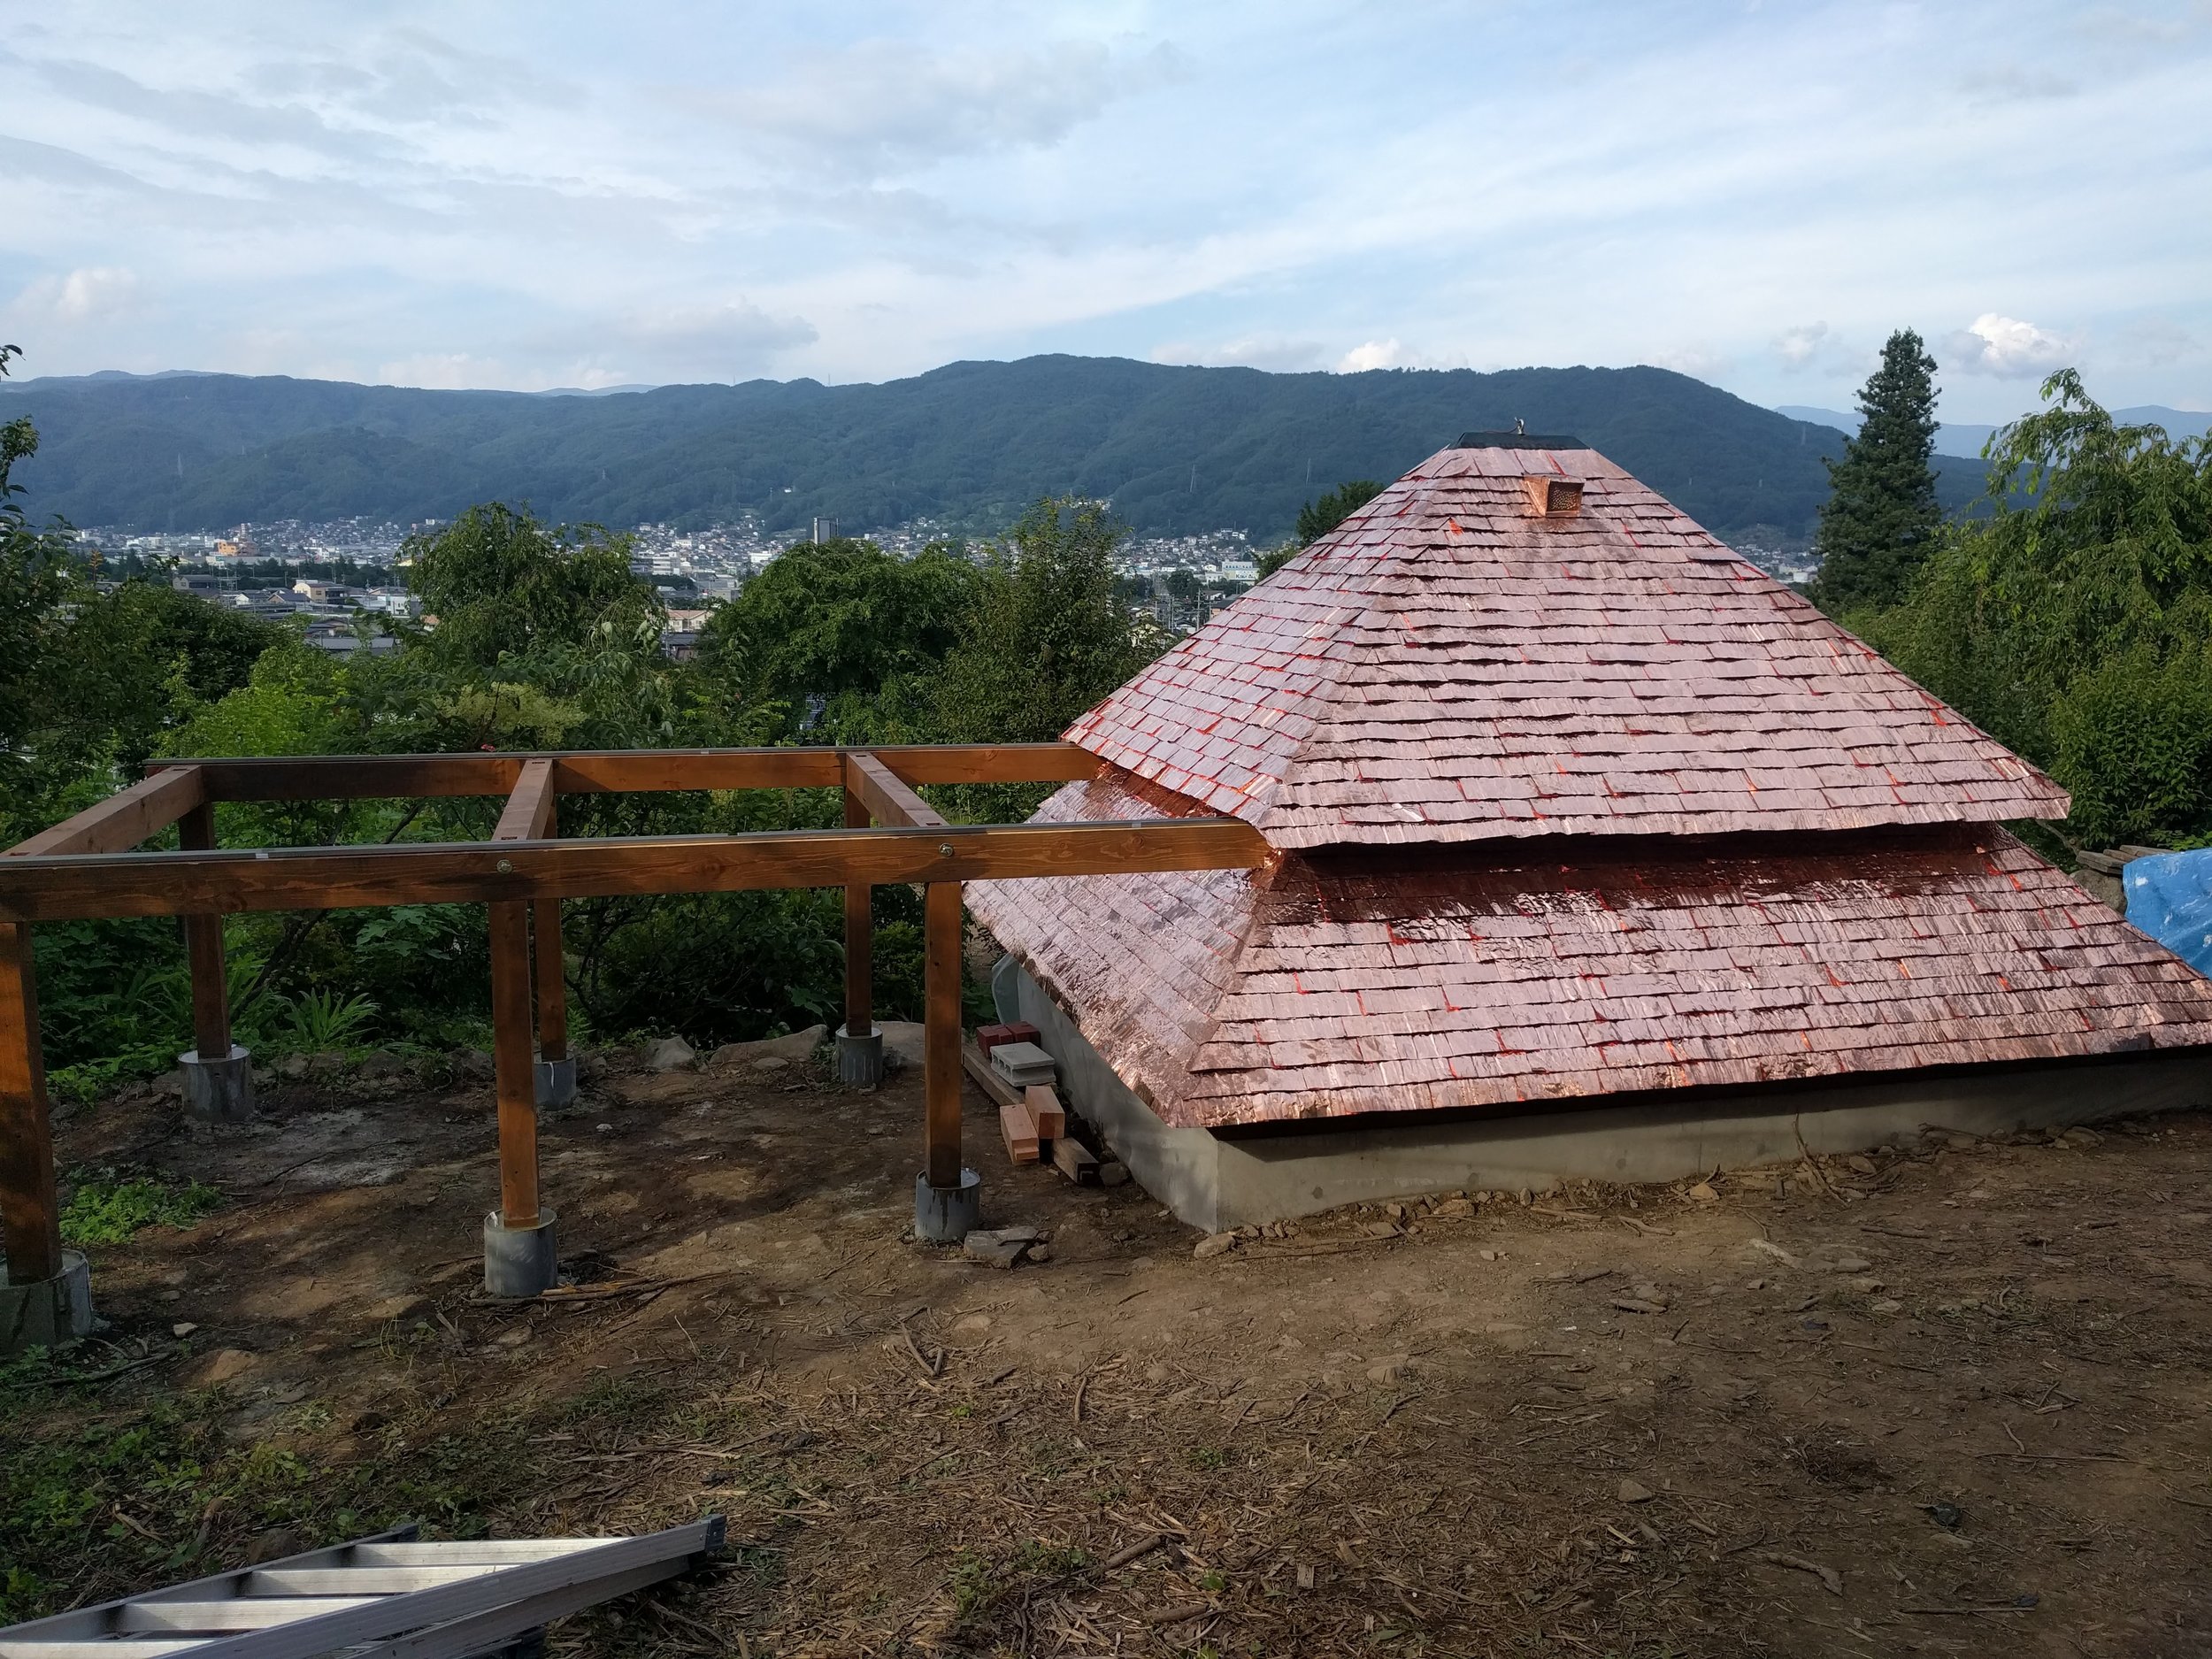
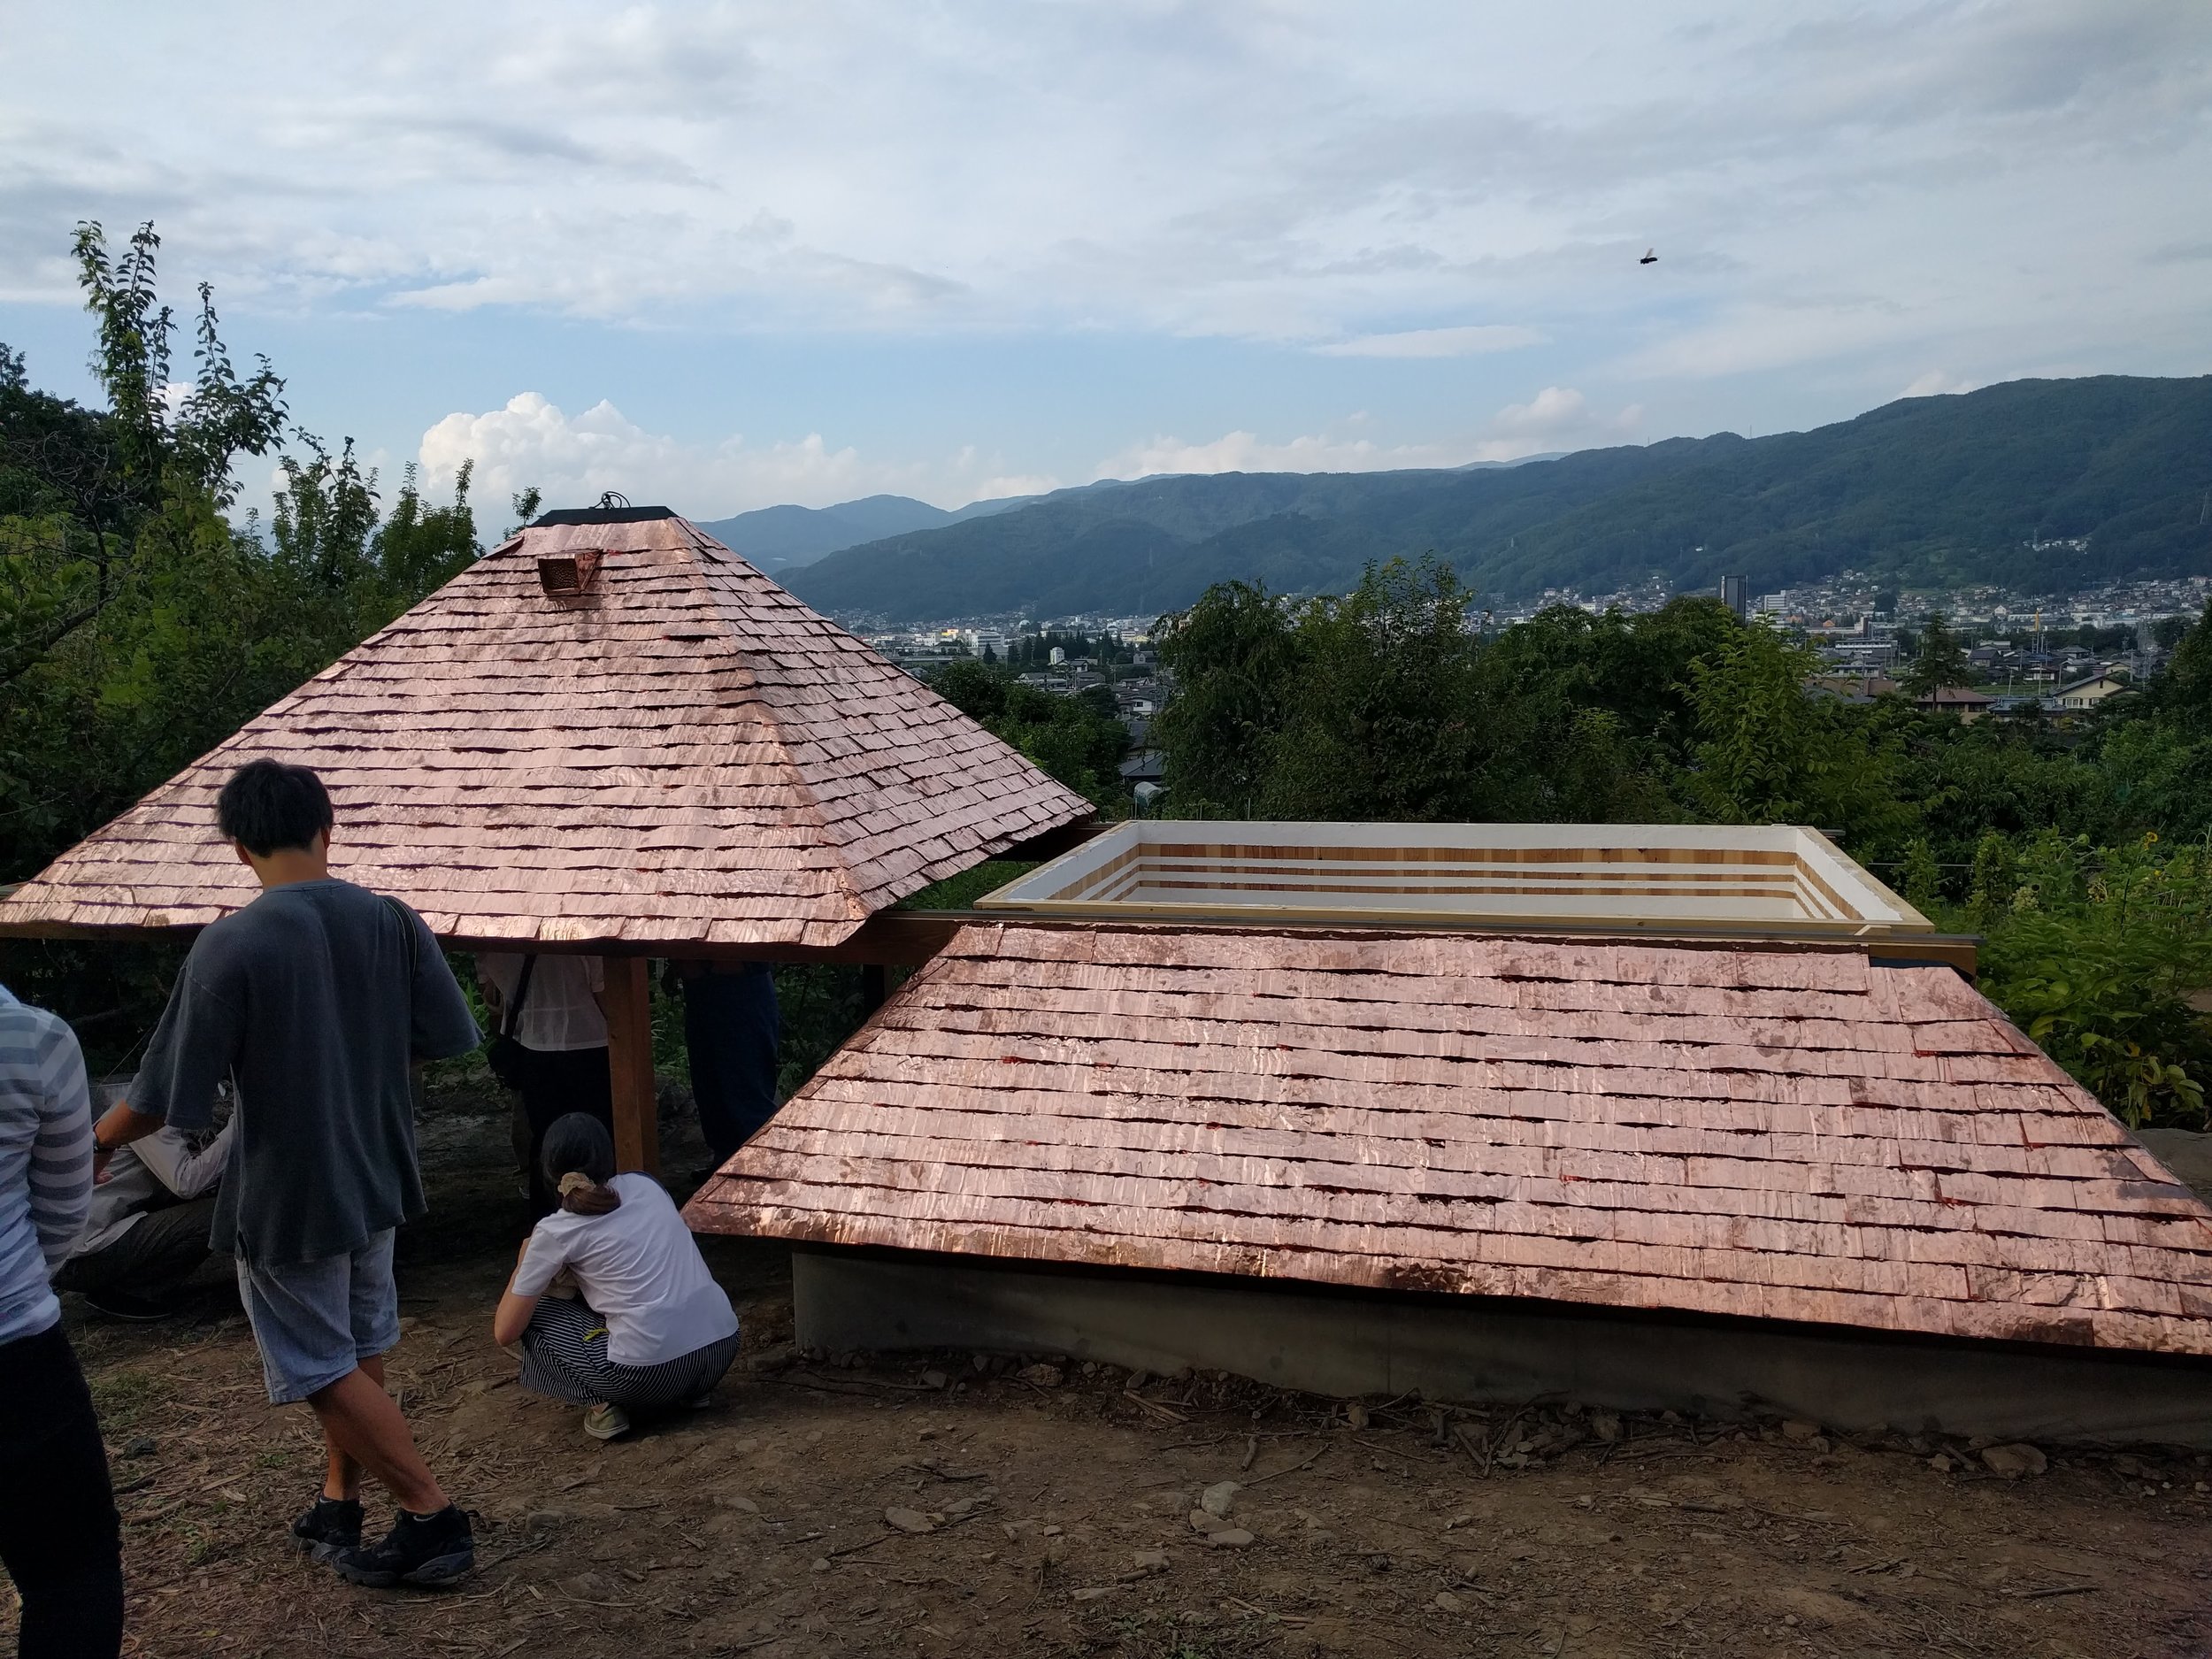
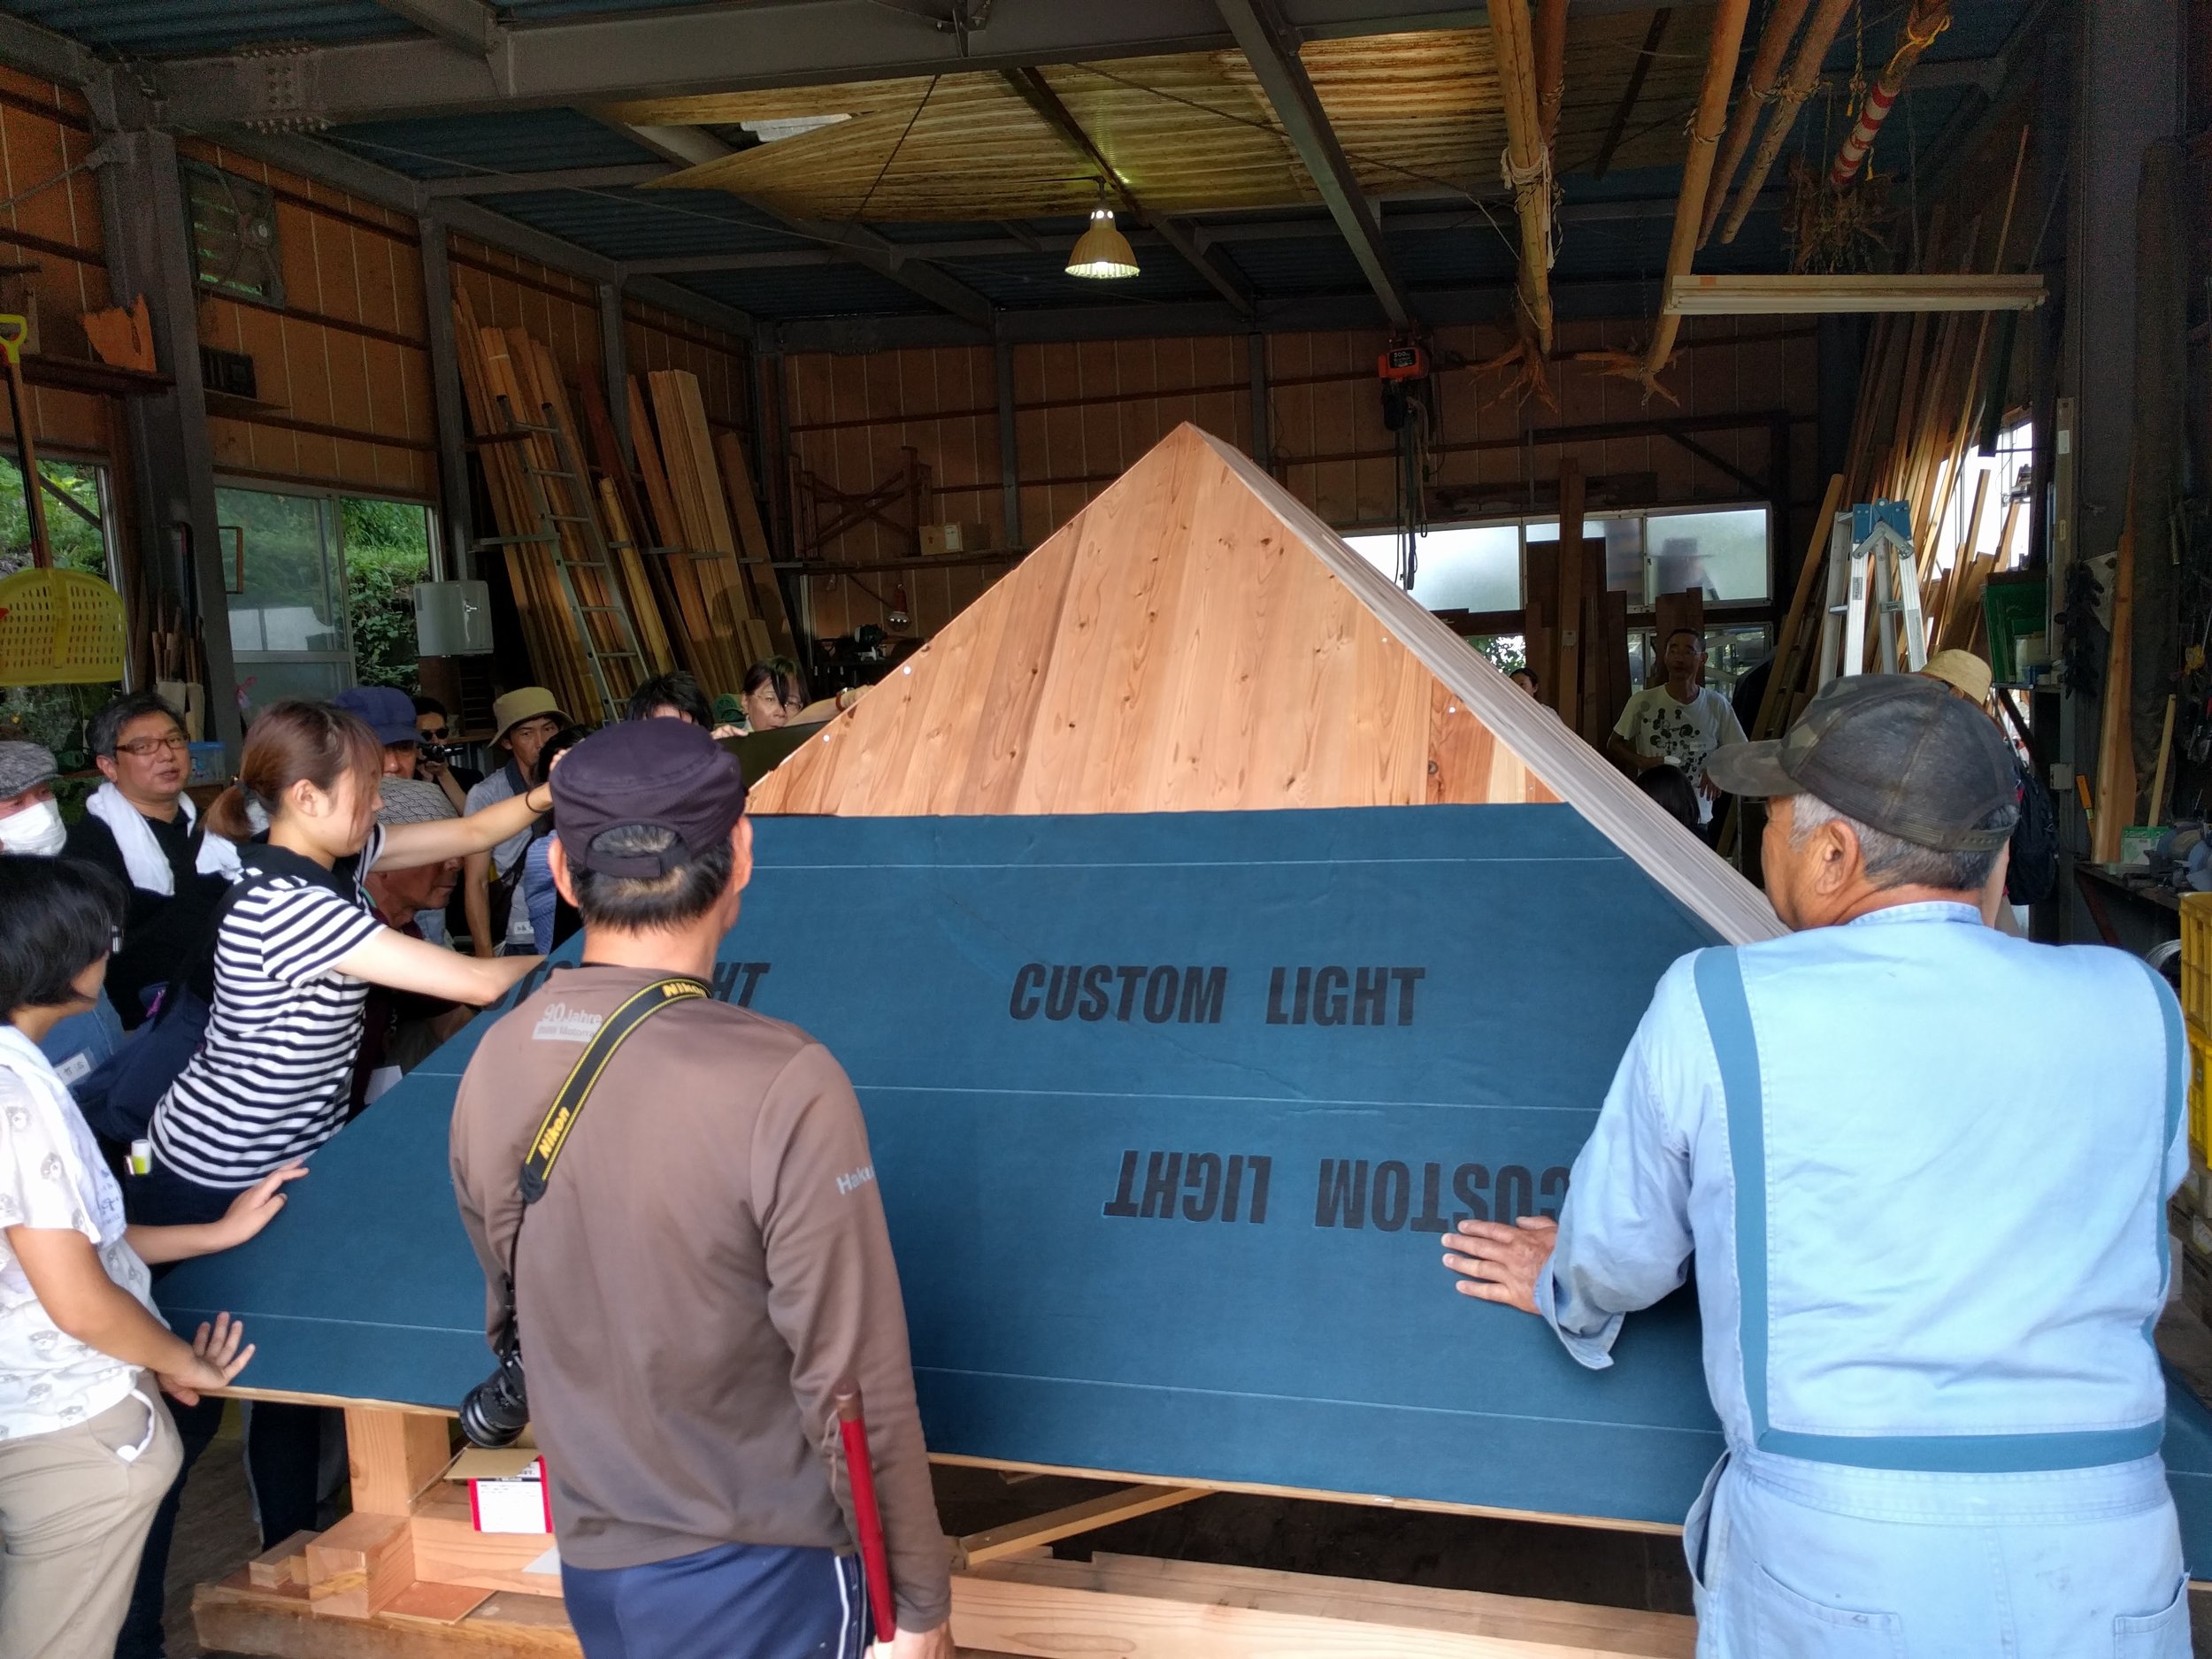
Top roof arrived and we are putting stripe plaster inside the top roof. The bottom roof is done and ready to recieve the top roof.
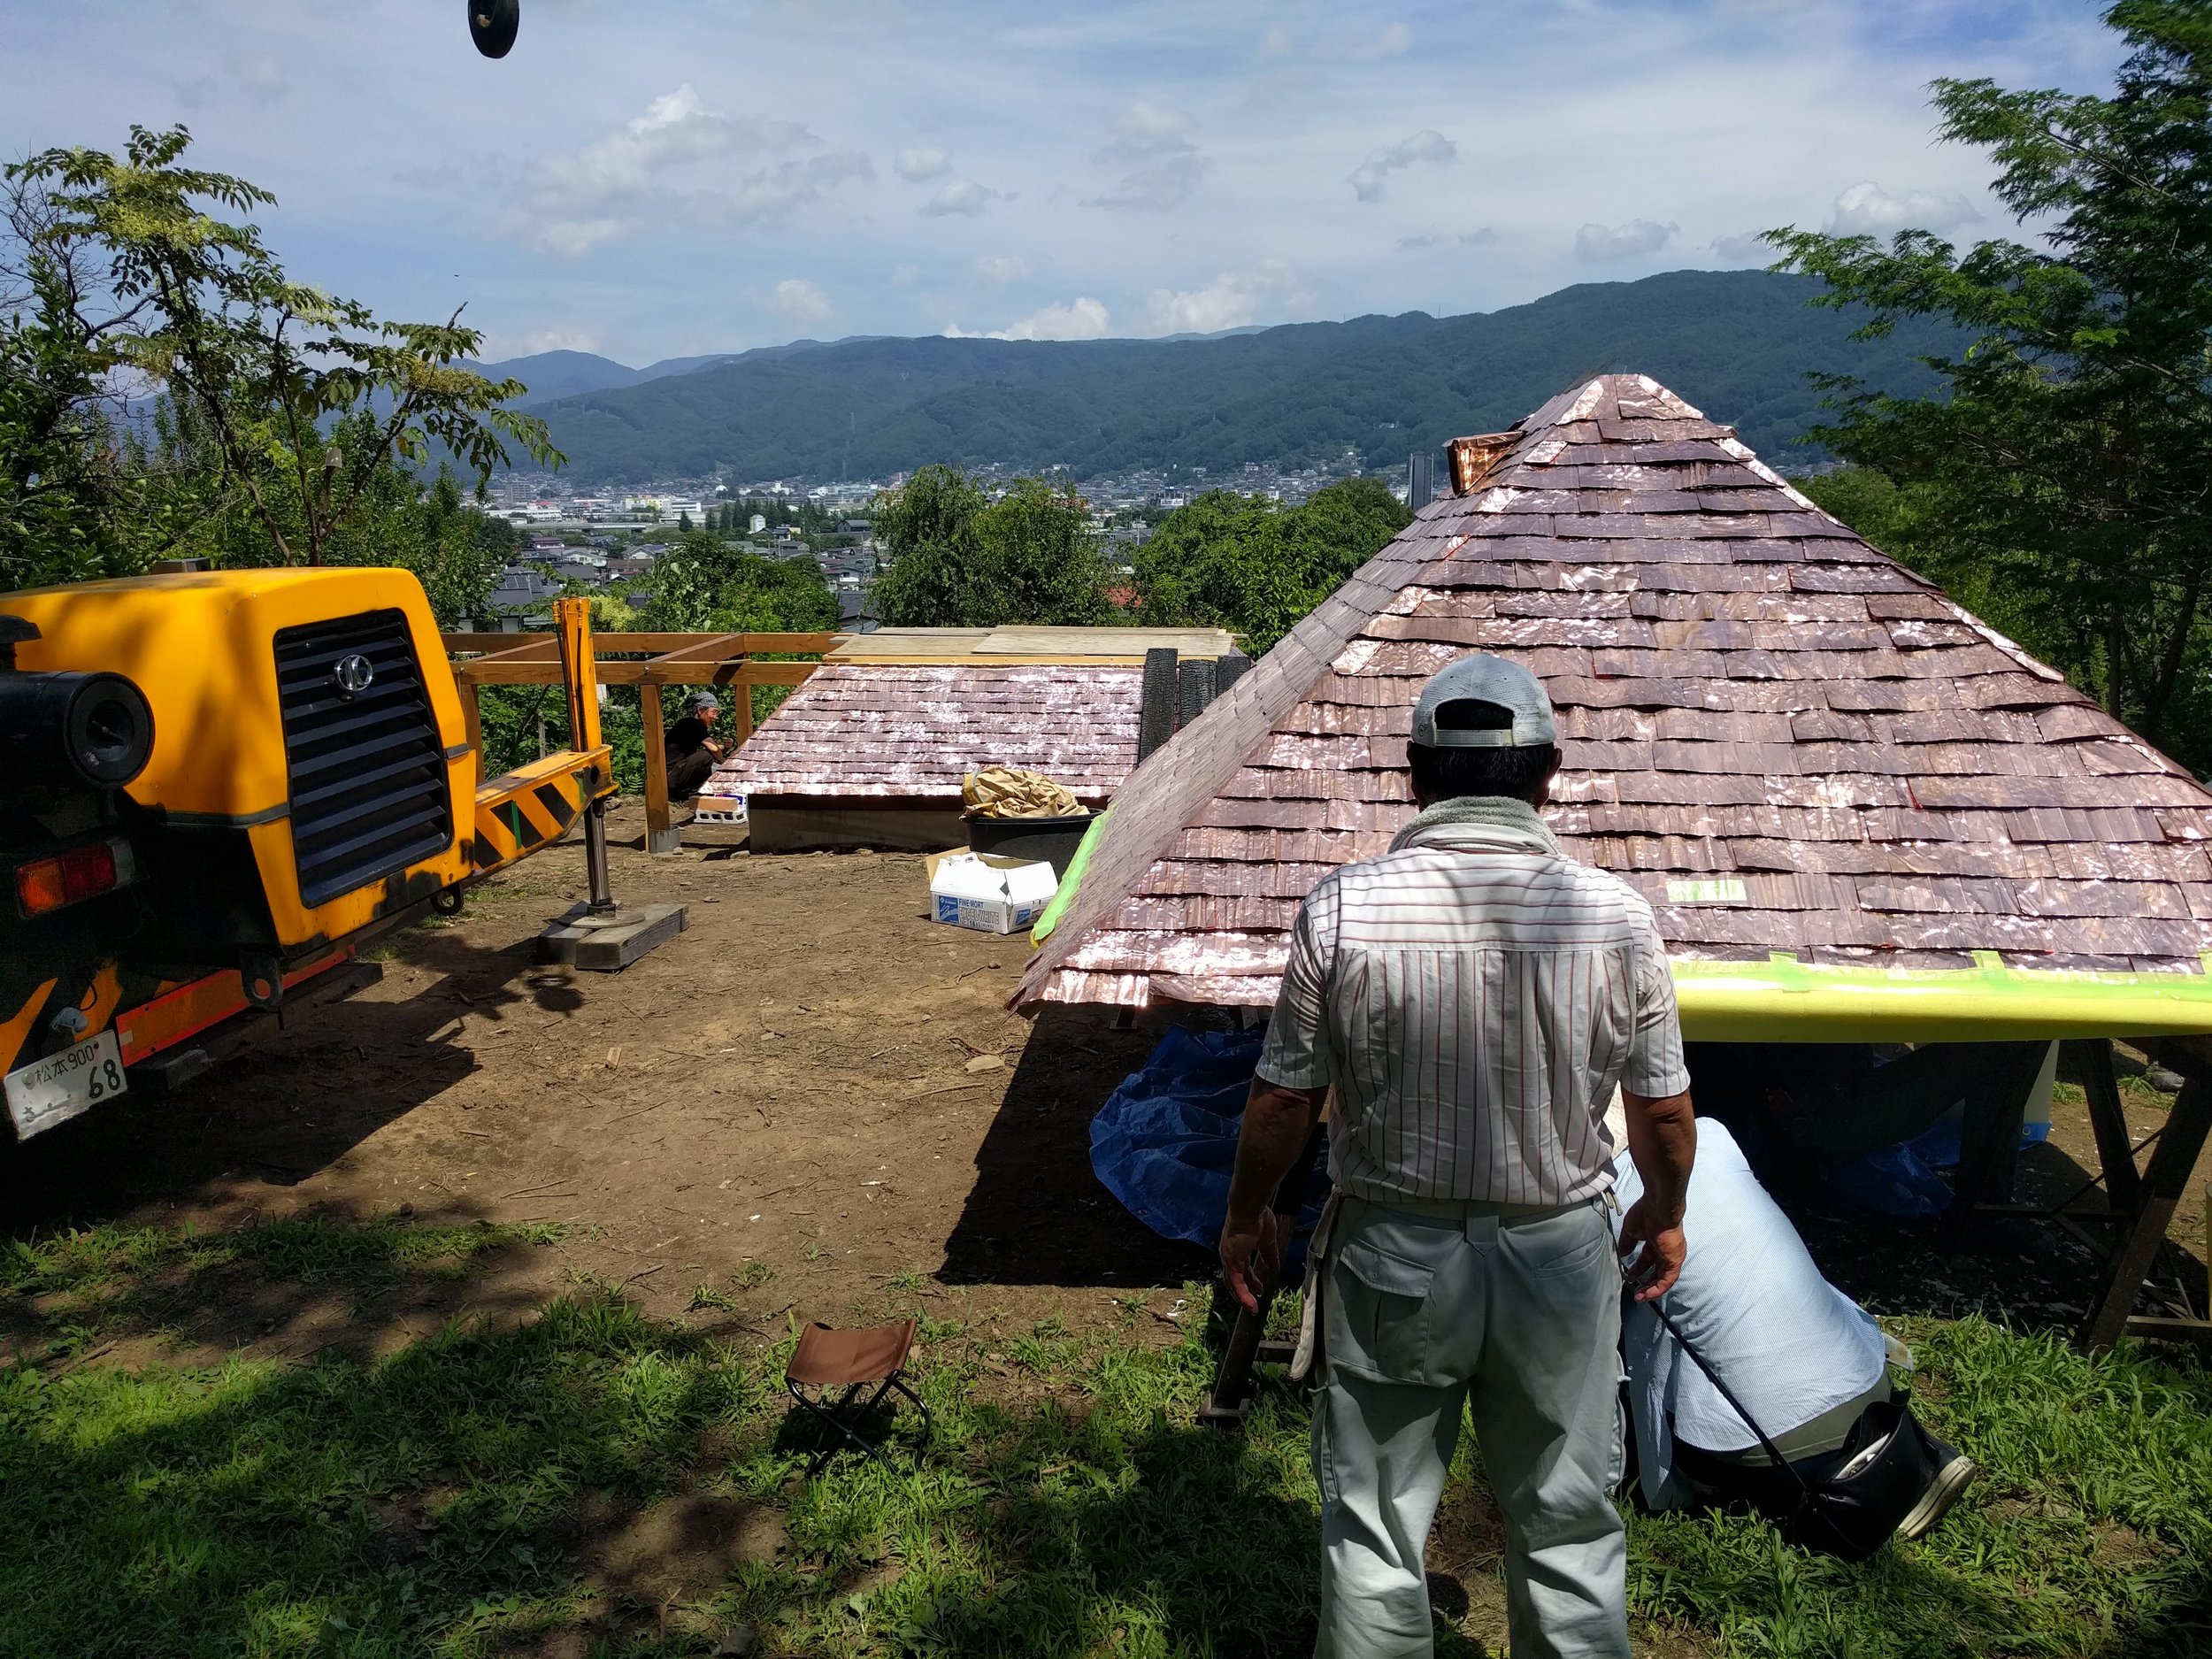
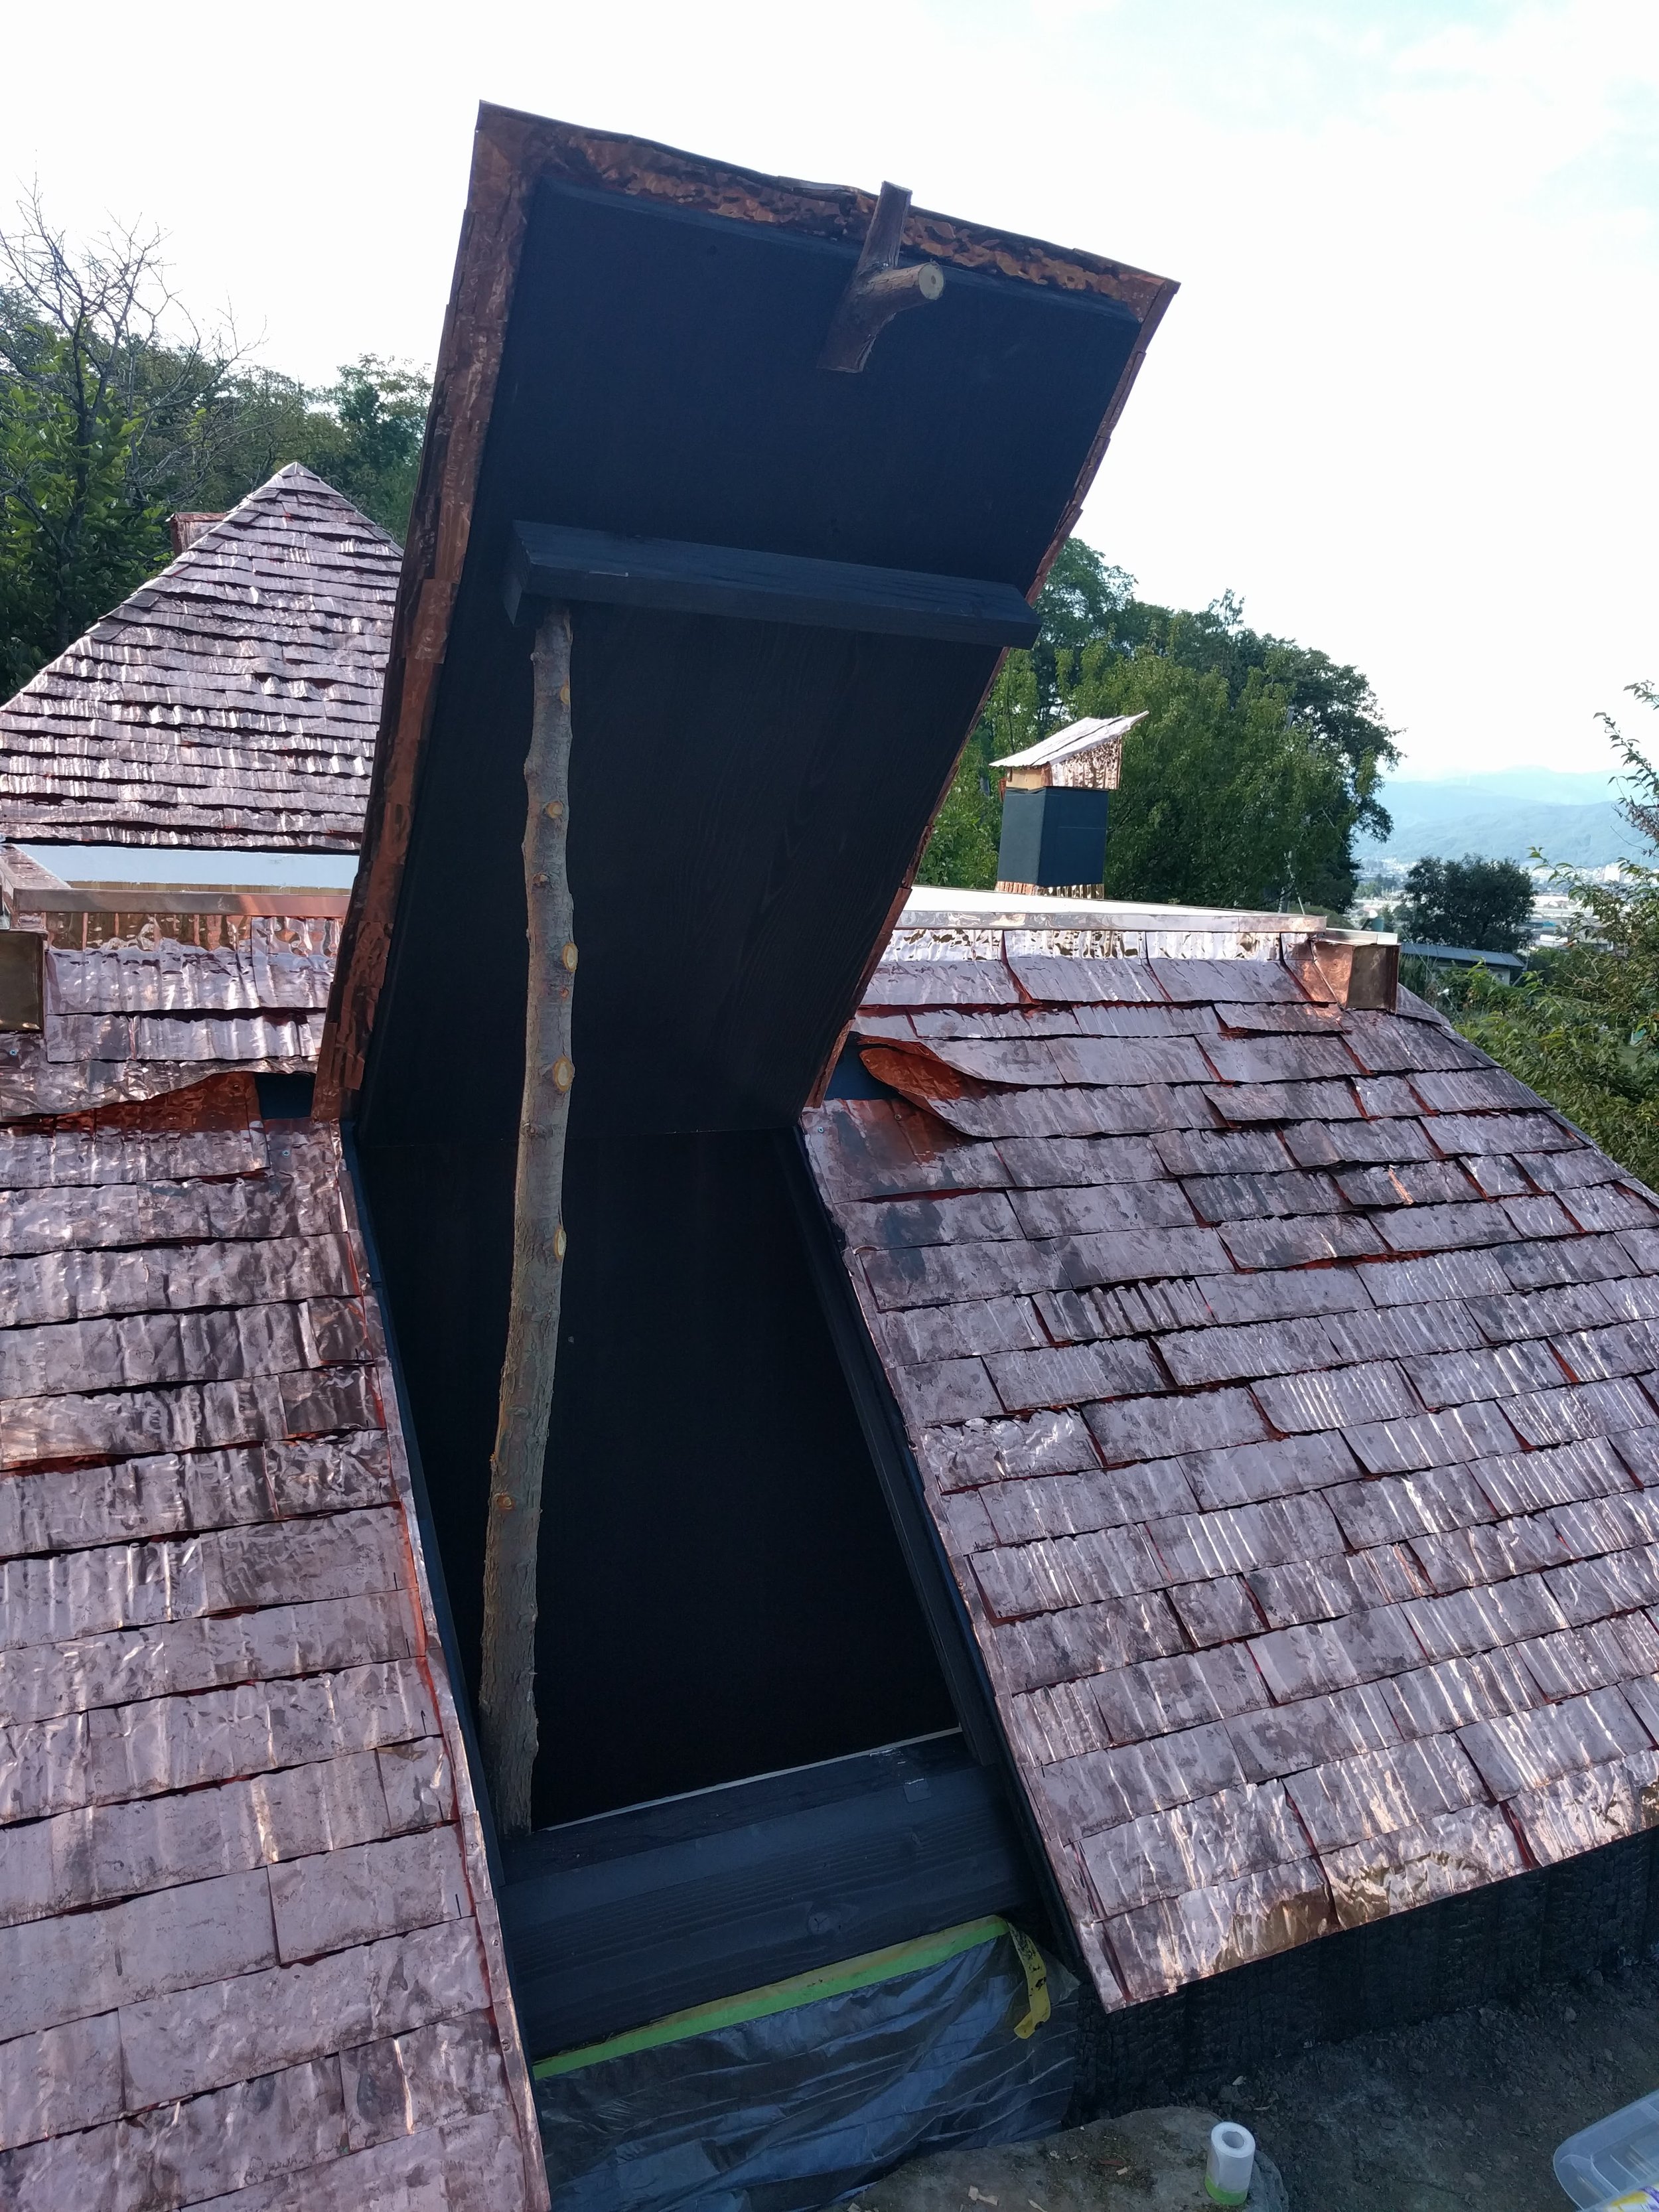
Now we are putting the top roof. It is on a rail and it slides open!!!!
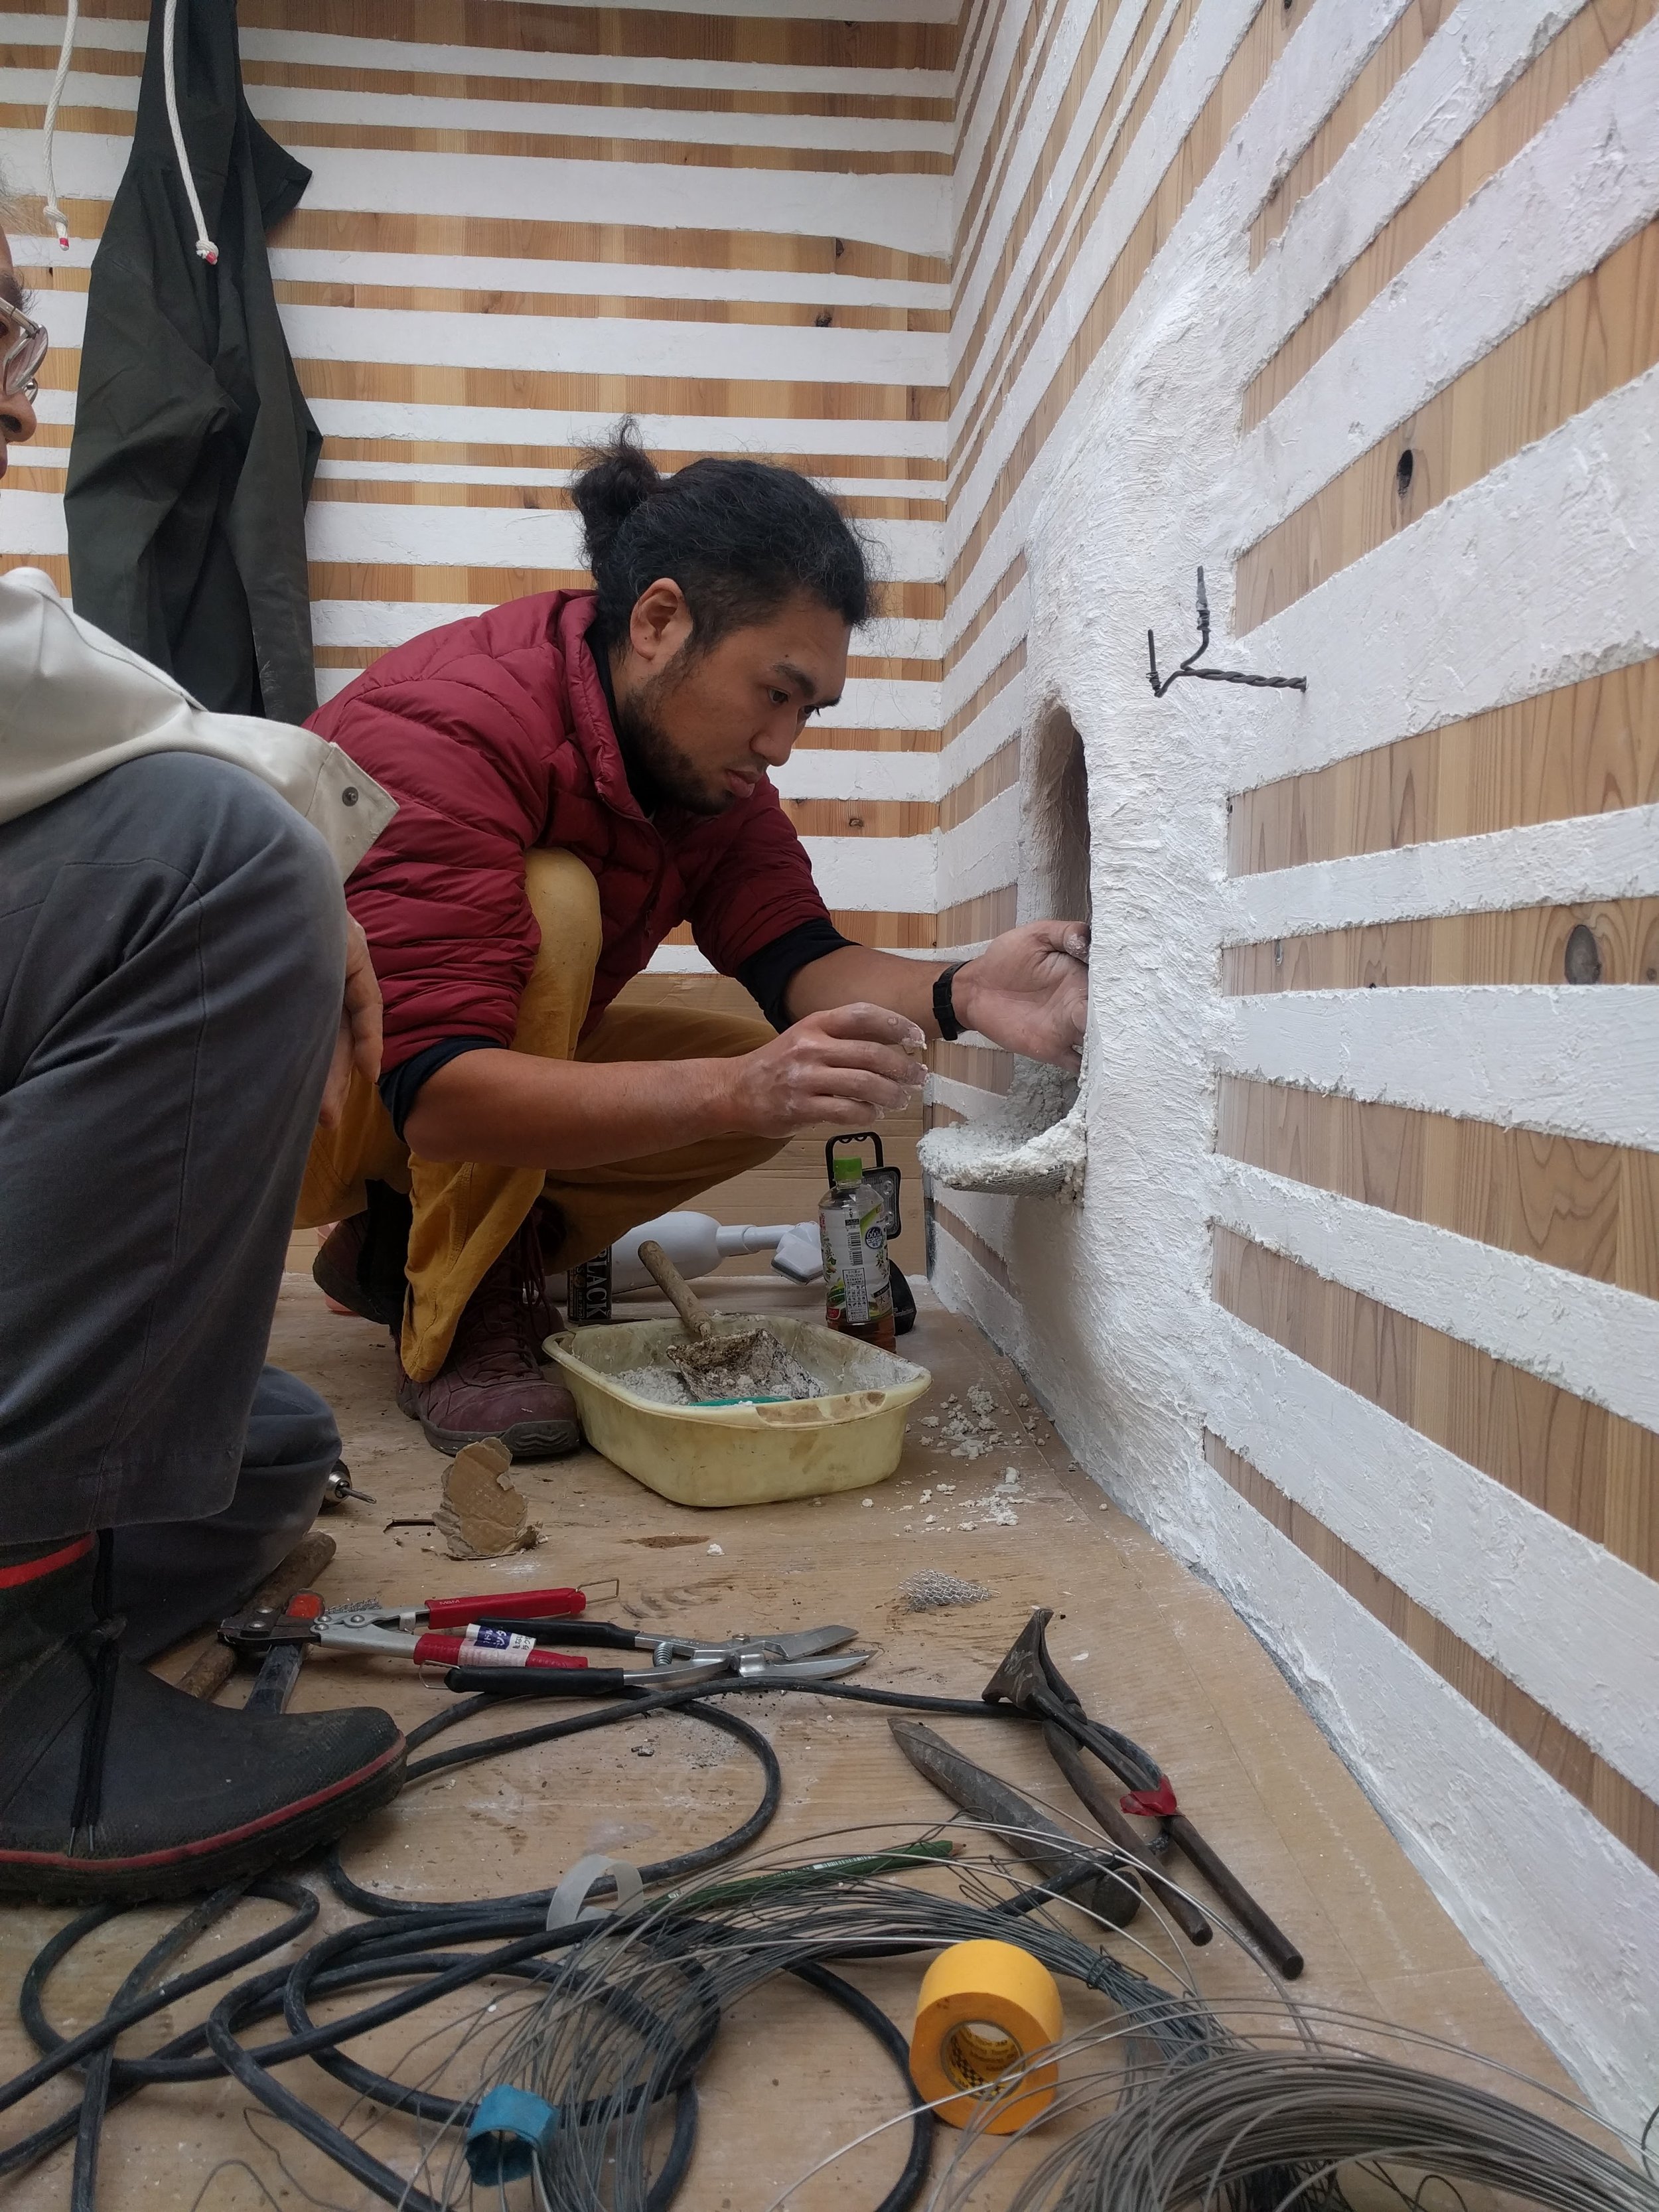
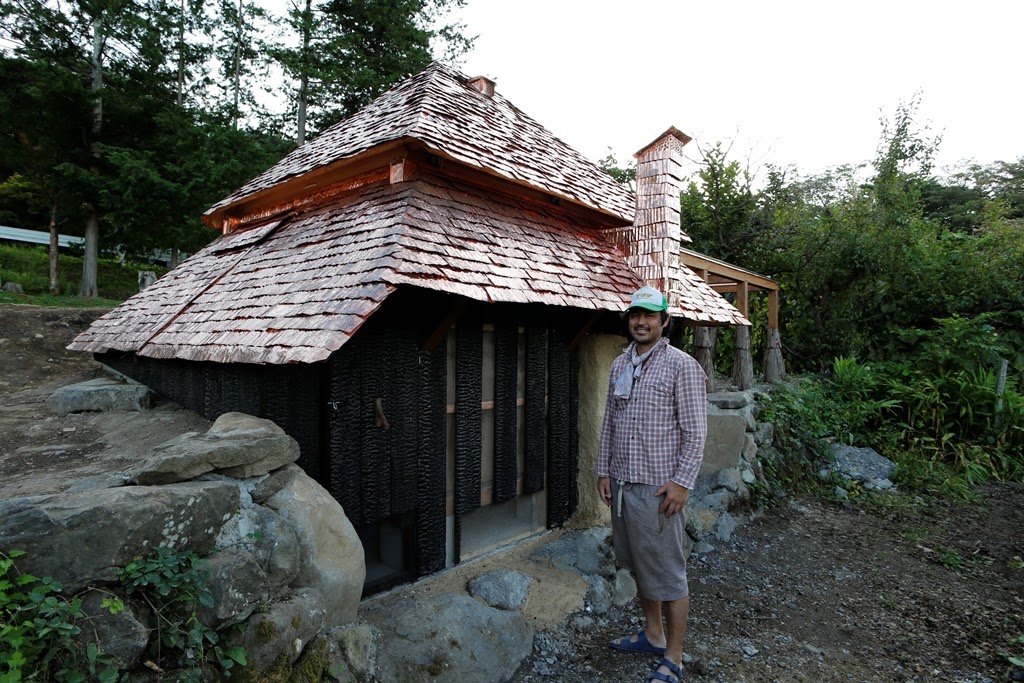
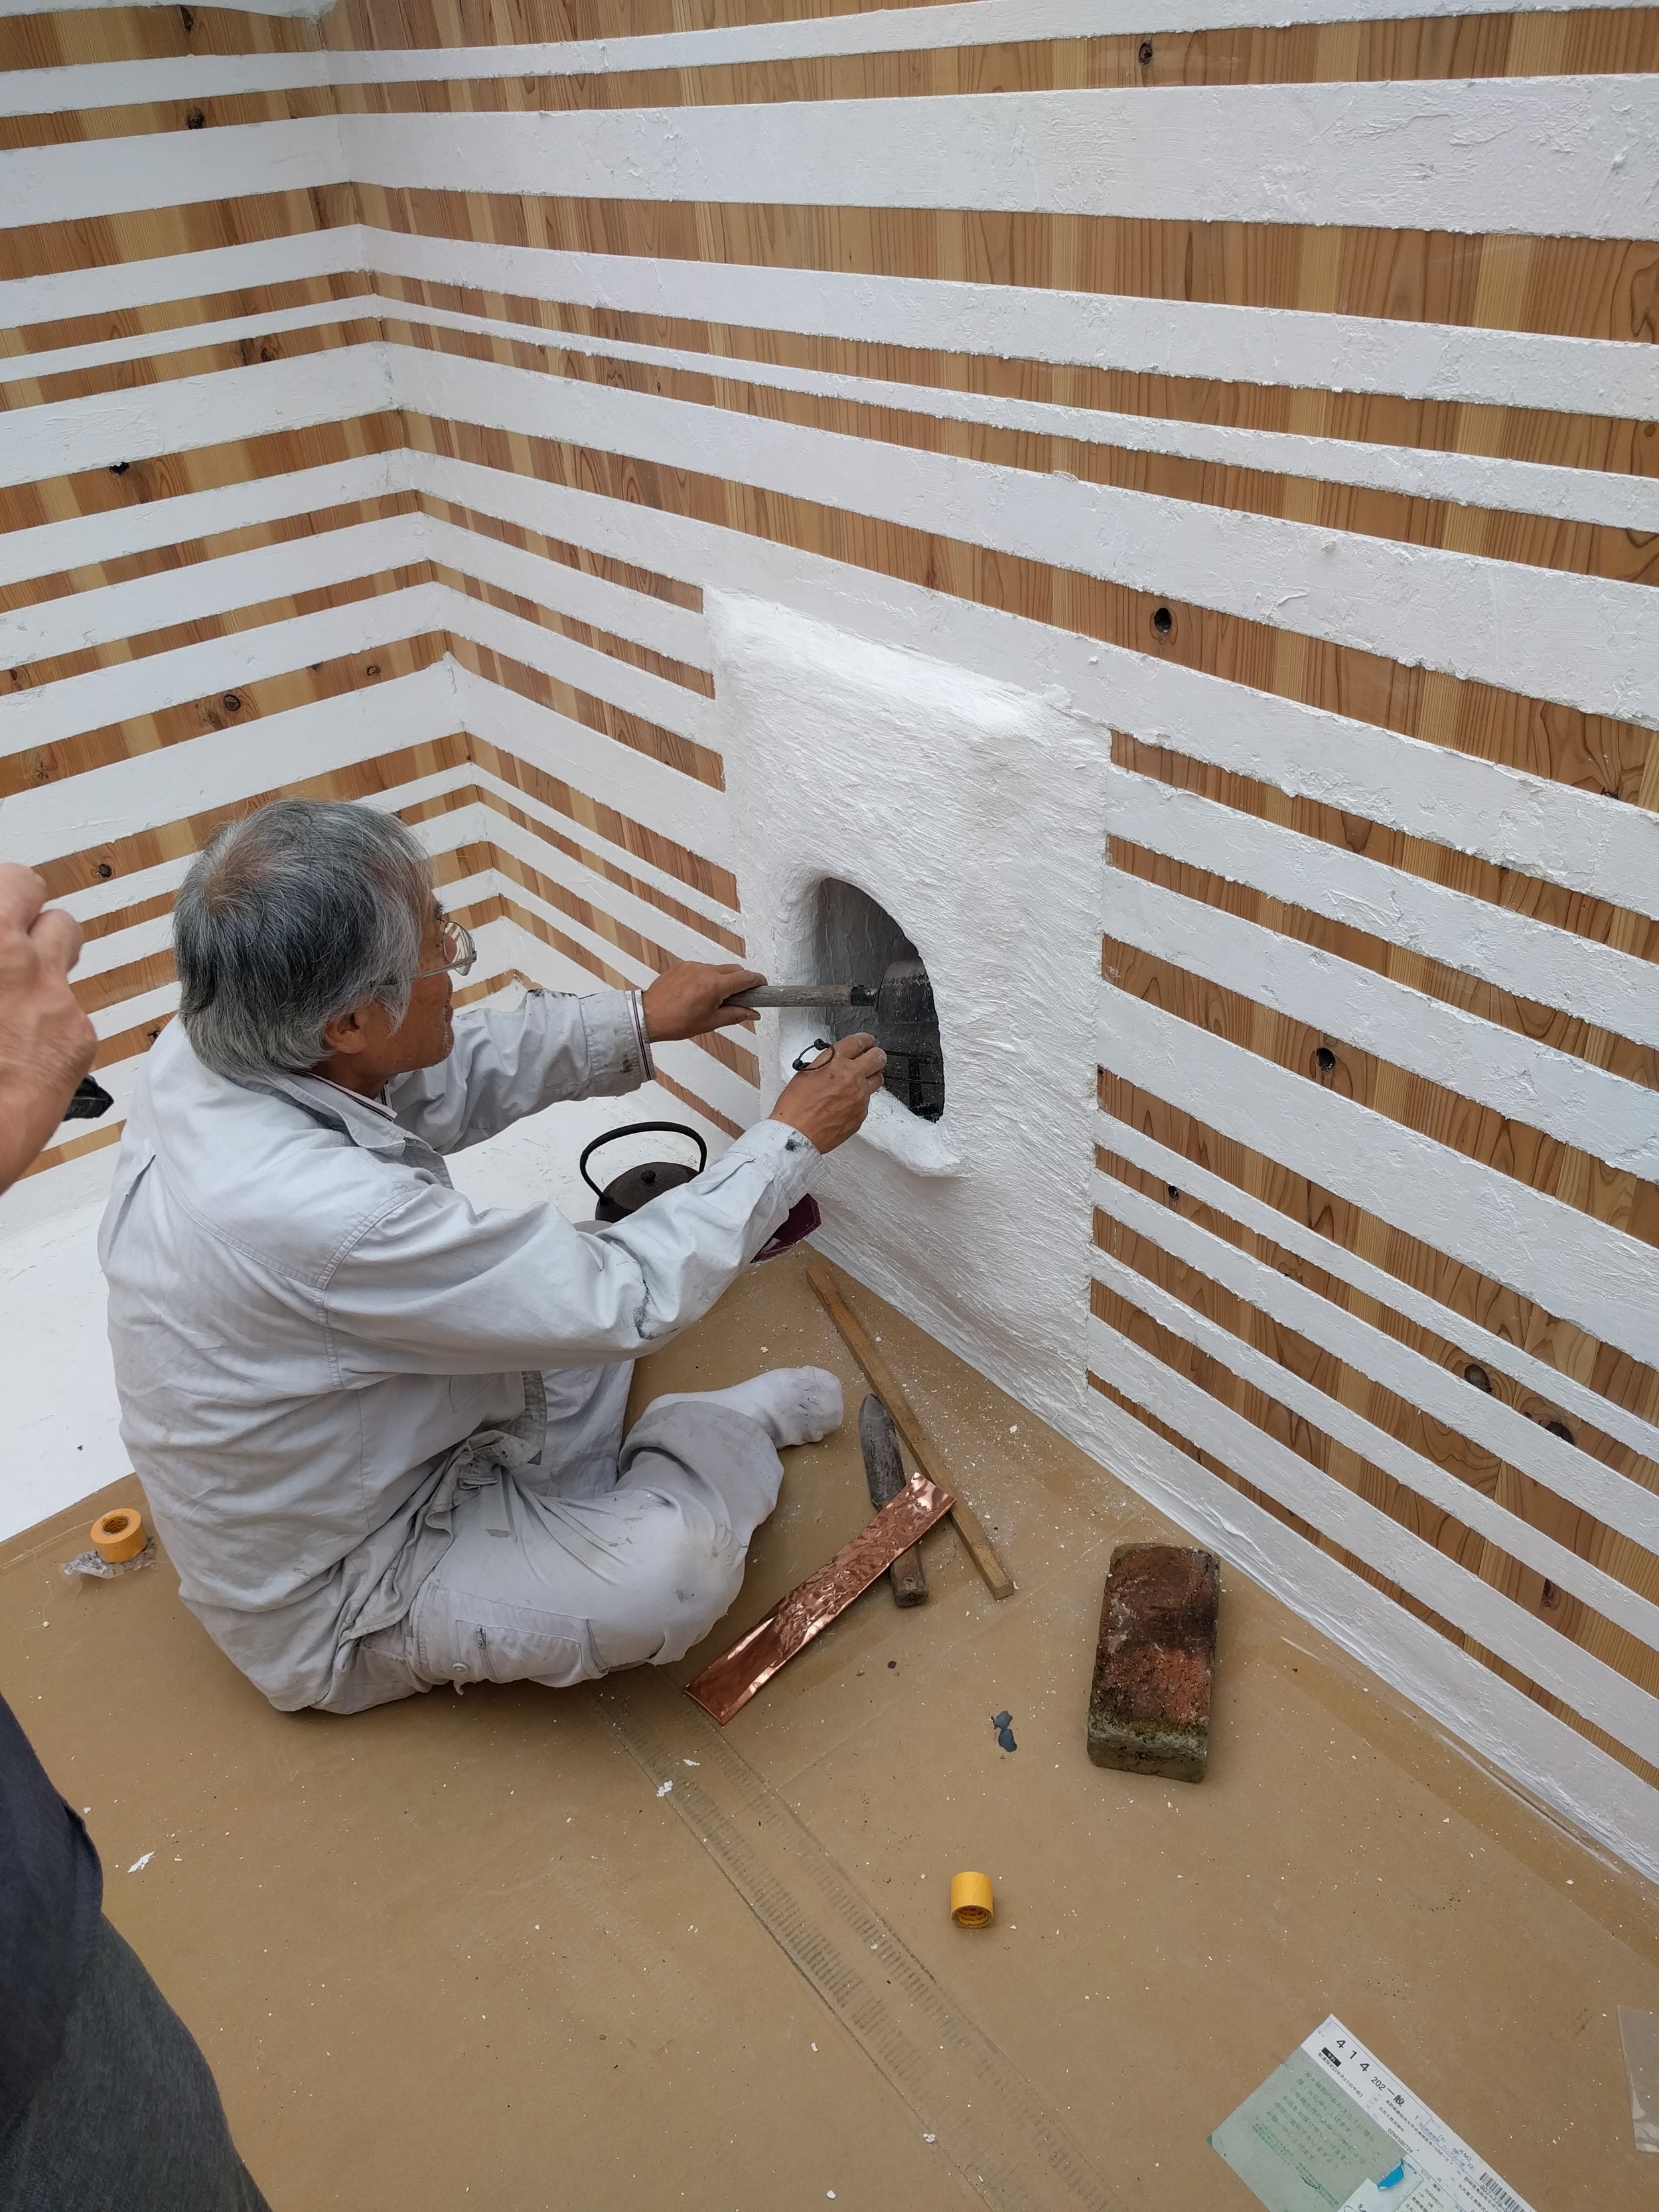
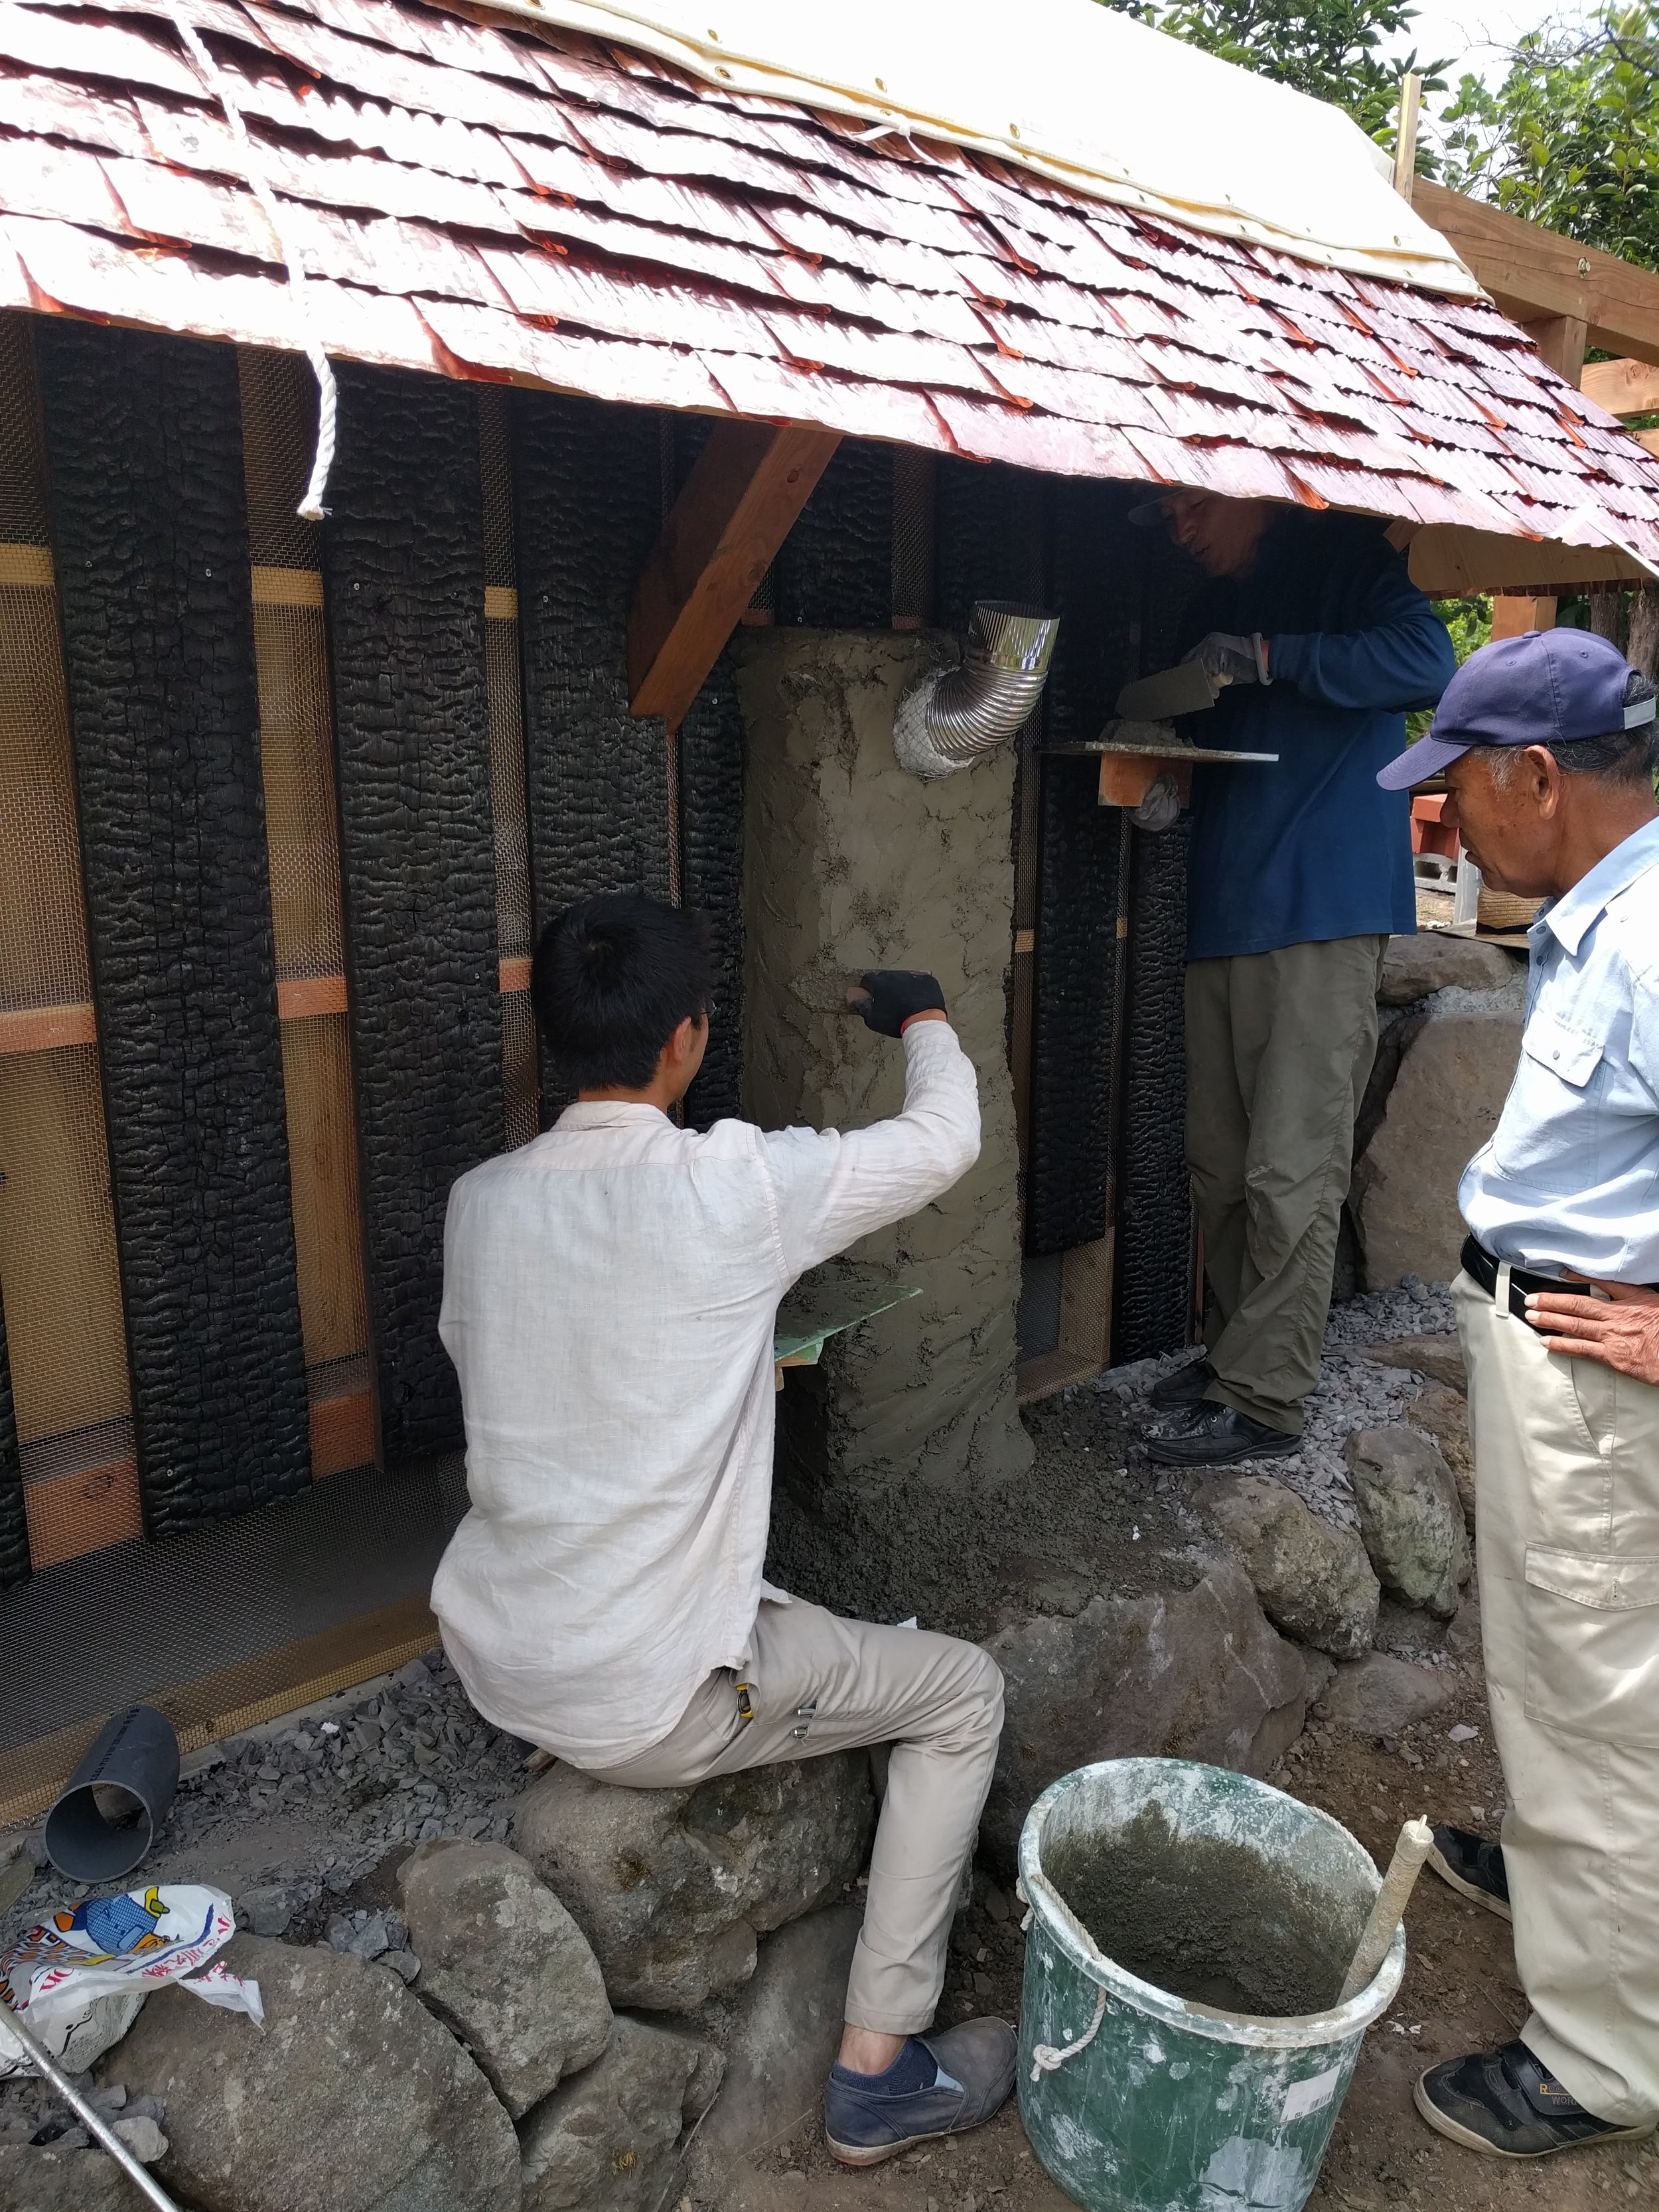
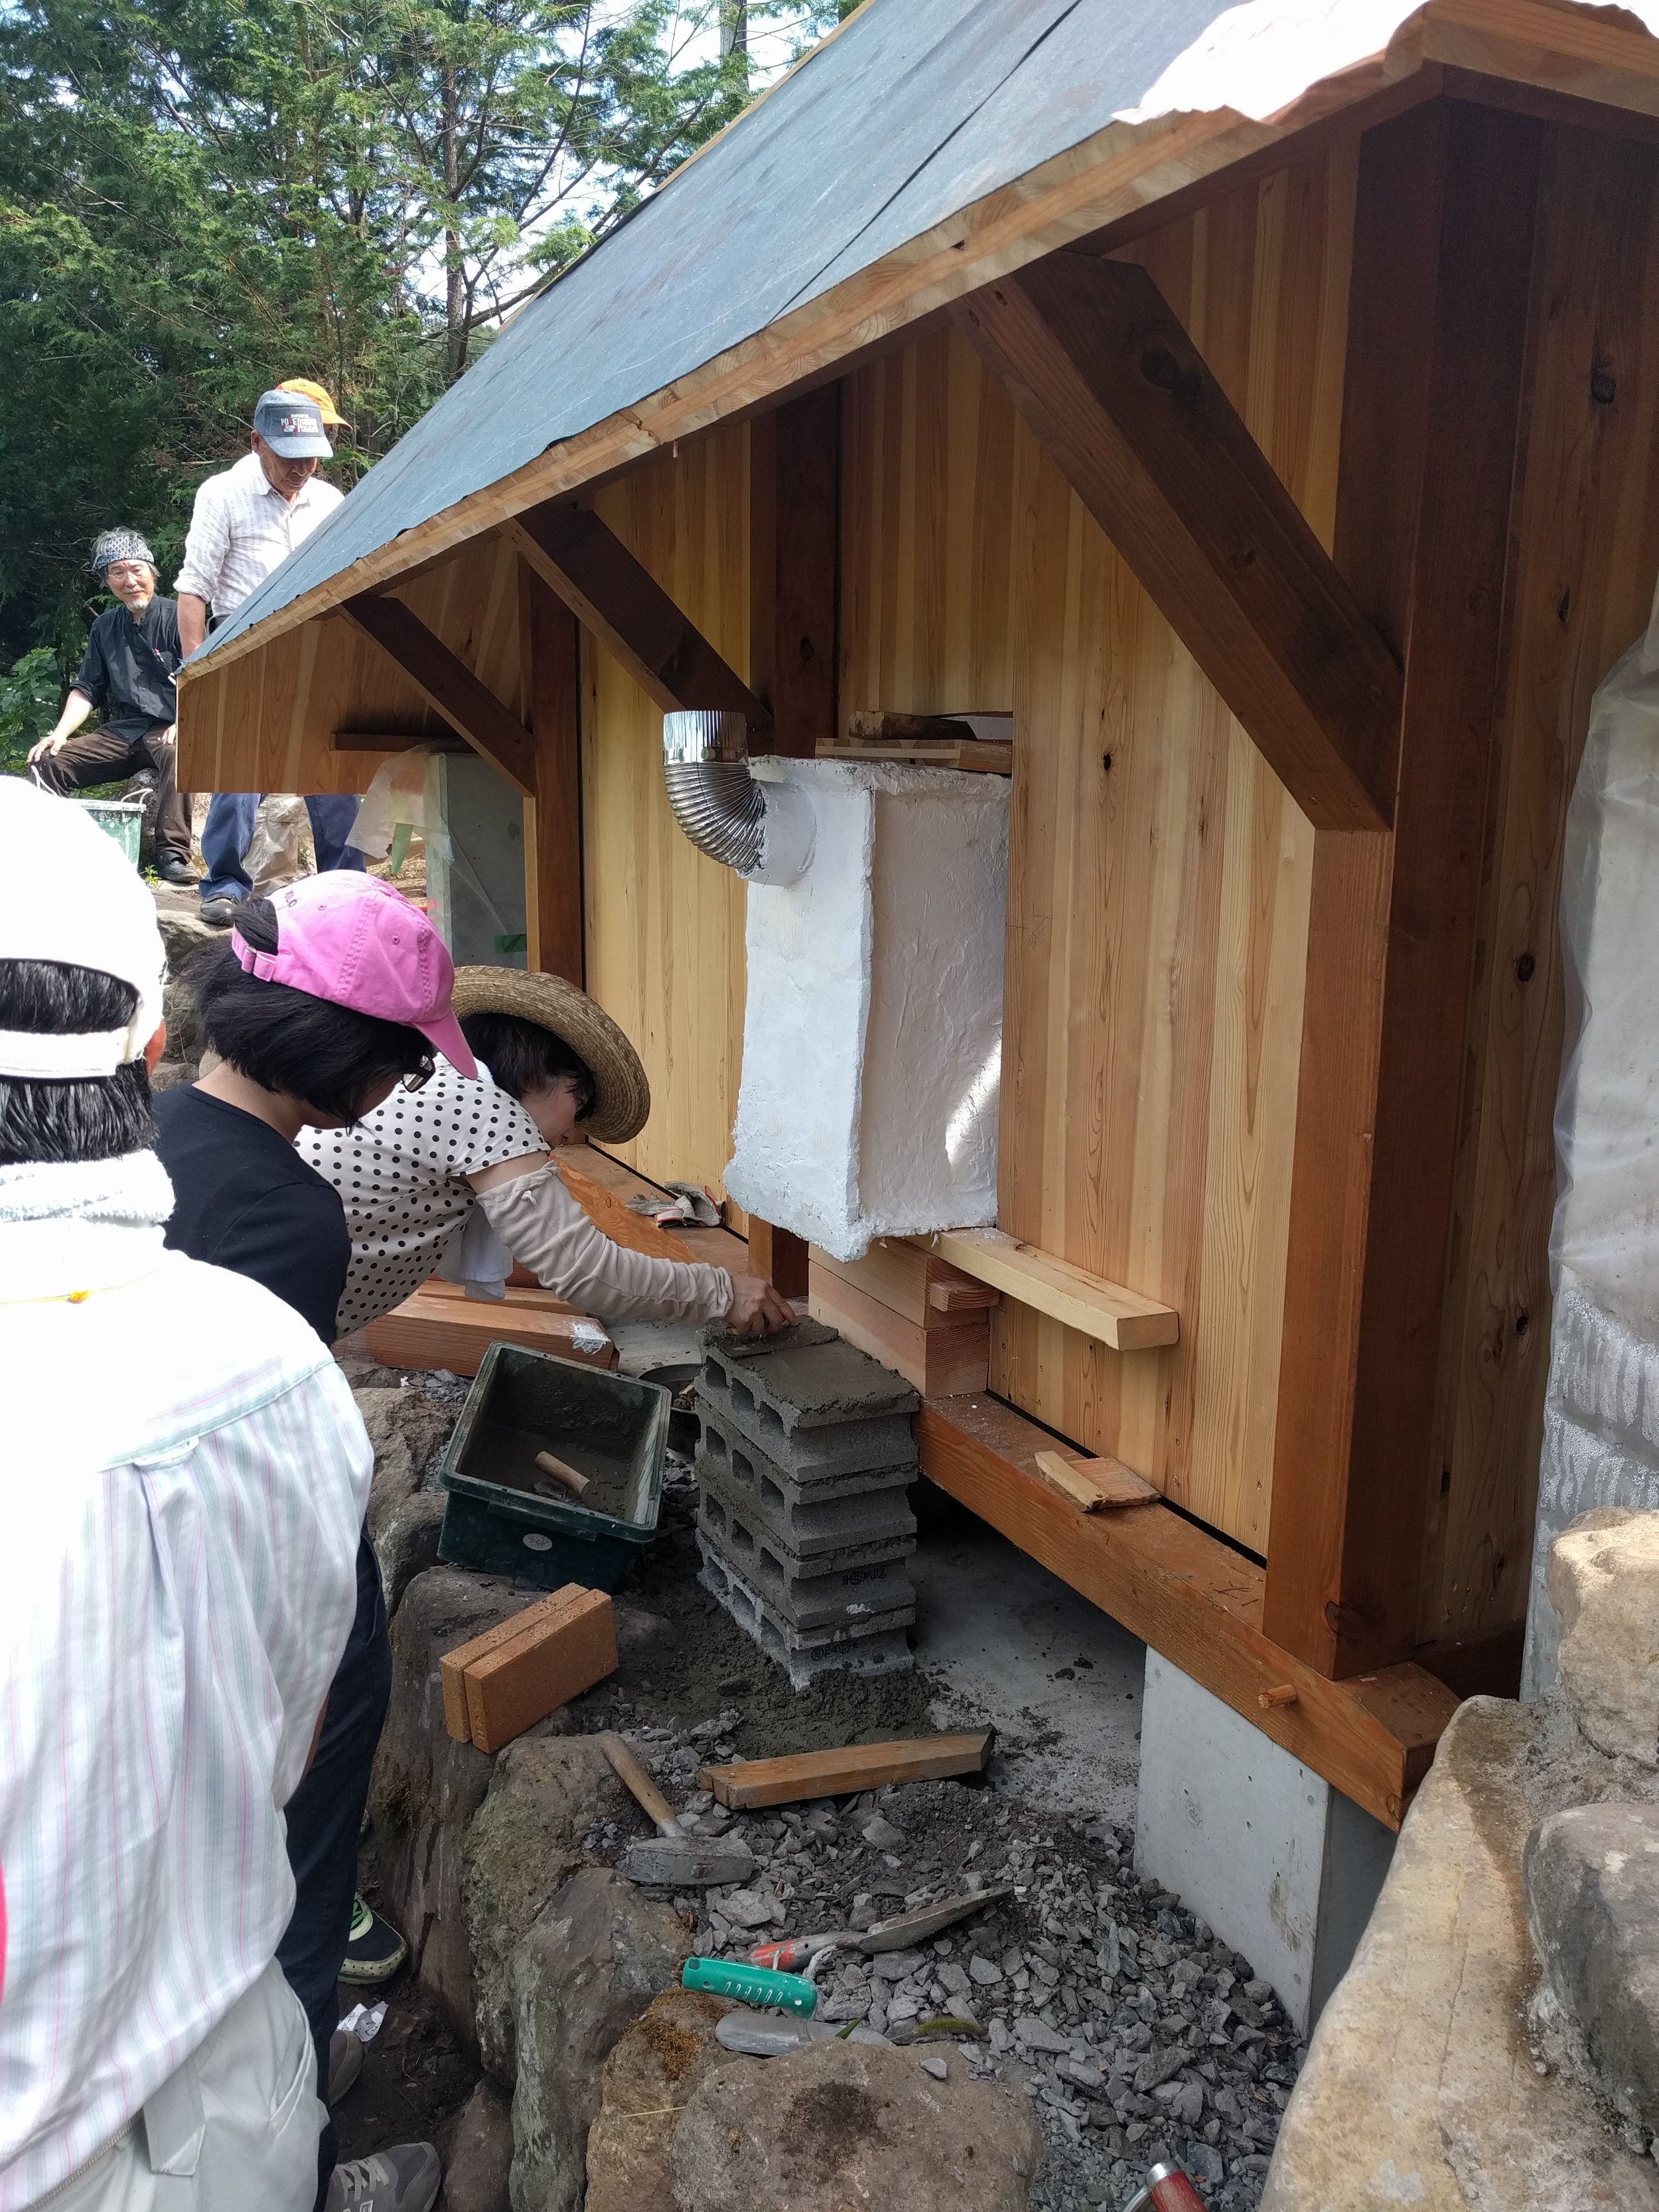
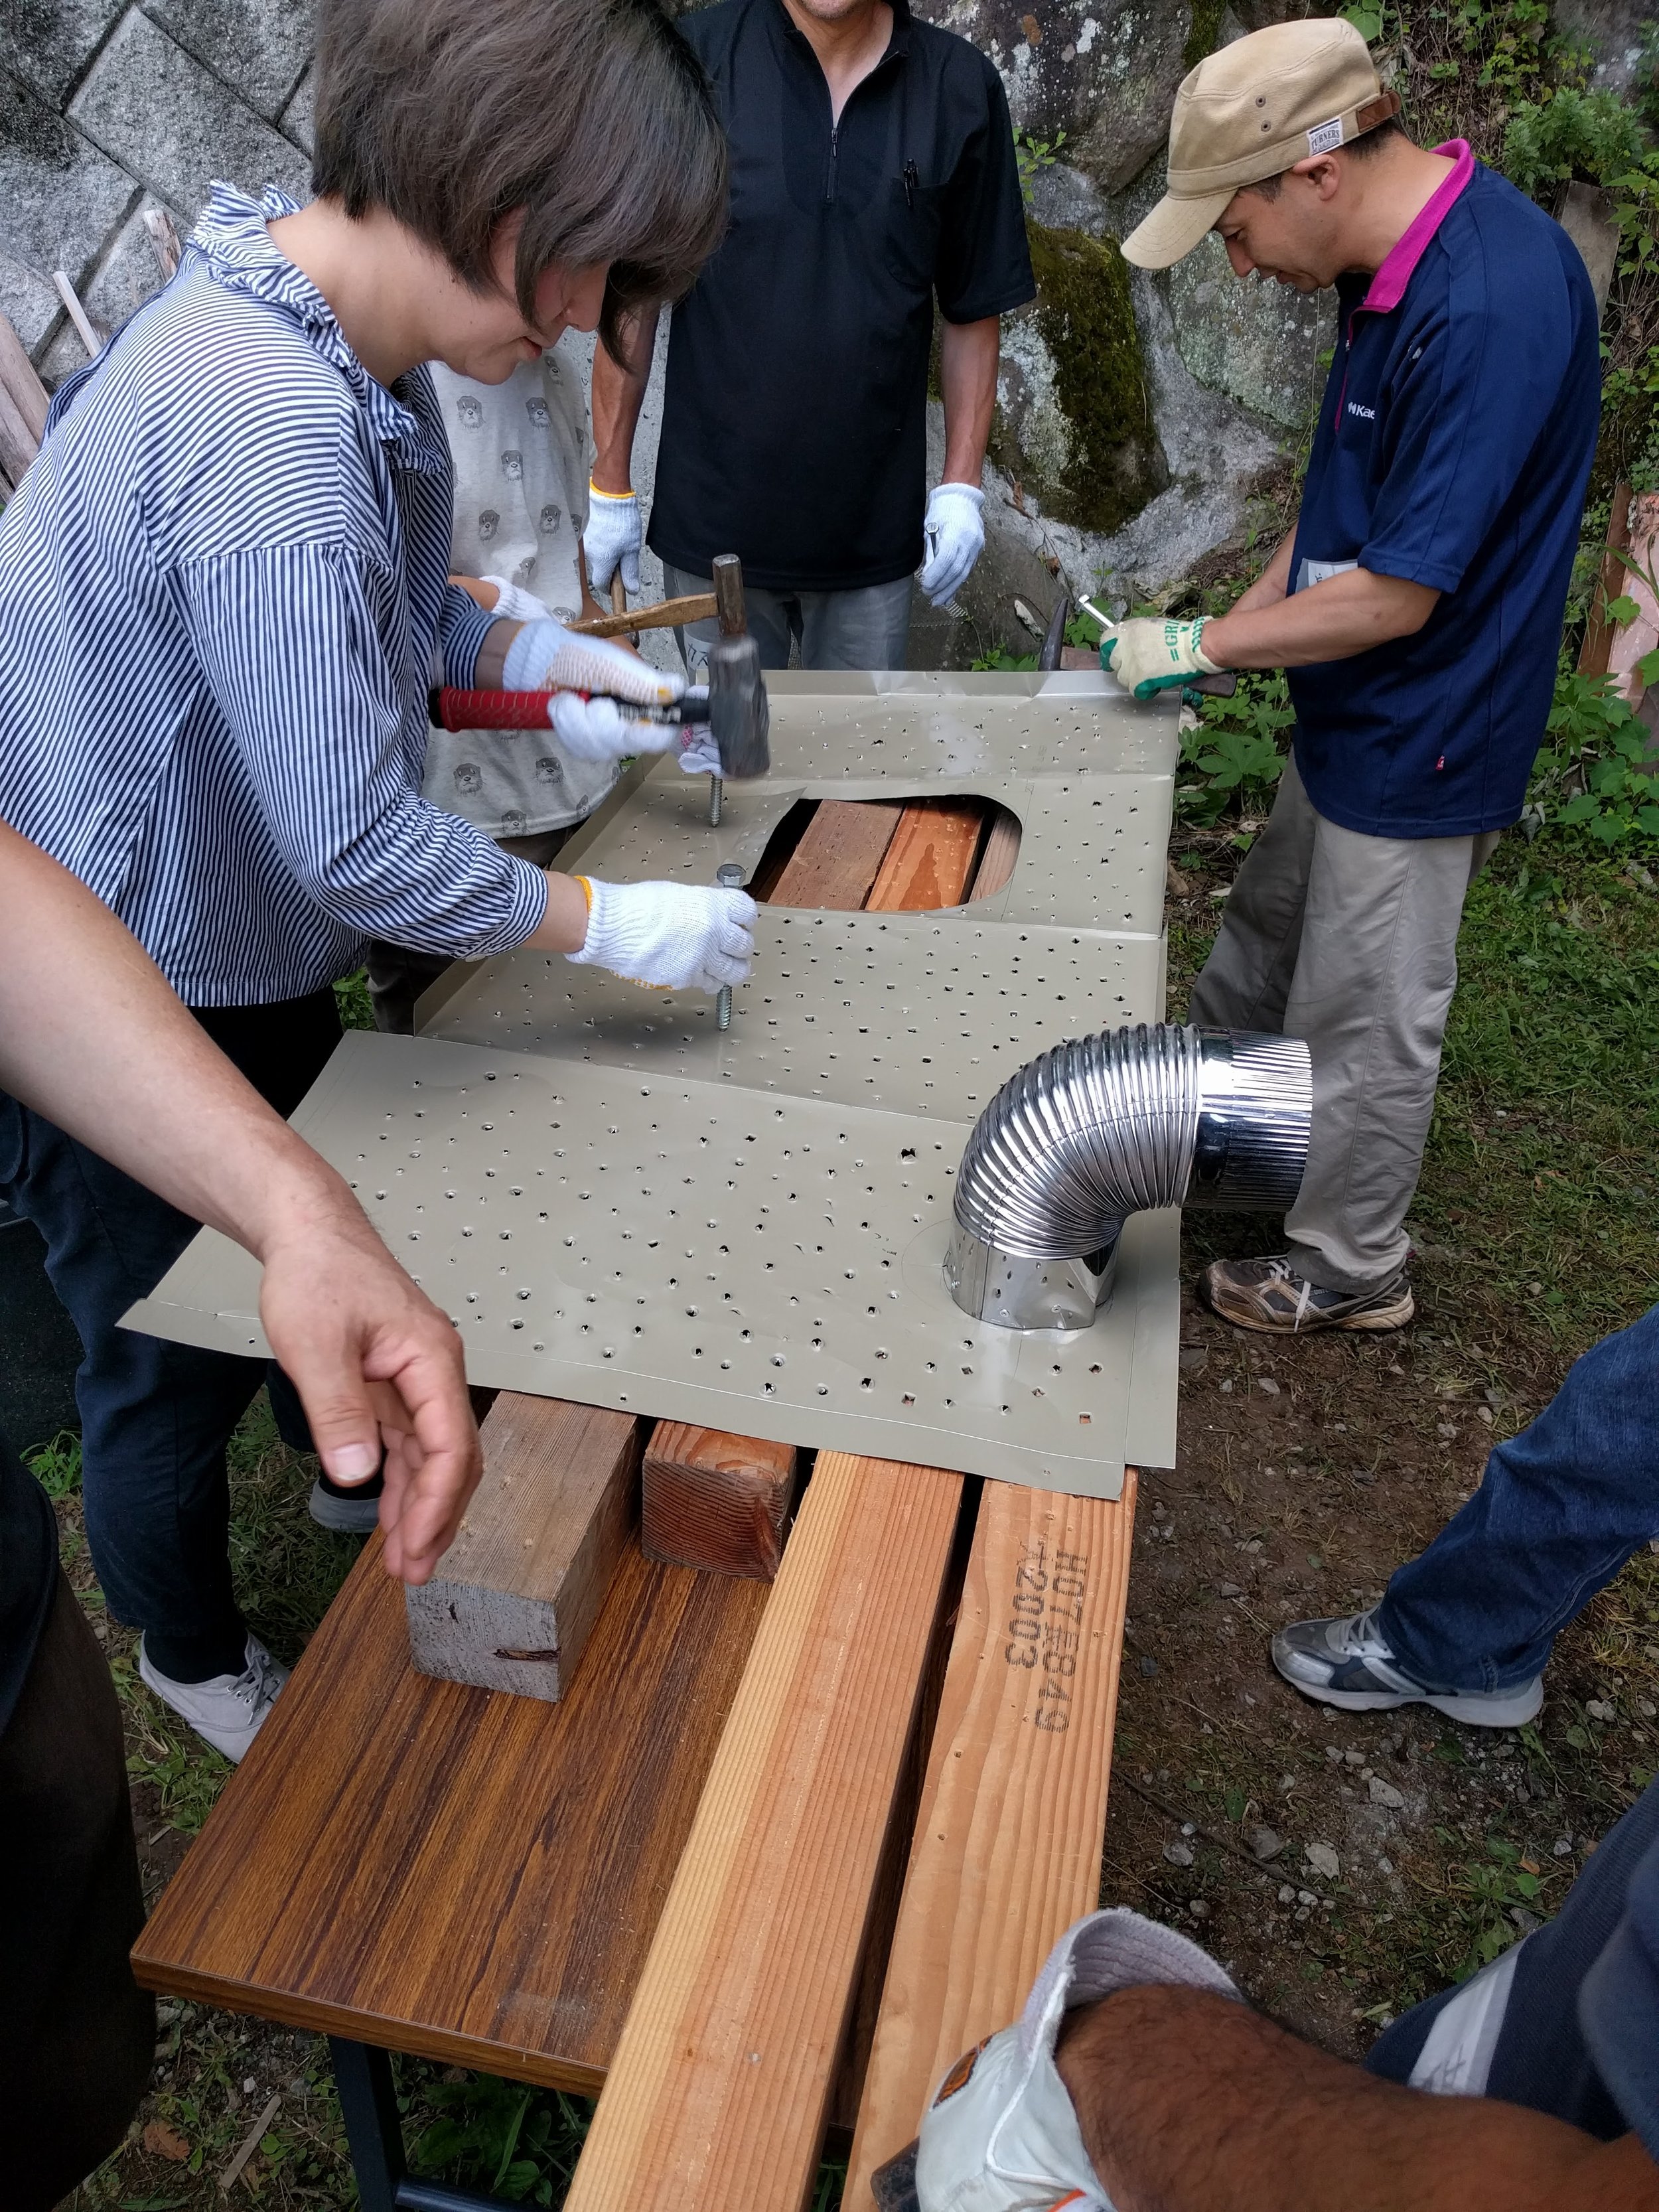
Installing the kettle. The kettle has the tin sheet box which is covered with steel lath which is covered with cement which is coverd with lime plaster.

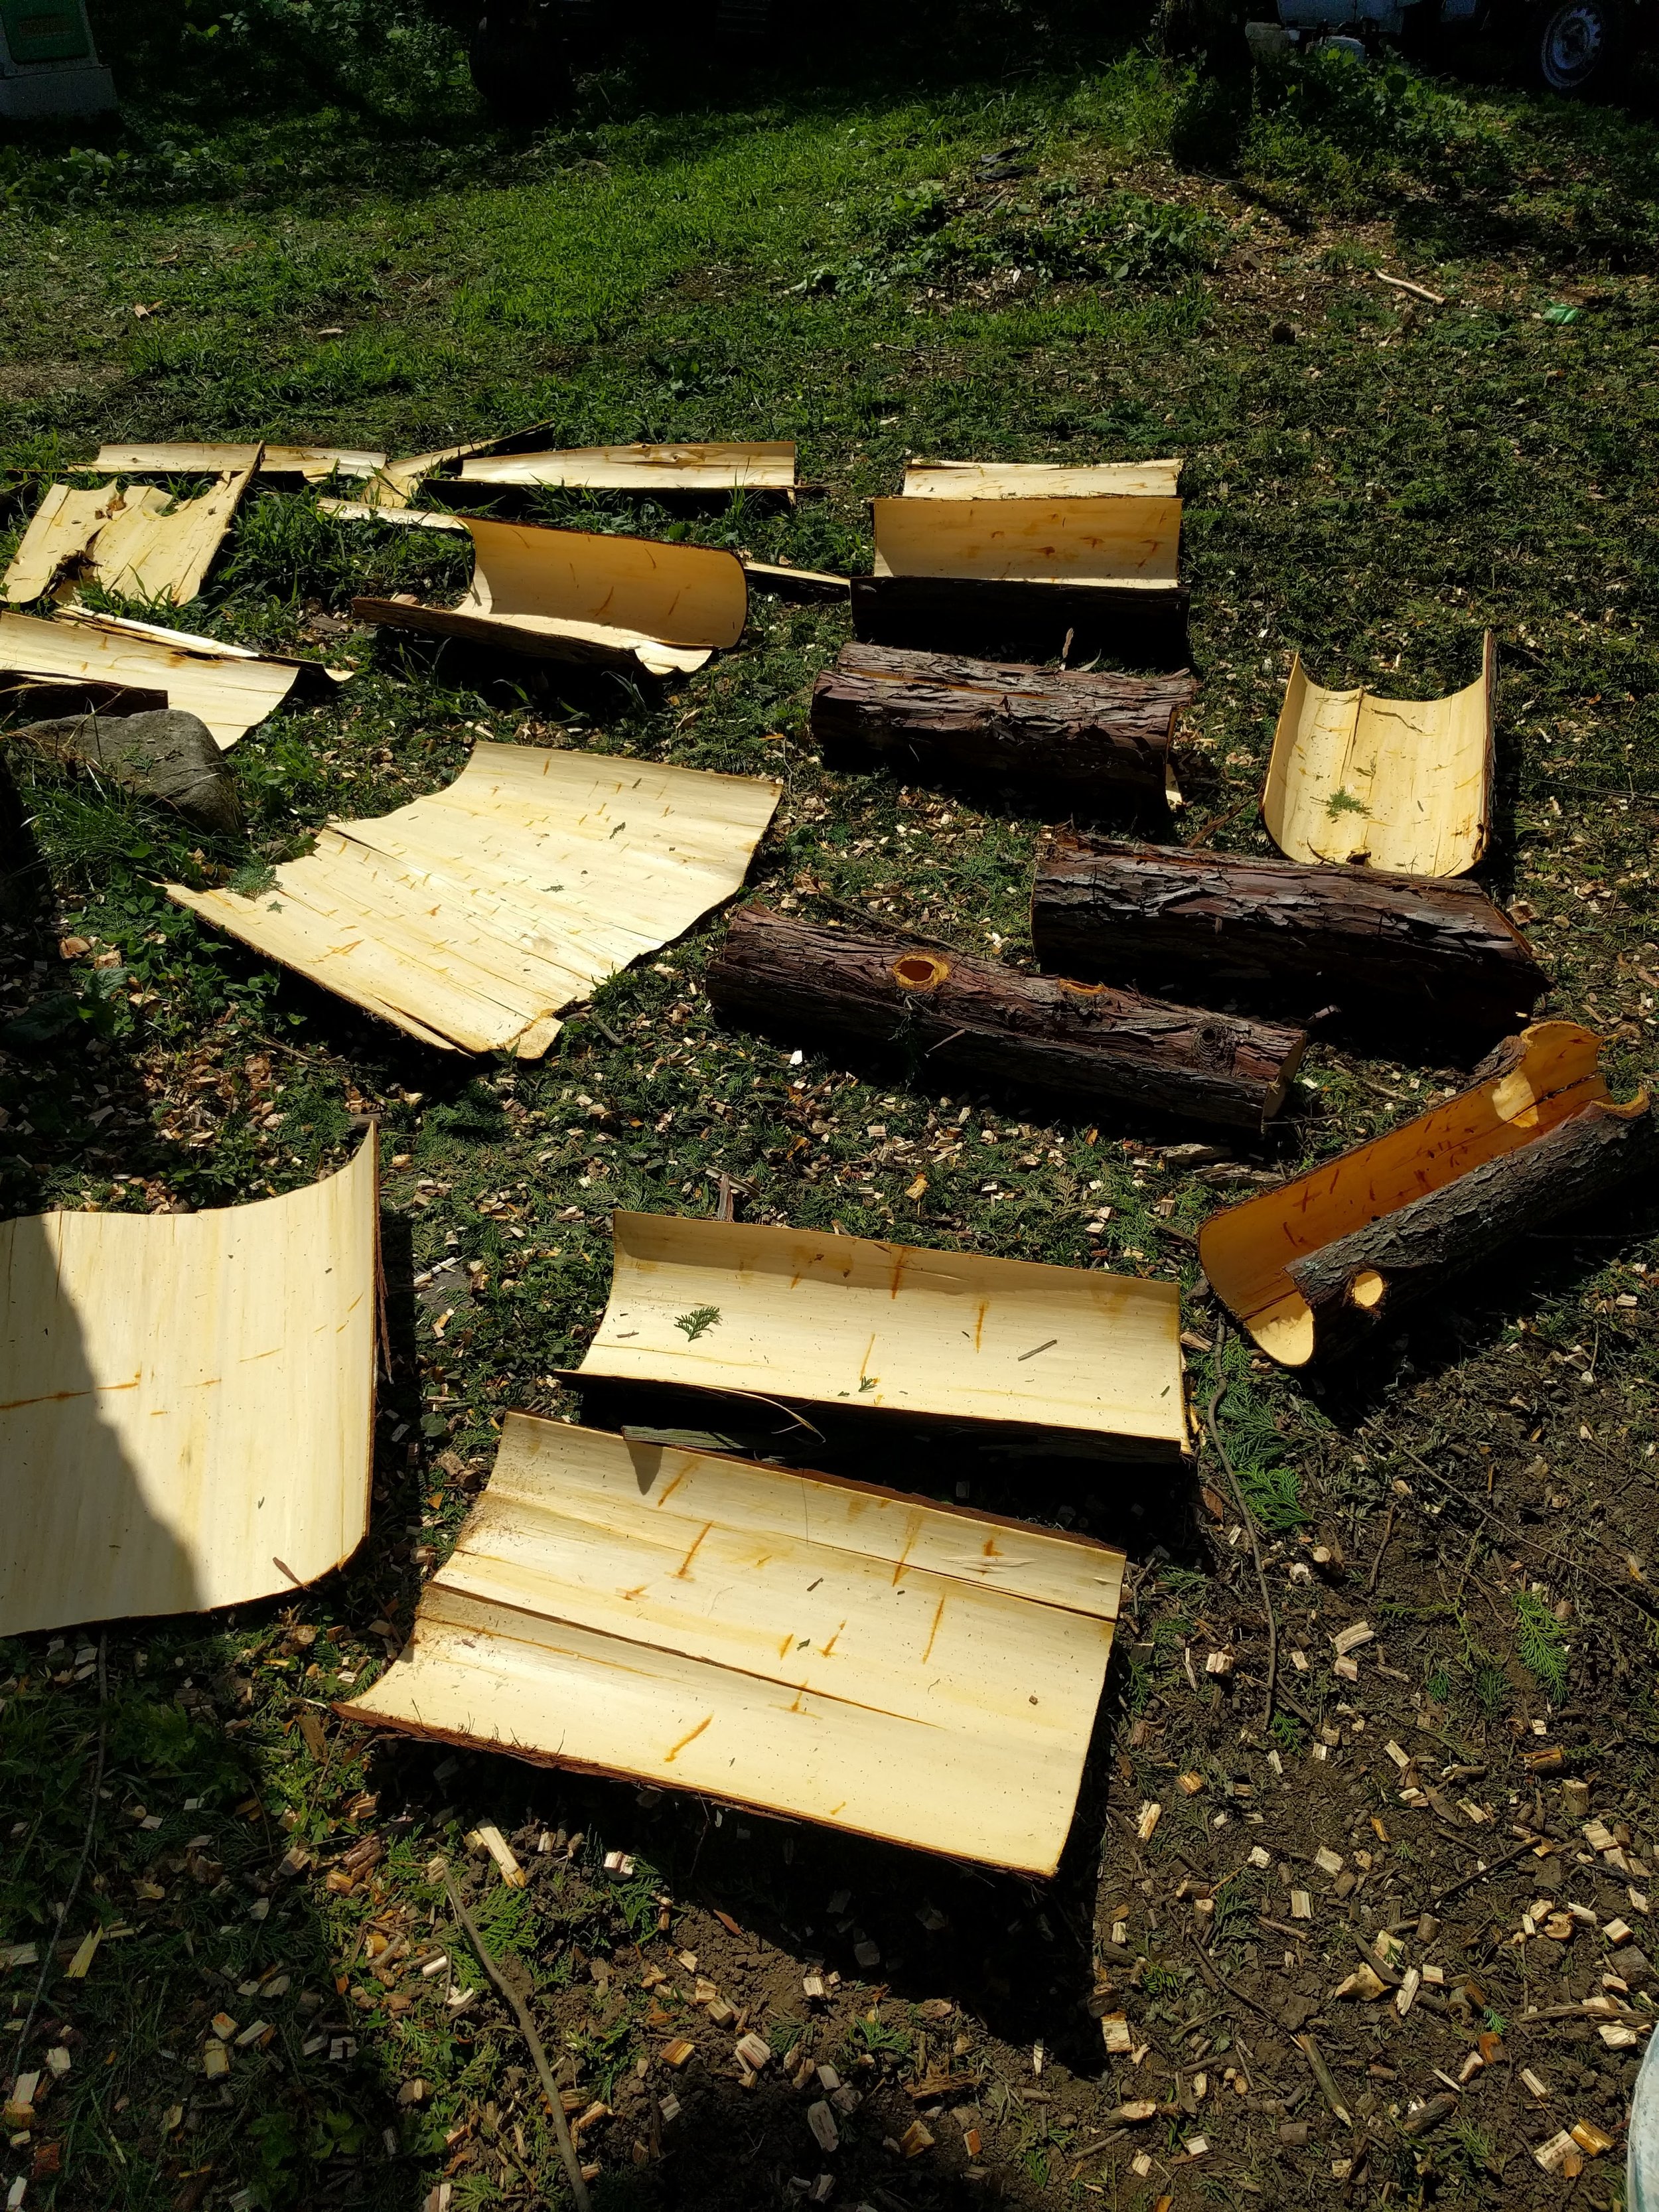
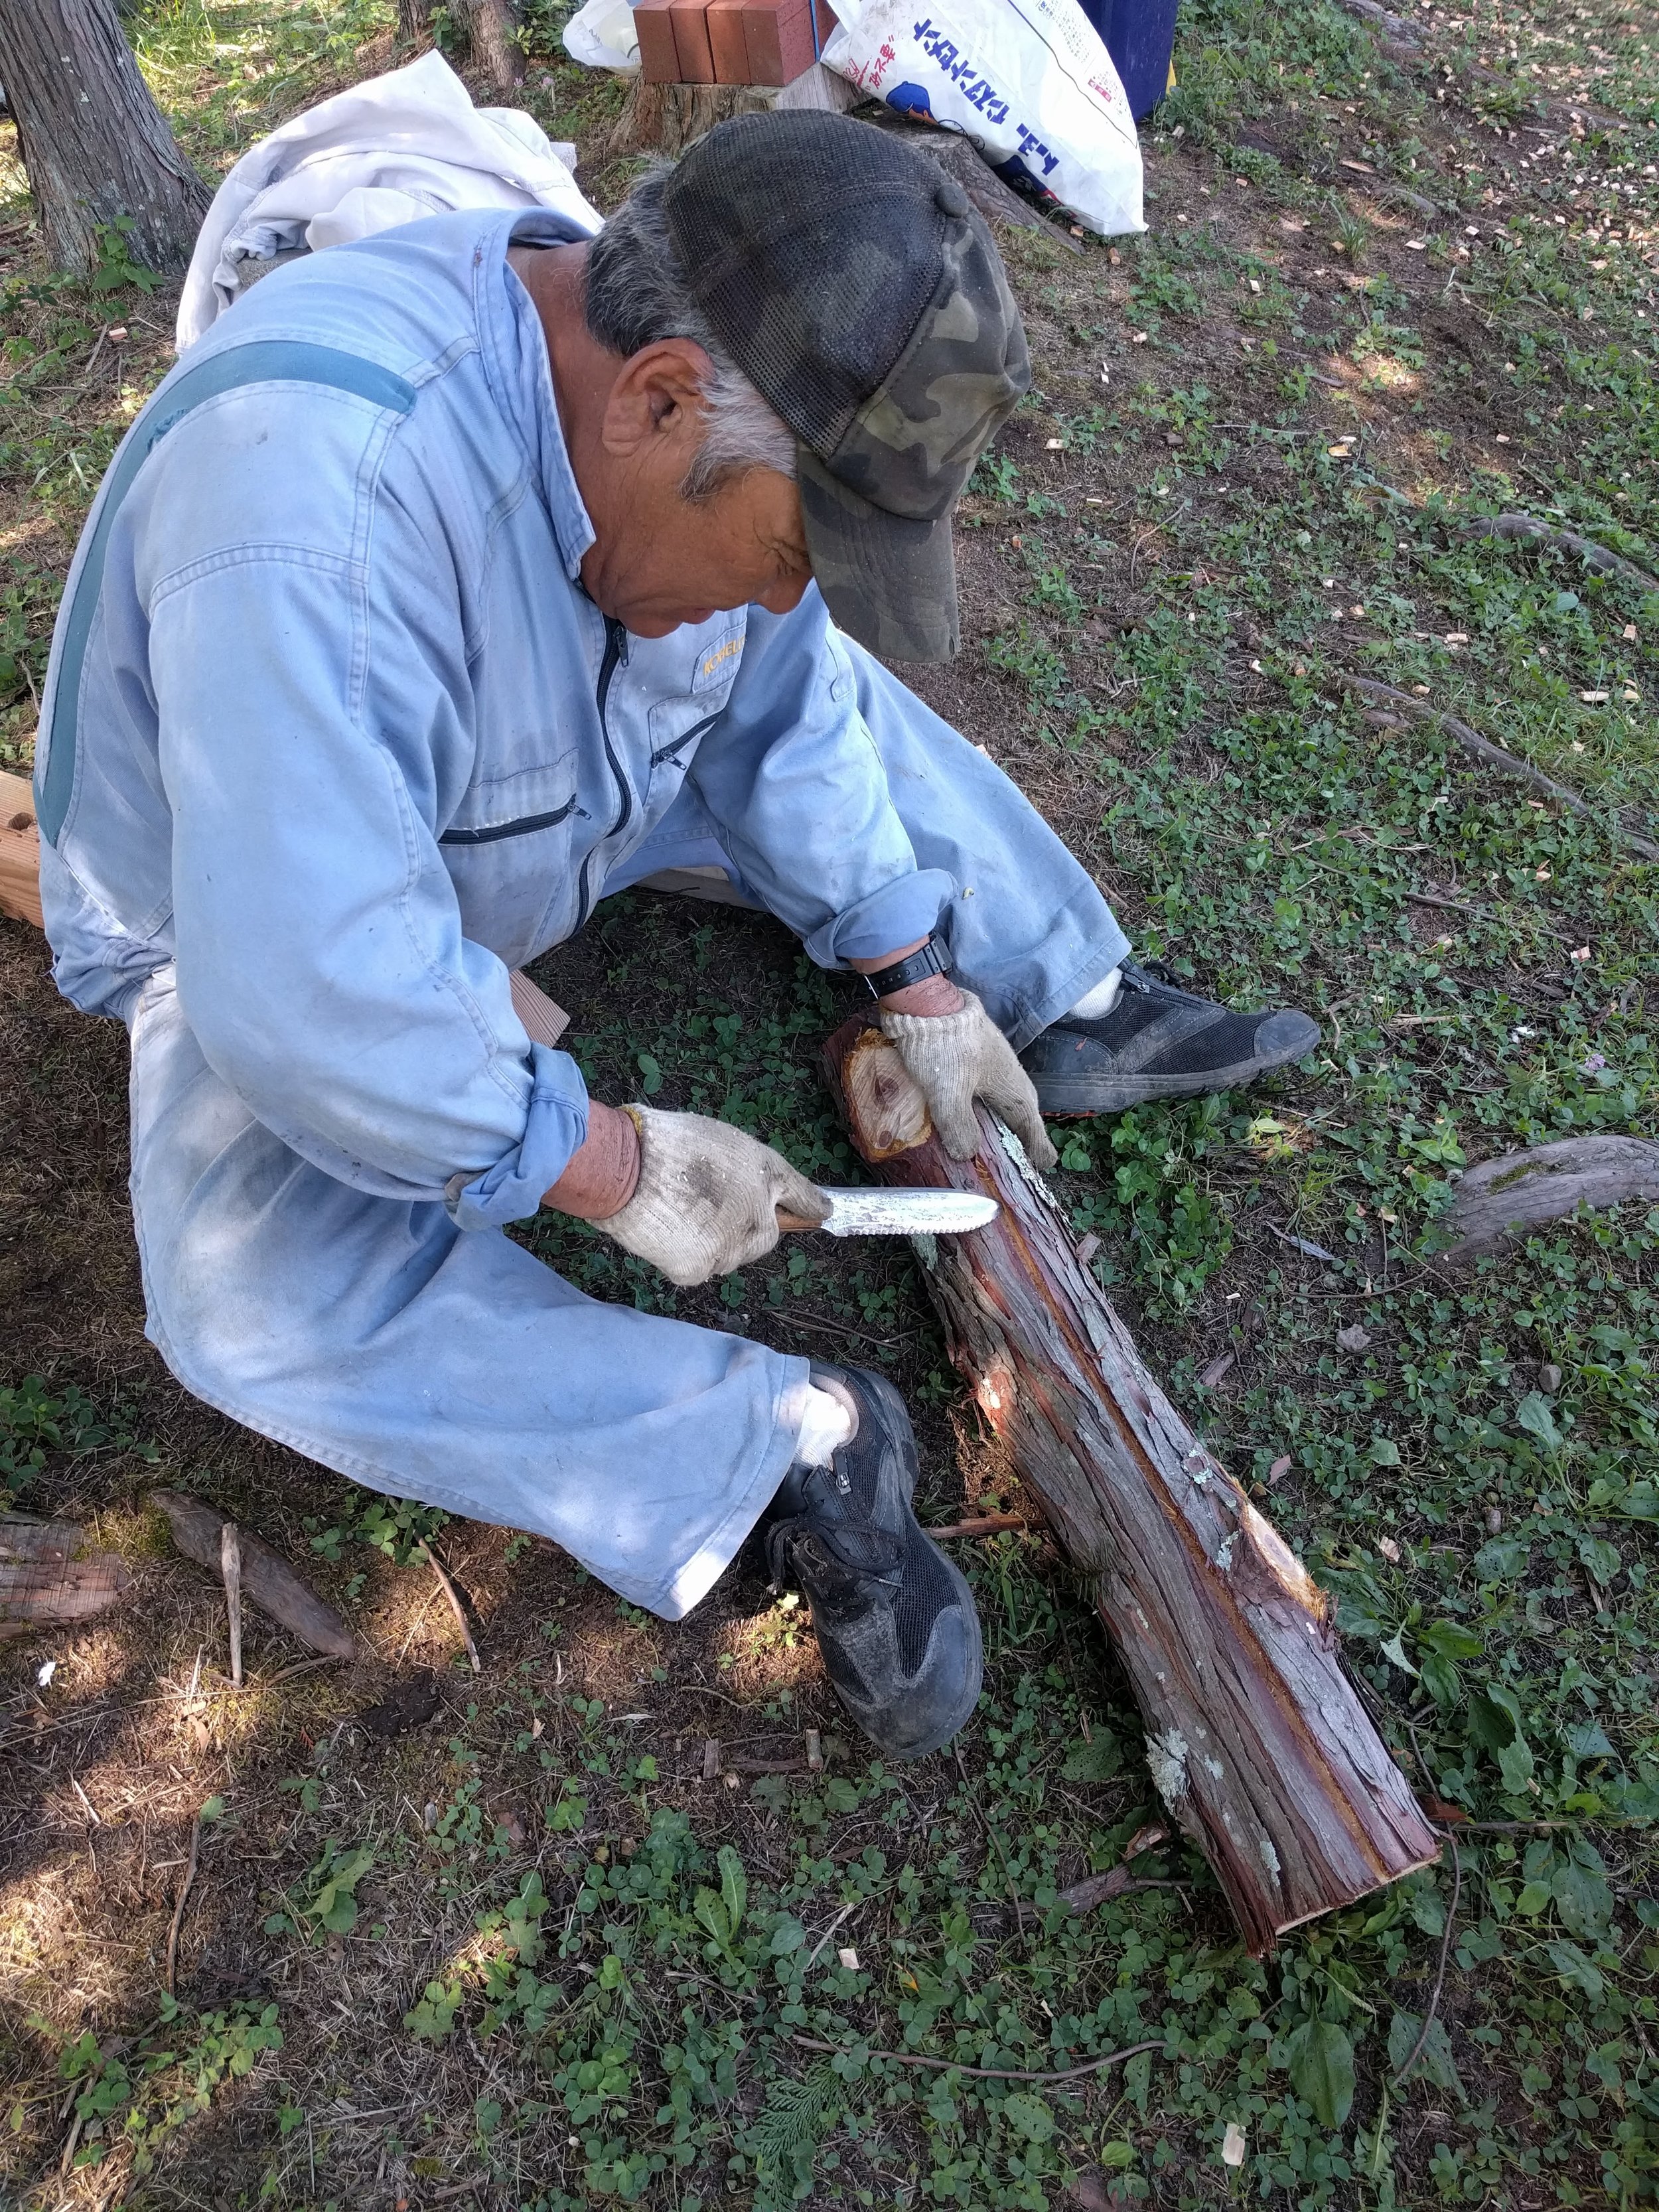
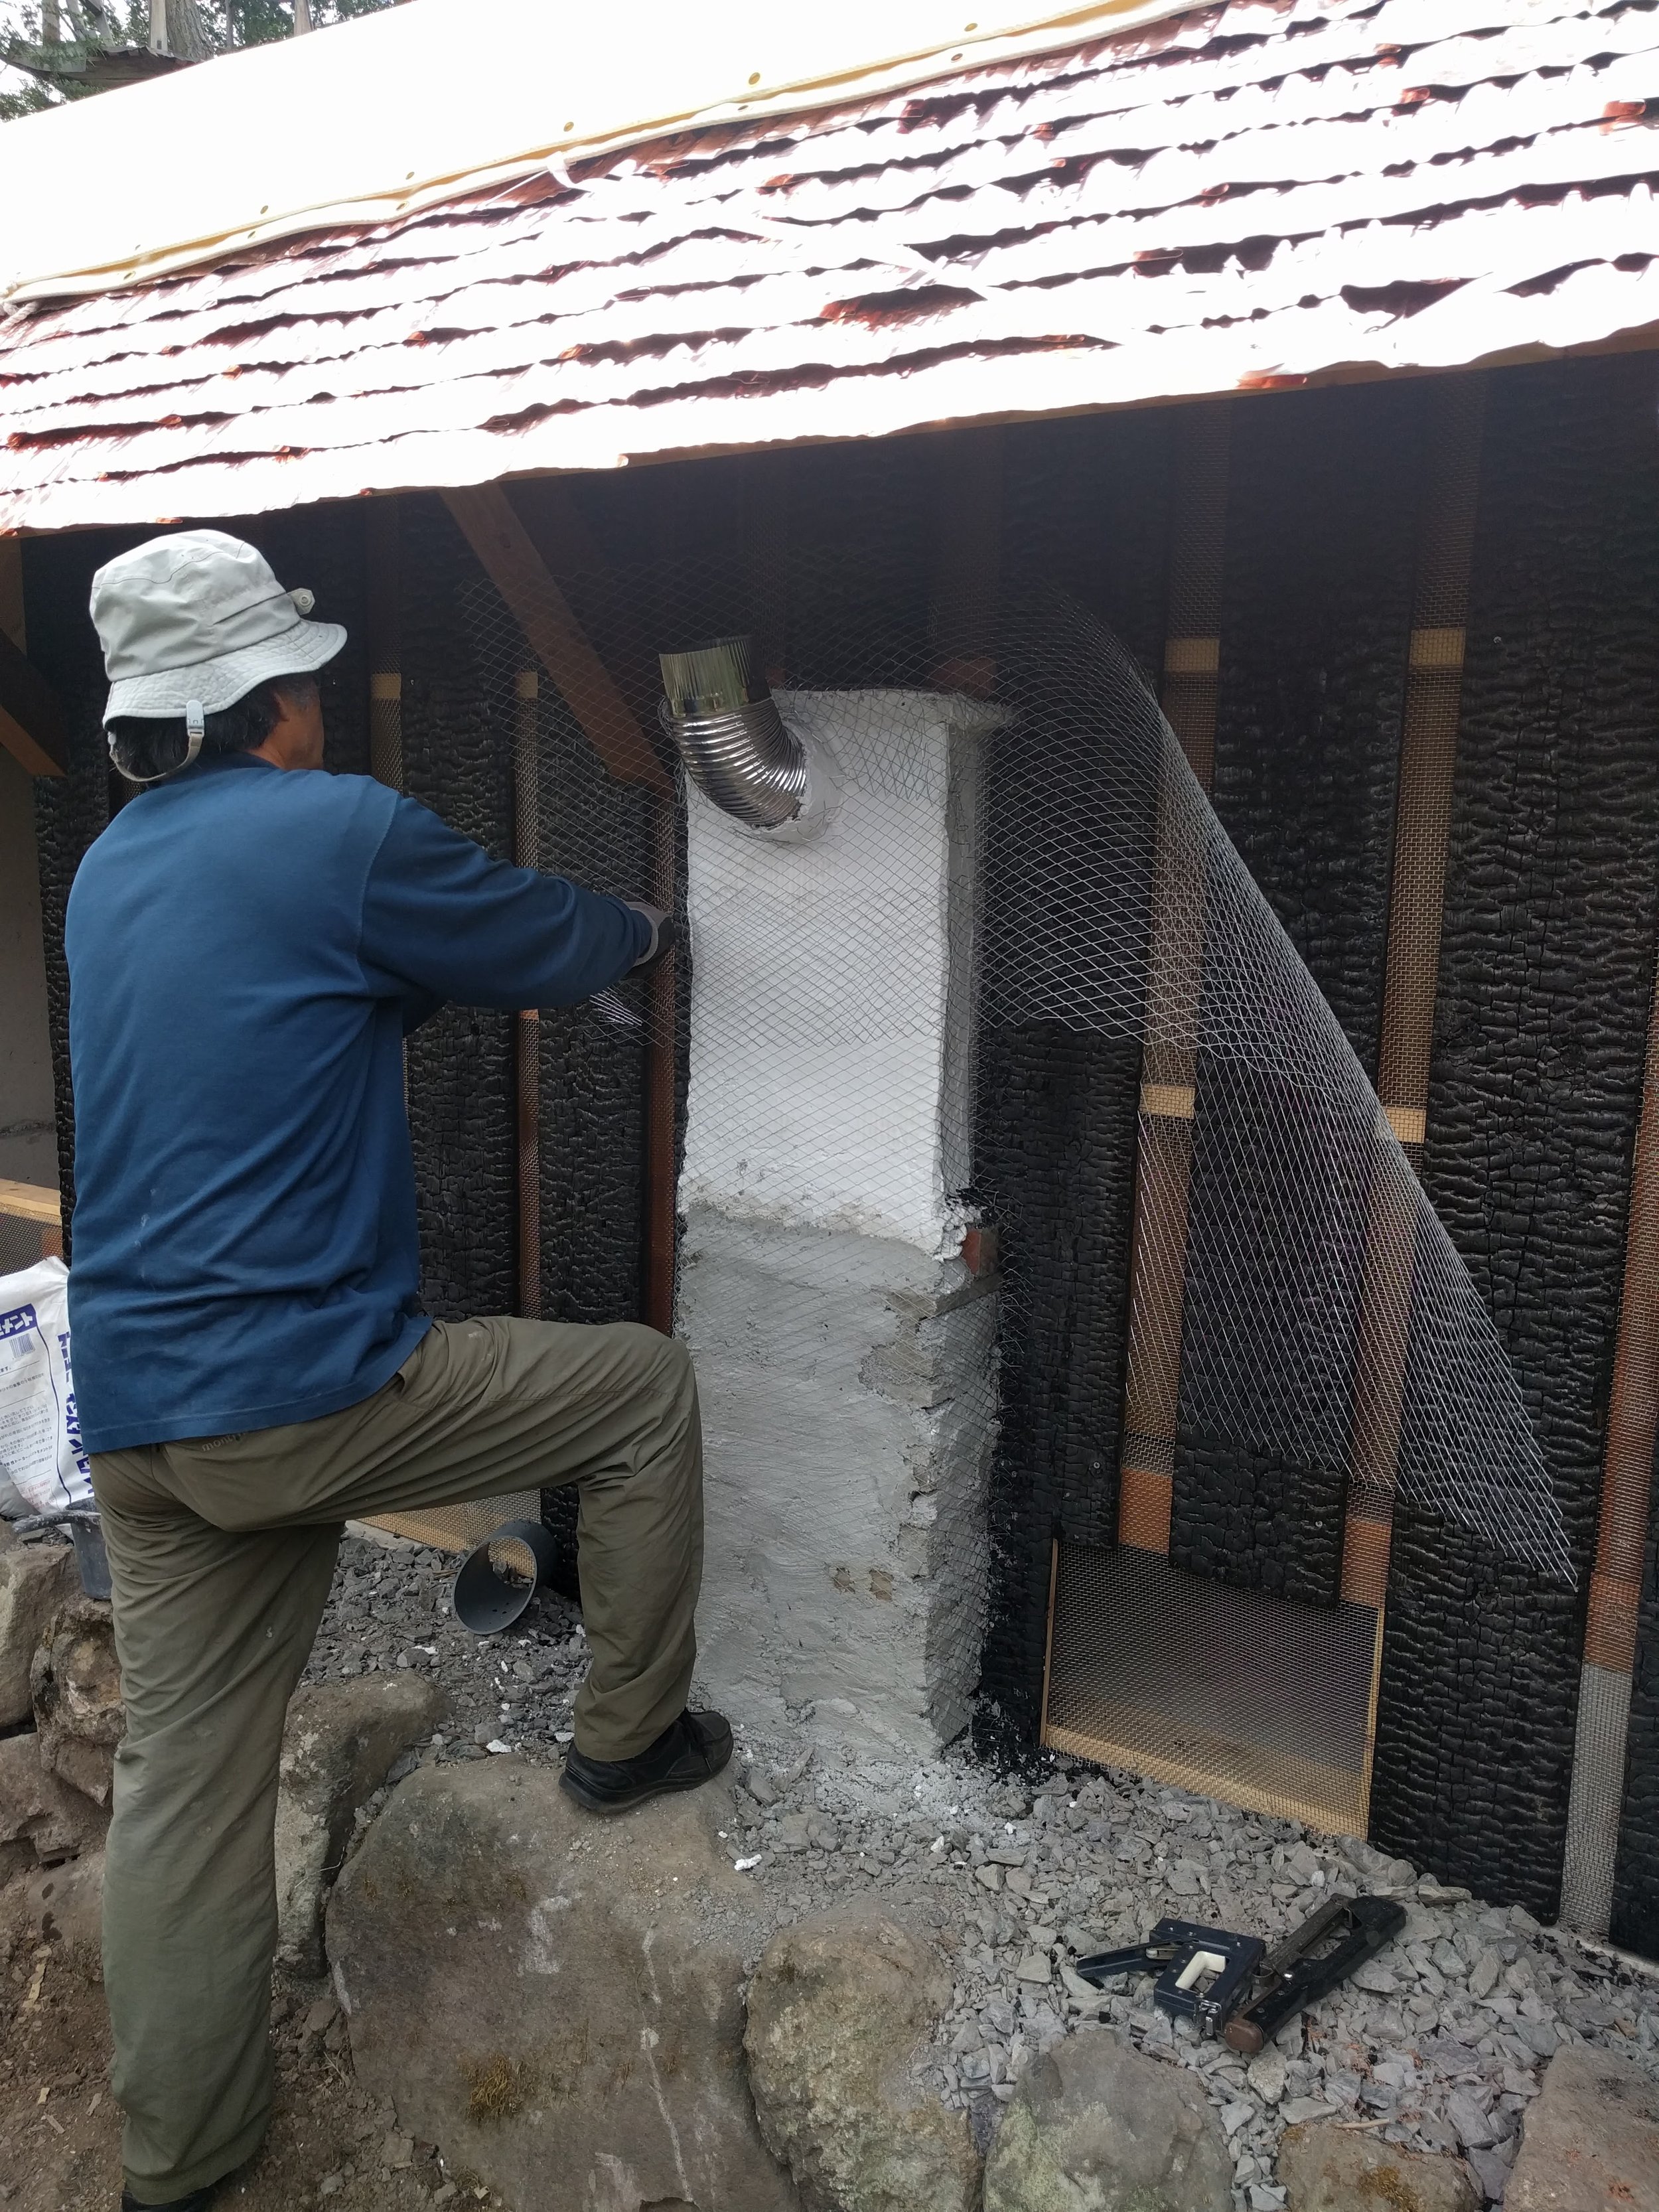
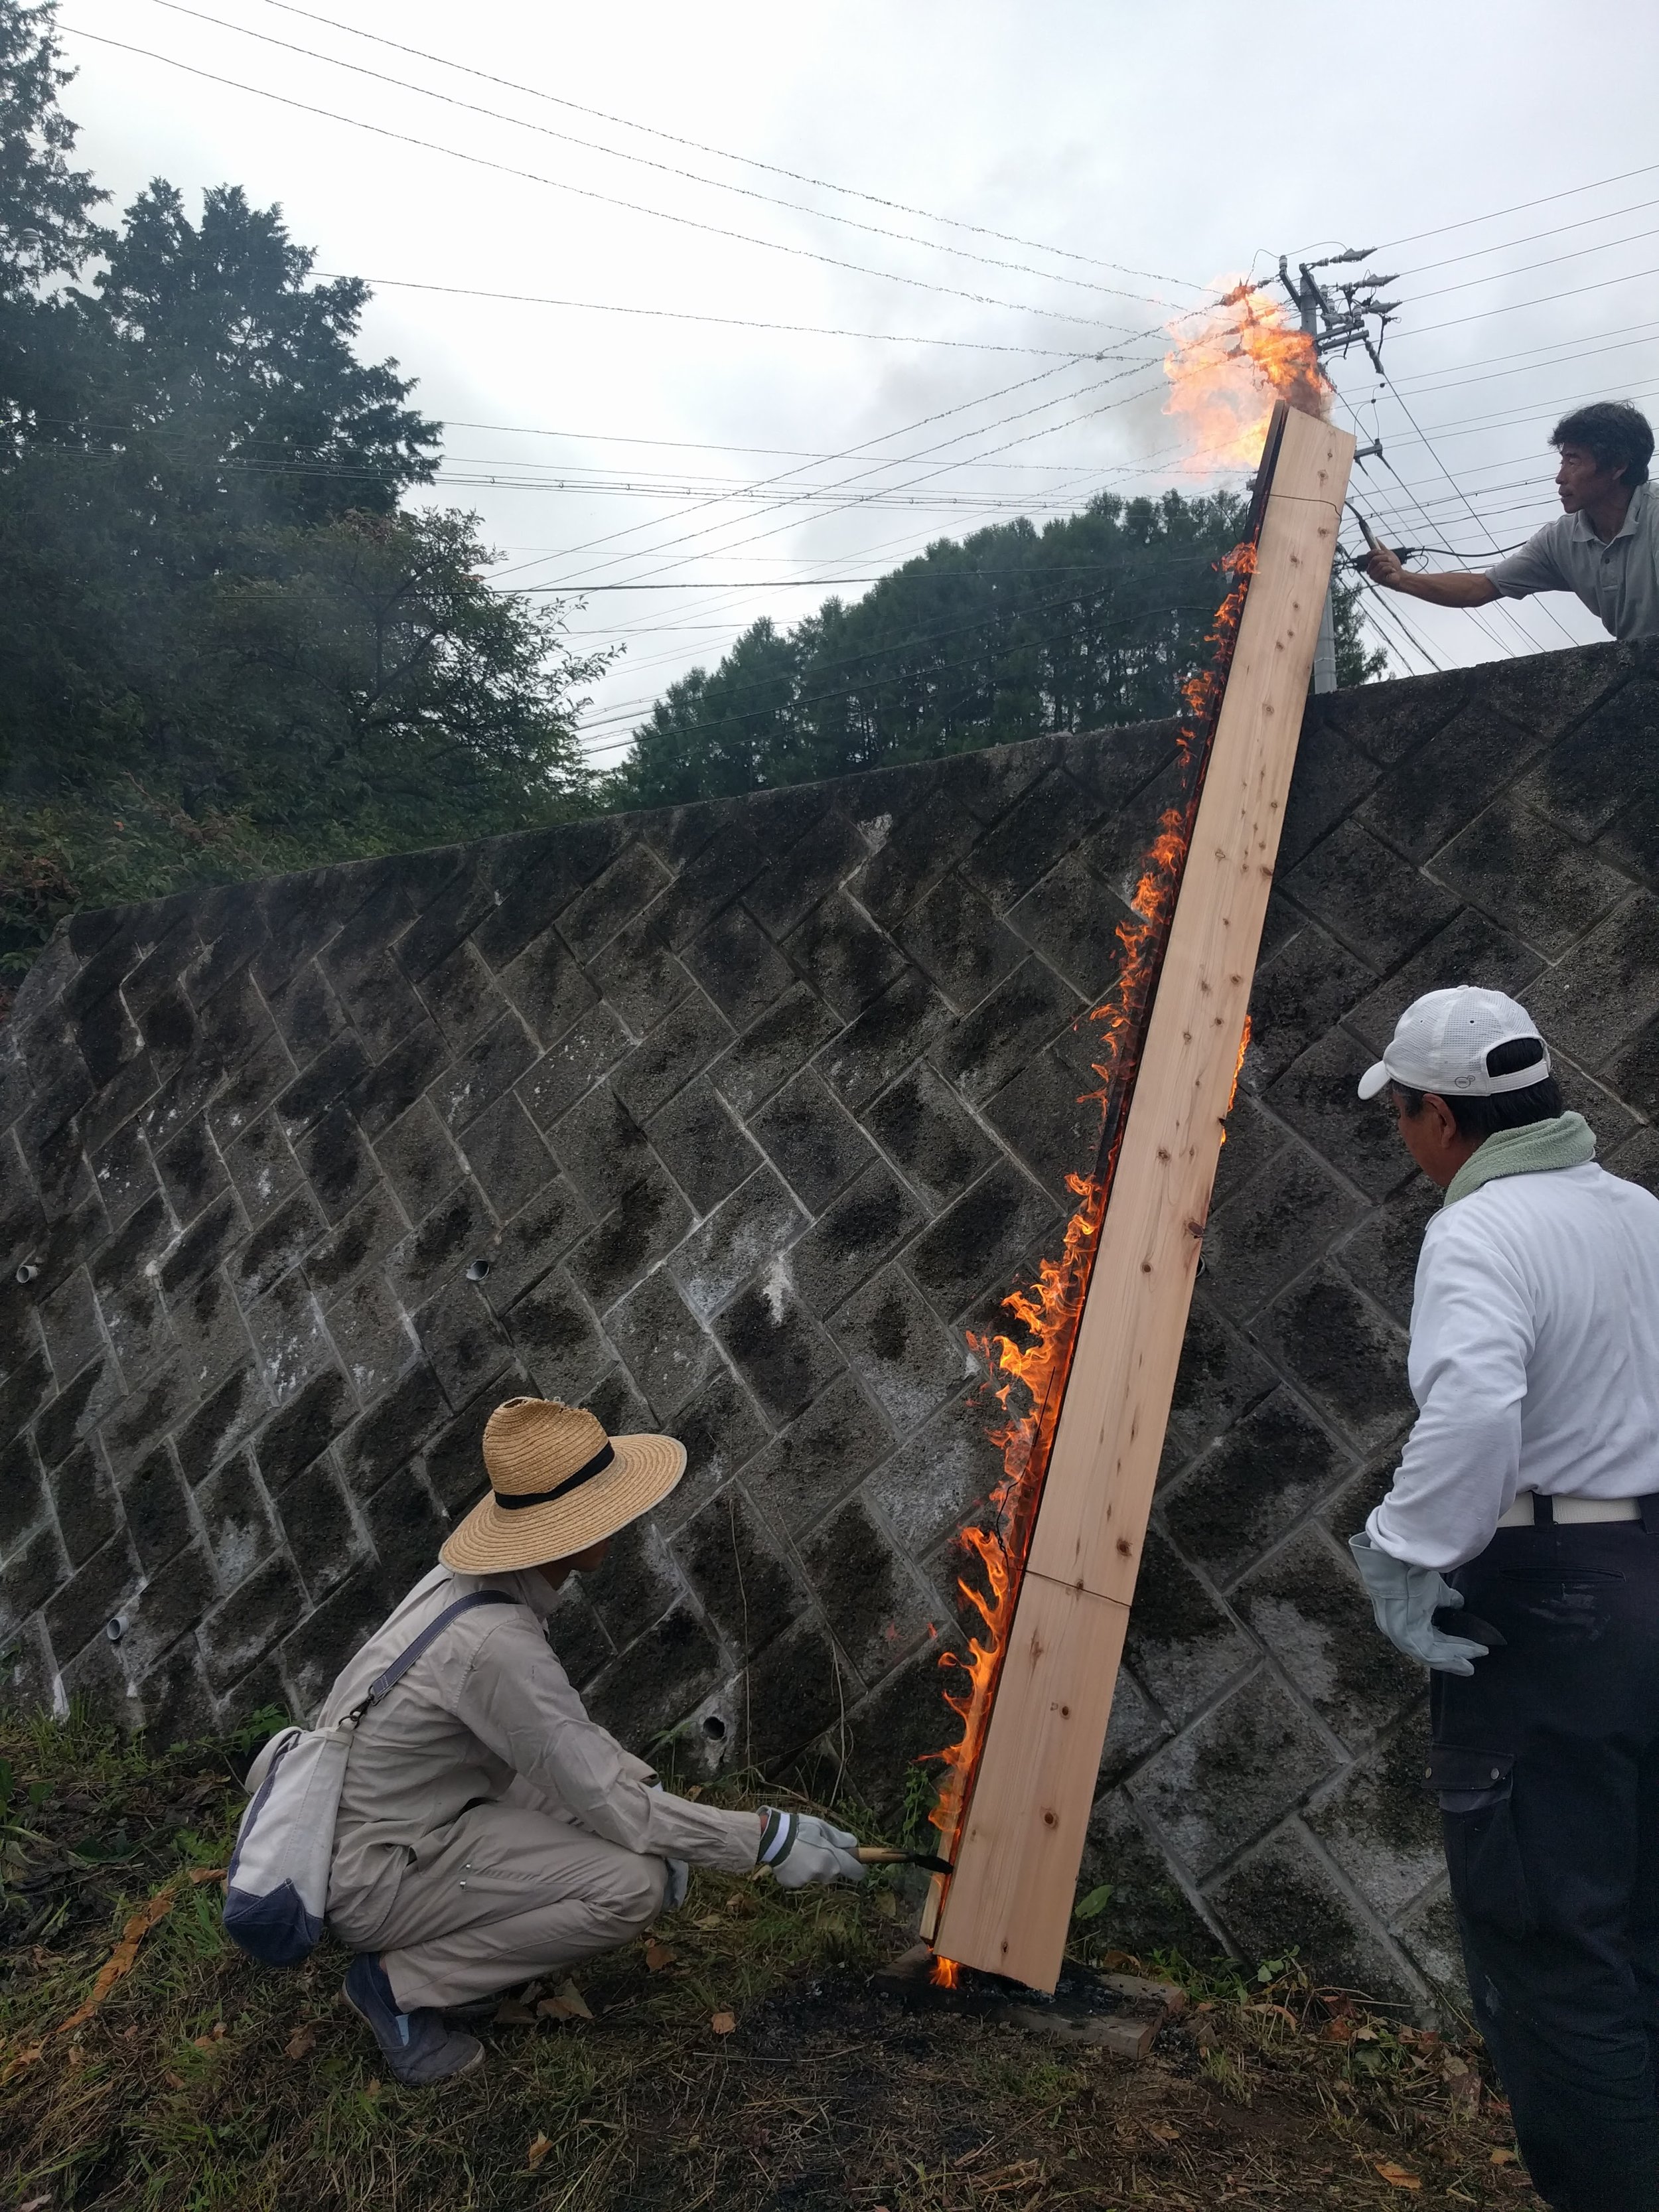
Today is Yakisugi day. Yakisugi is chard cedar planks. First, we make triangular chimney with cedar planks. Tigh it with steel wire.
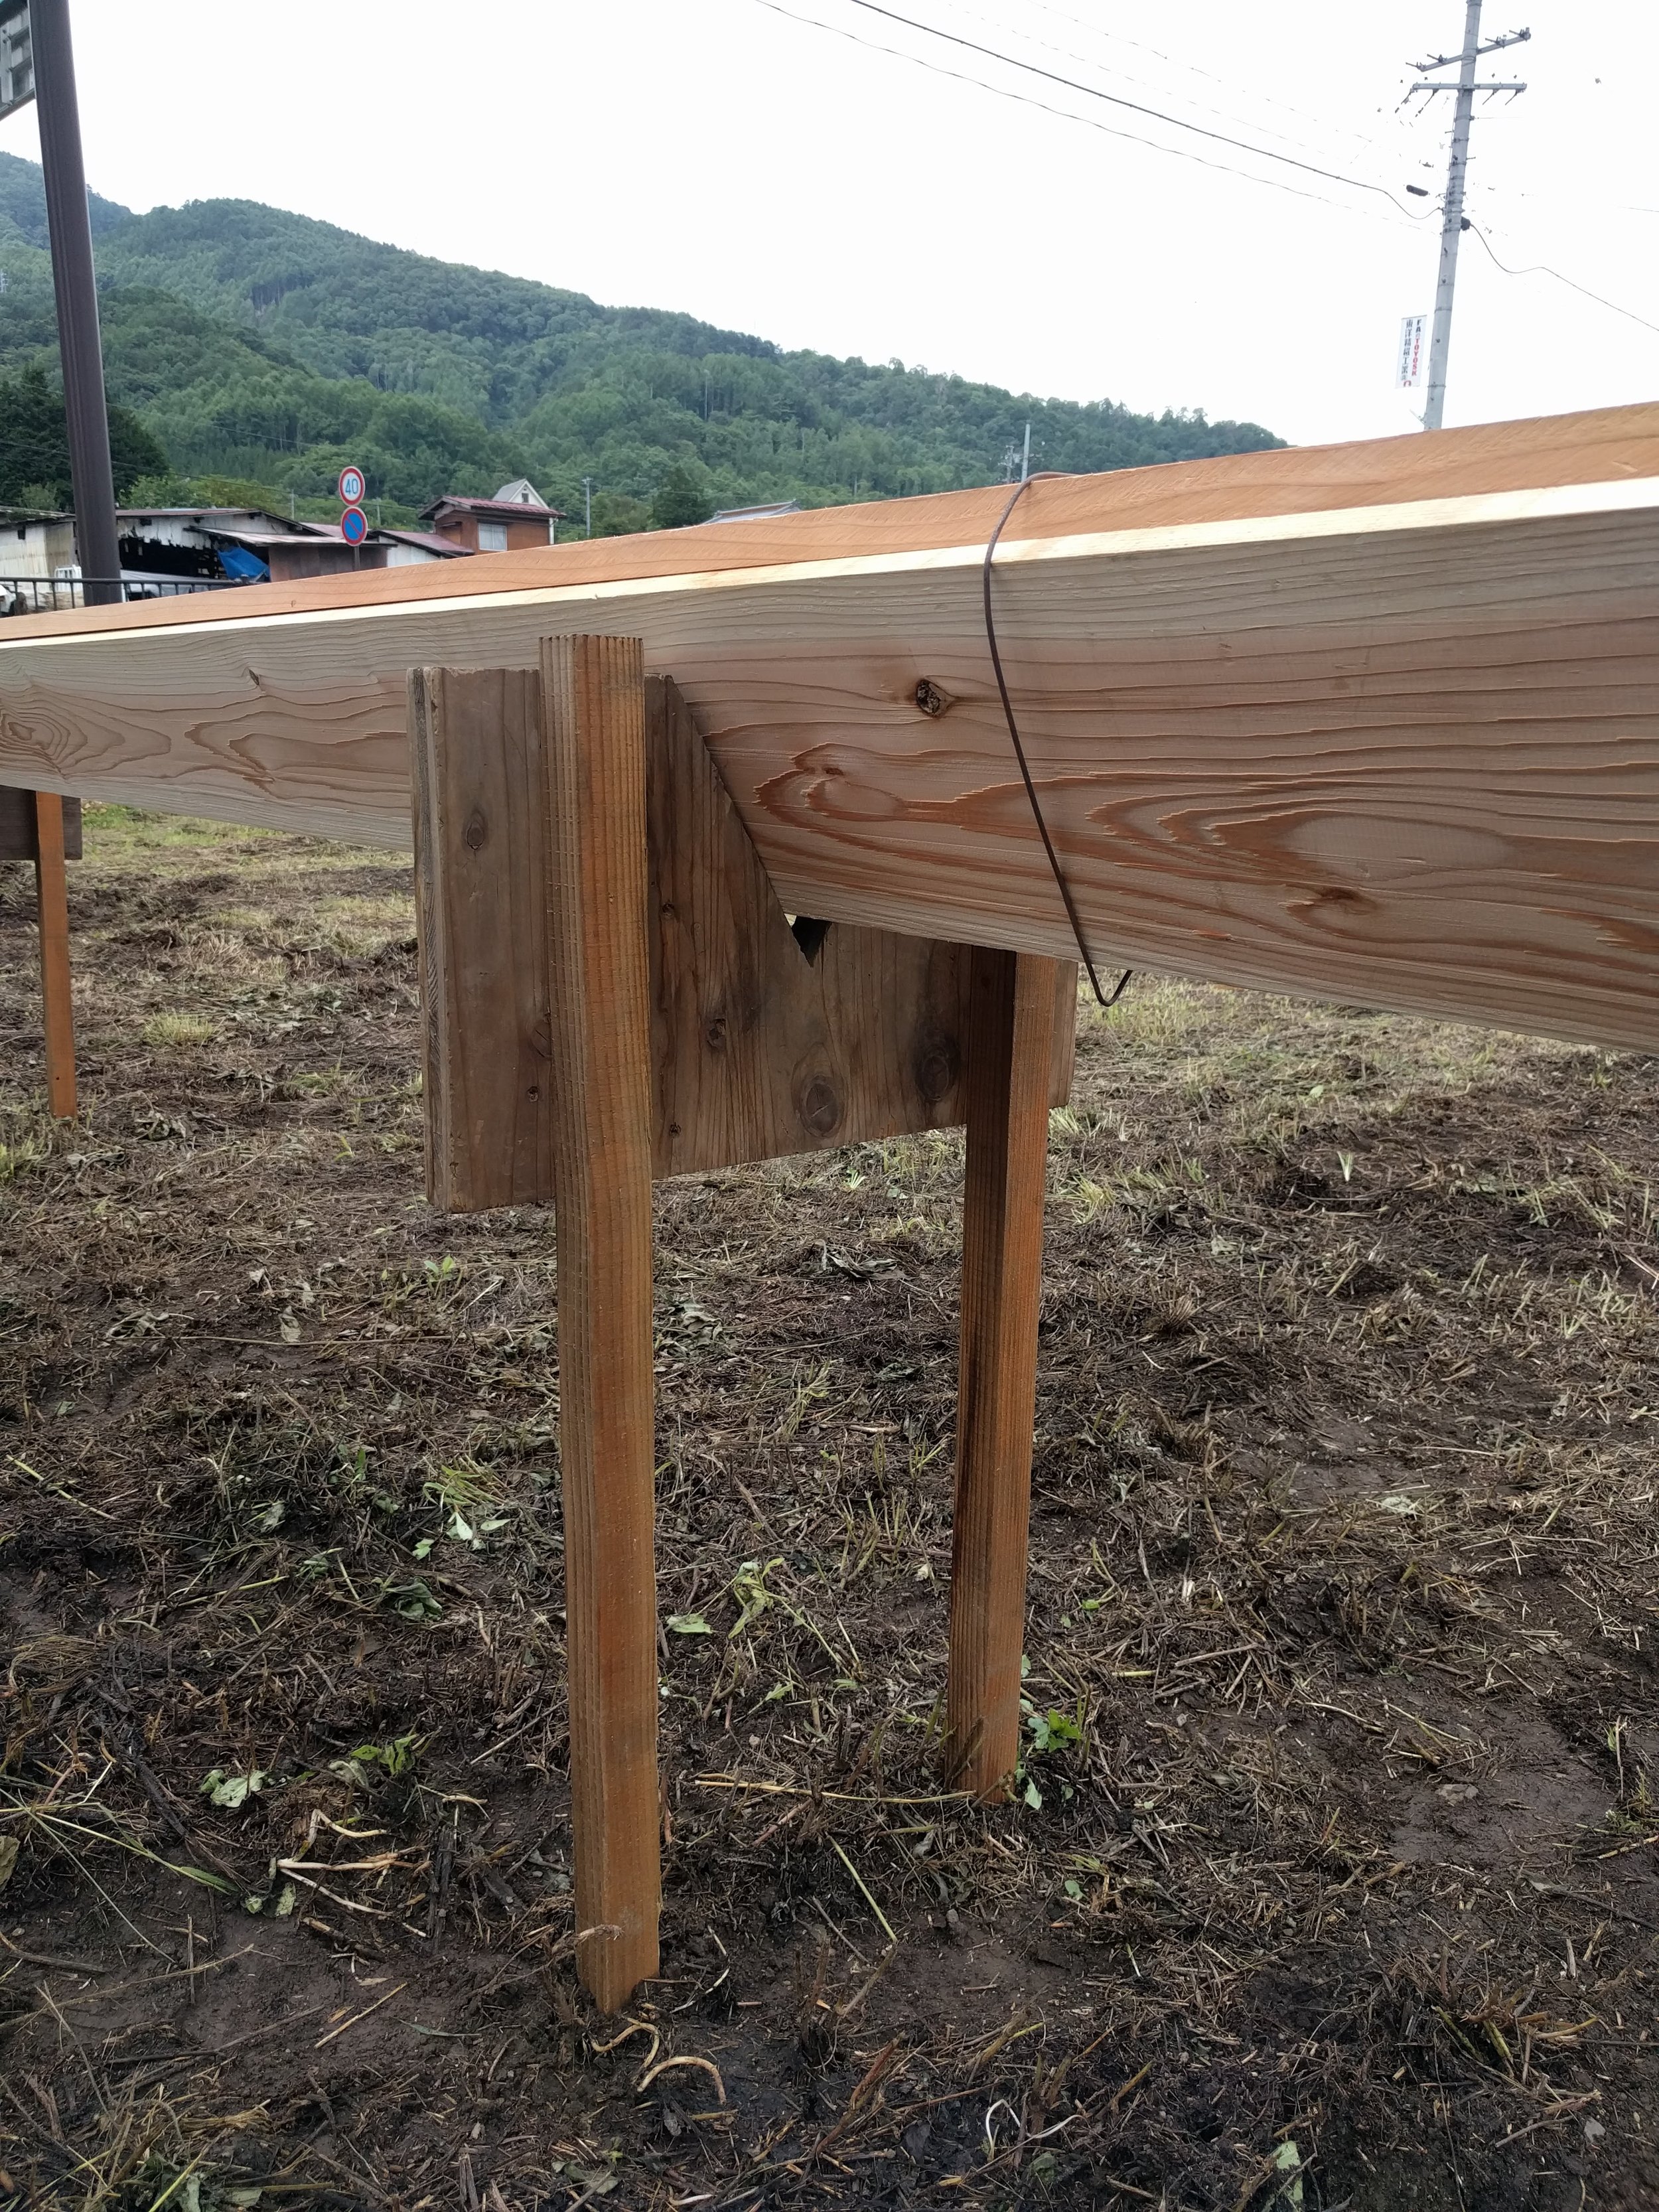
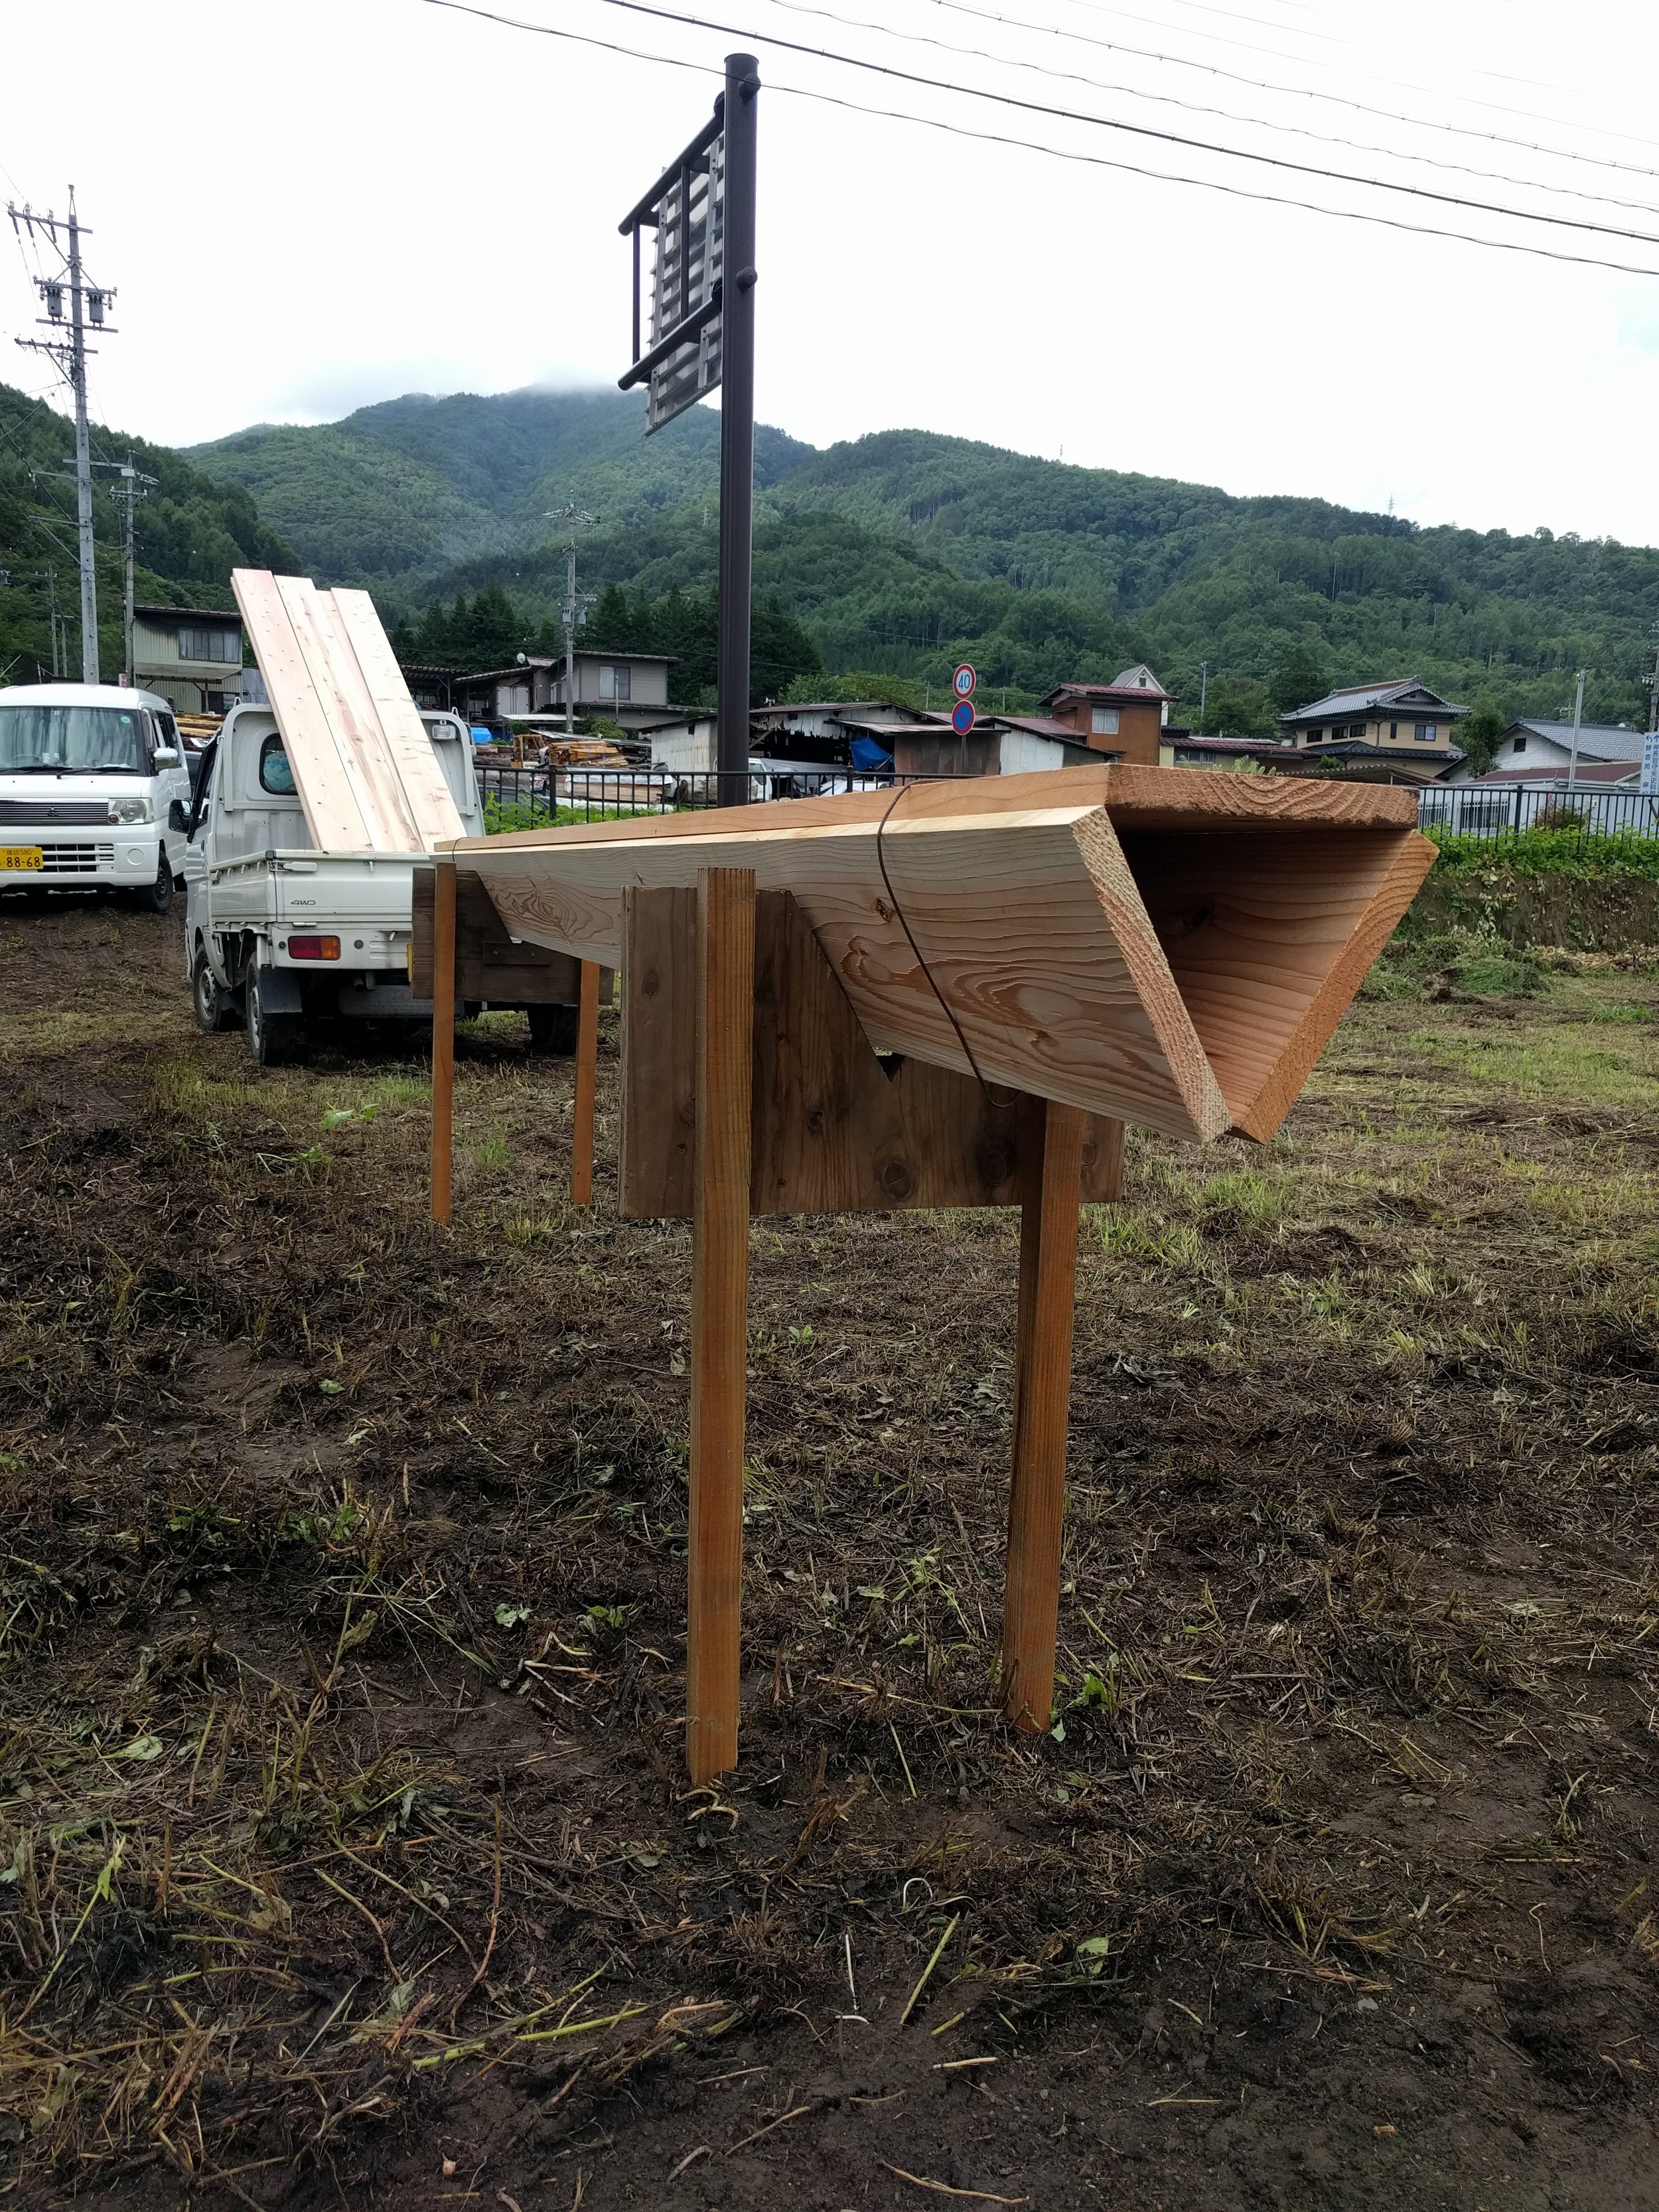
Then we just need one balled up newspaper to char the entire planks.
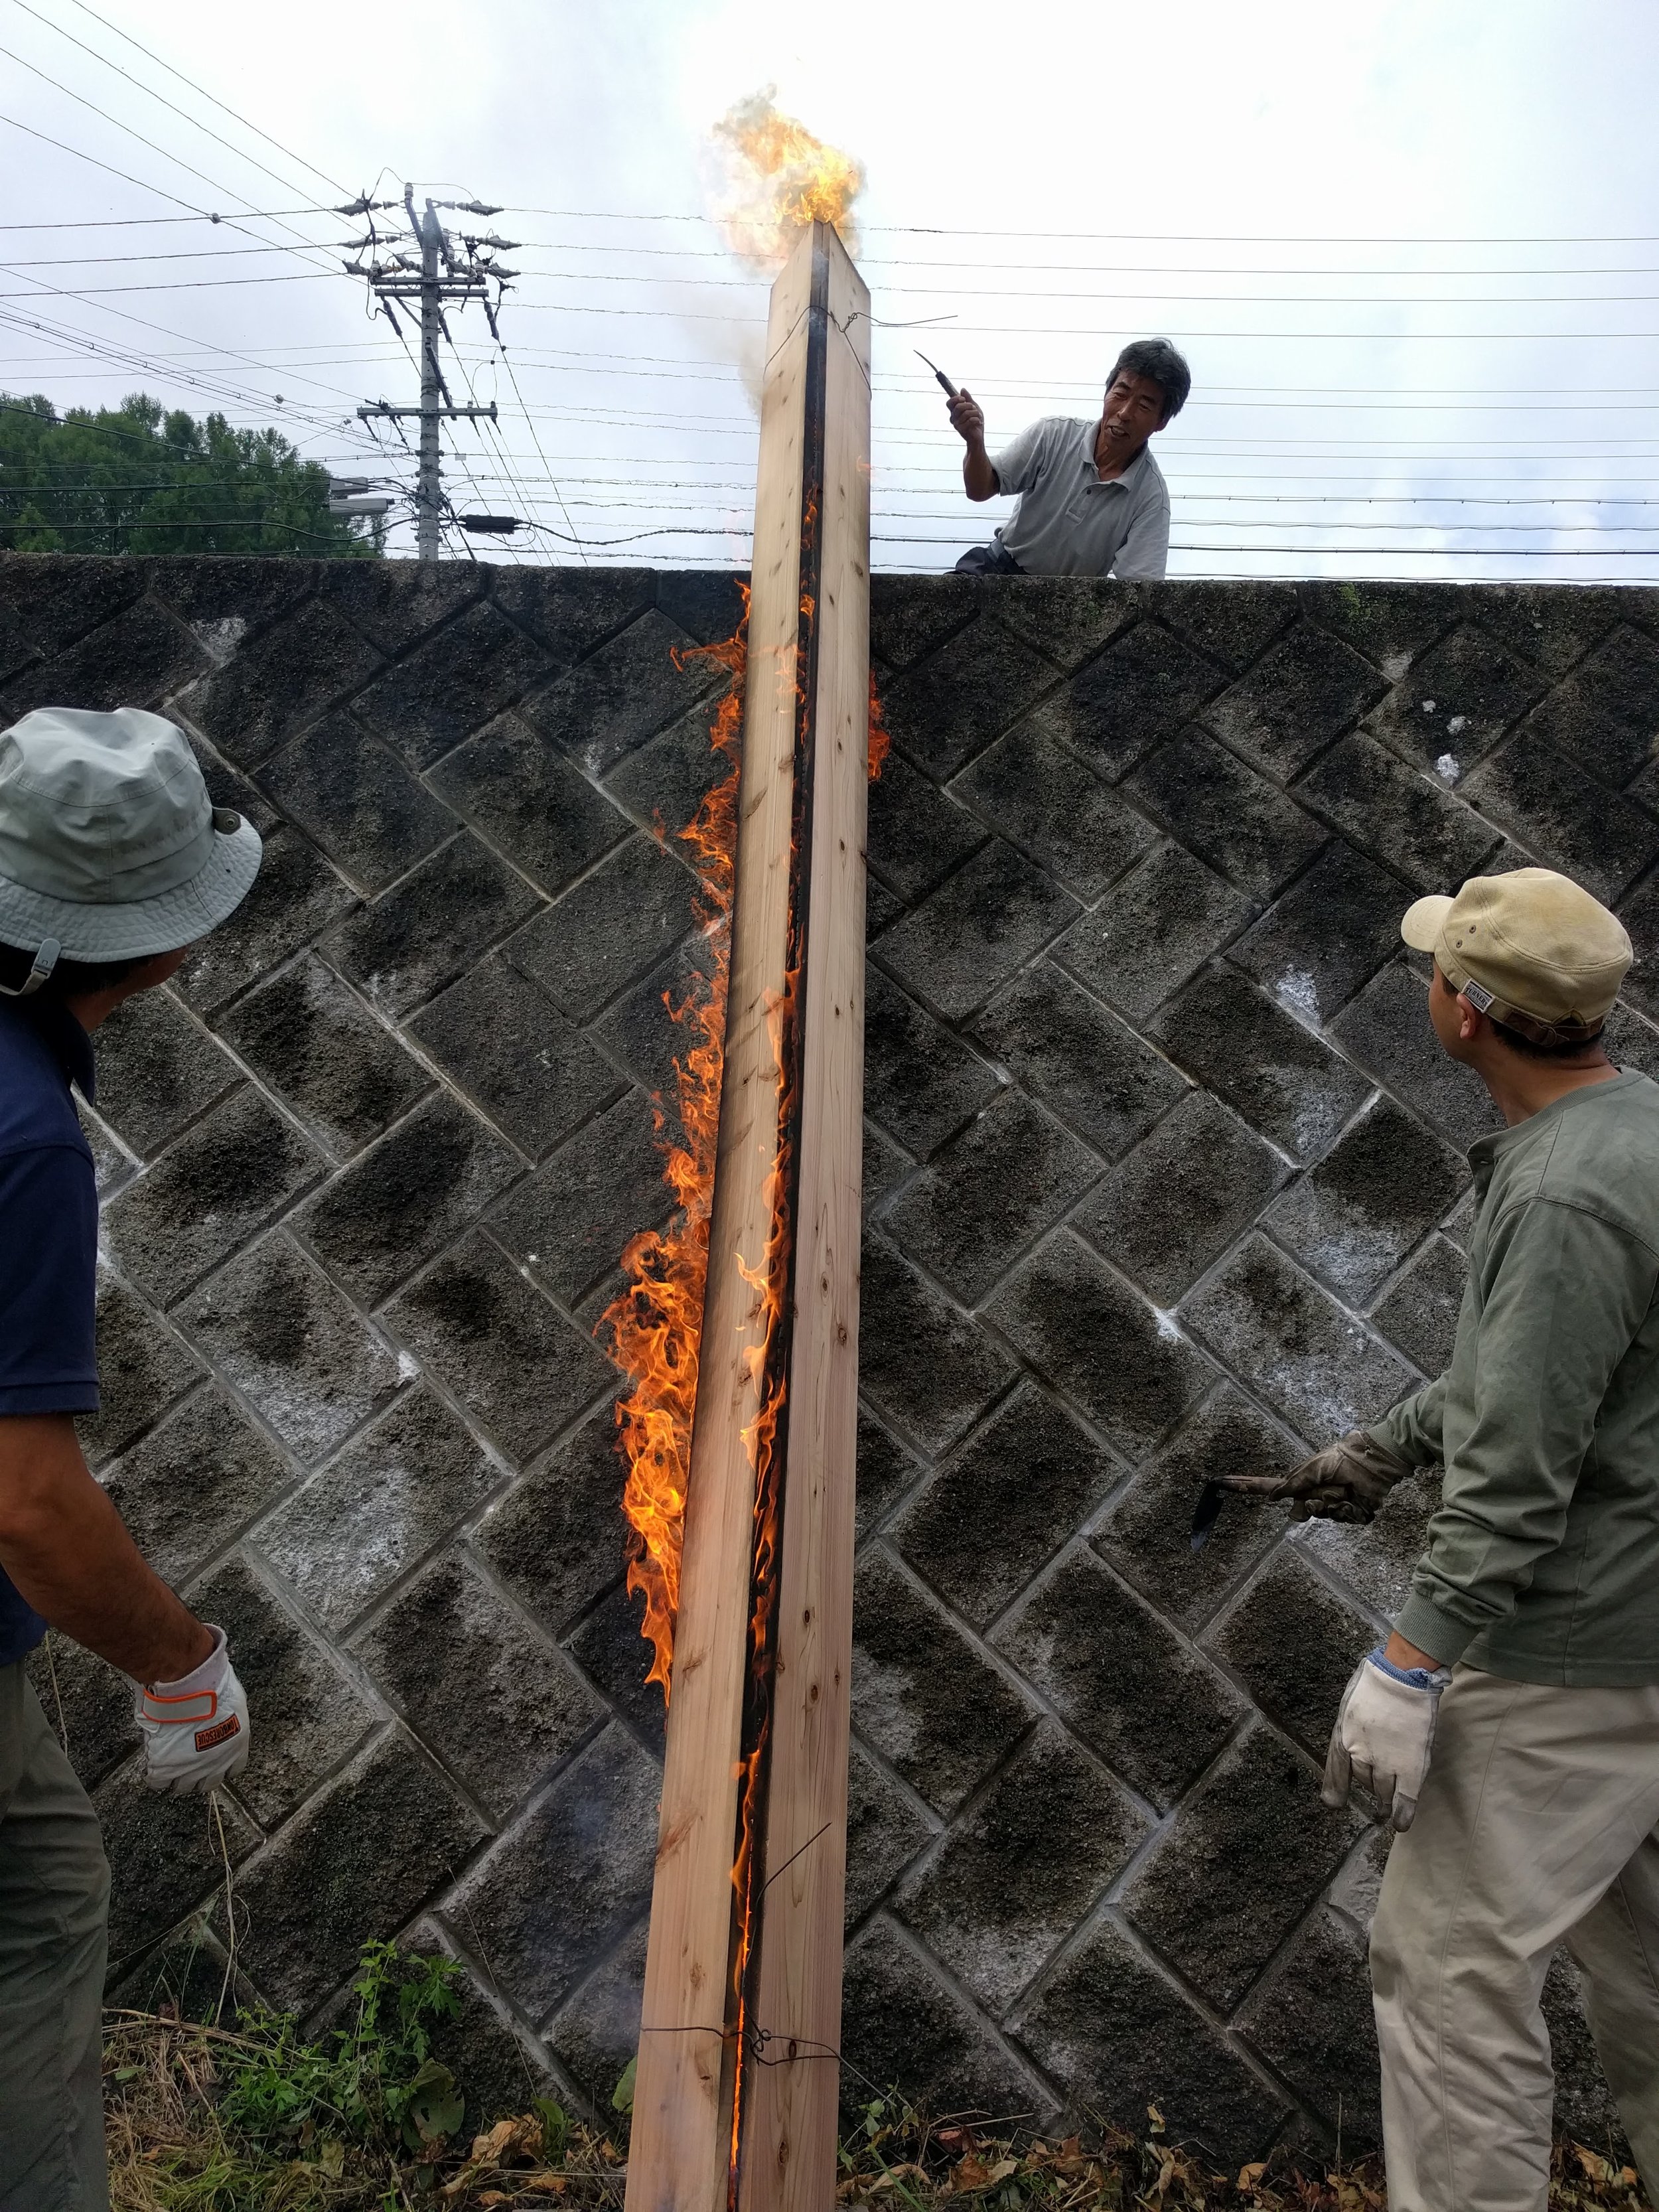
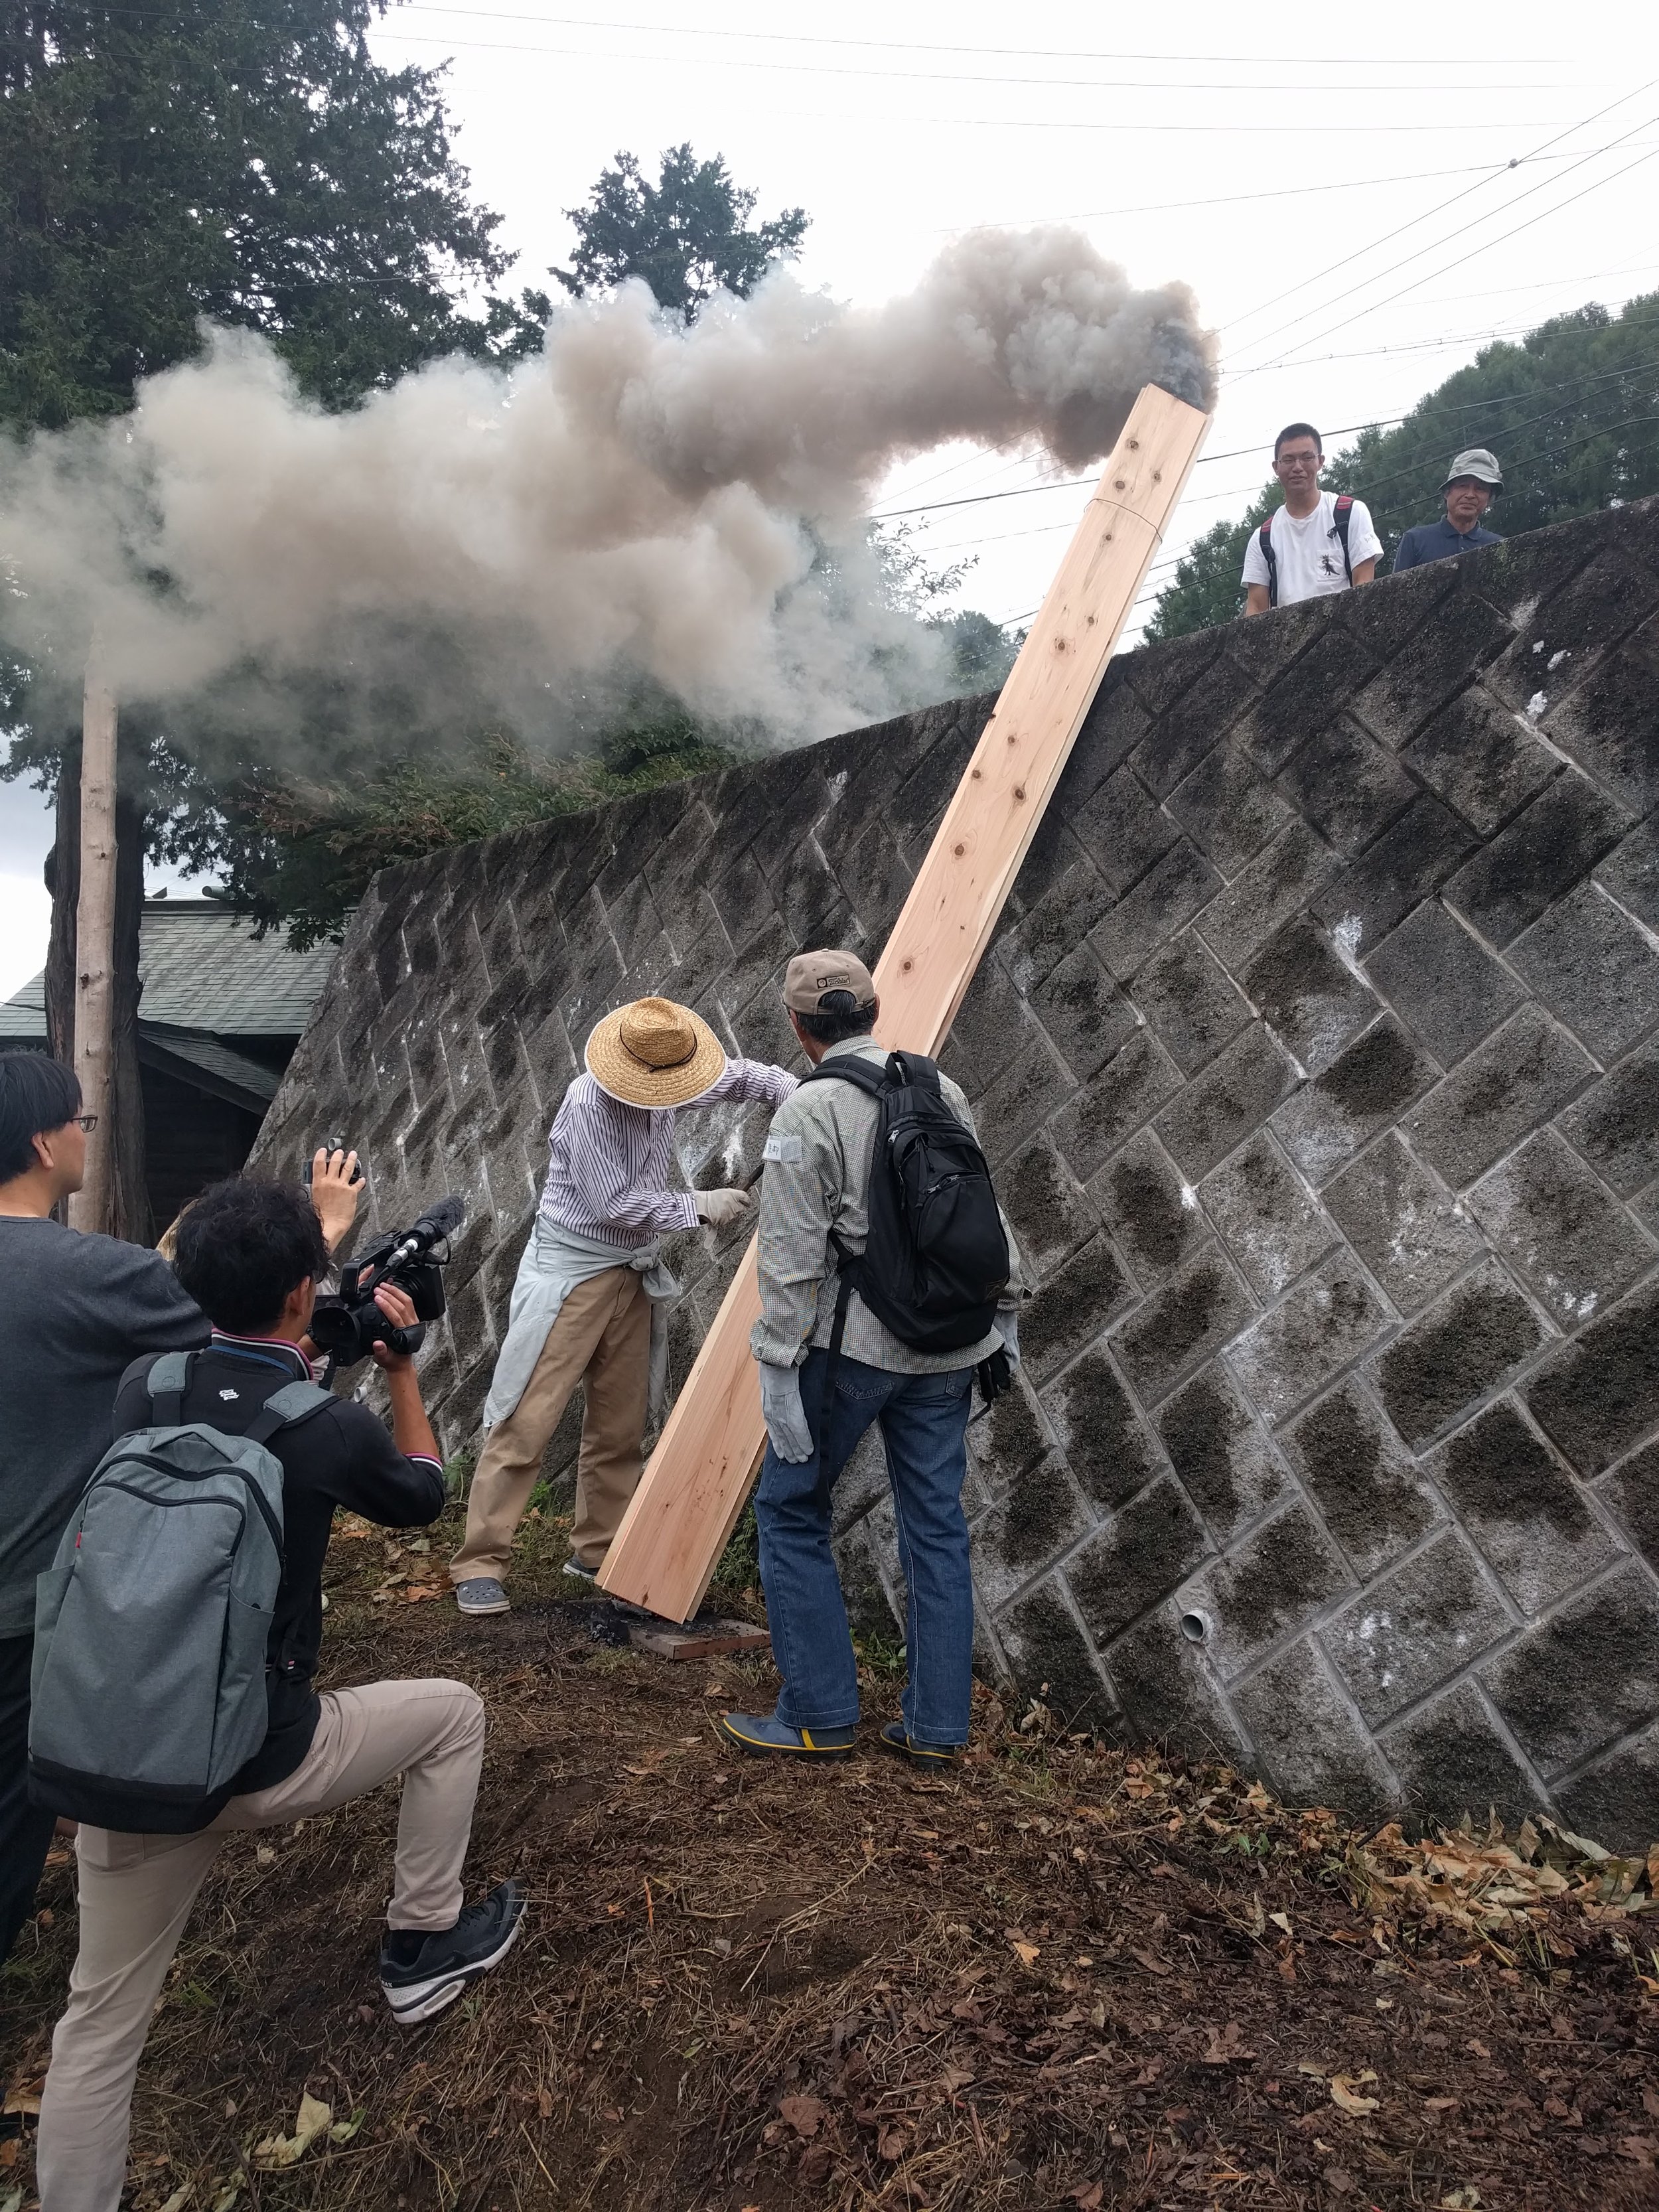
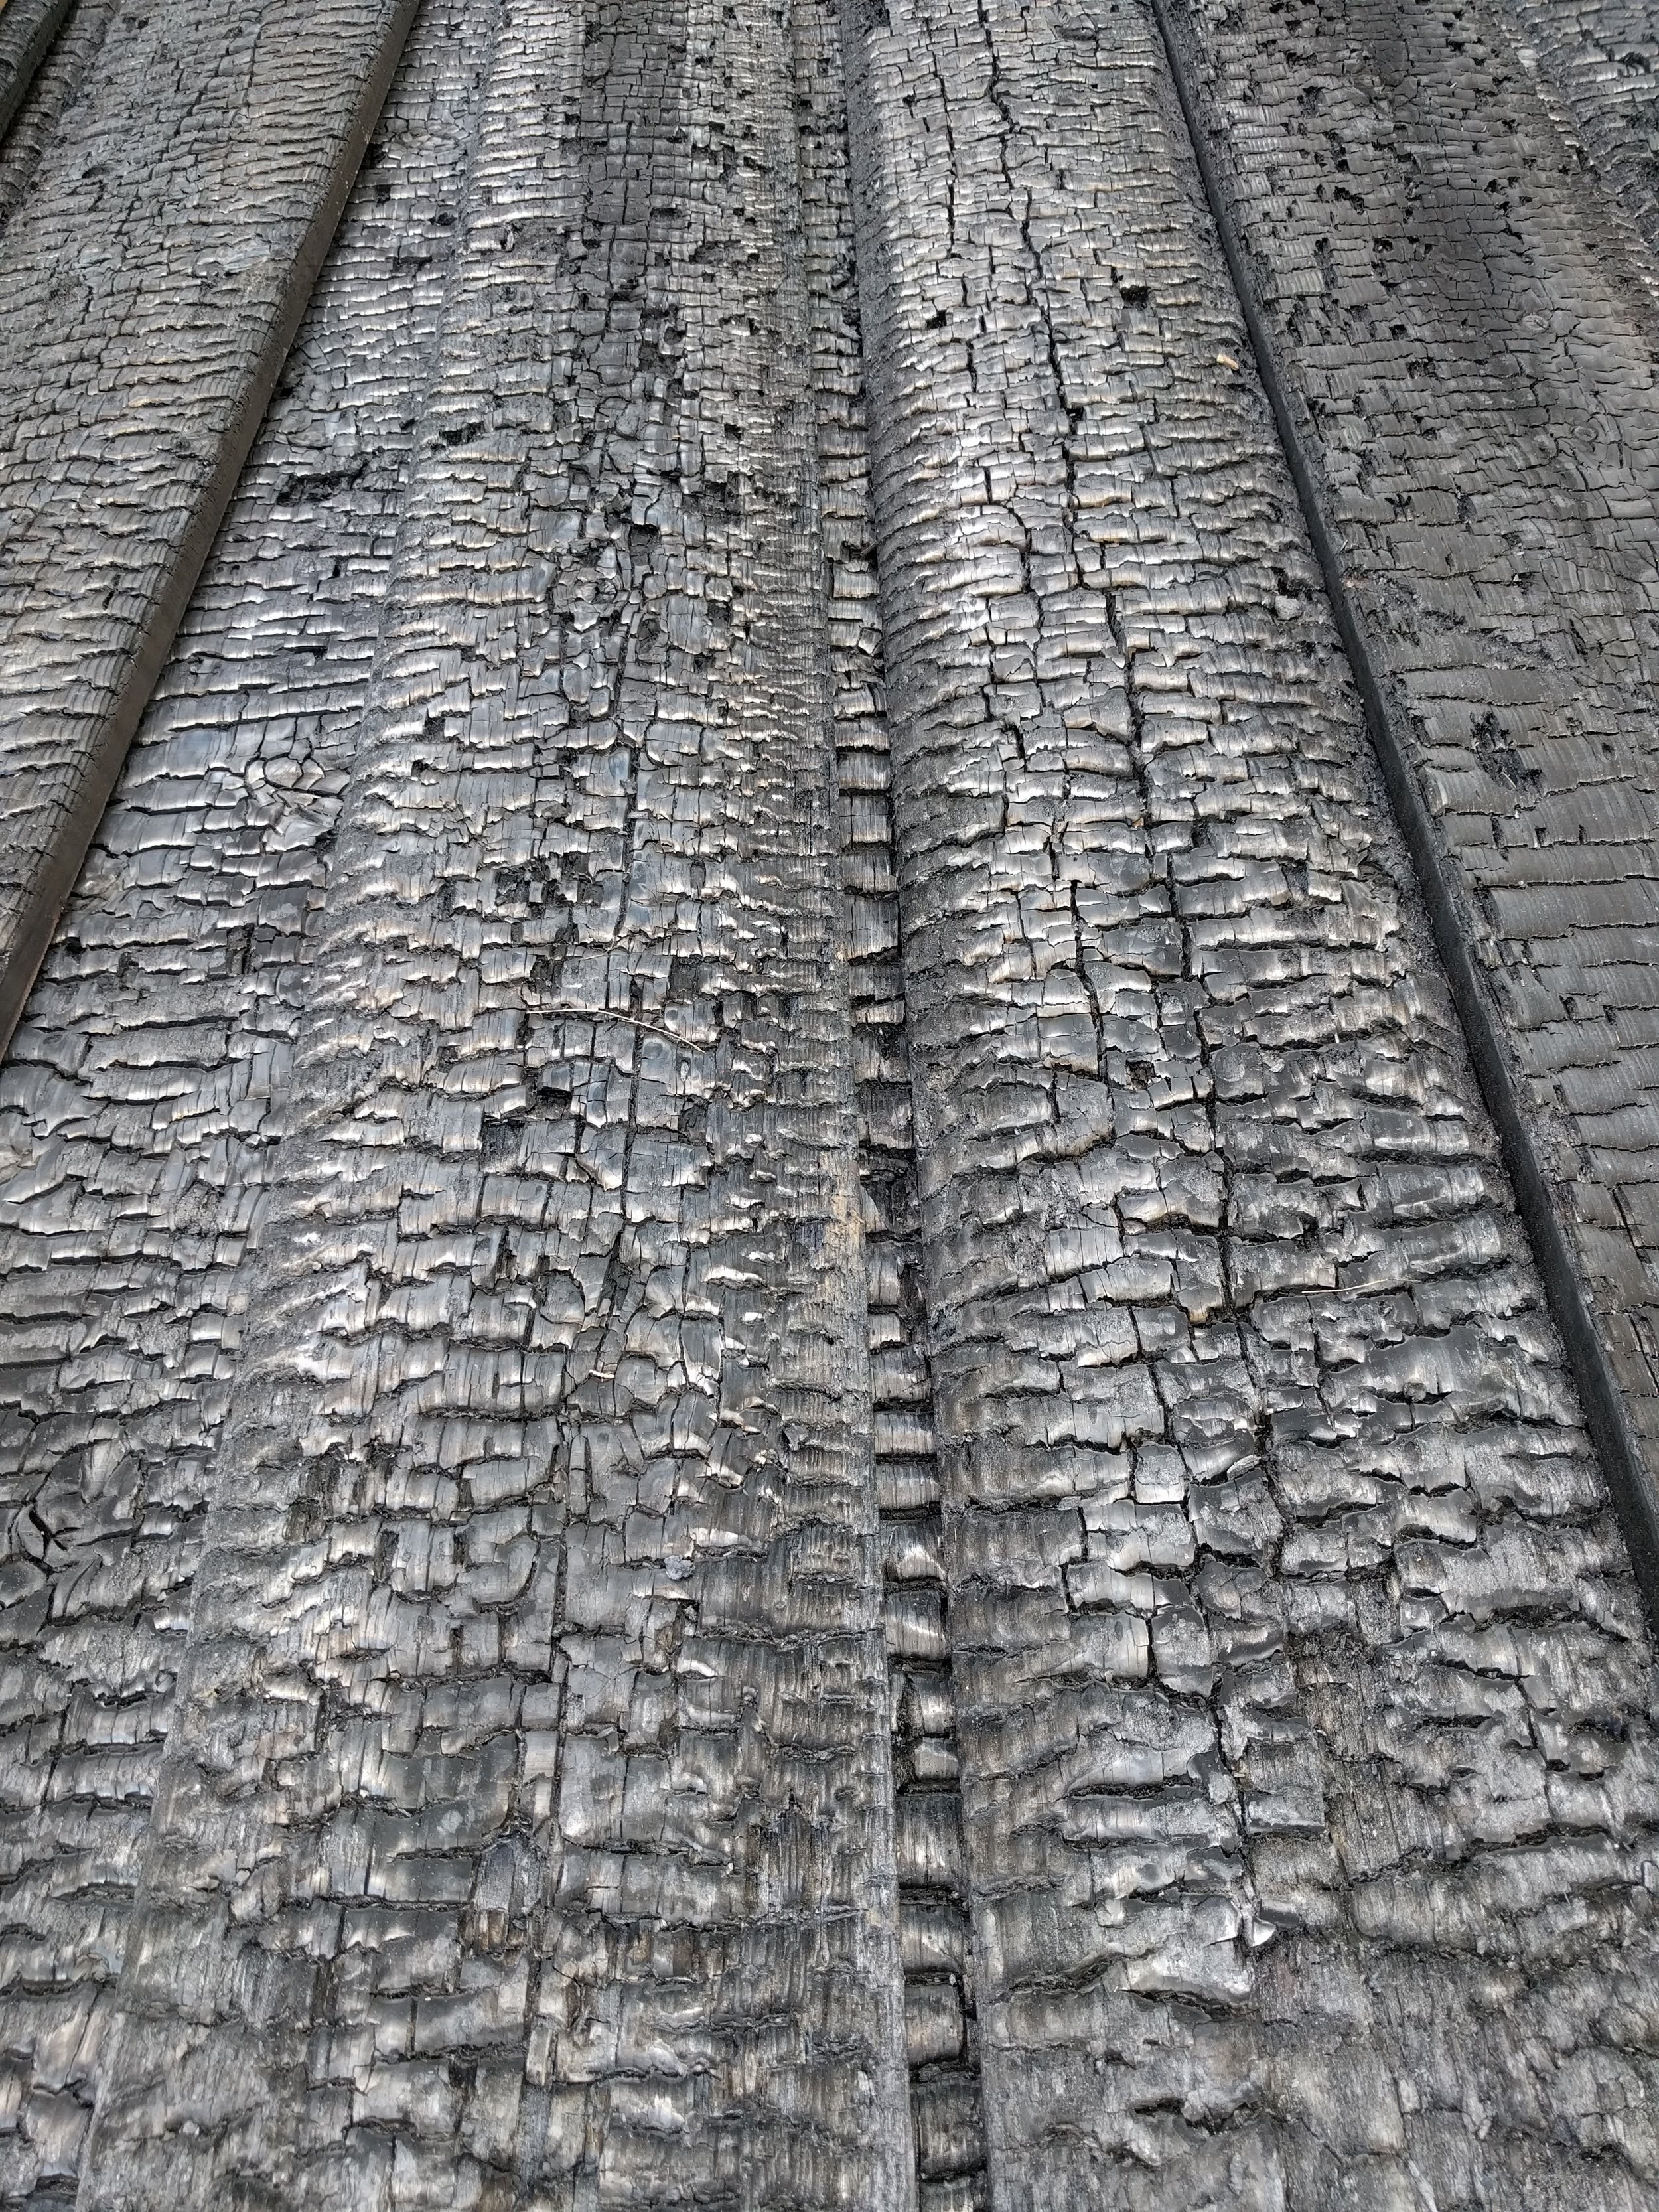
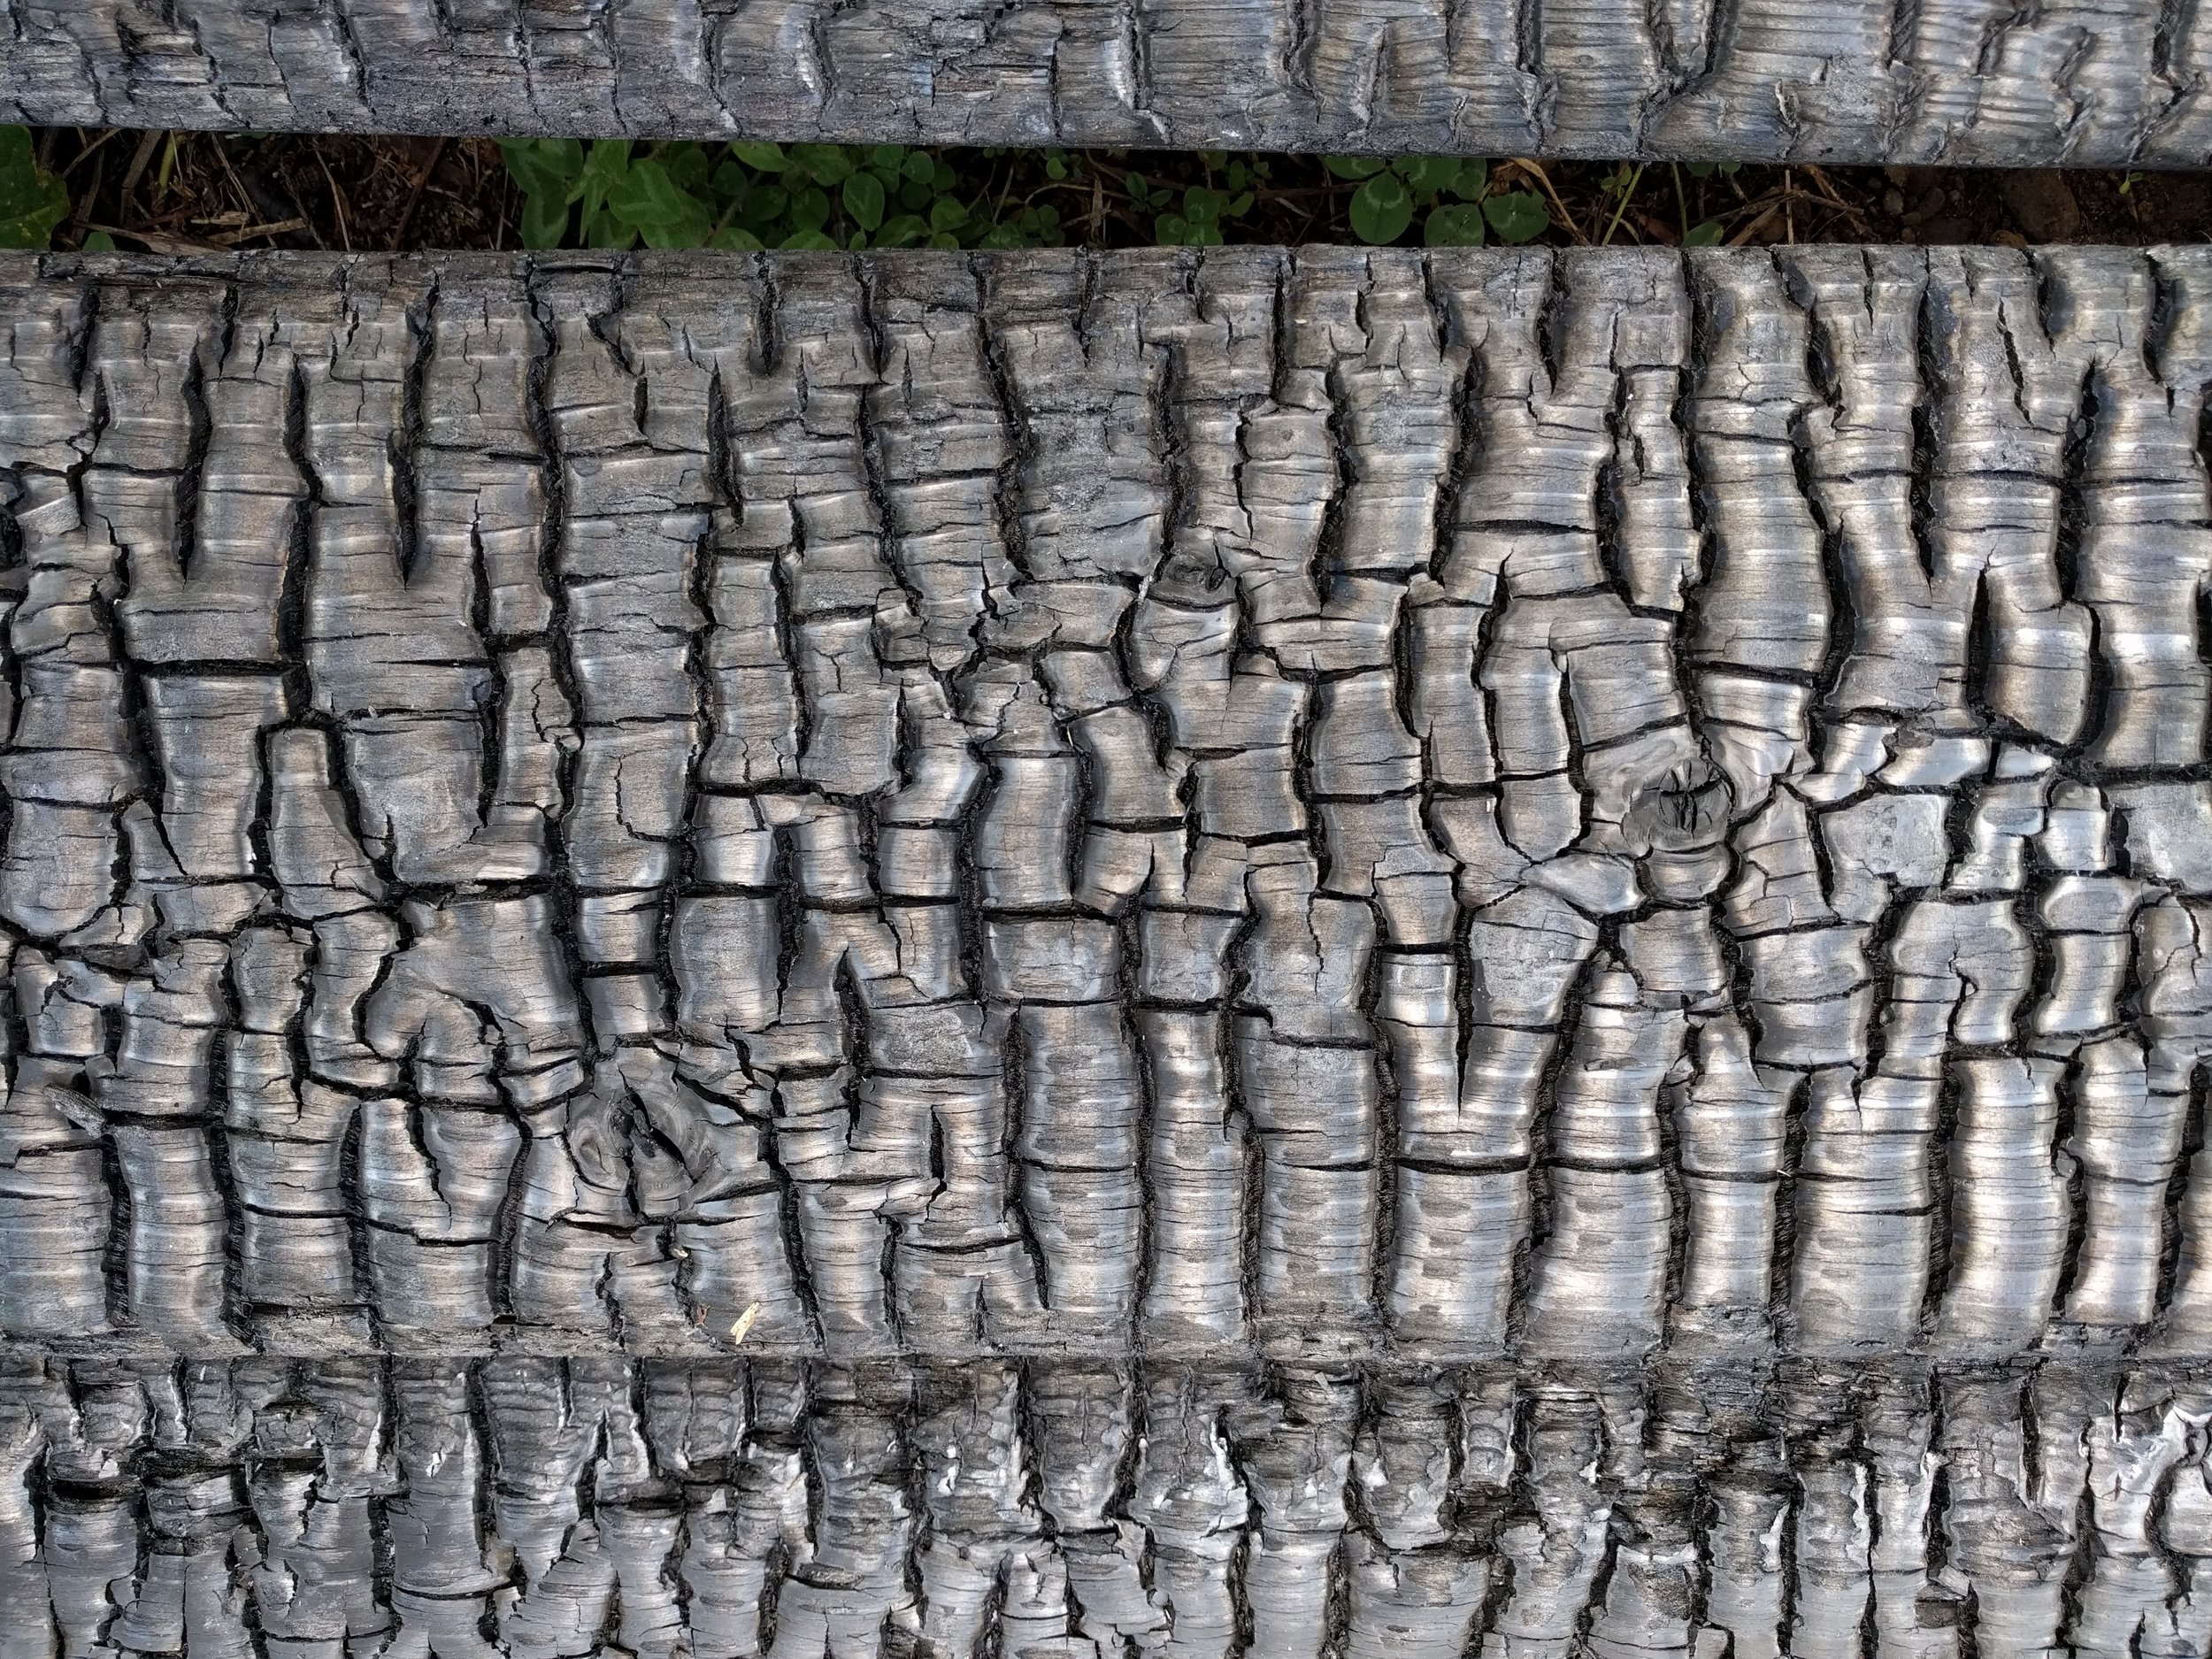
The result is a beautiful shiny textured ceder sidings.
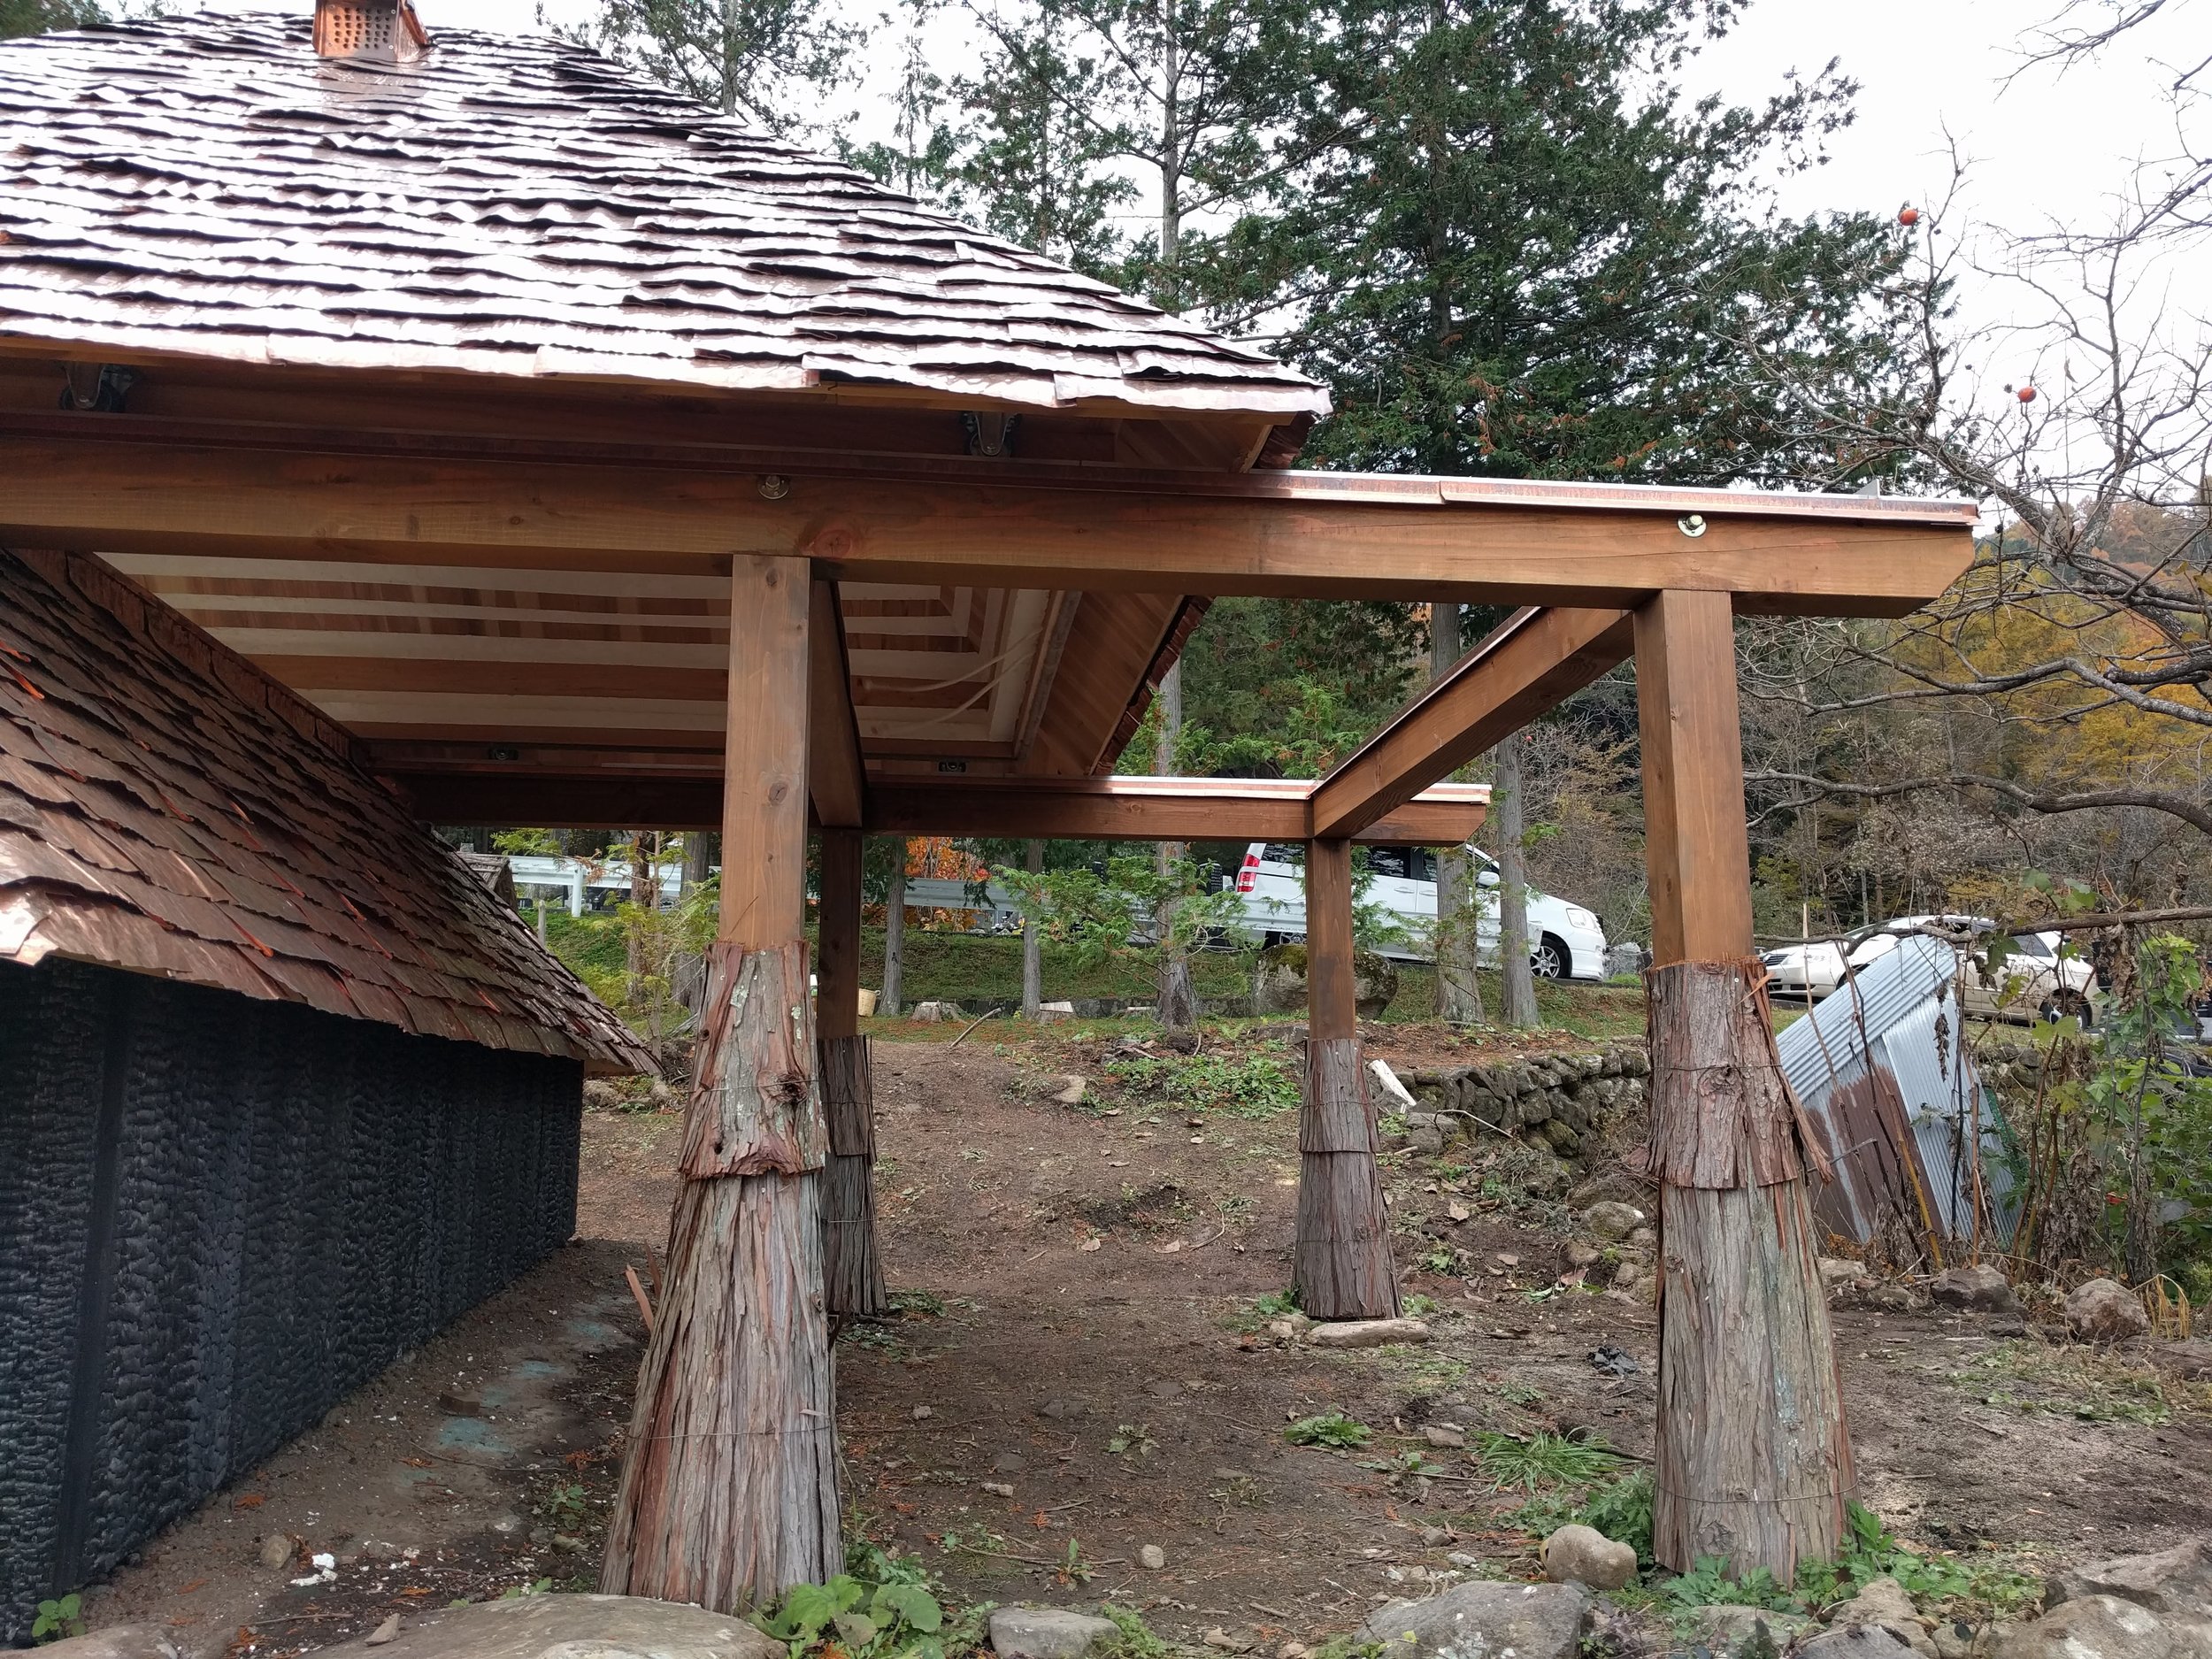
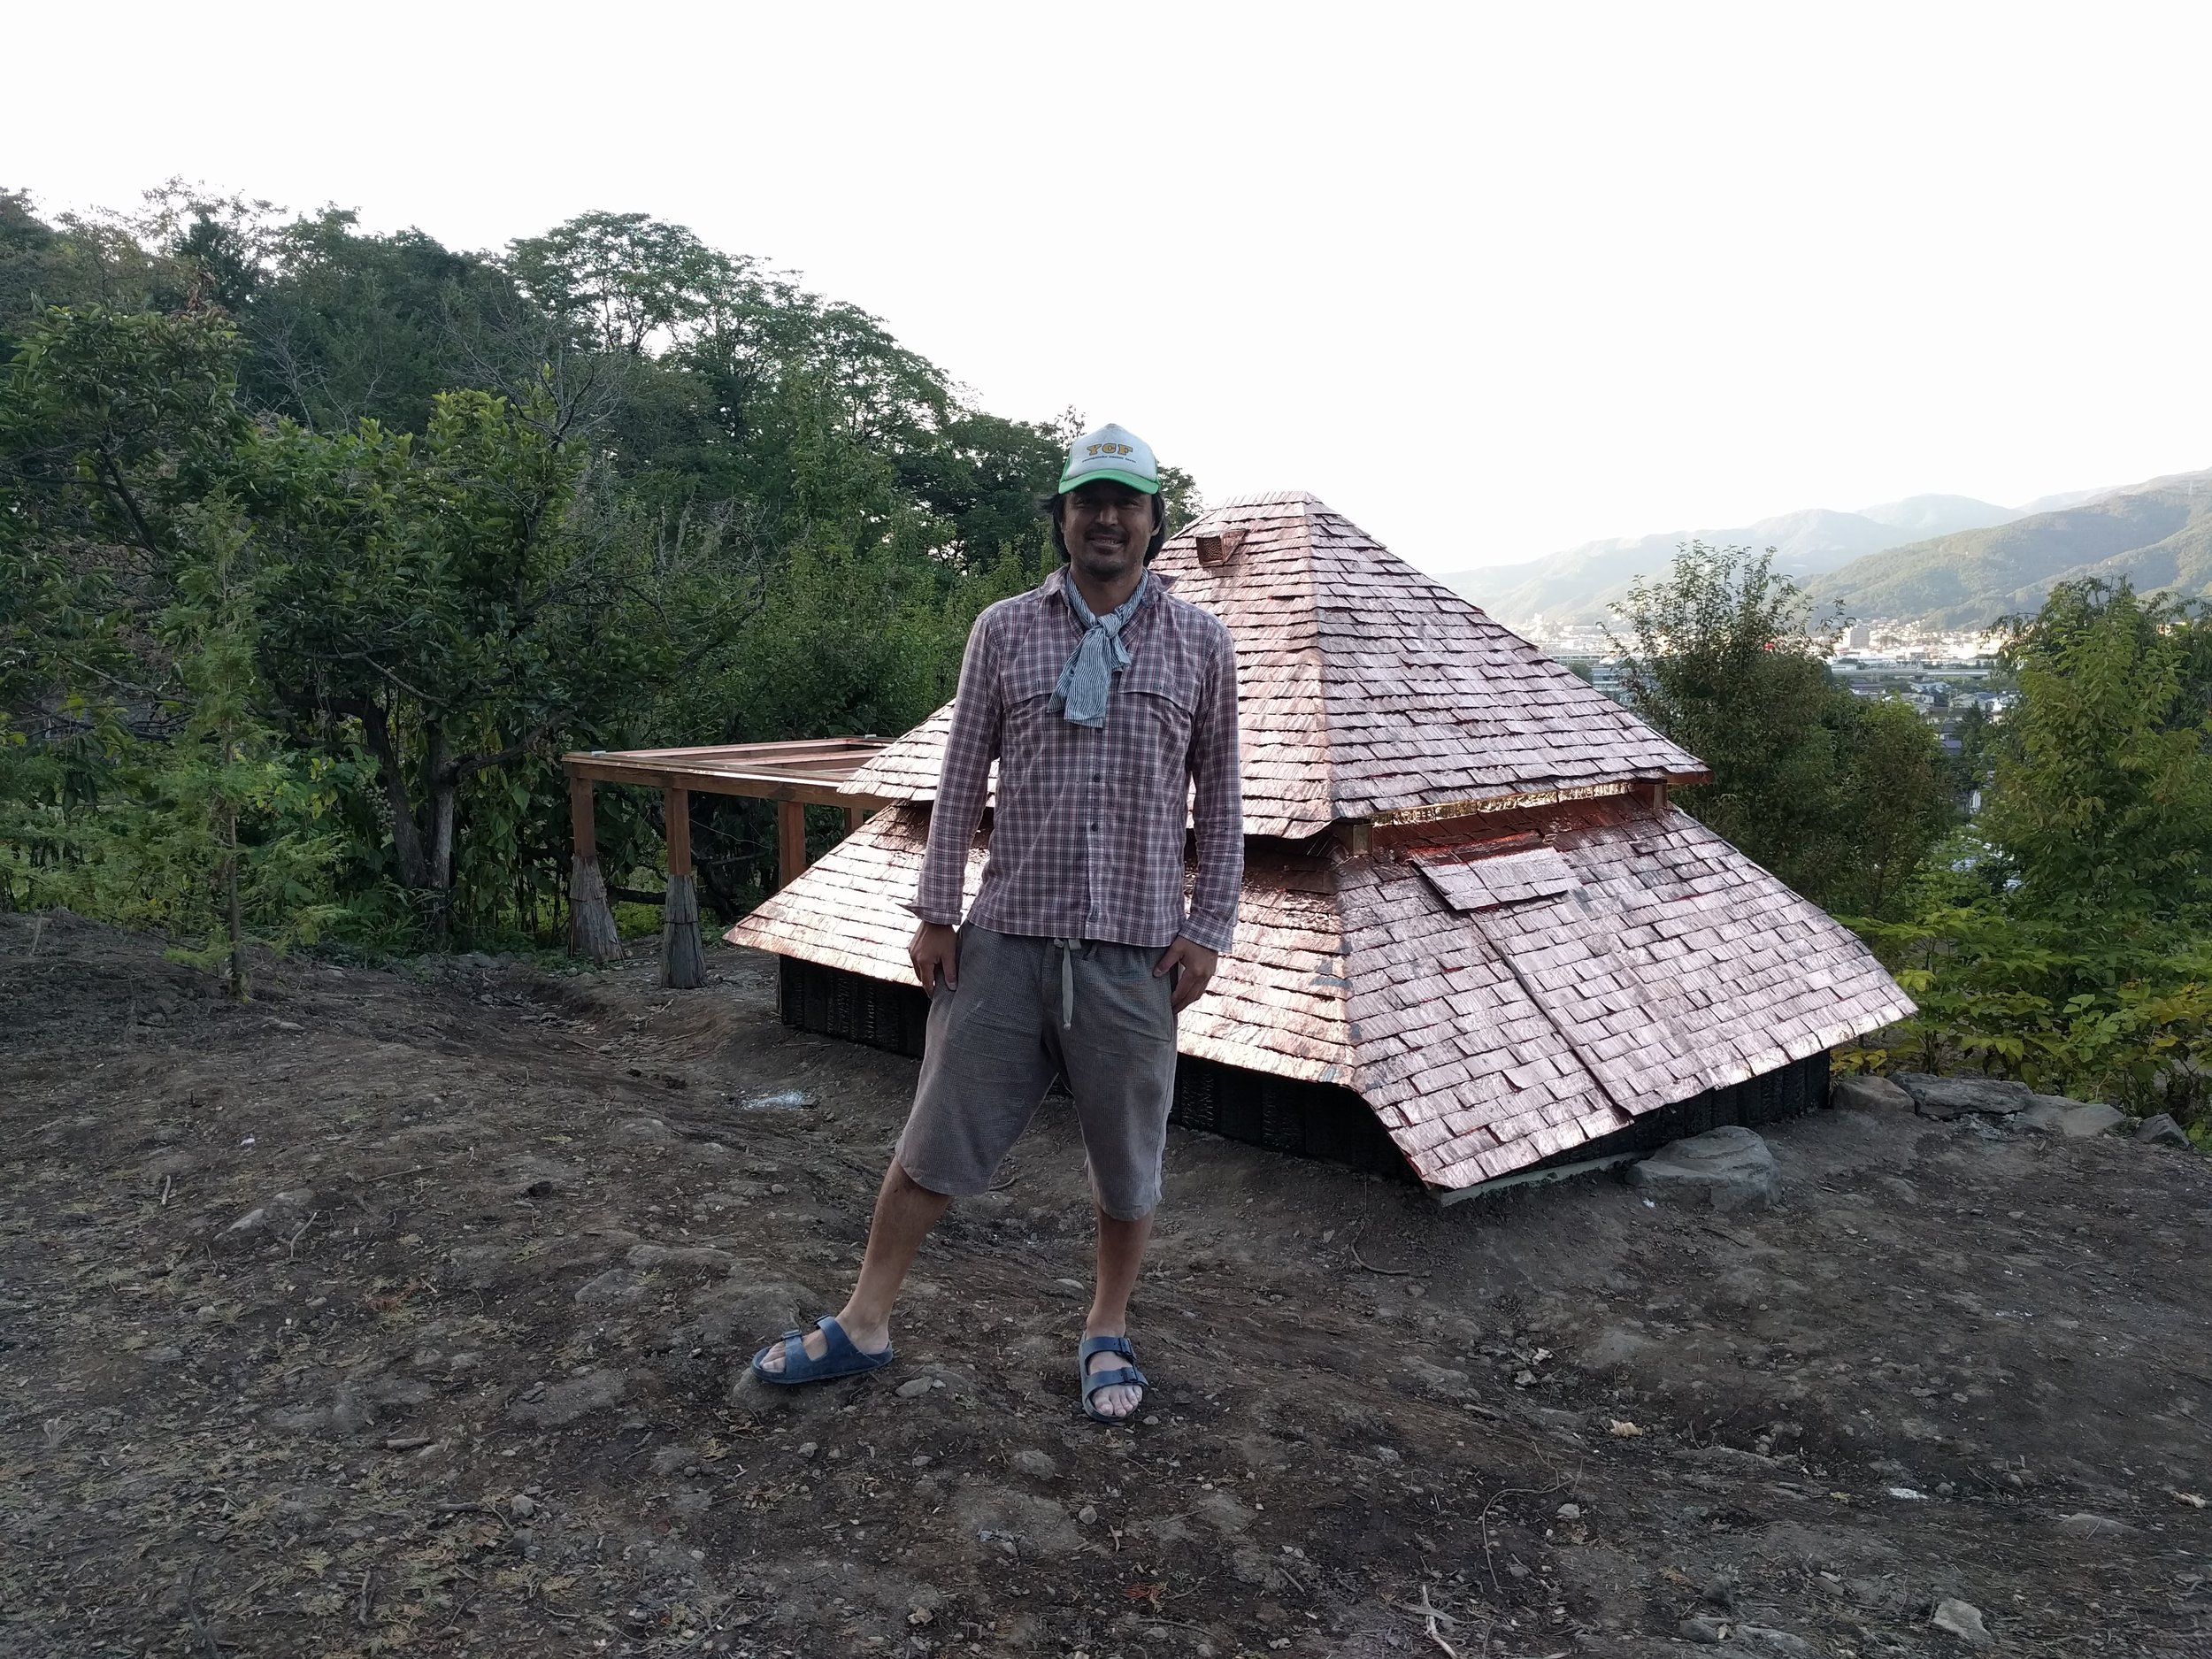
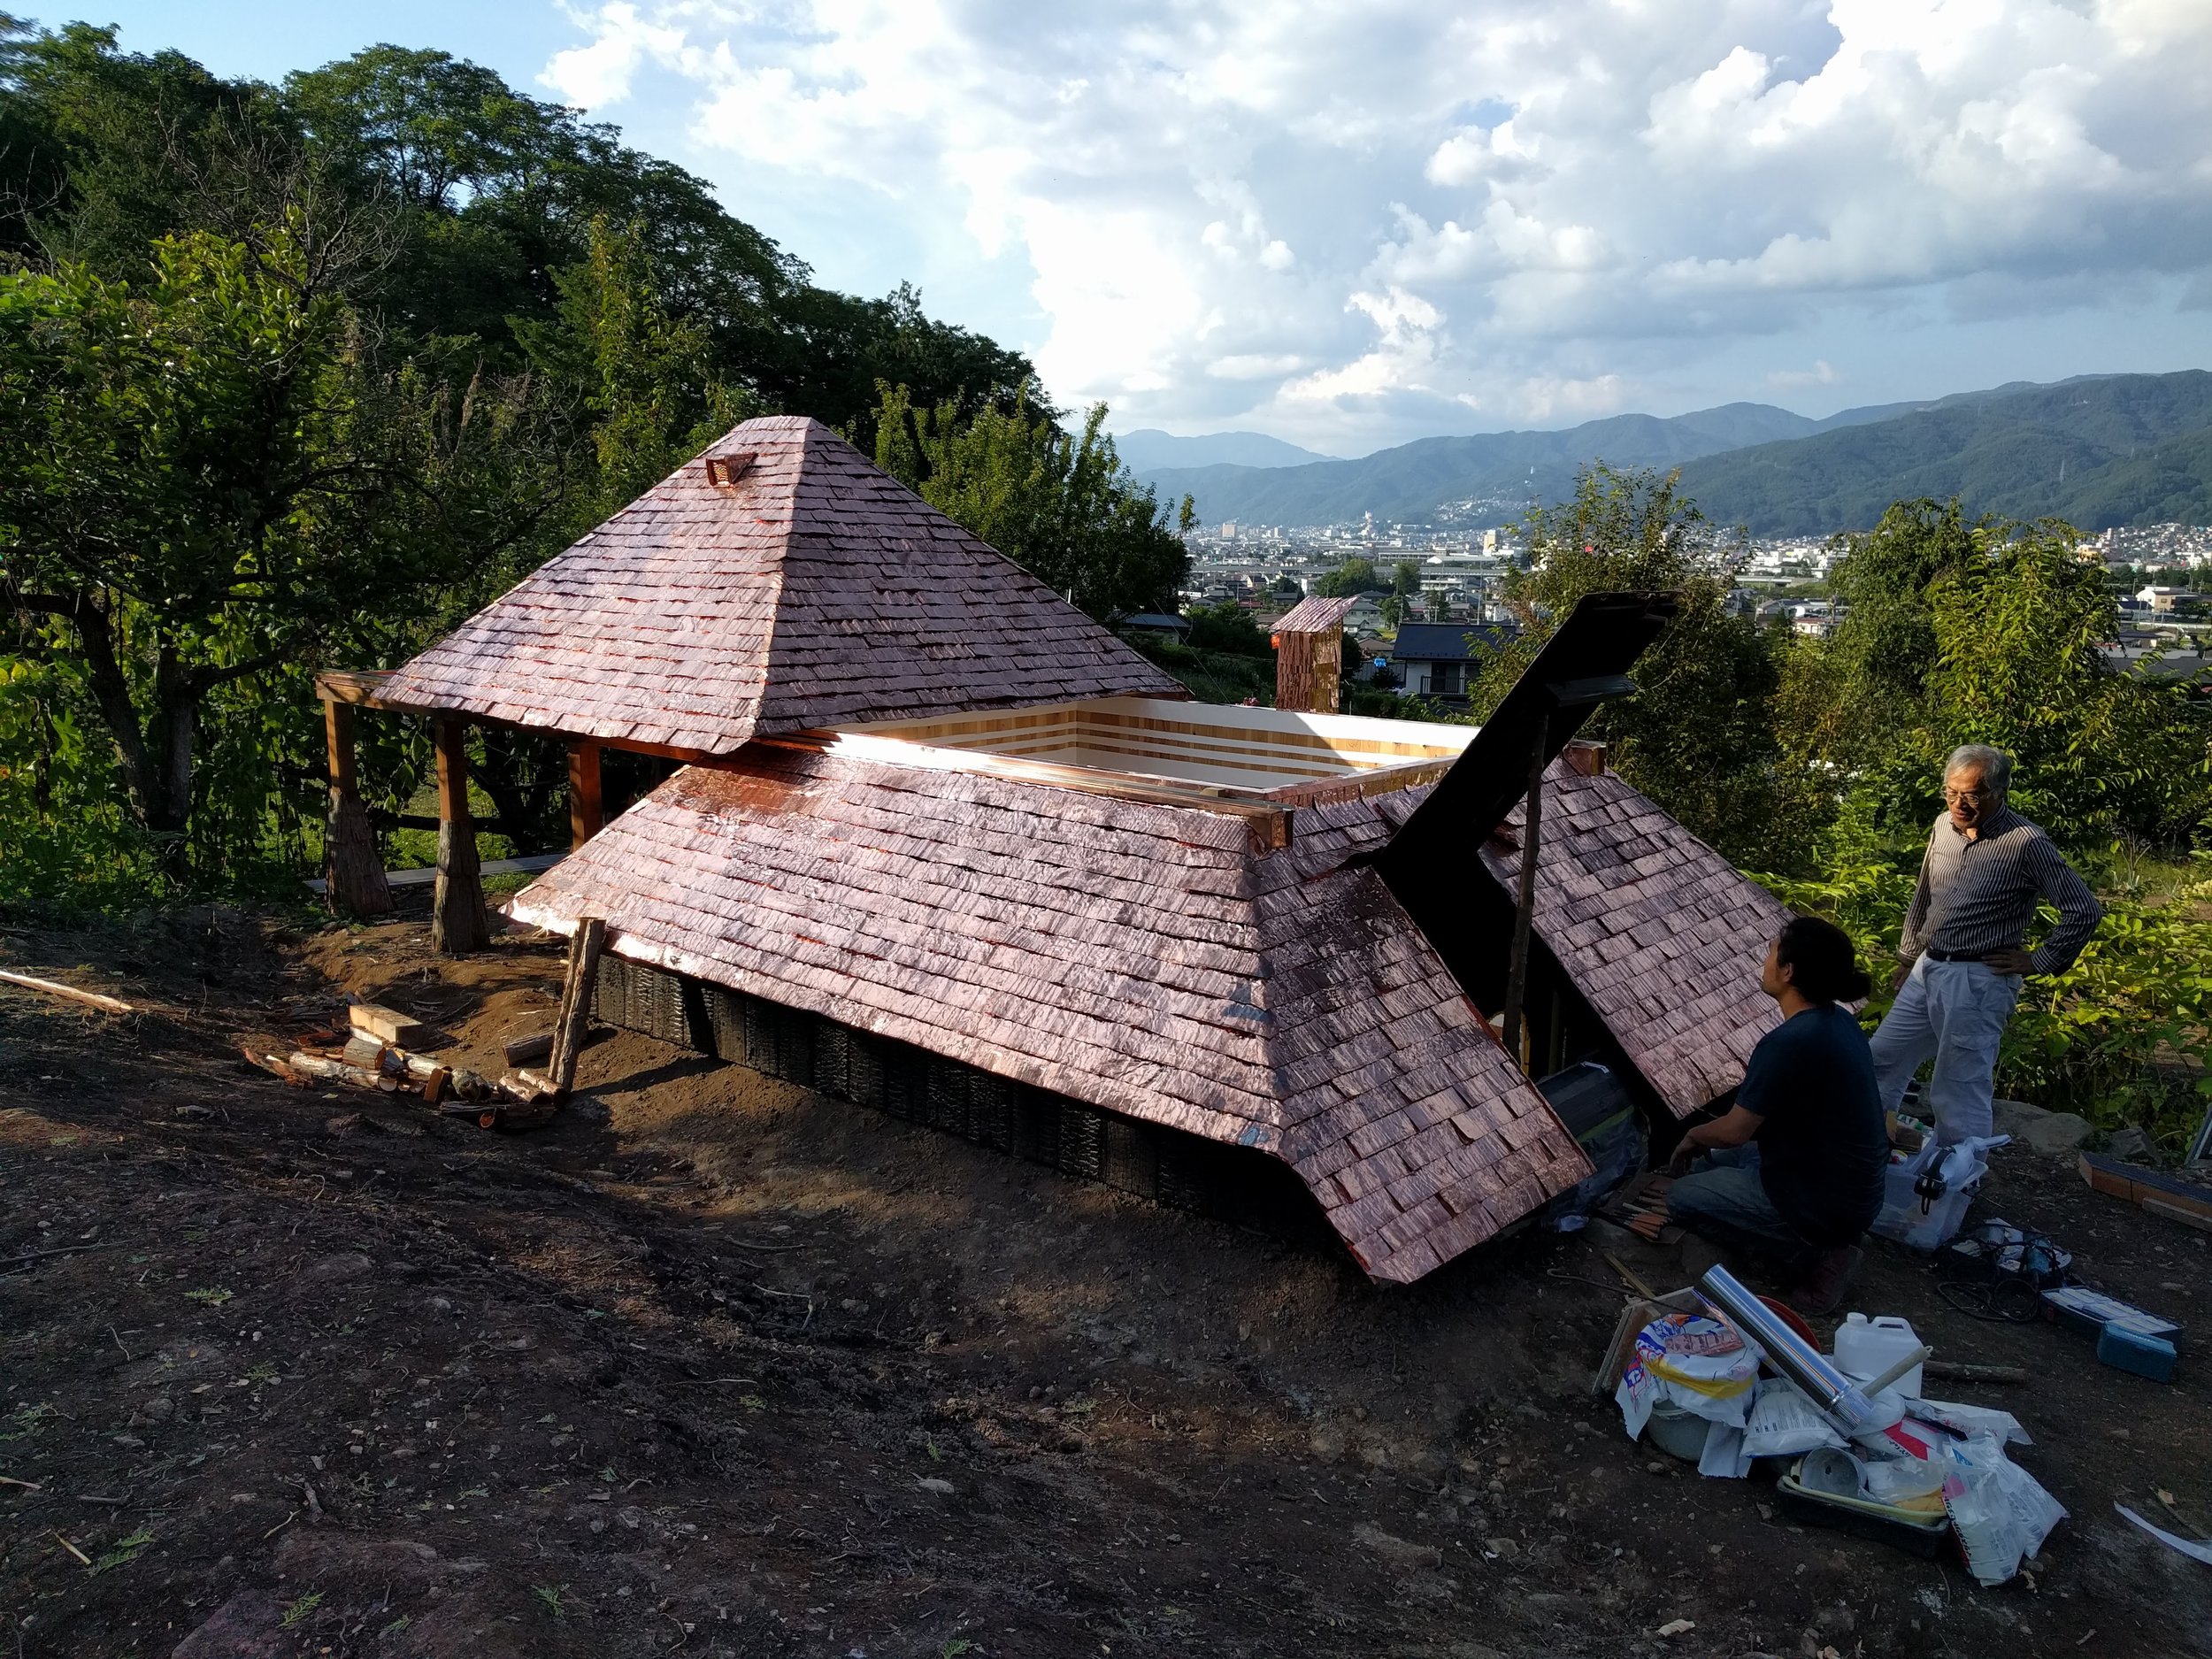
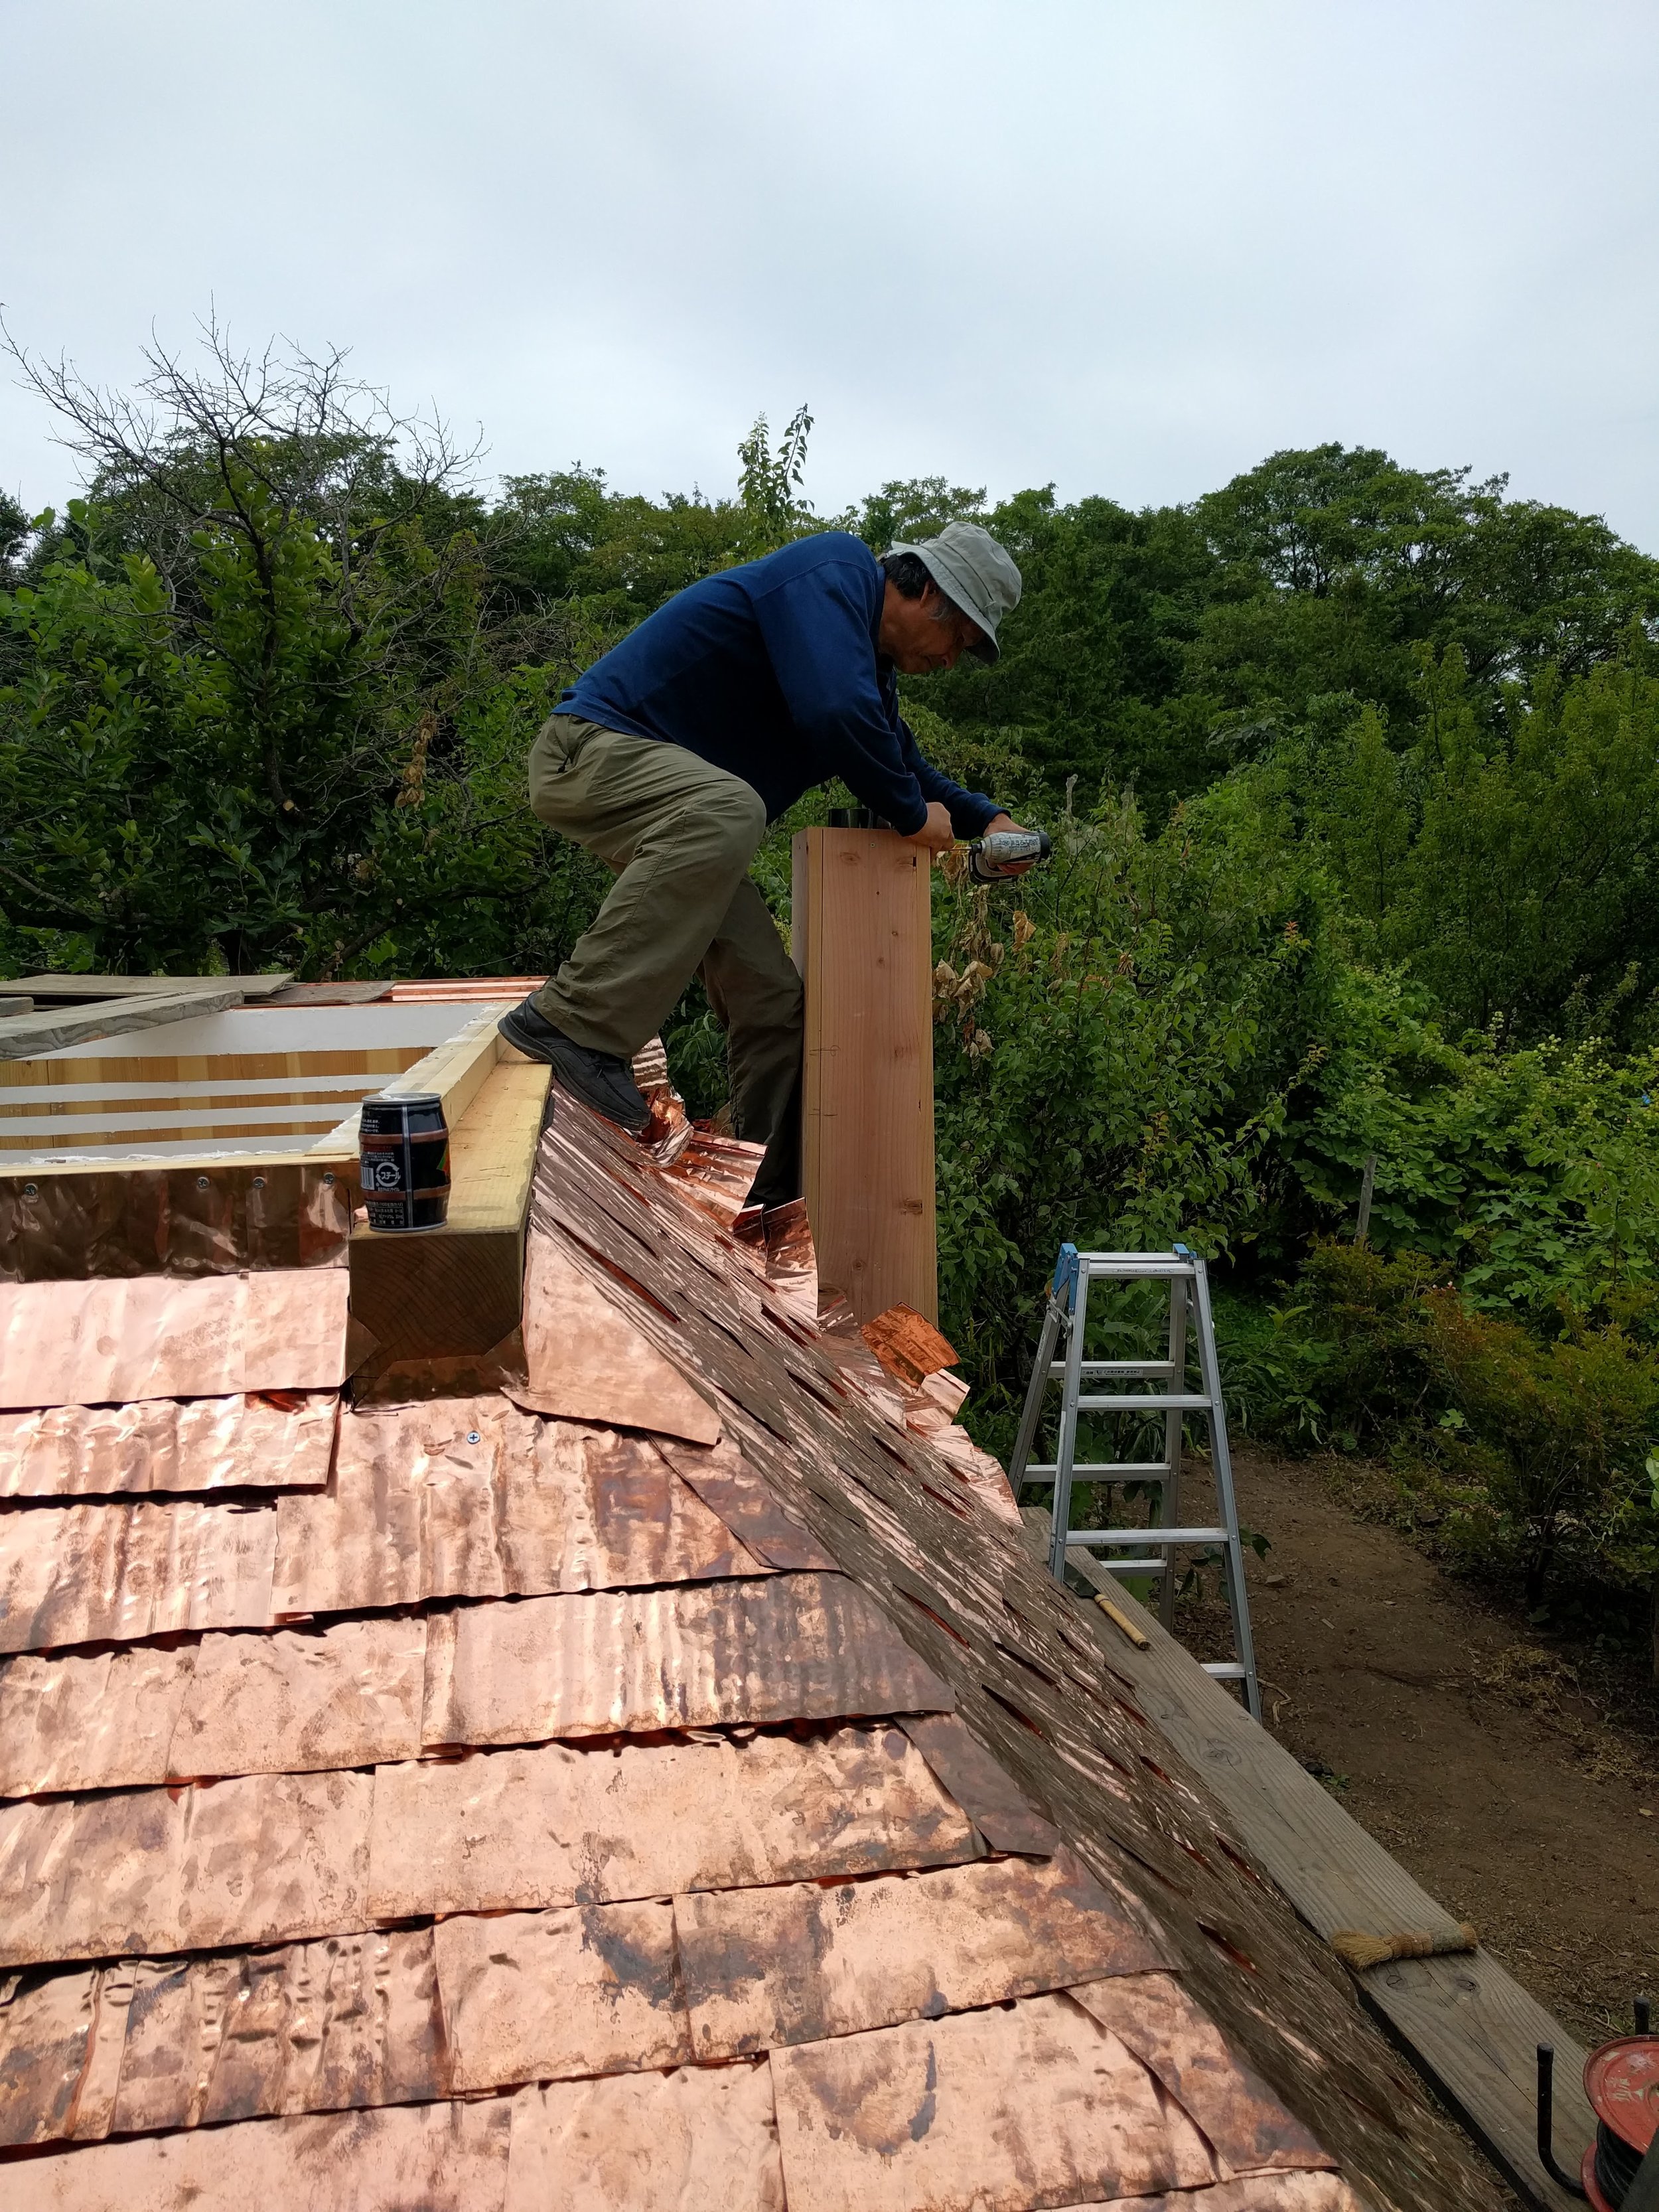
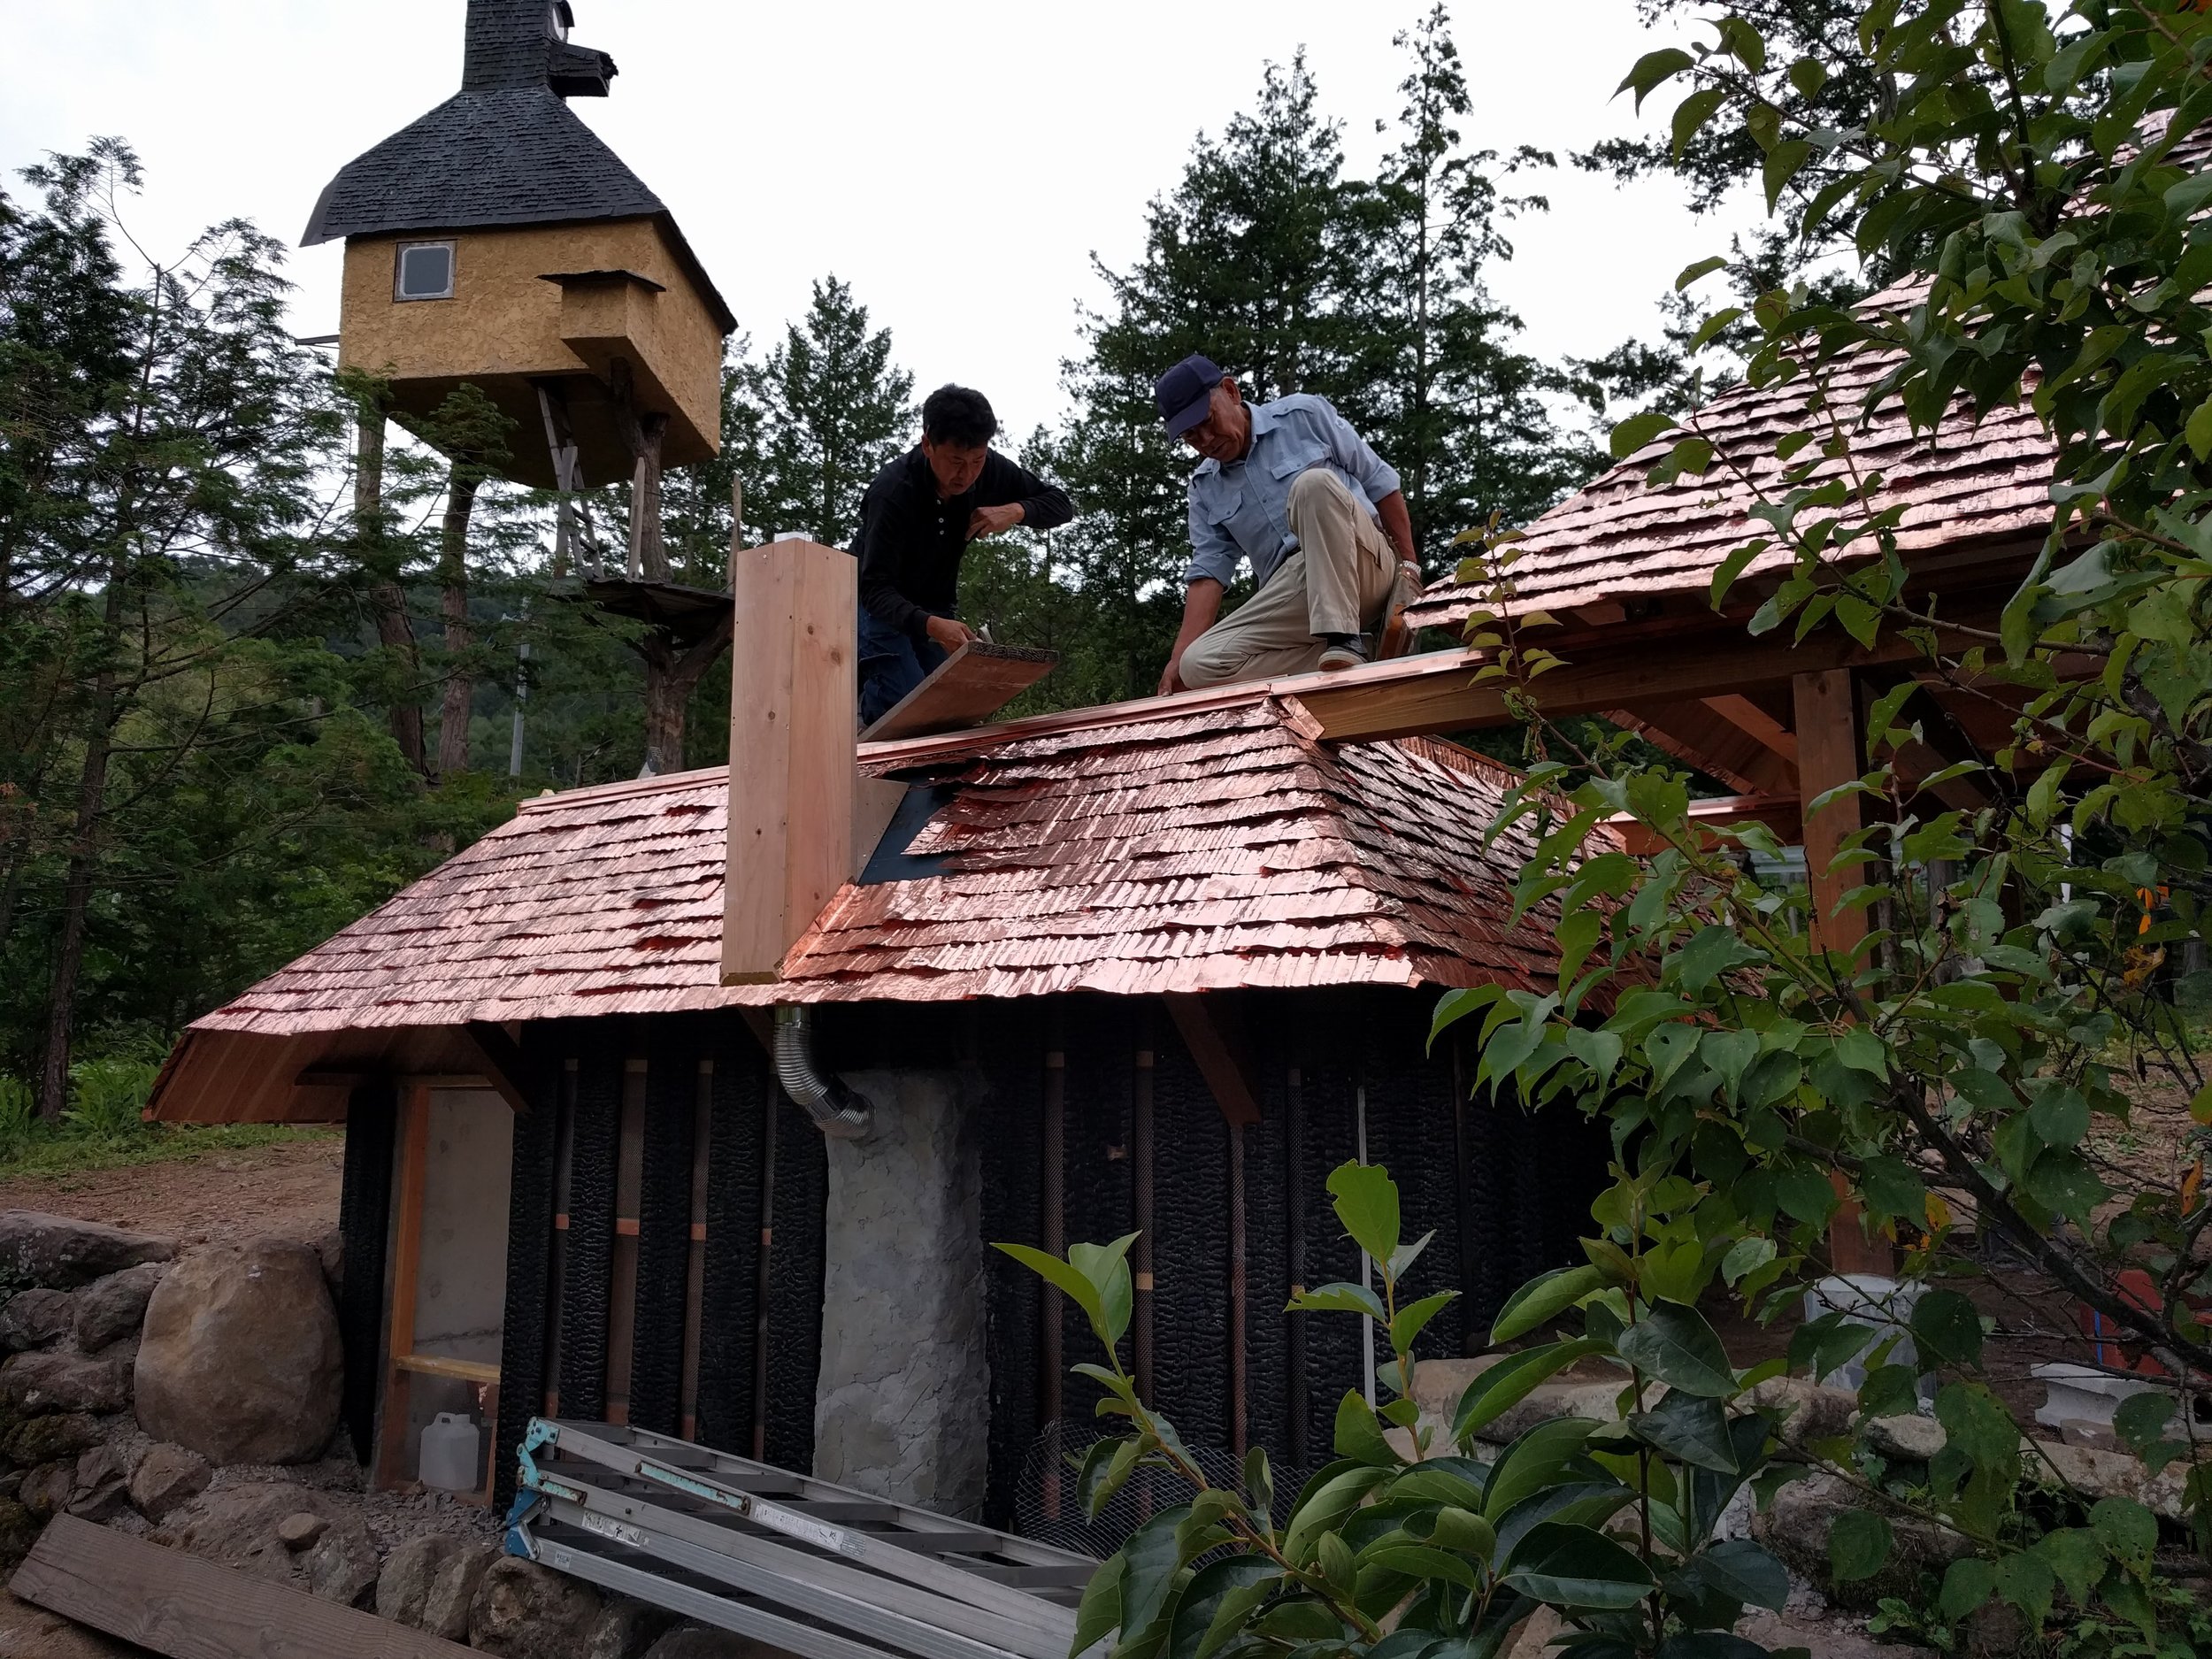
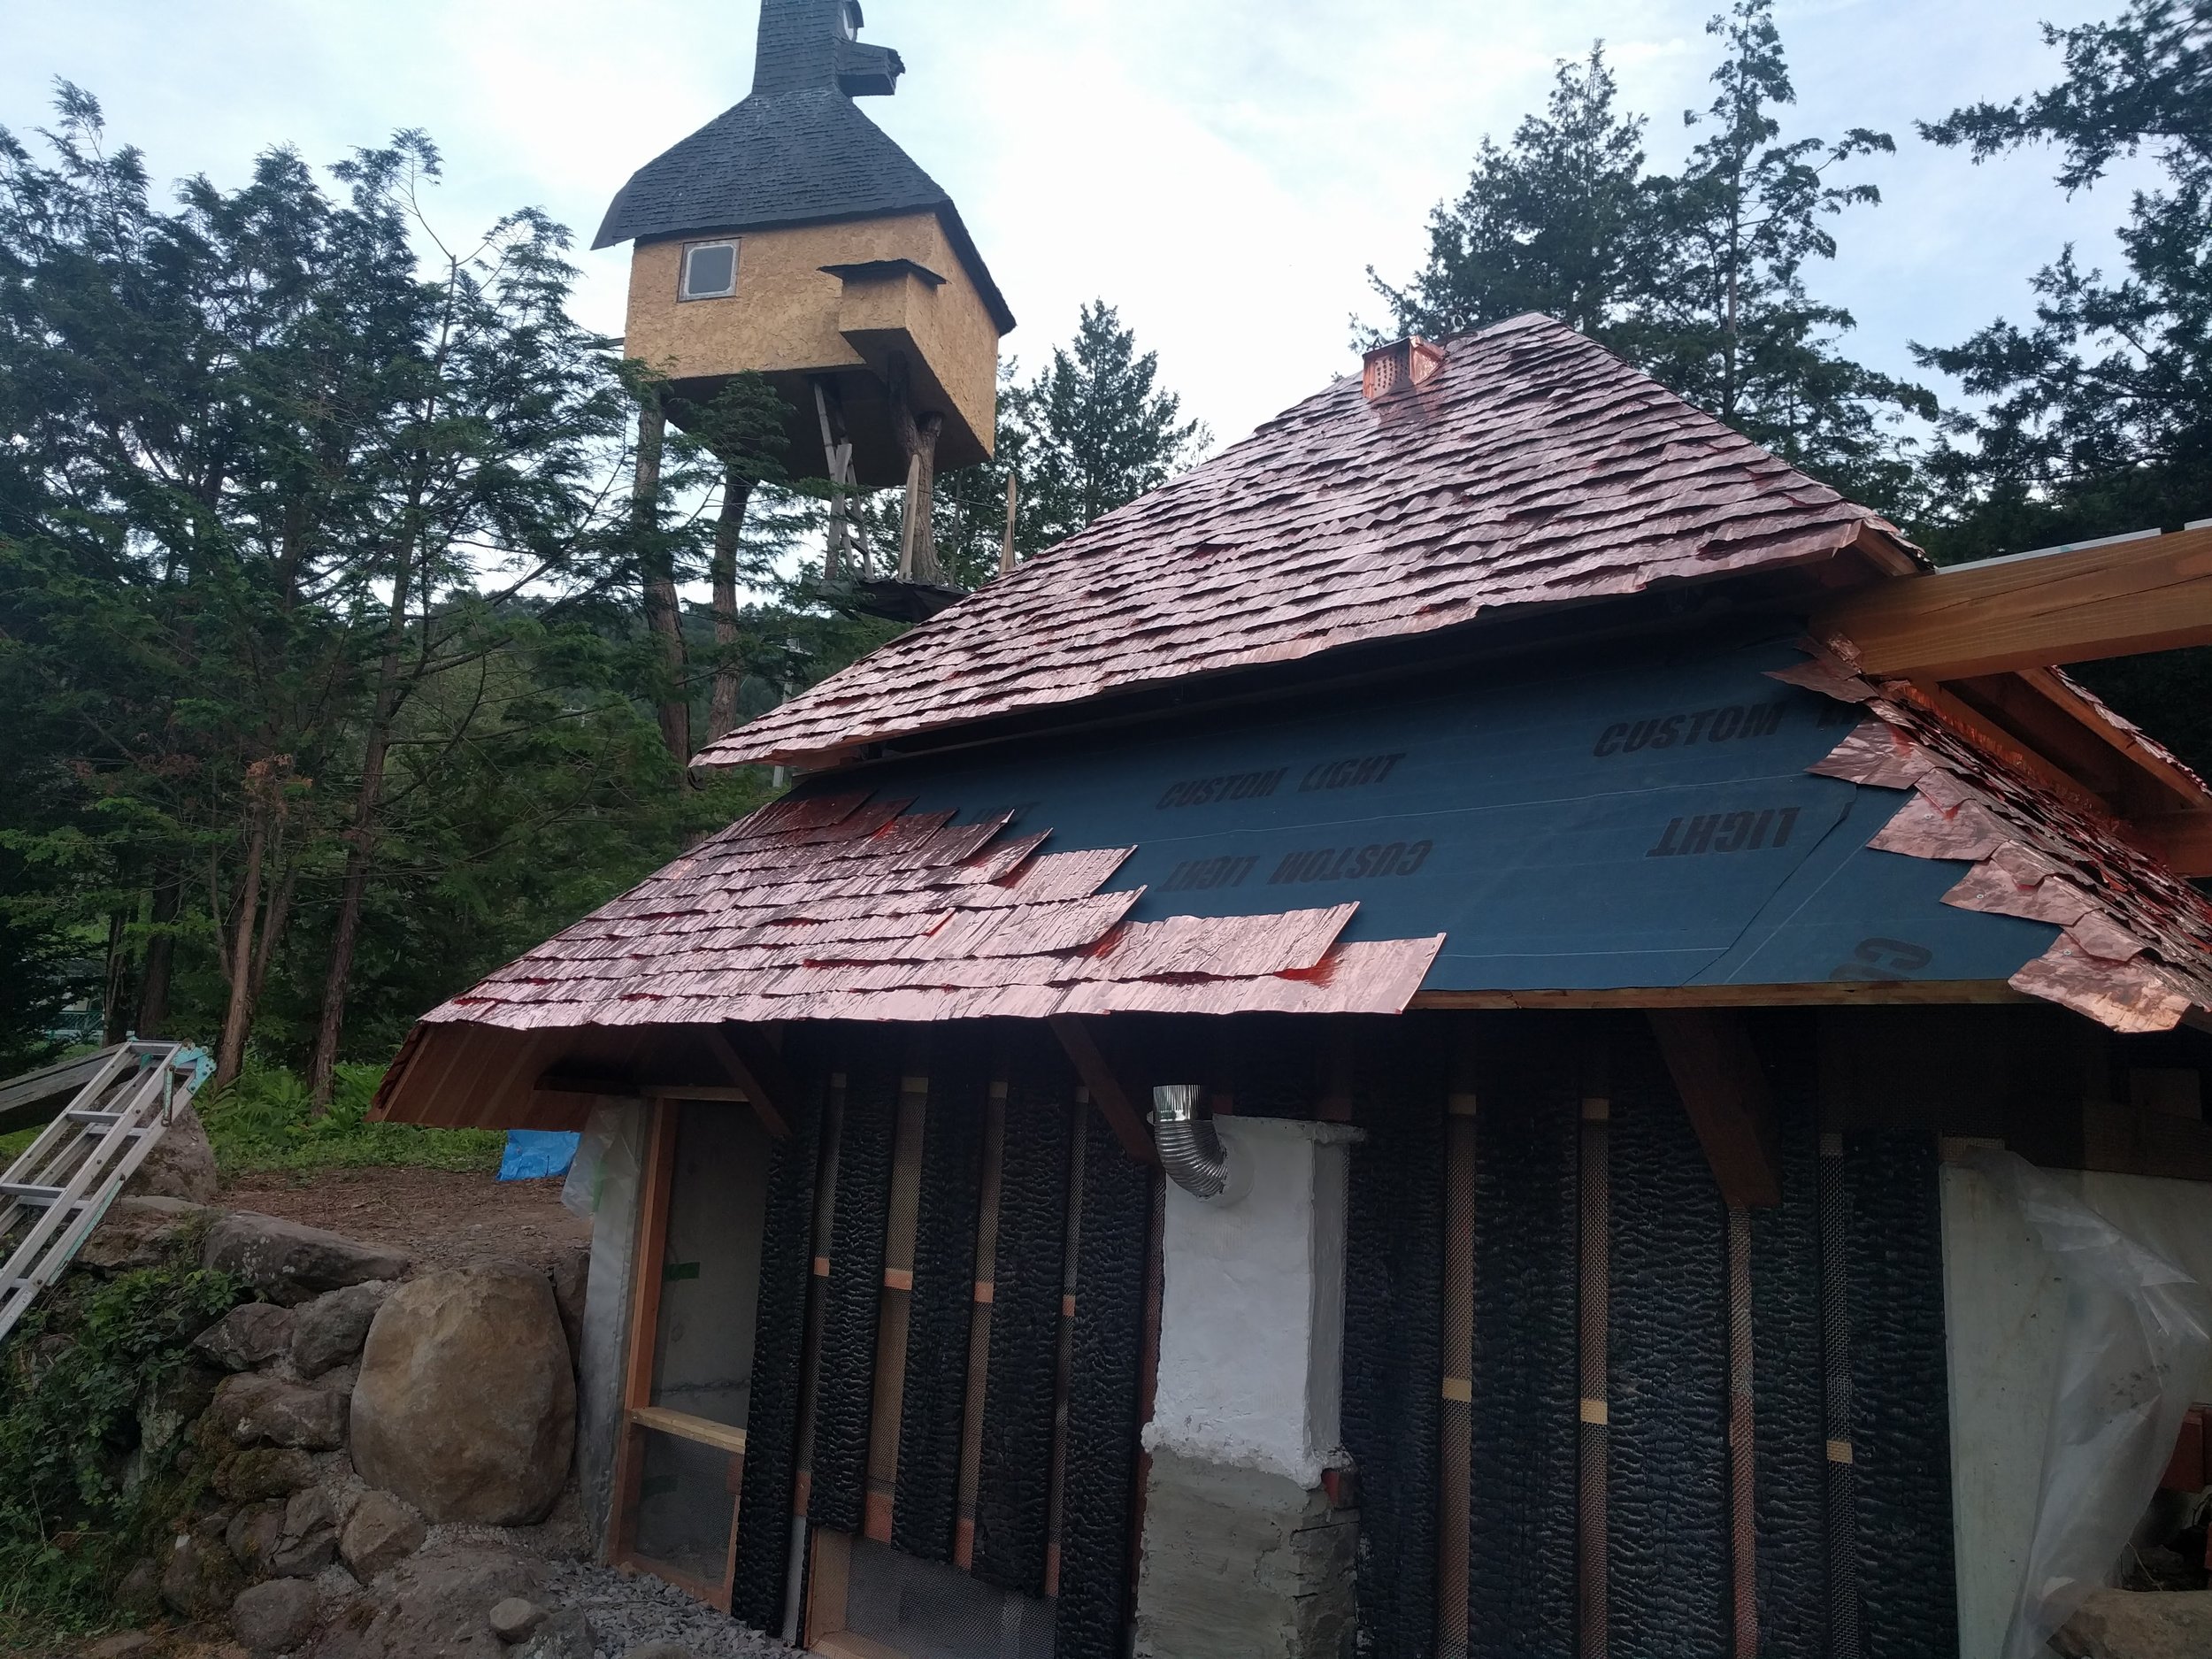
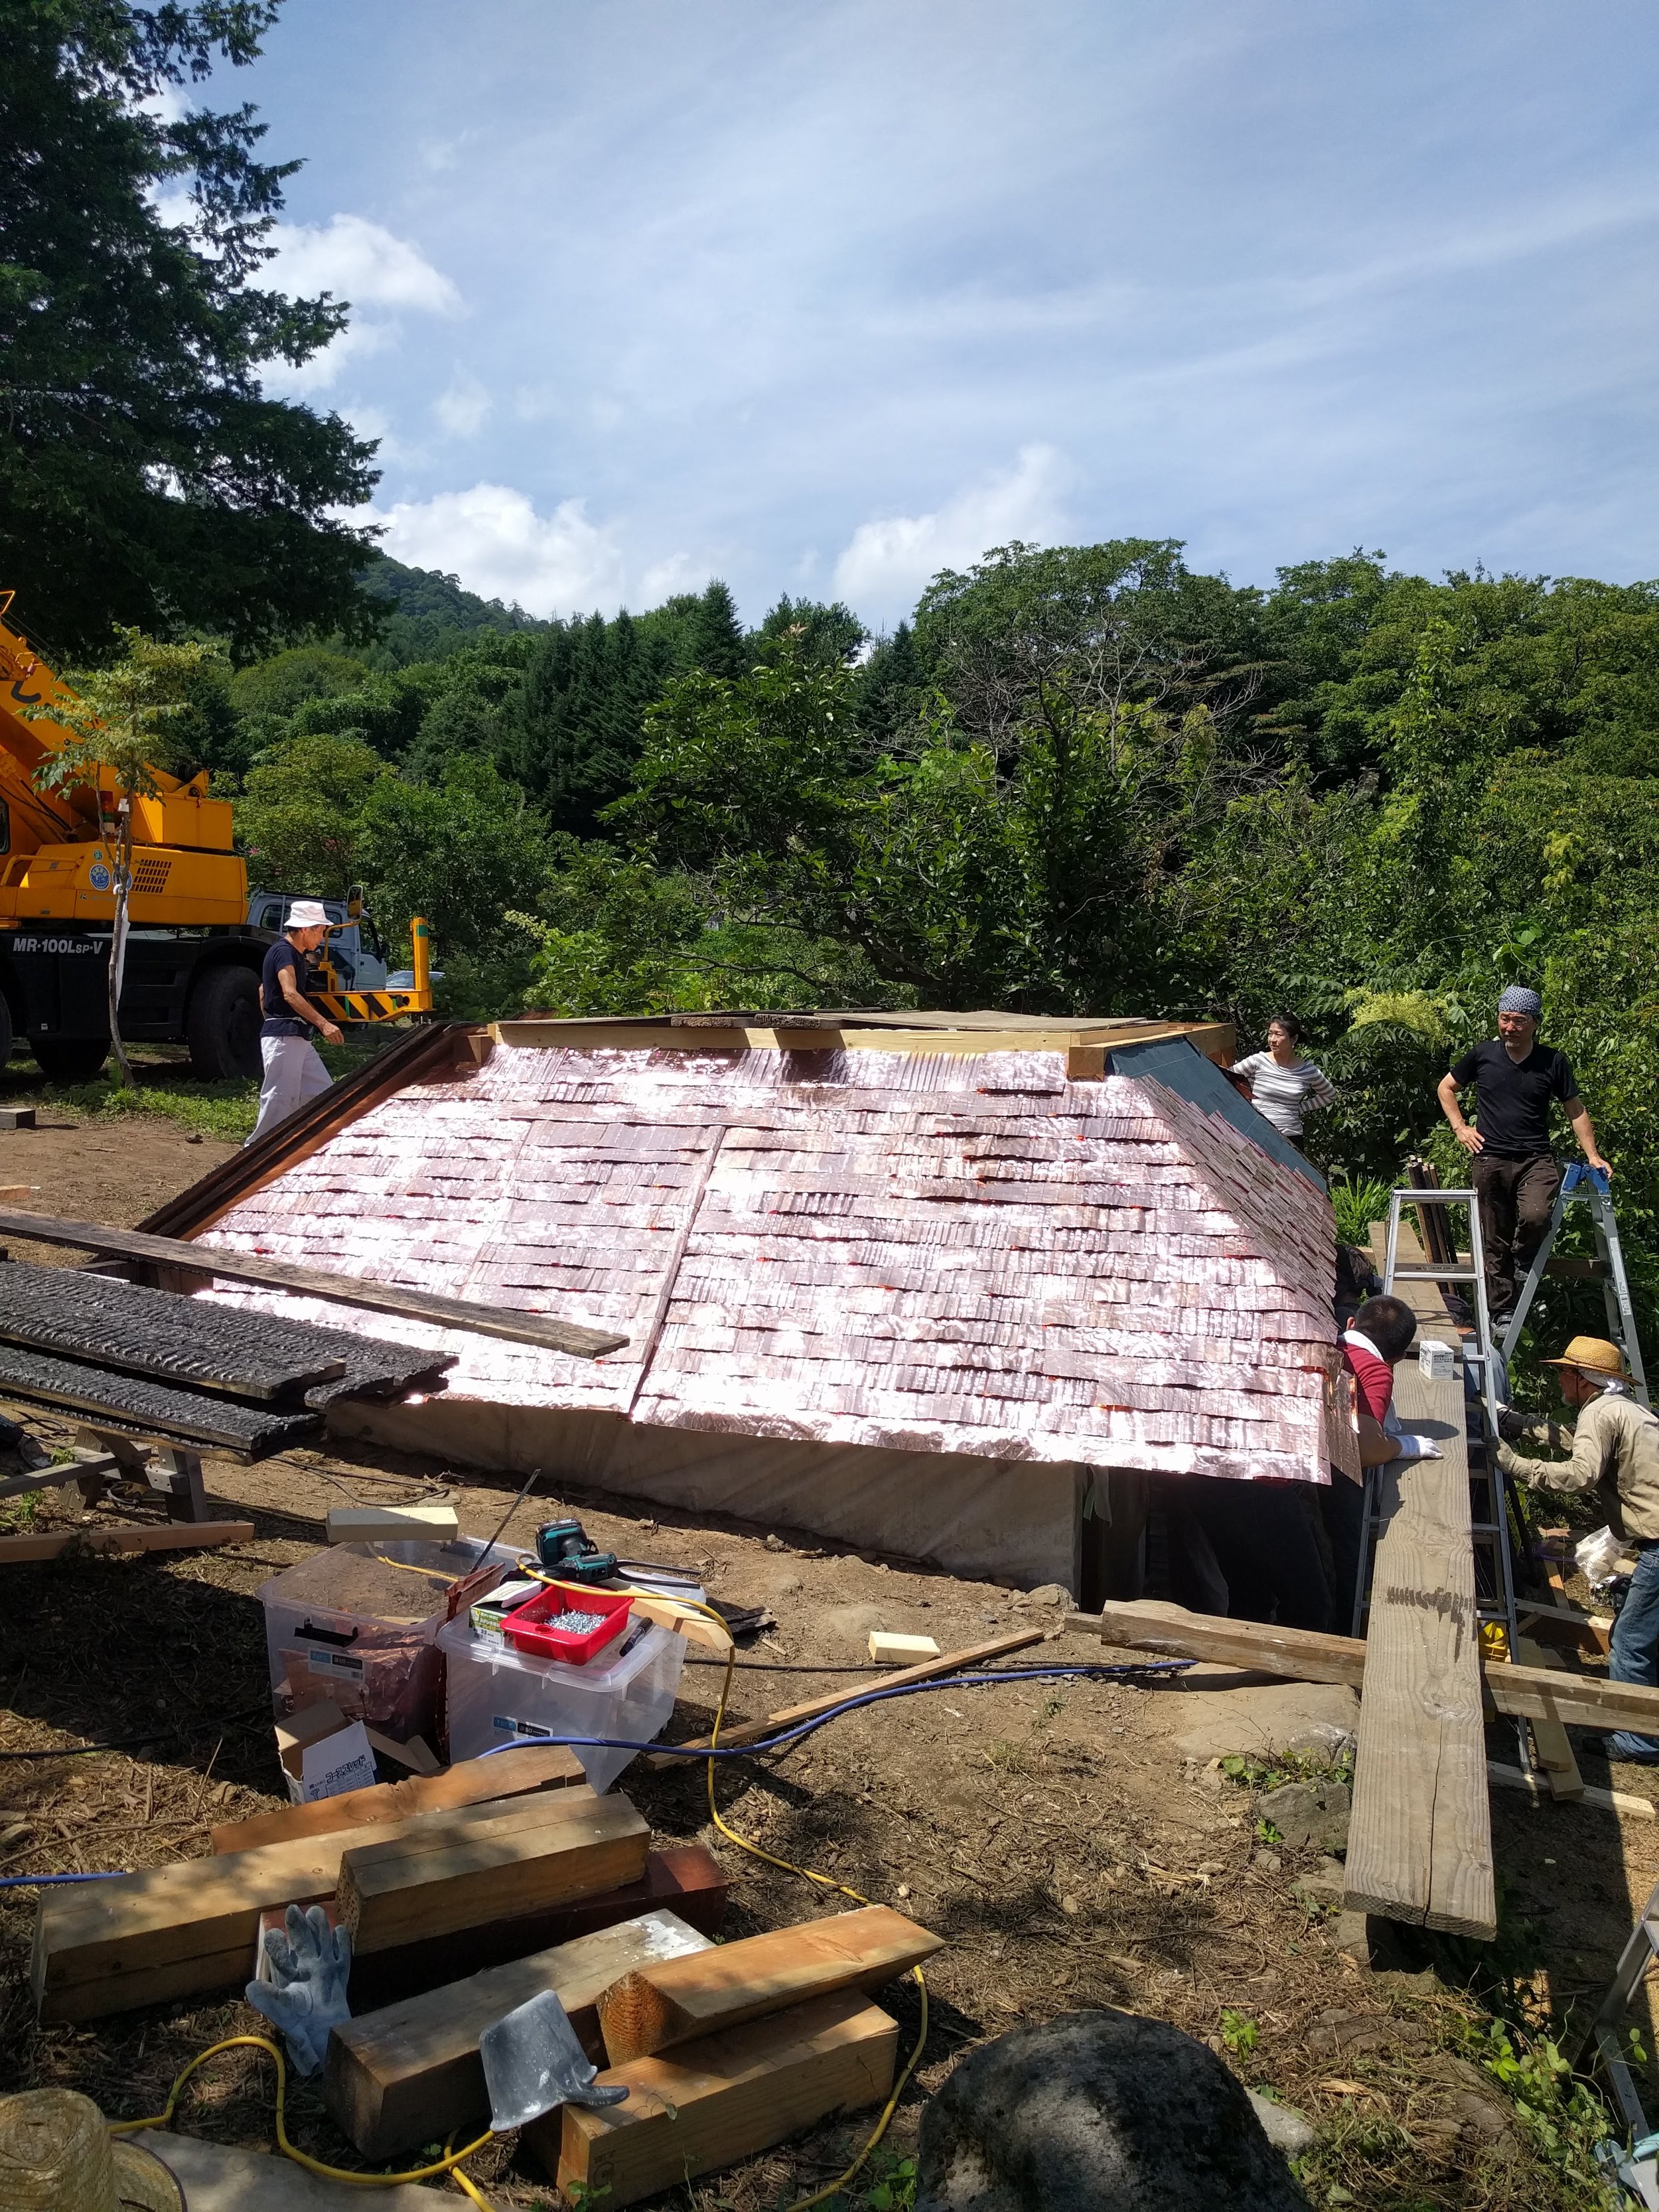
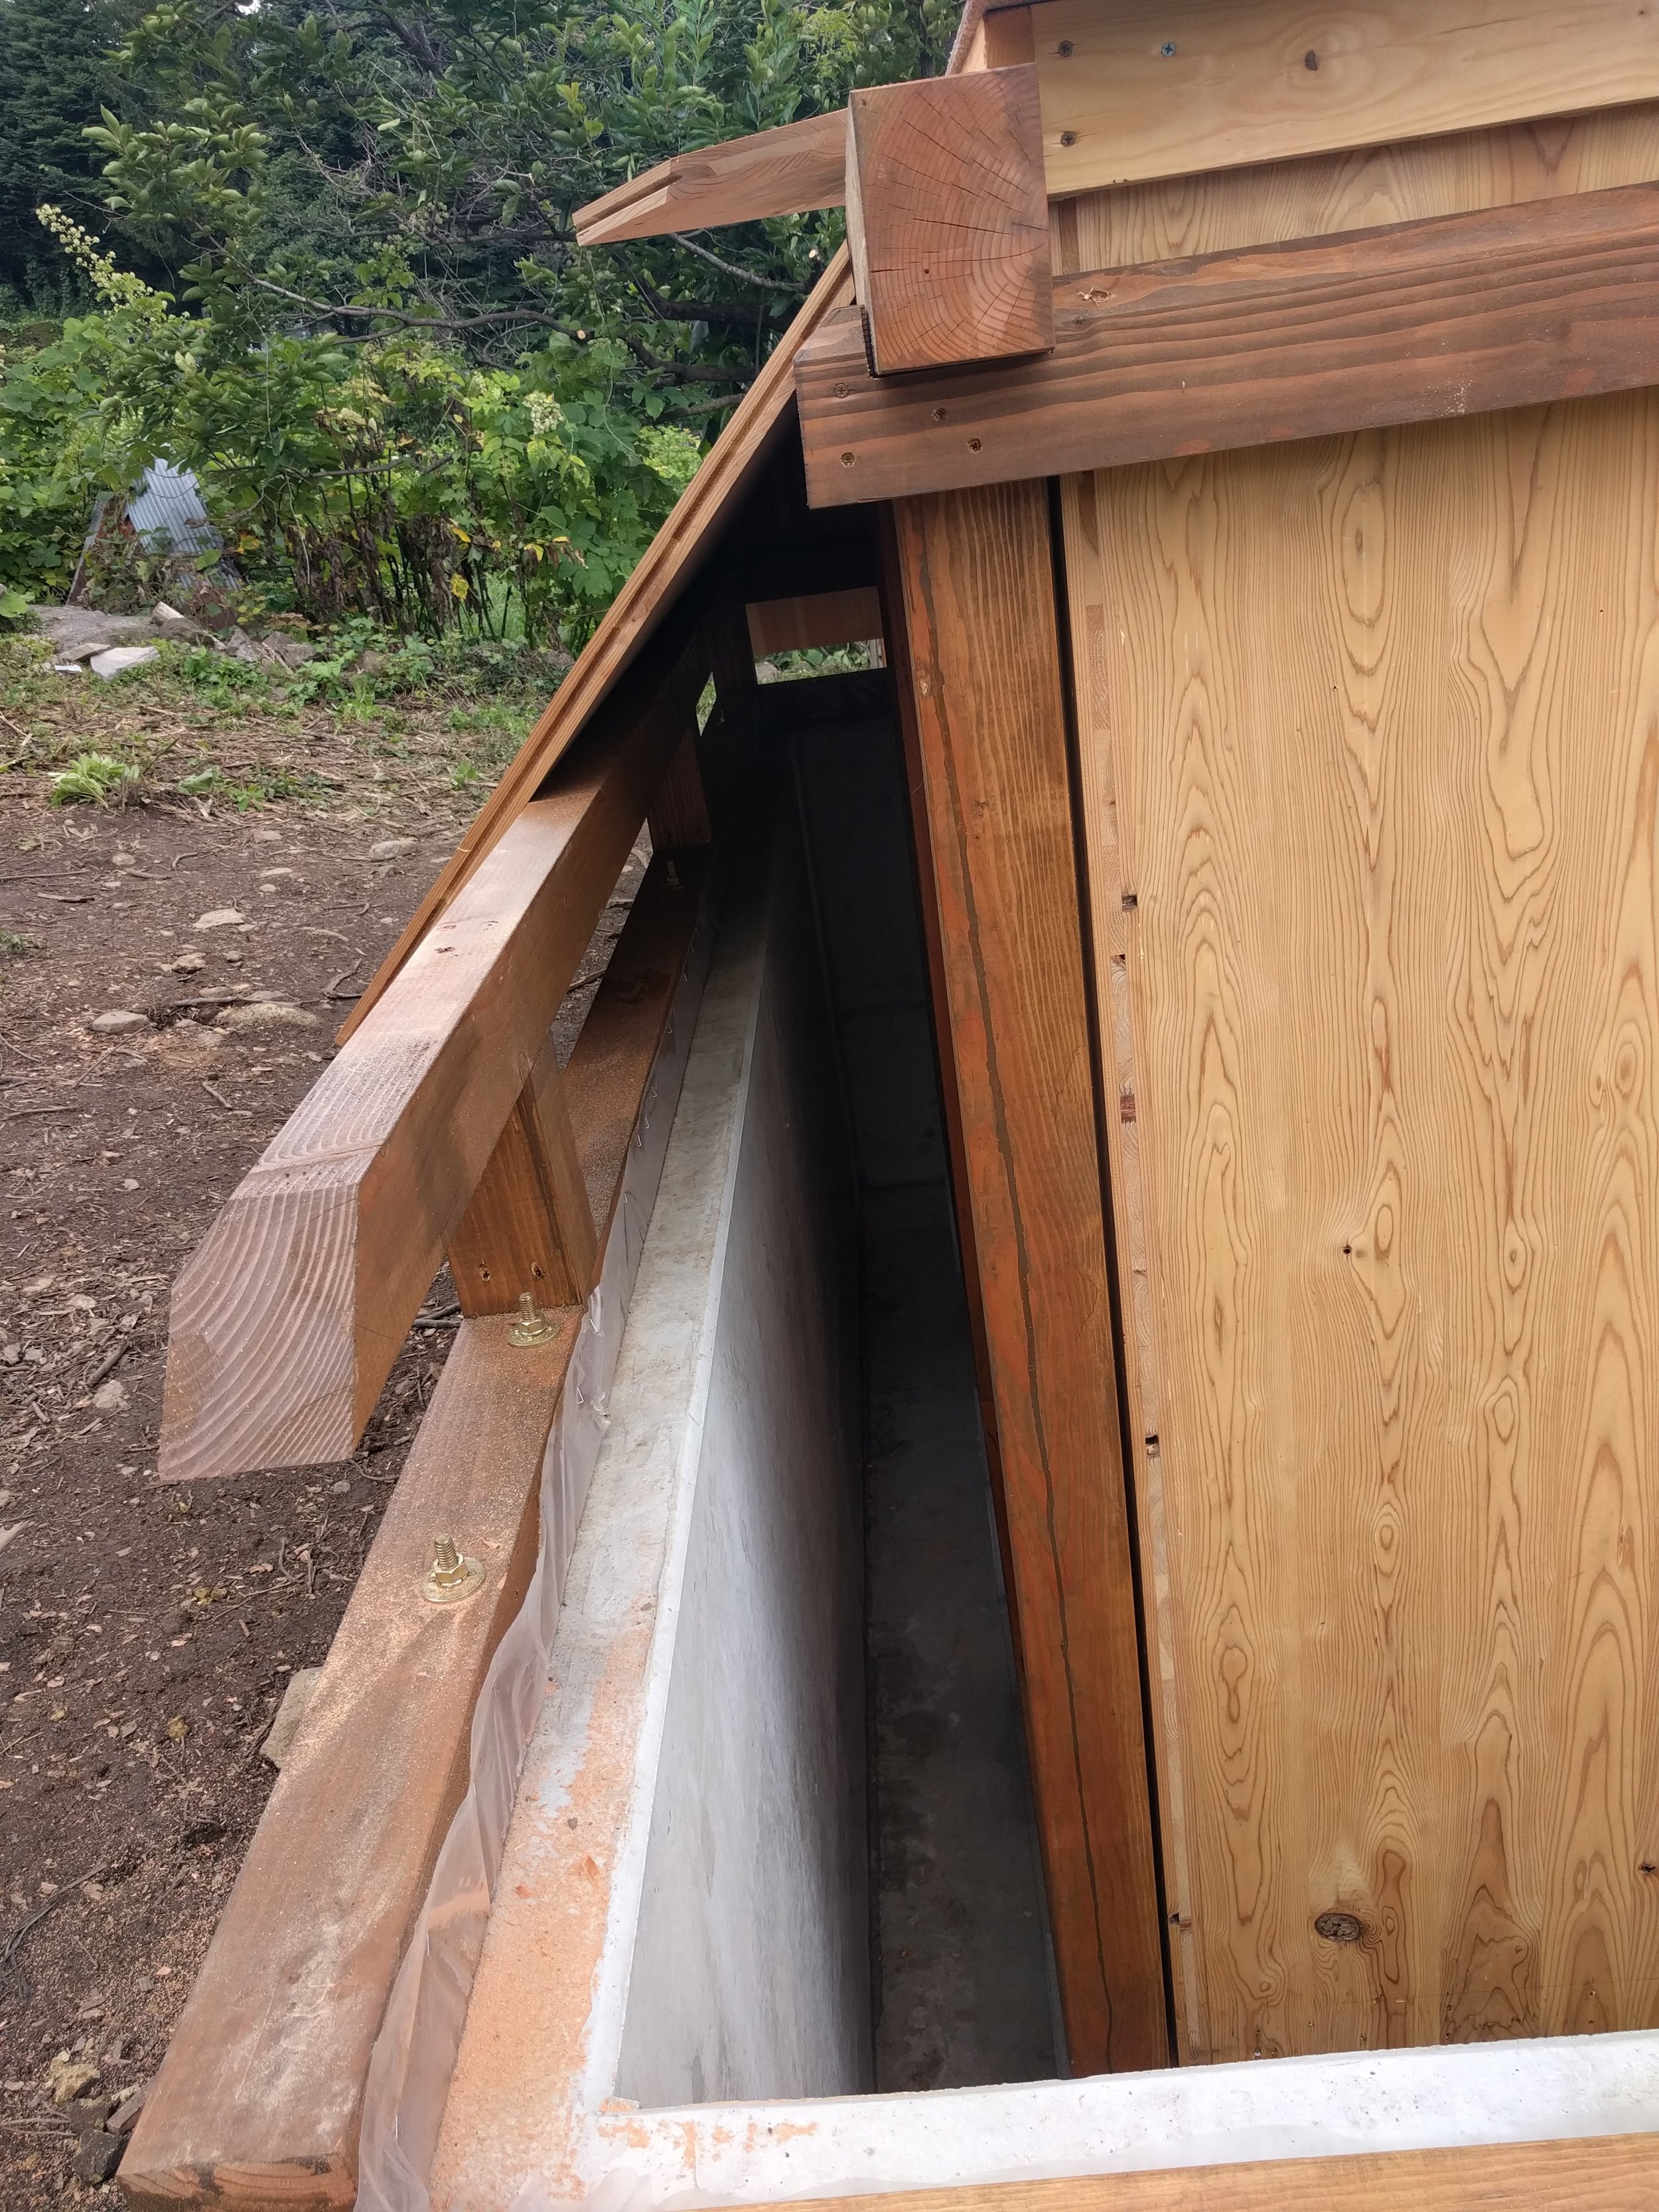
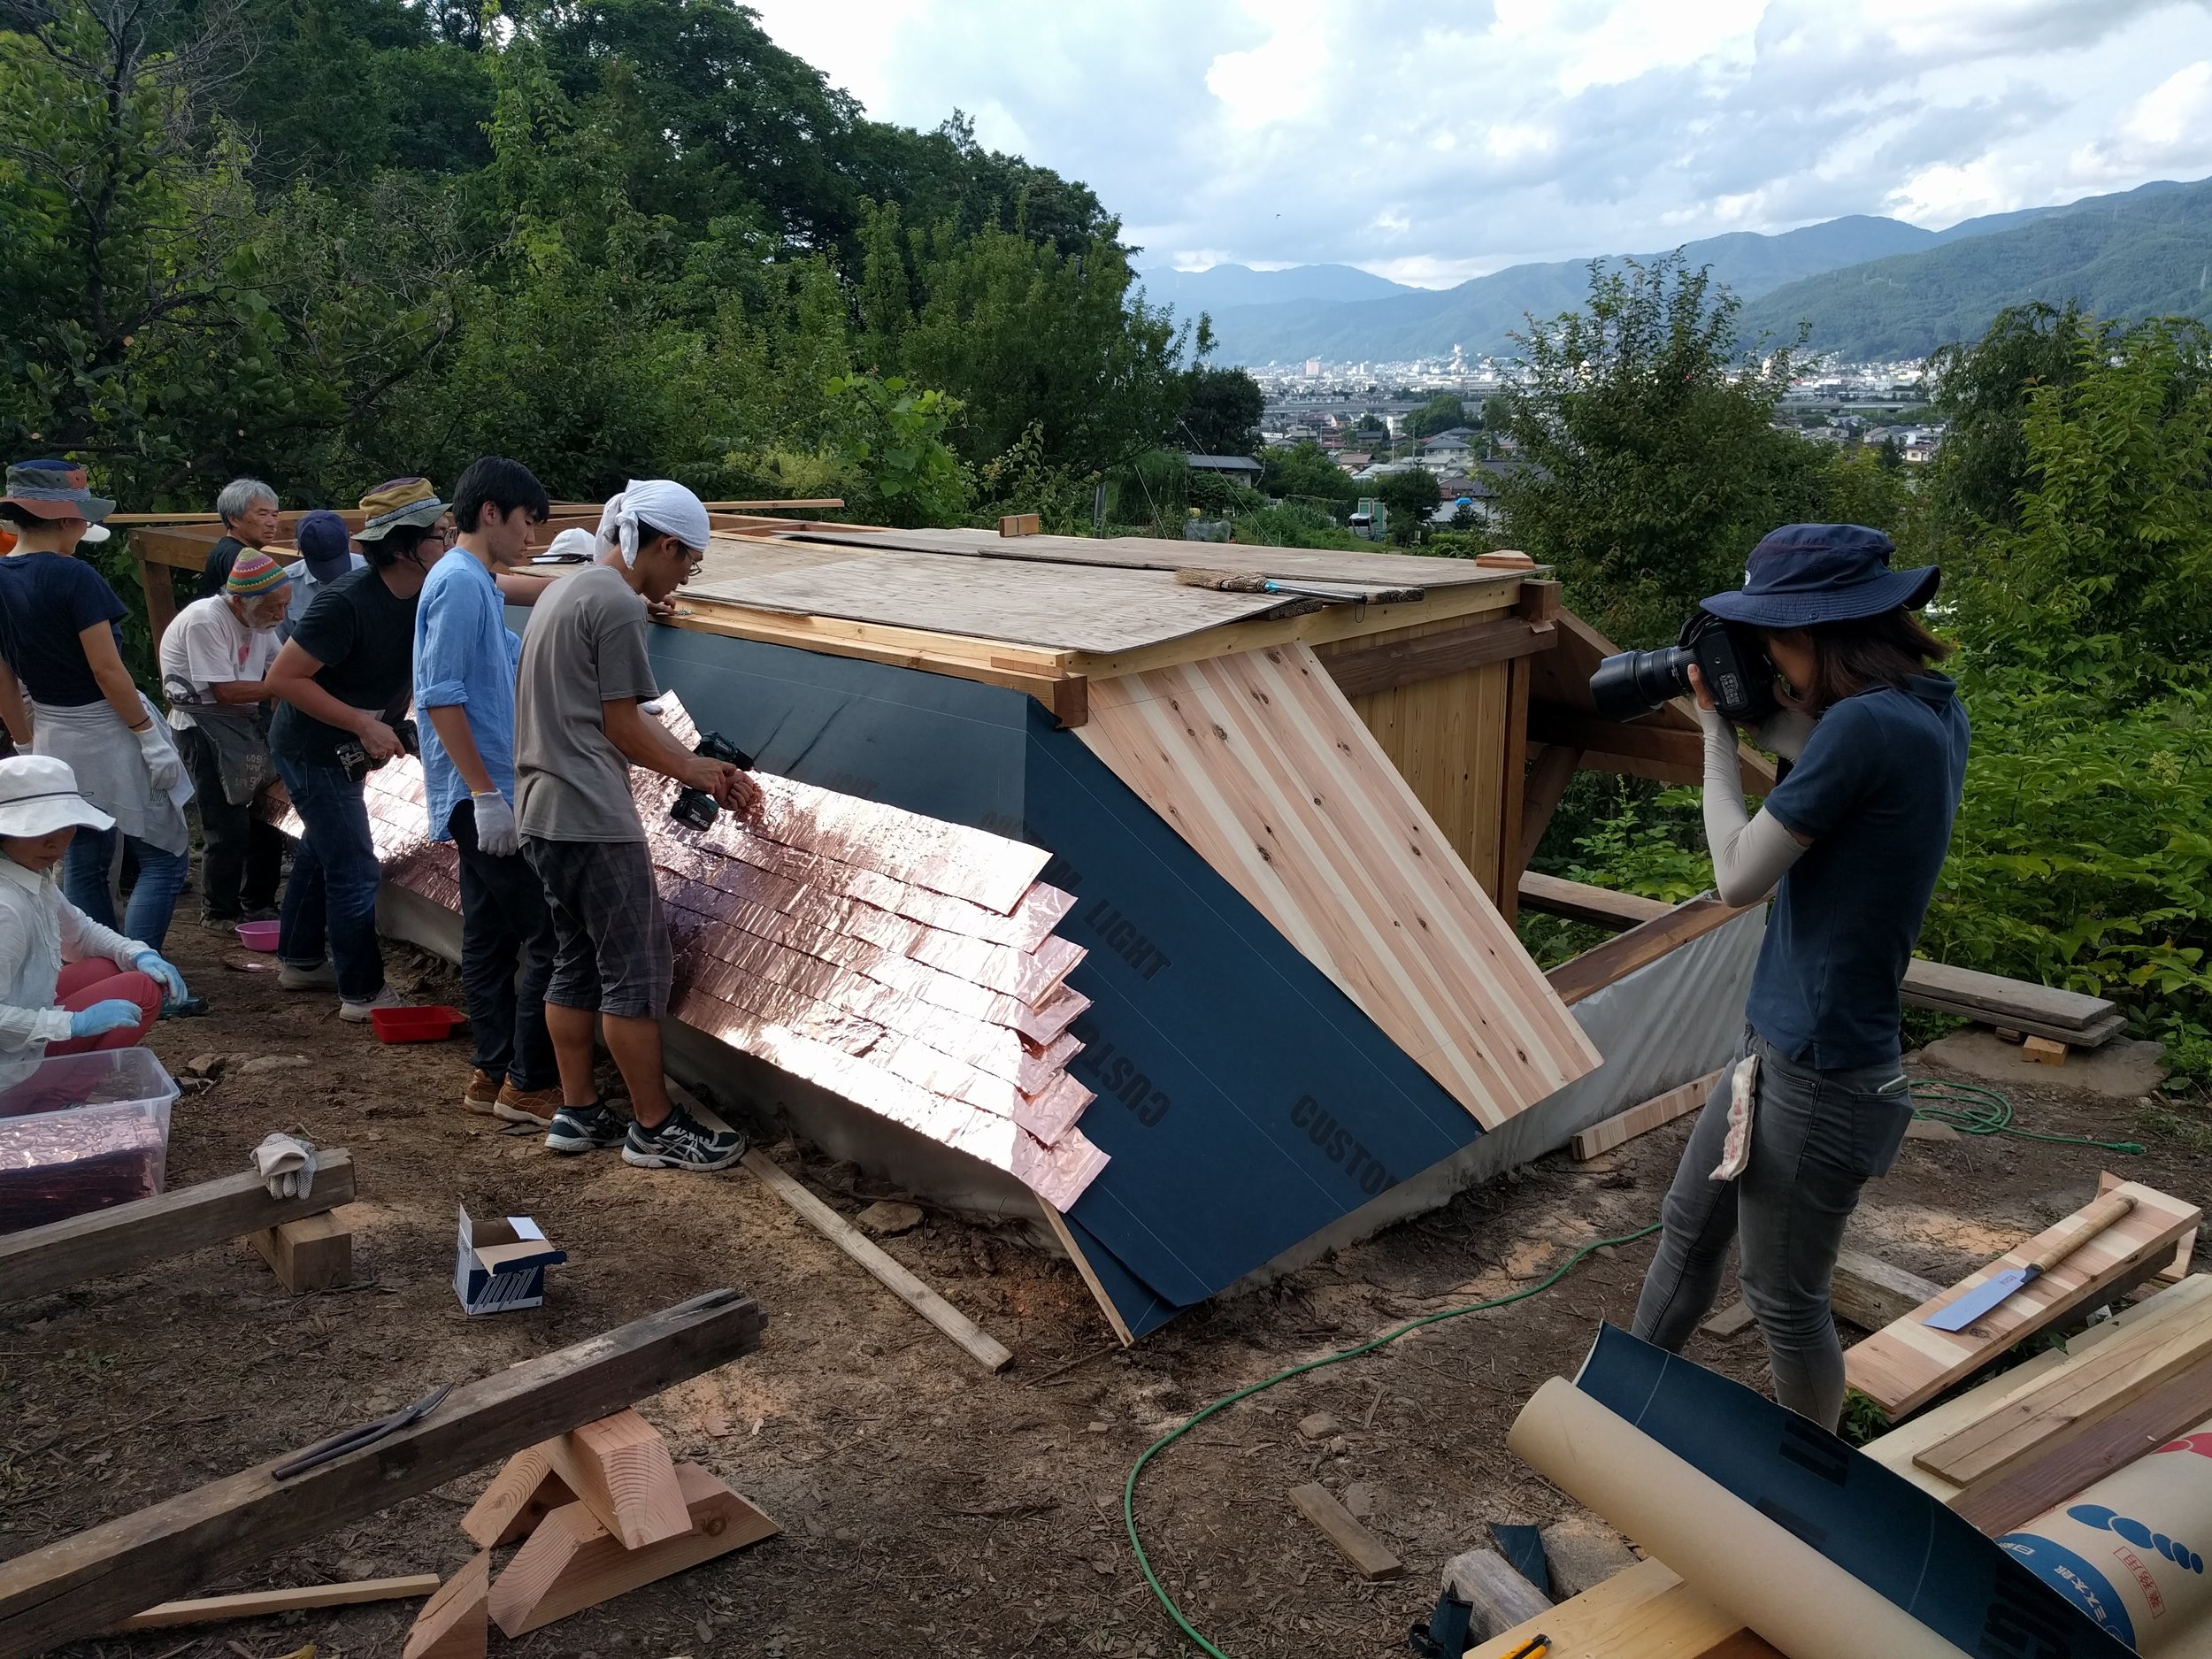
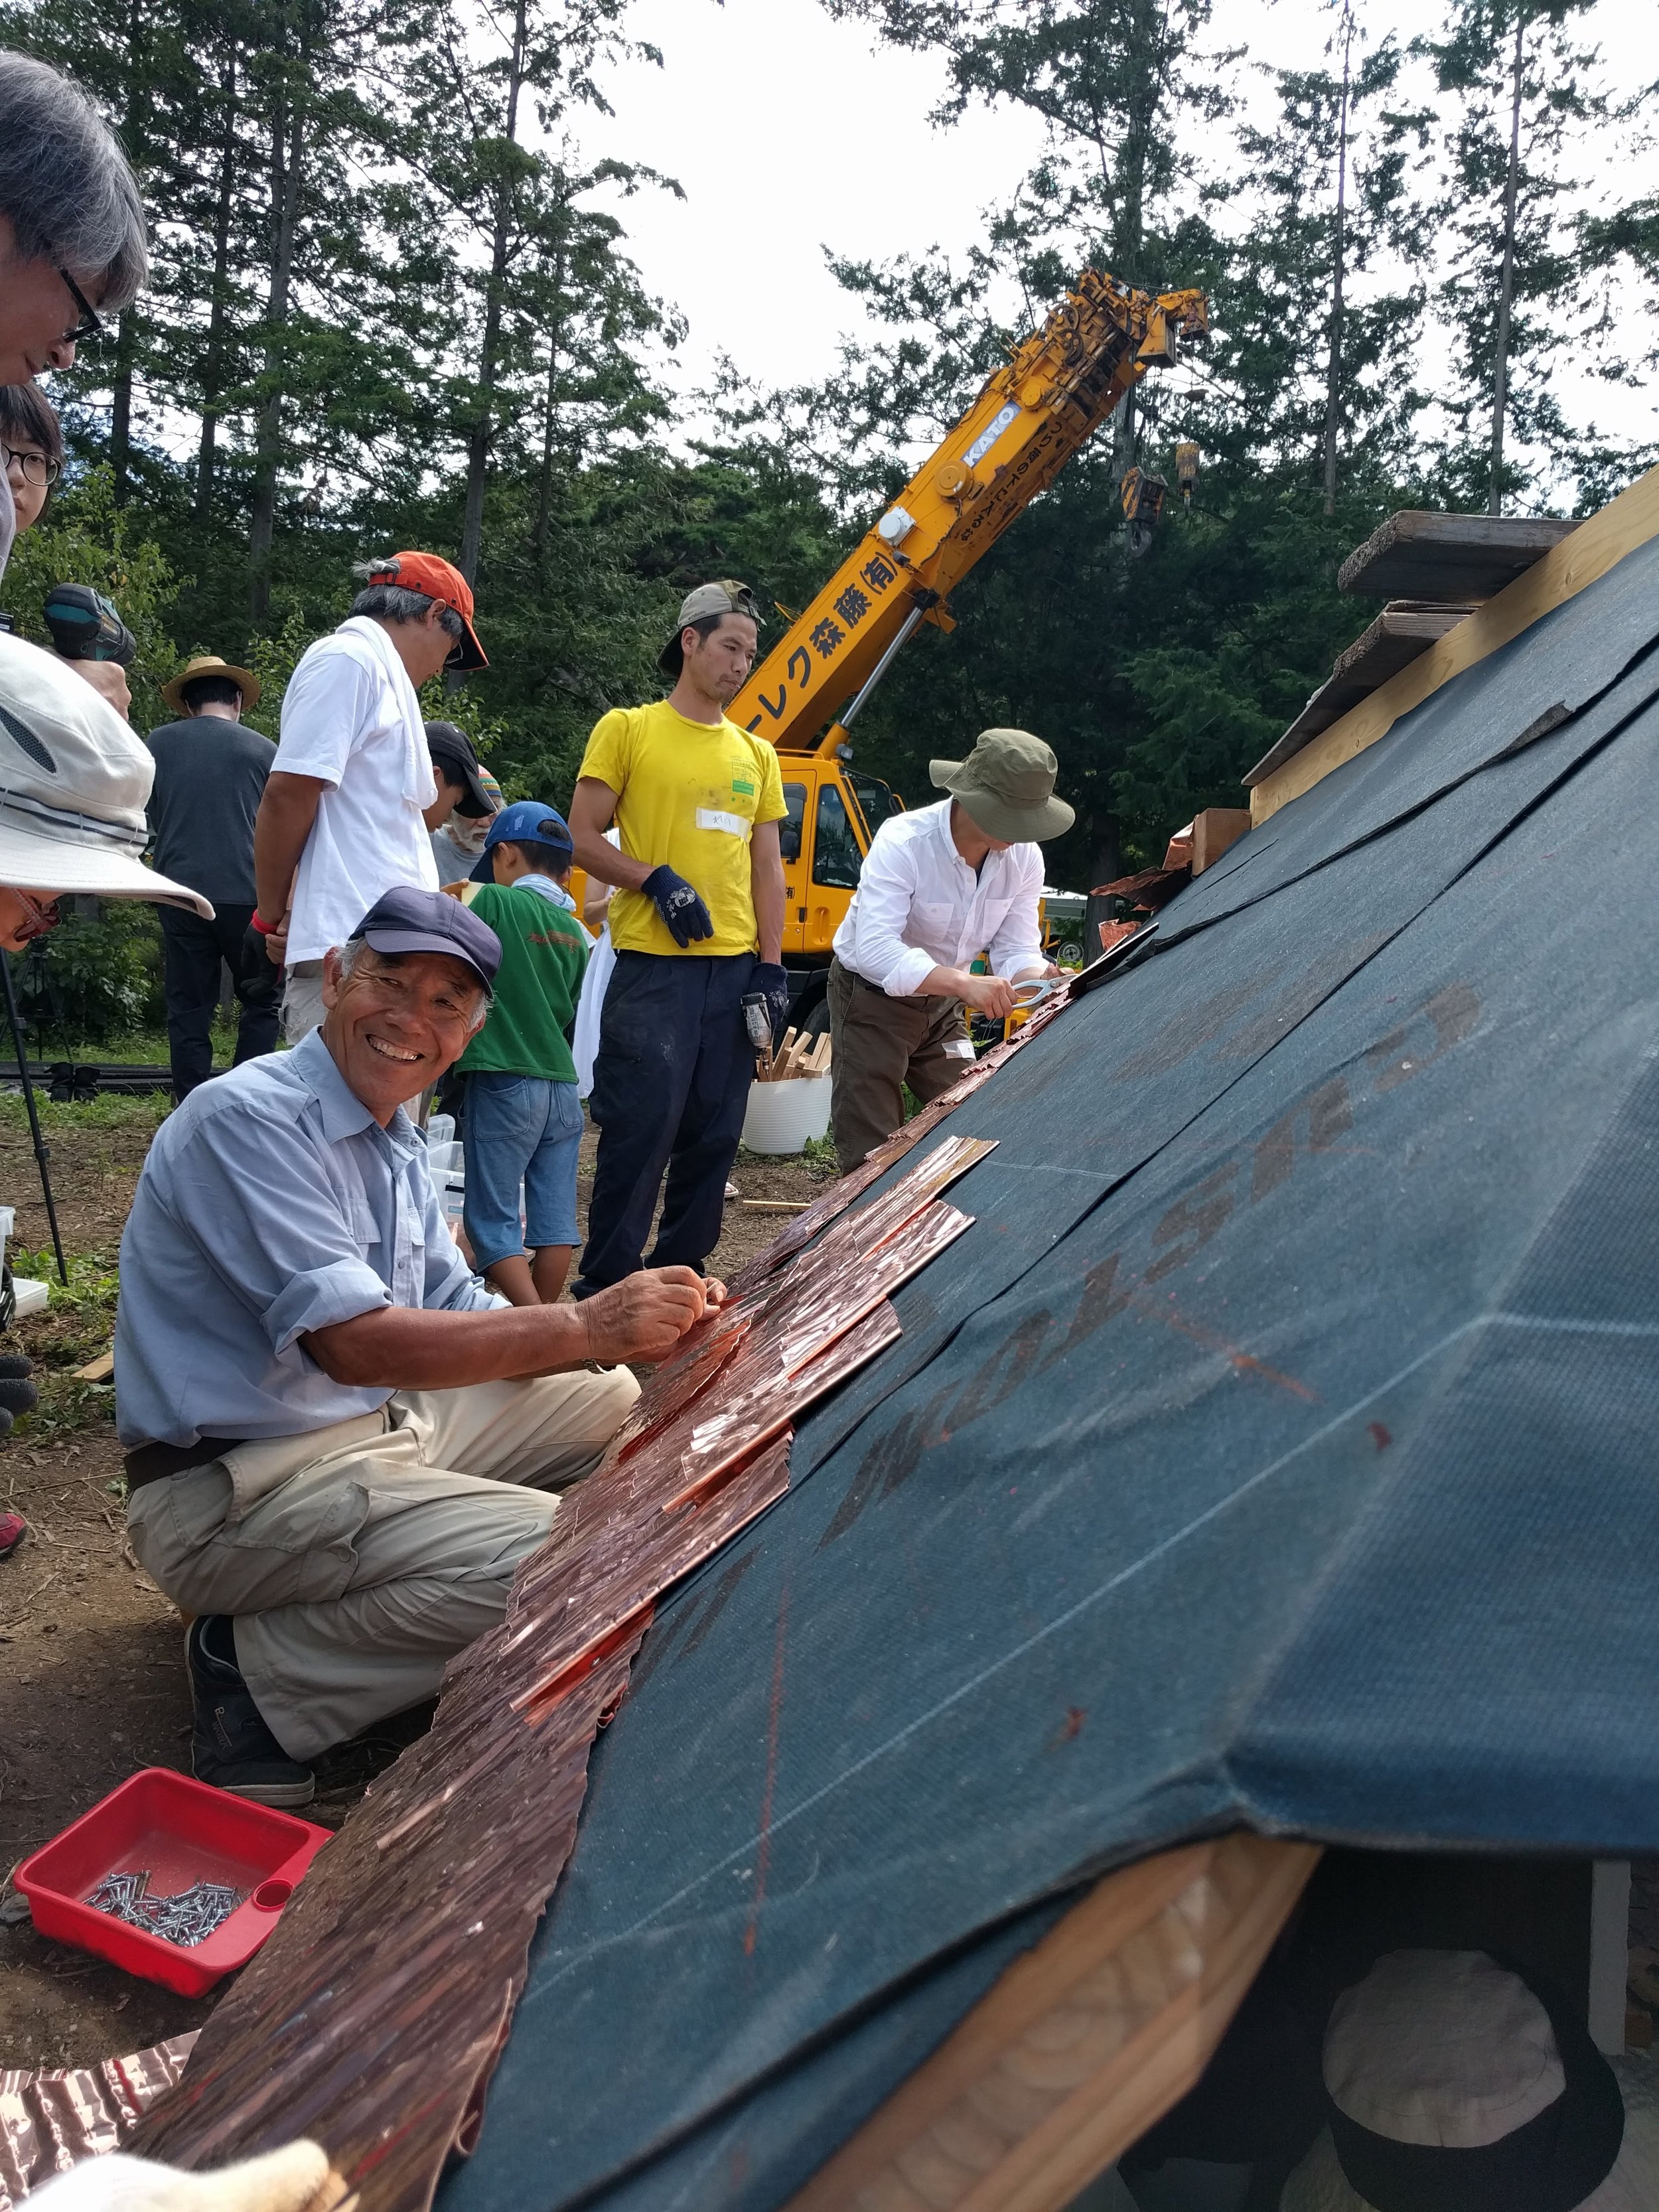
Here we are building the lower part of the roof structure, then appliying the waterproofing and the copper shingles.
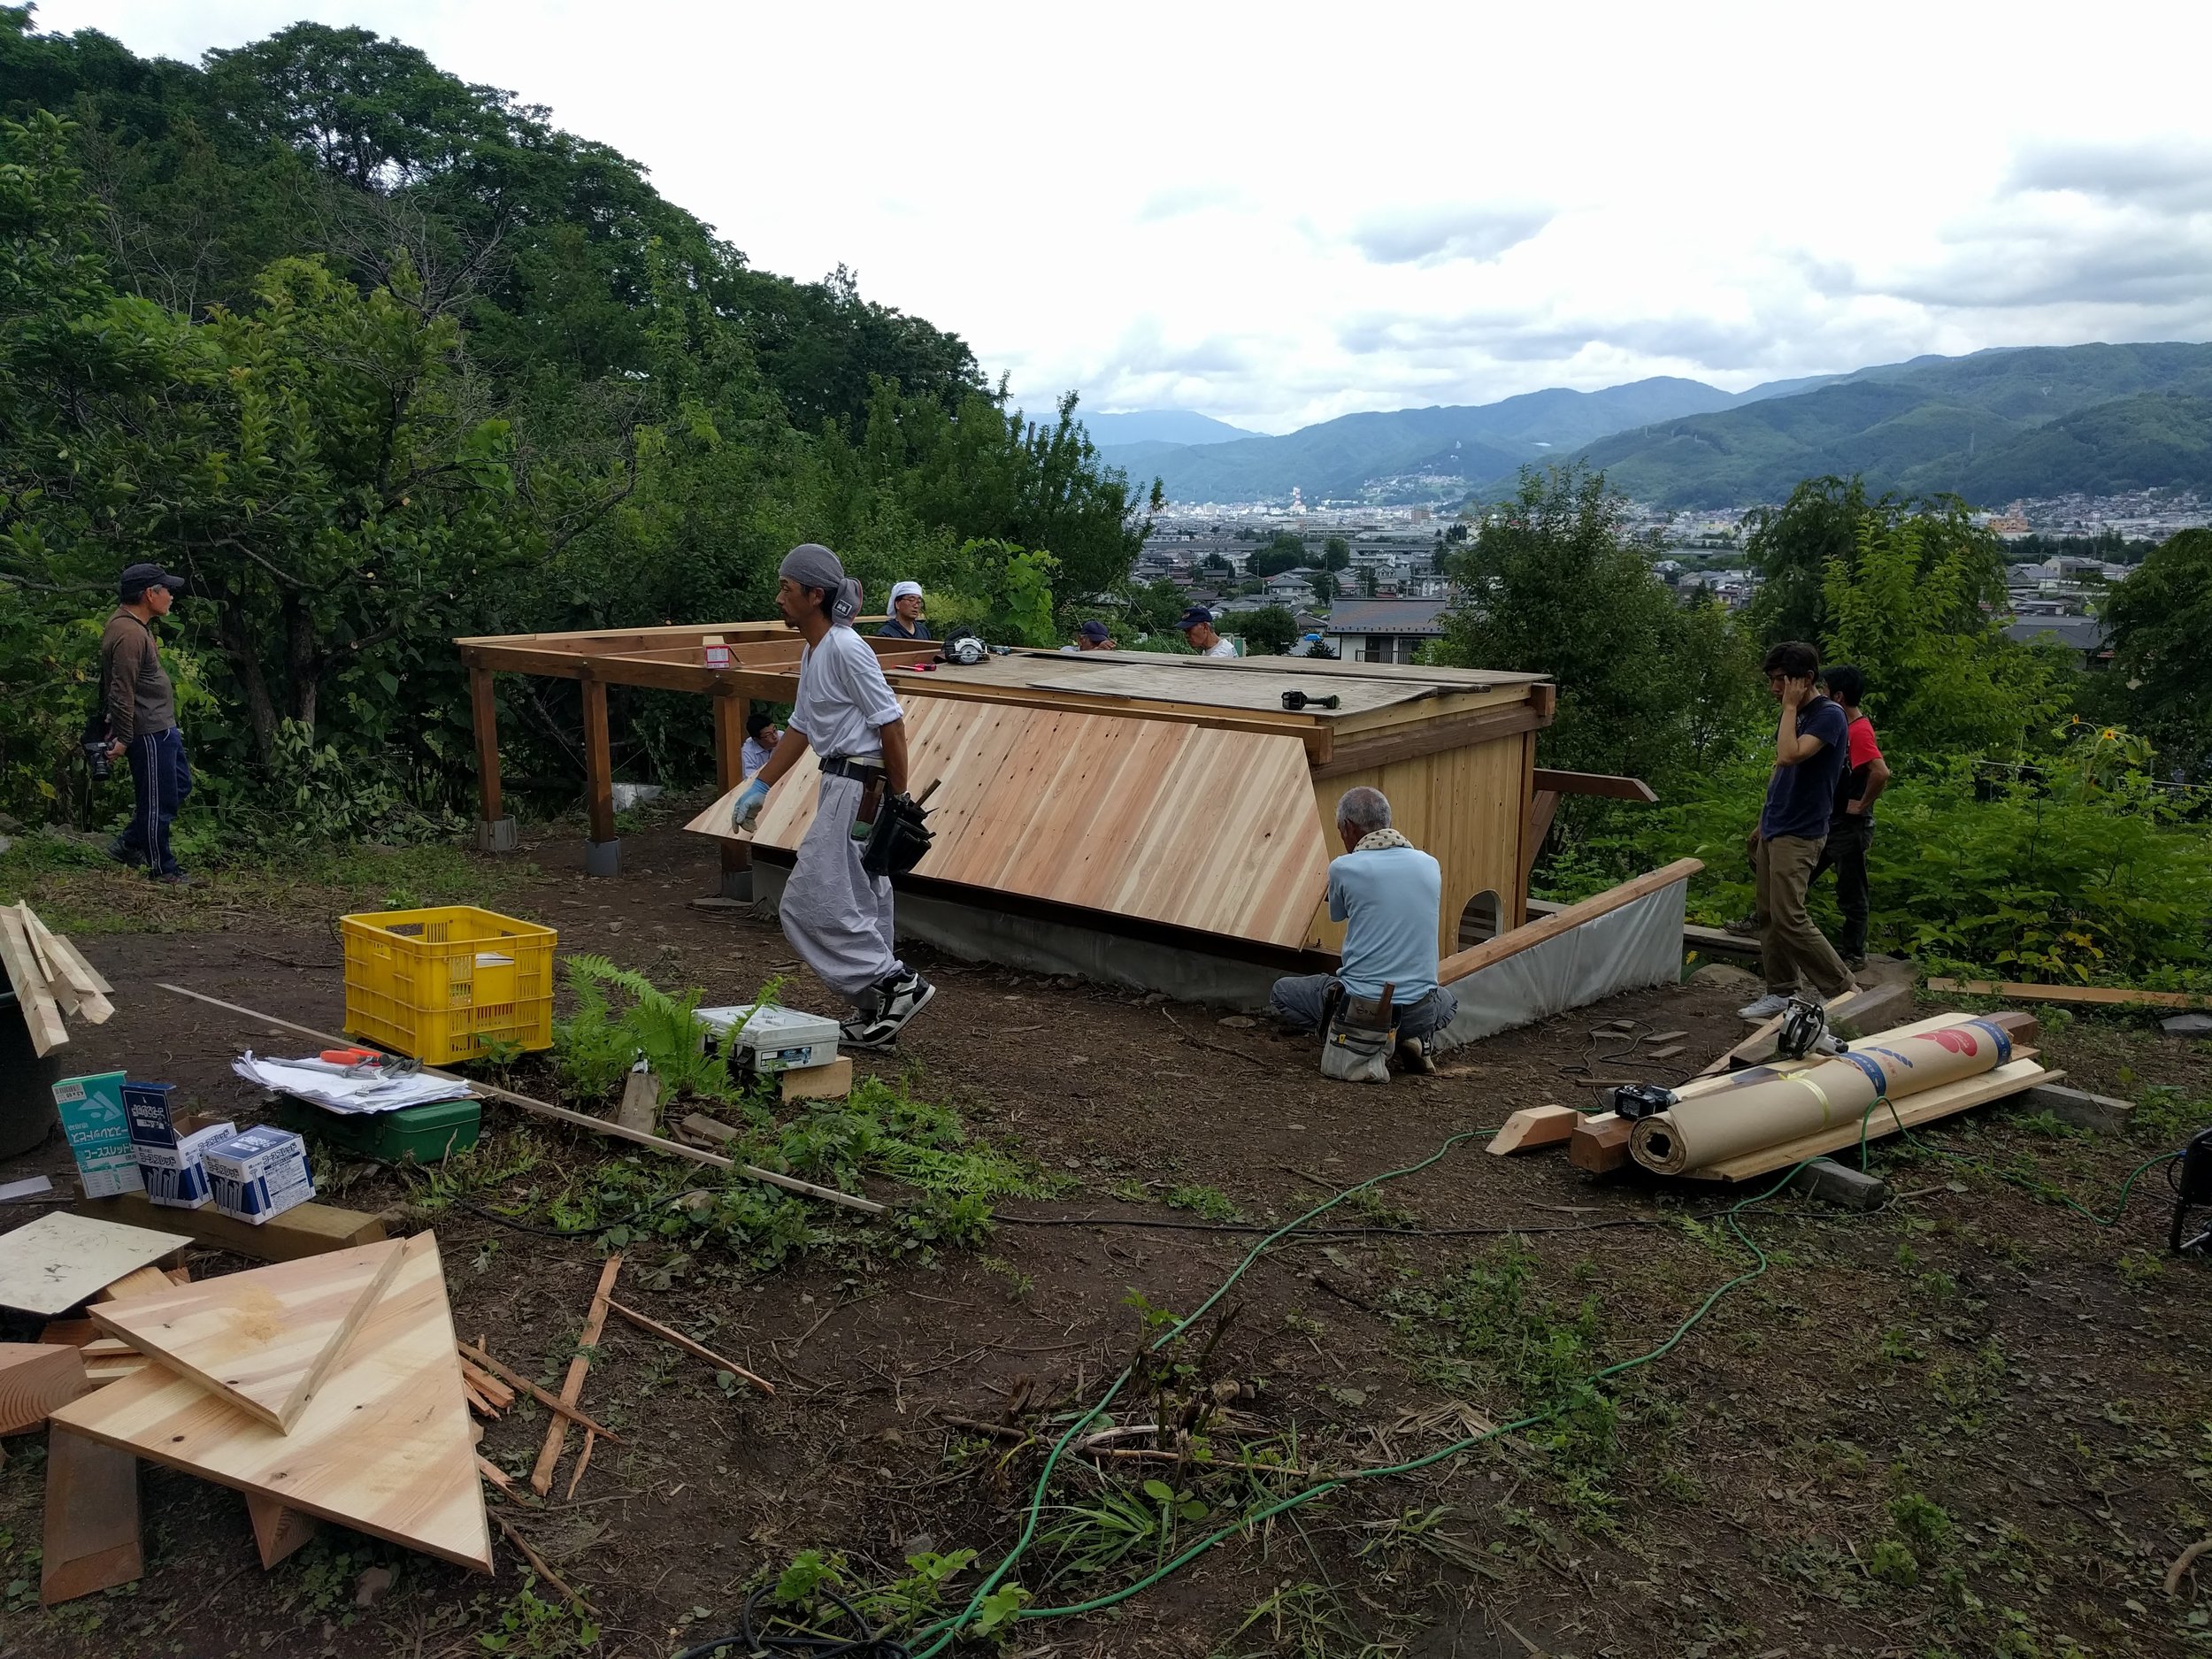
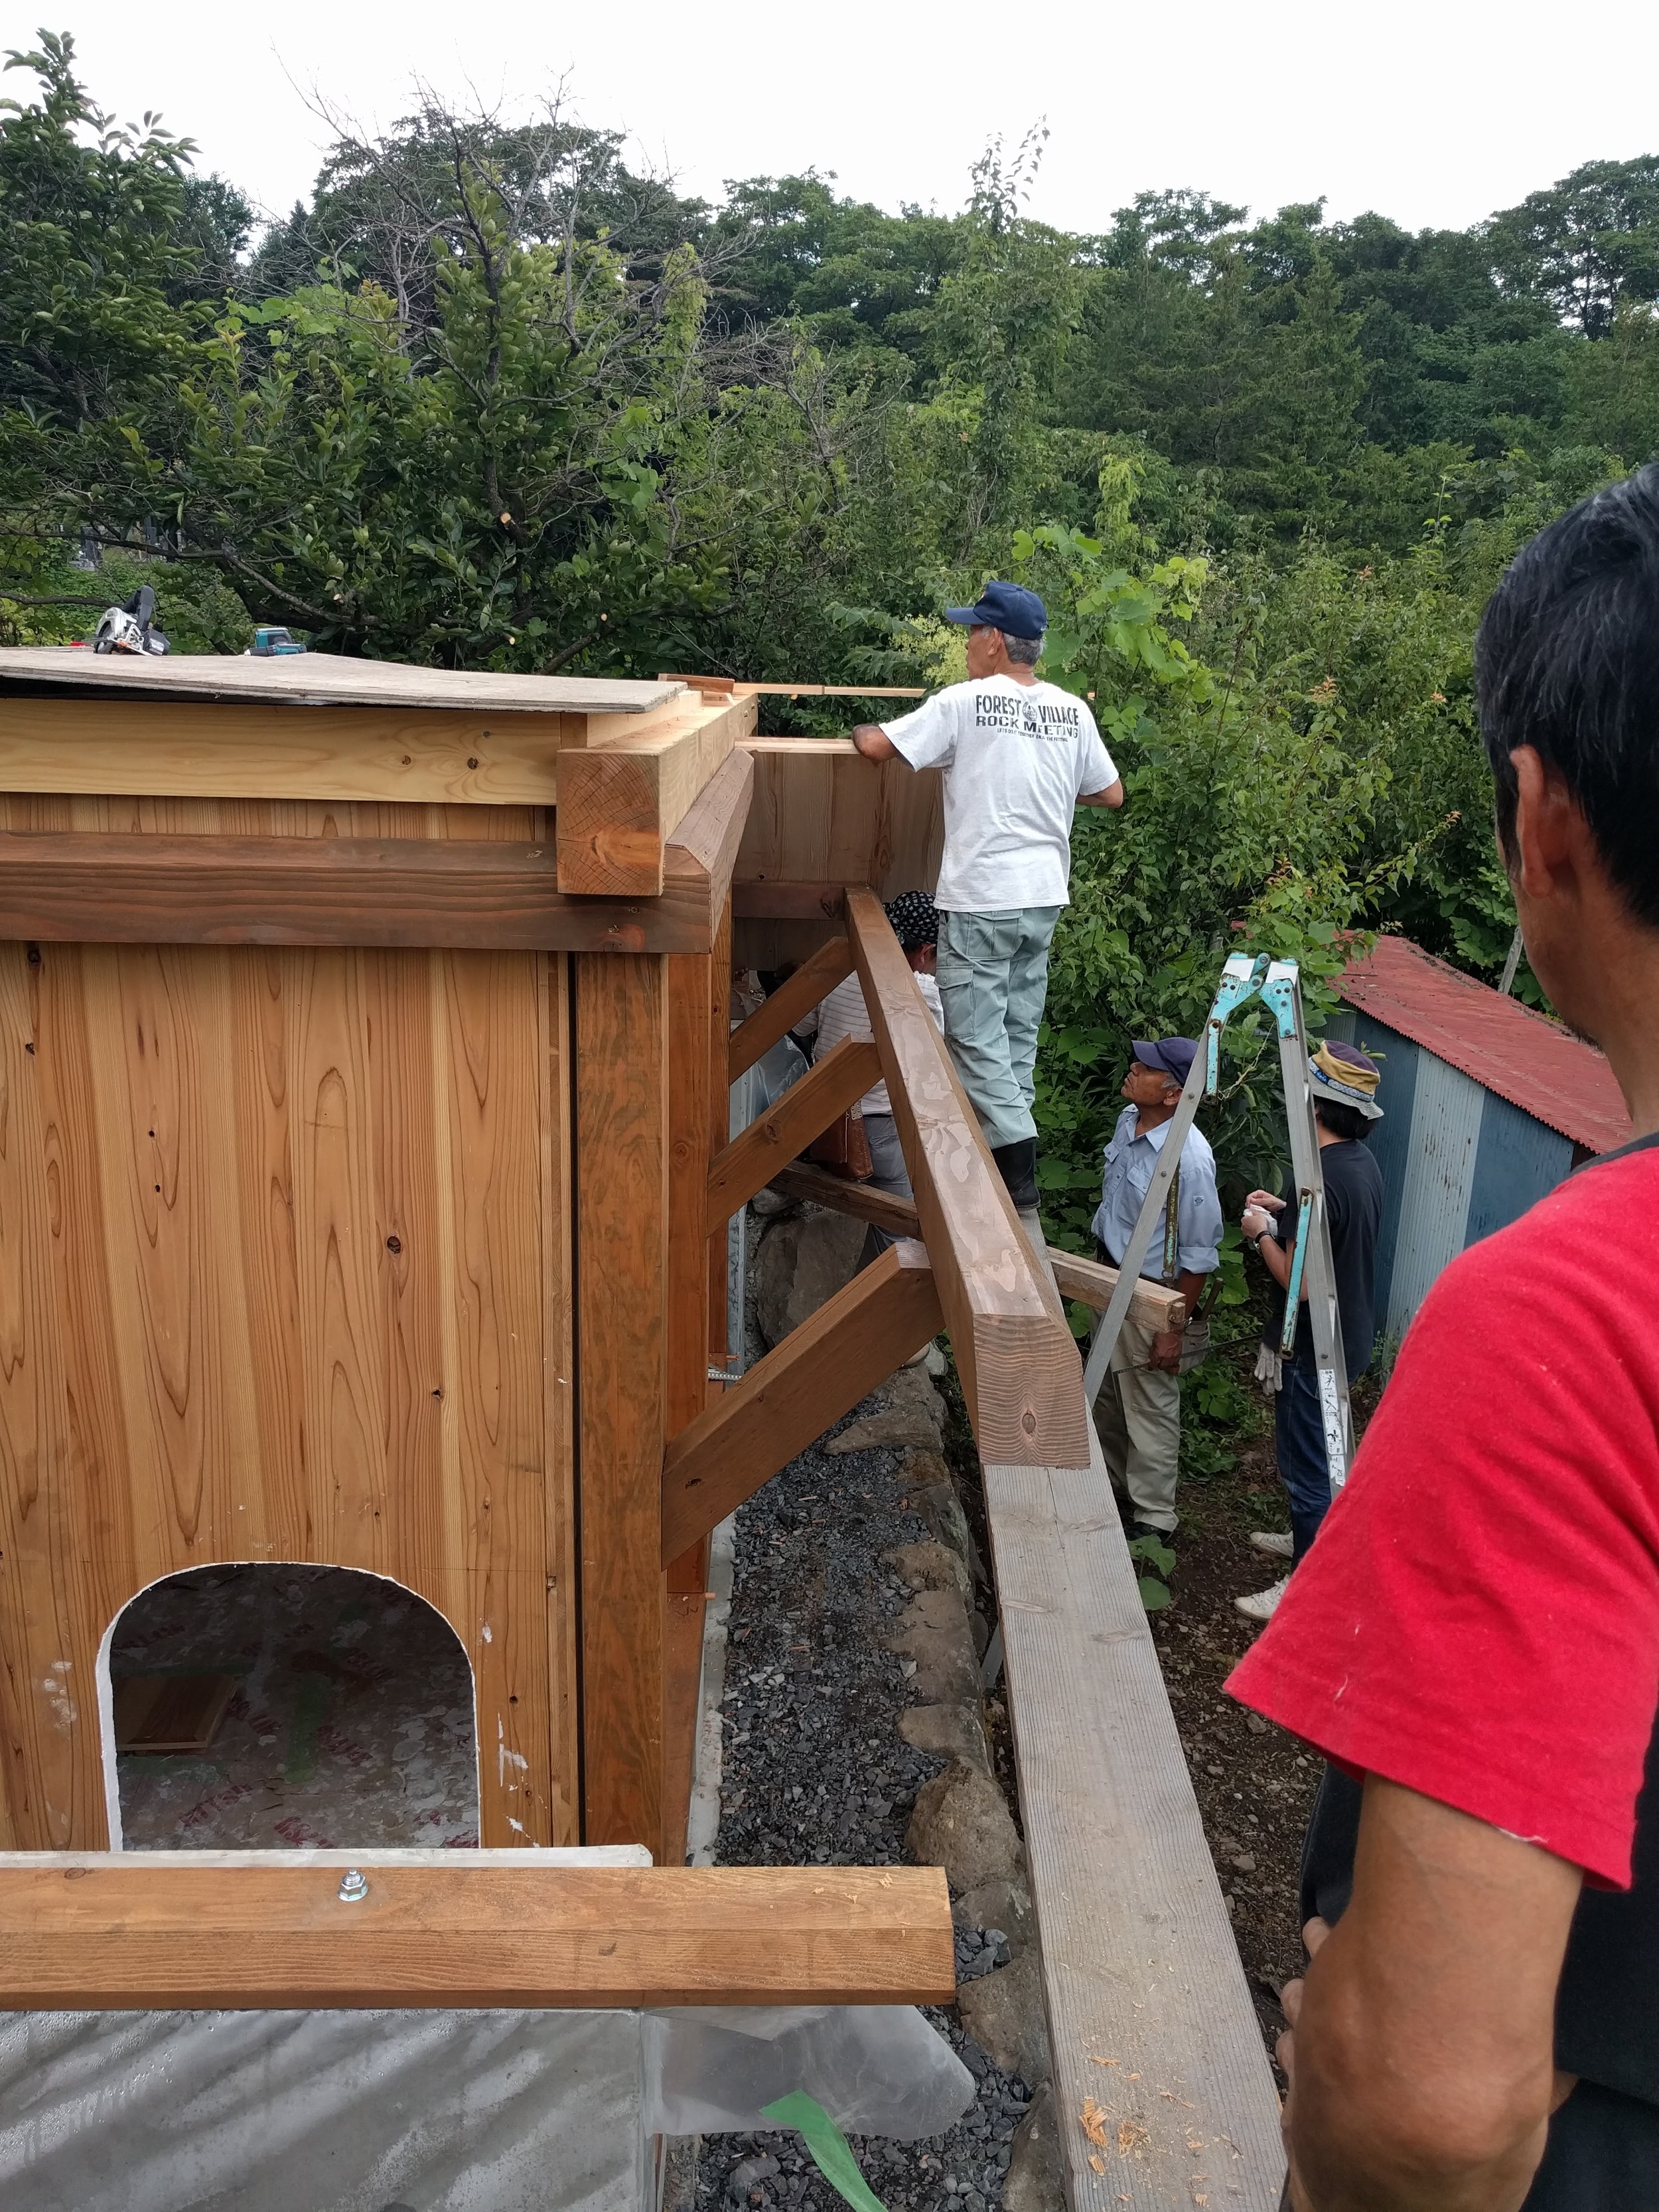

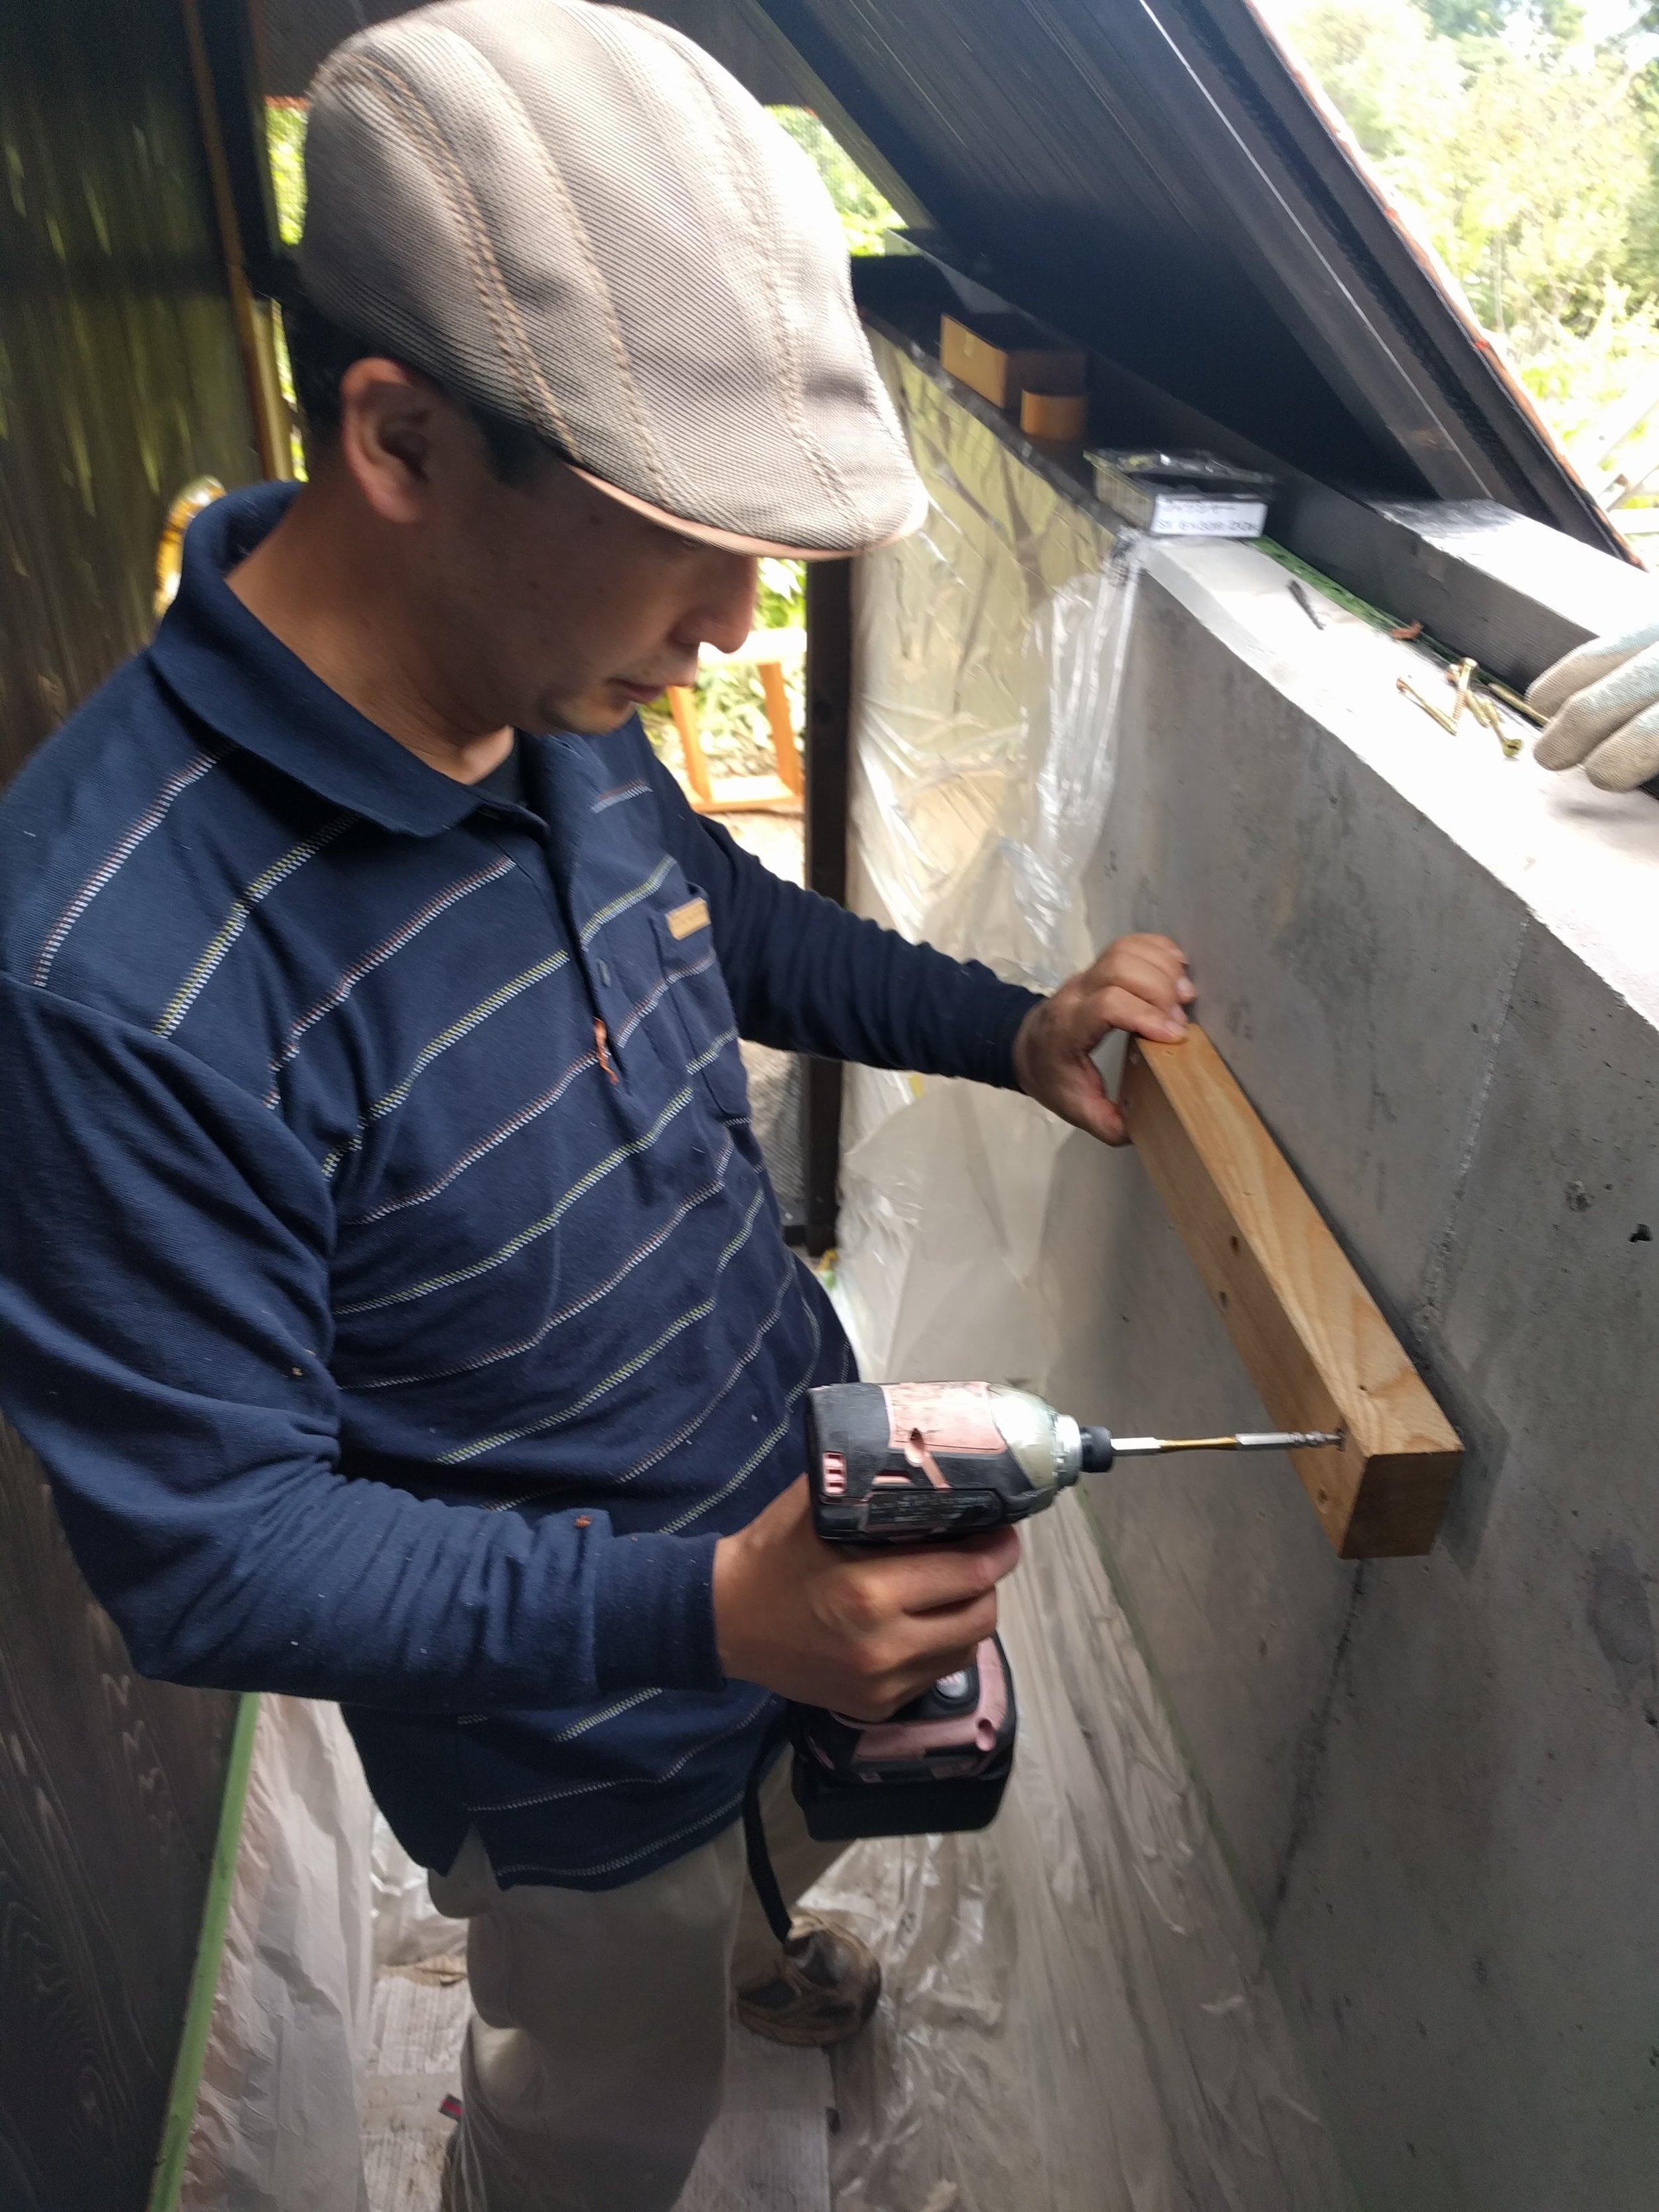
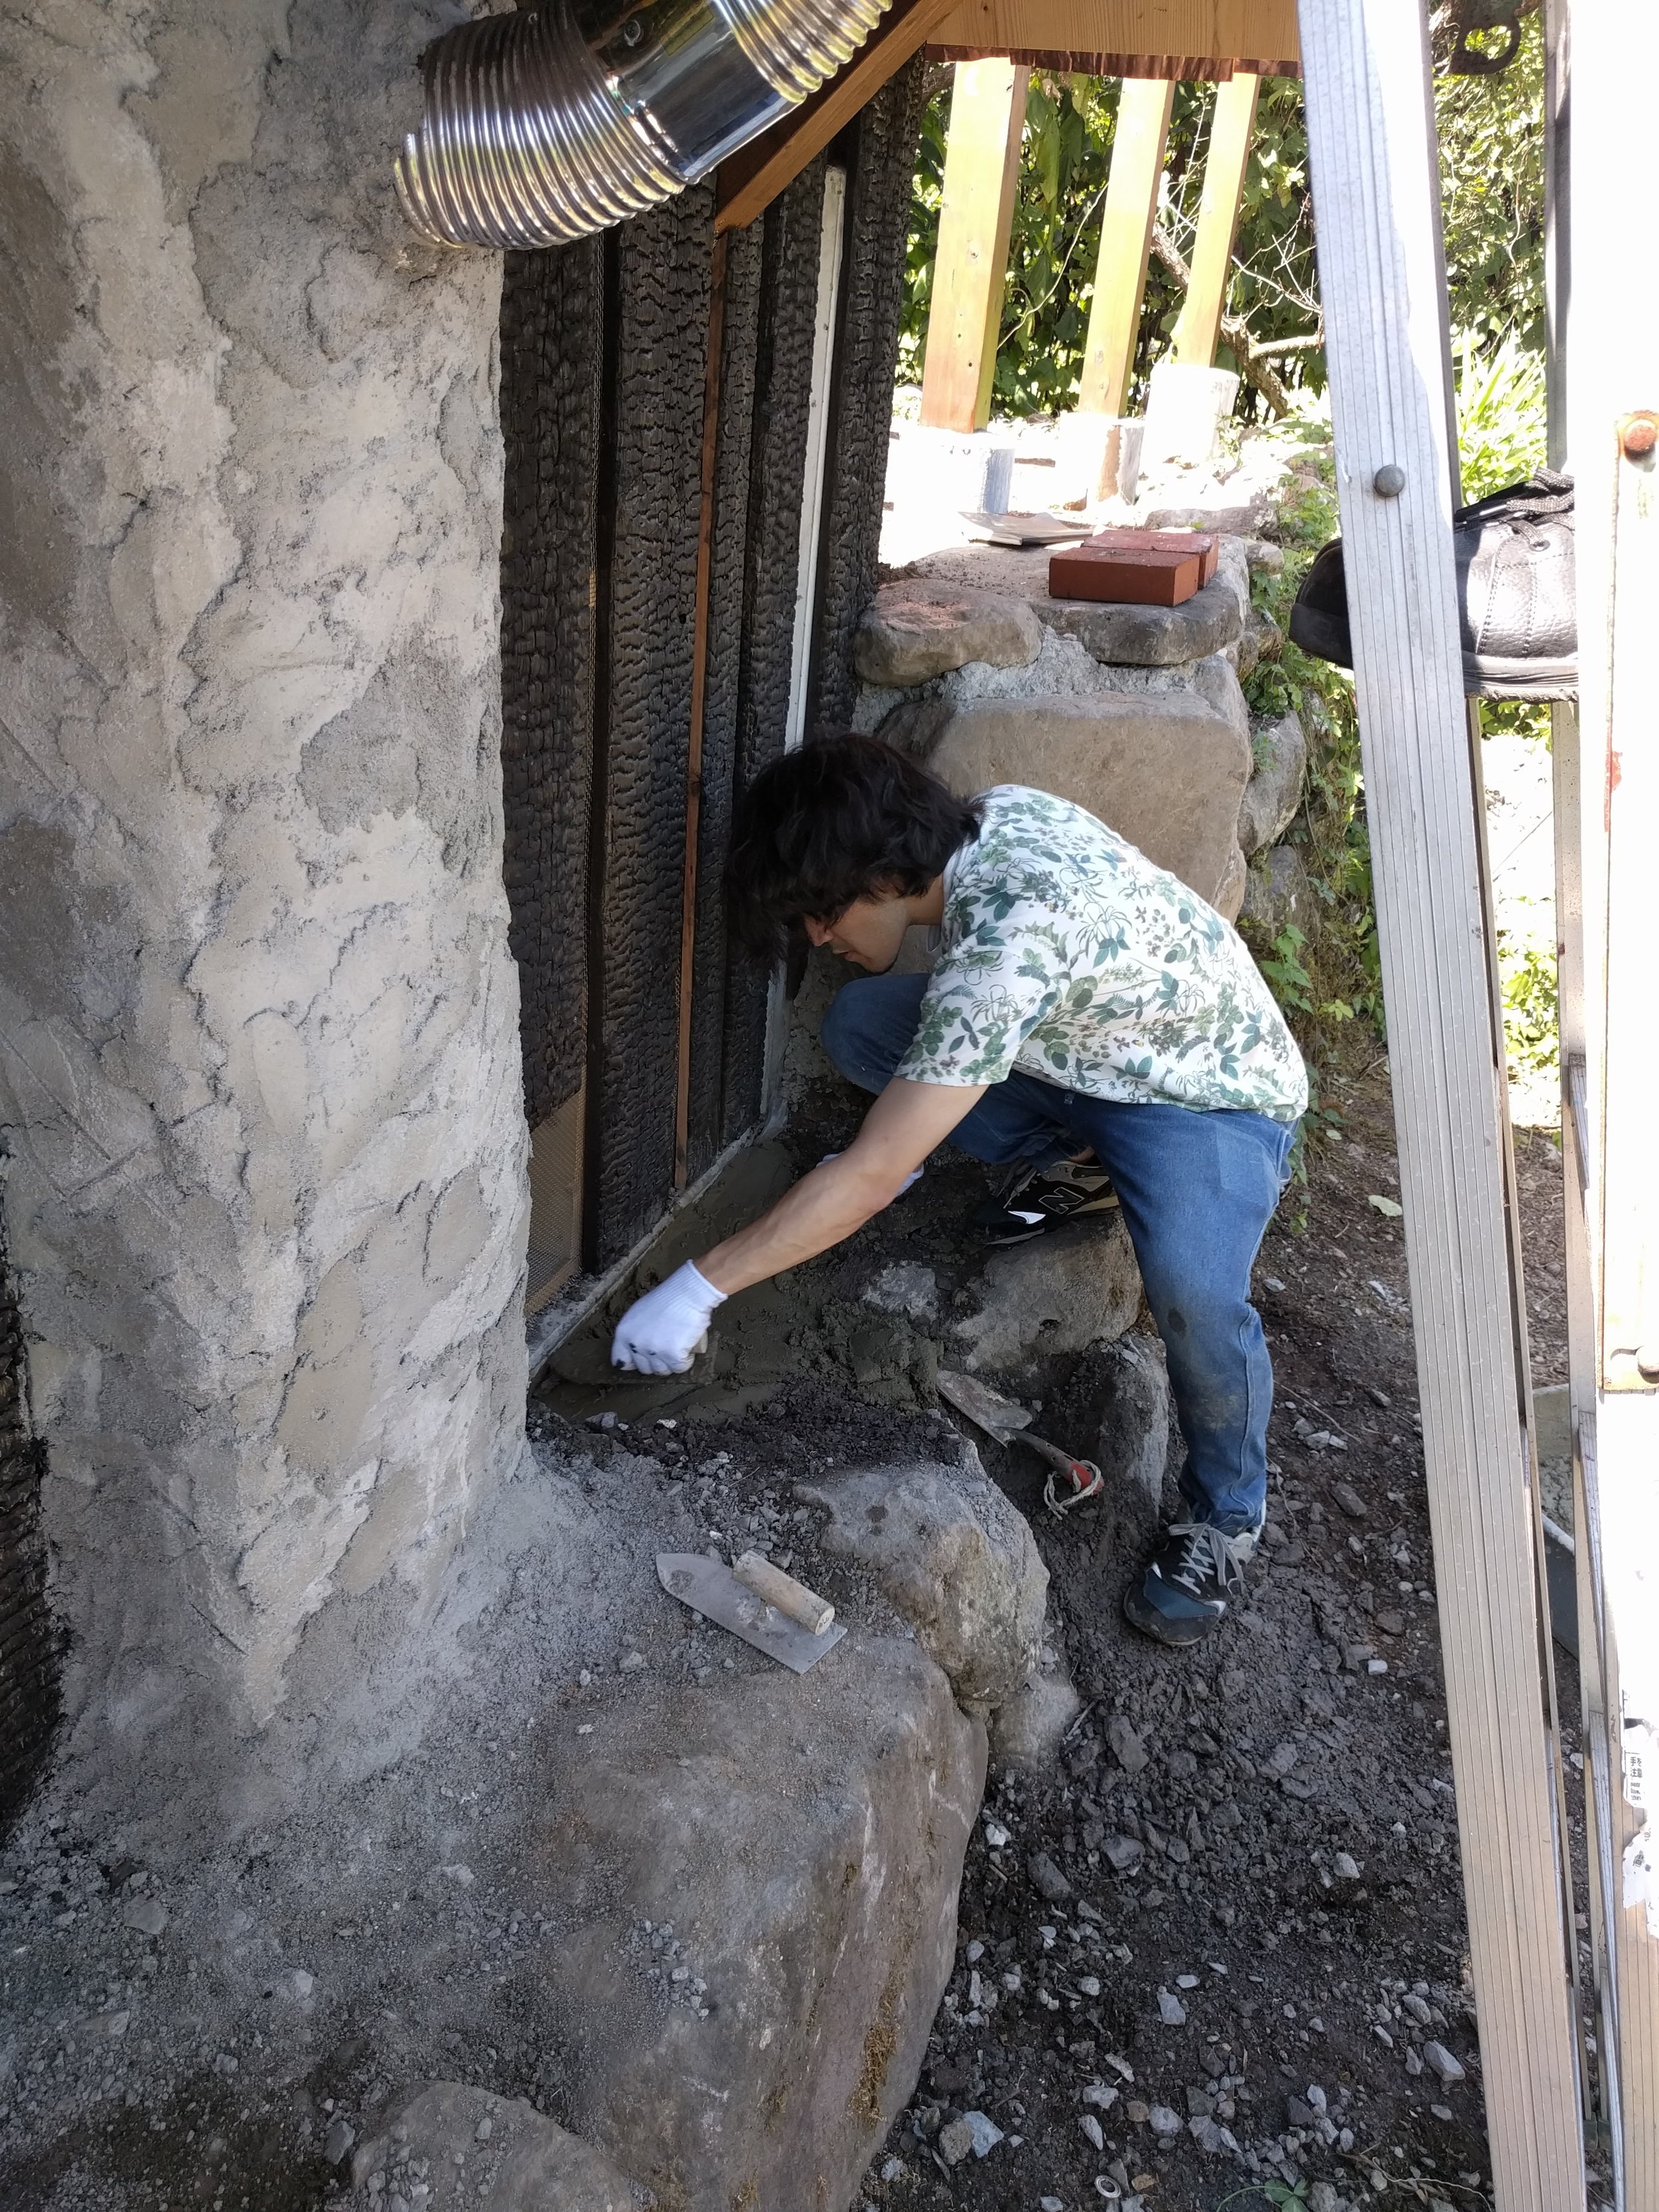
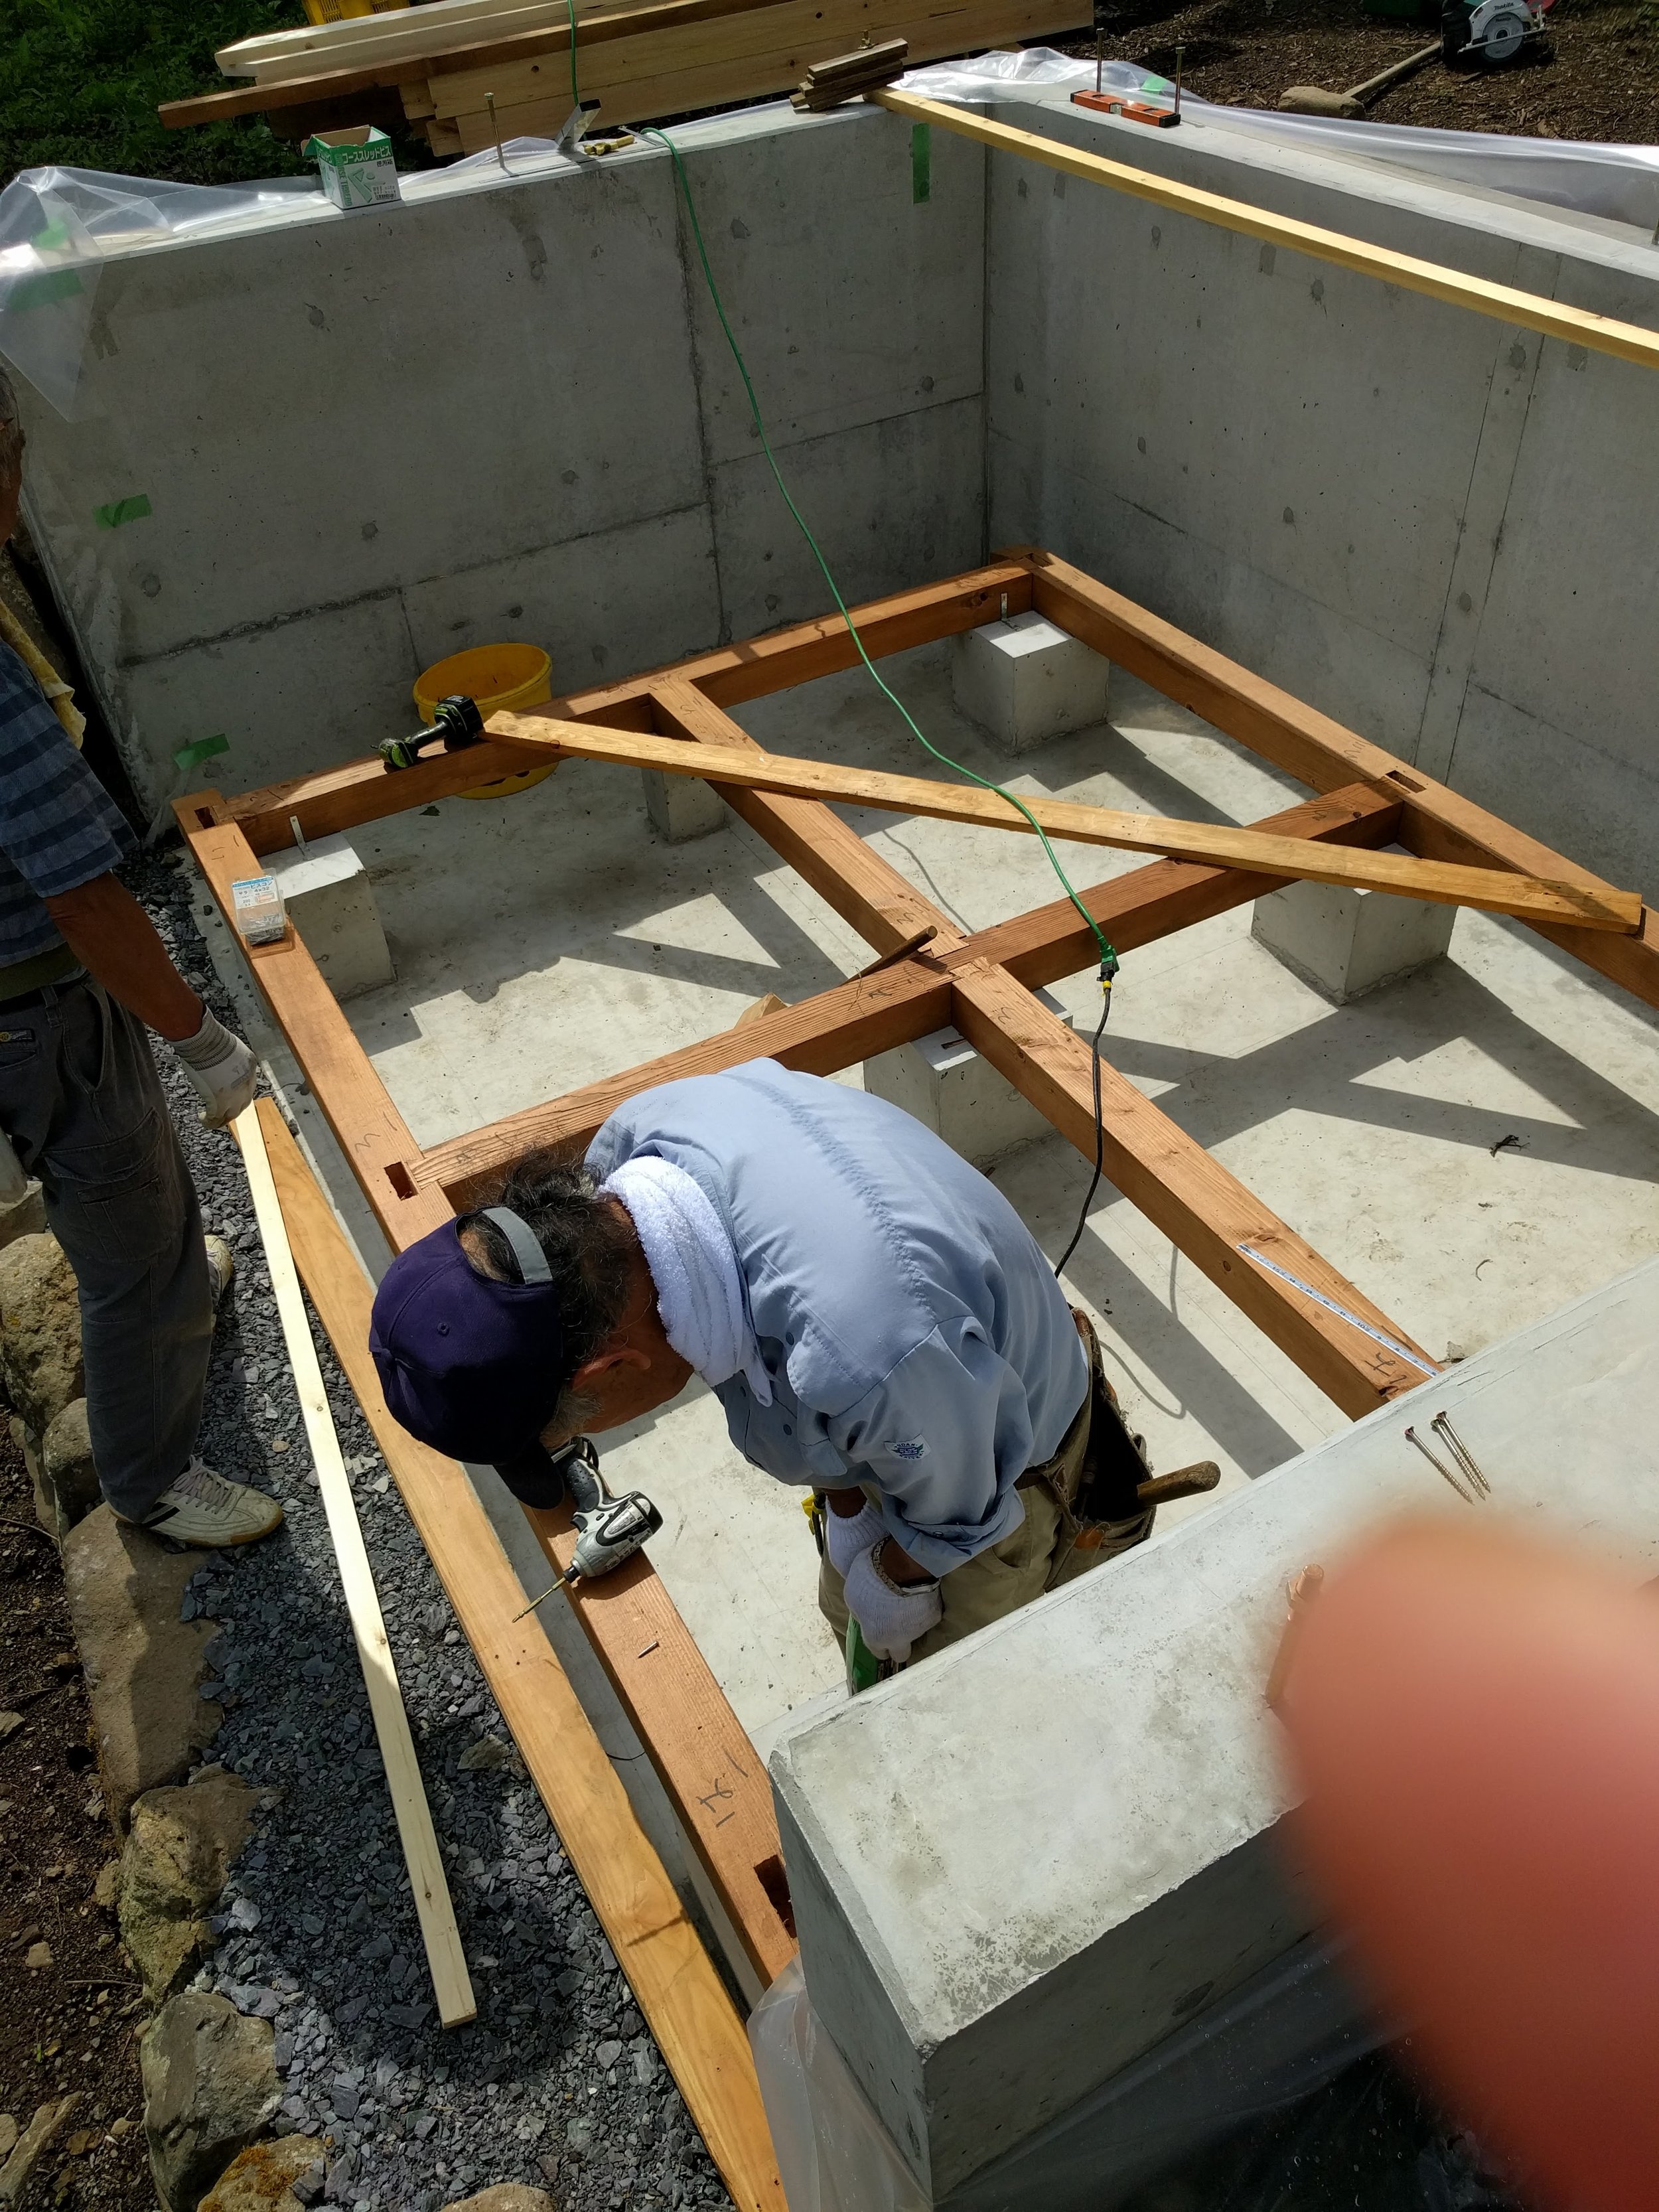
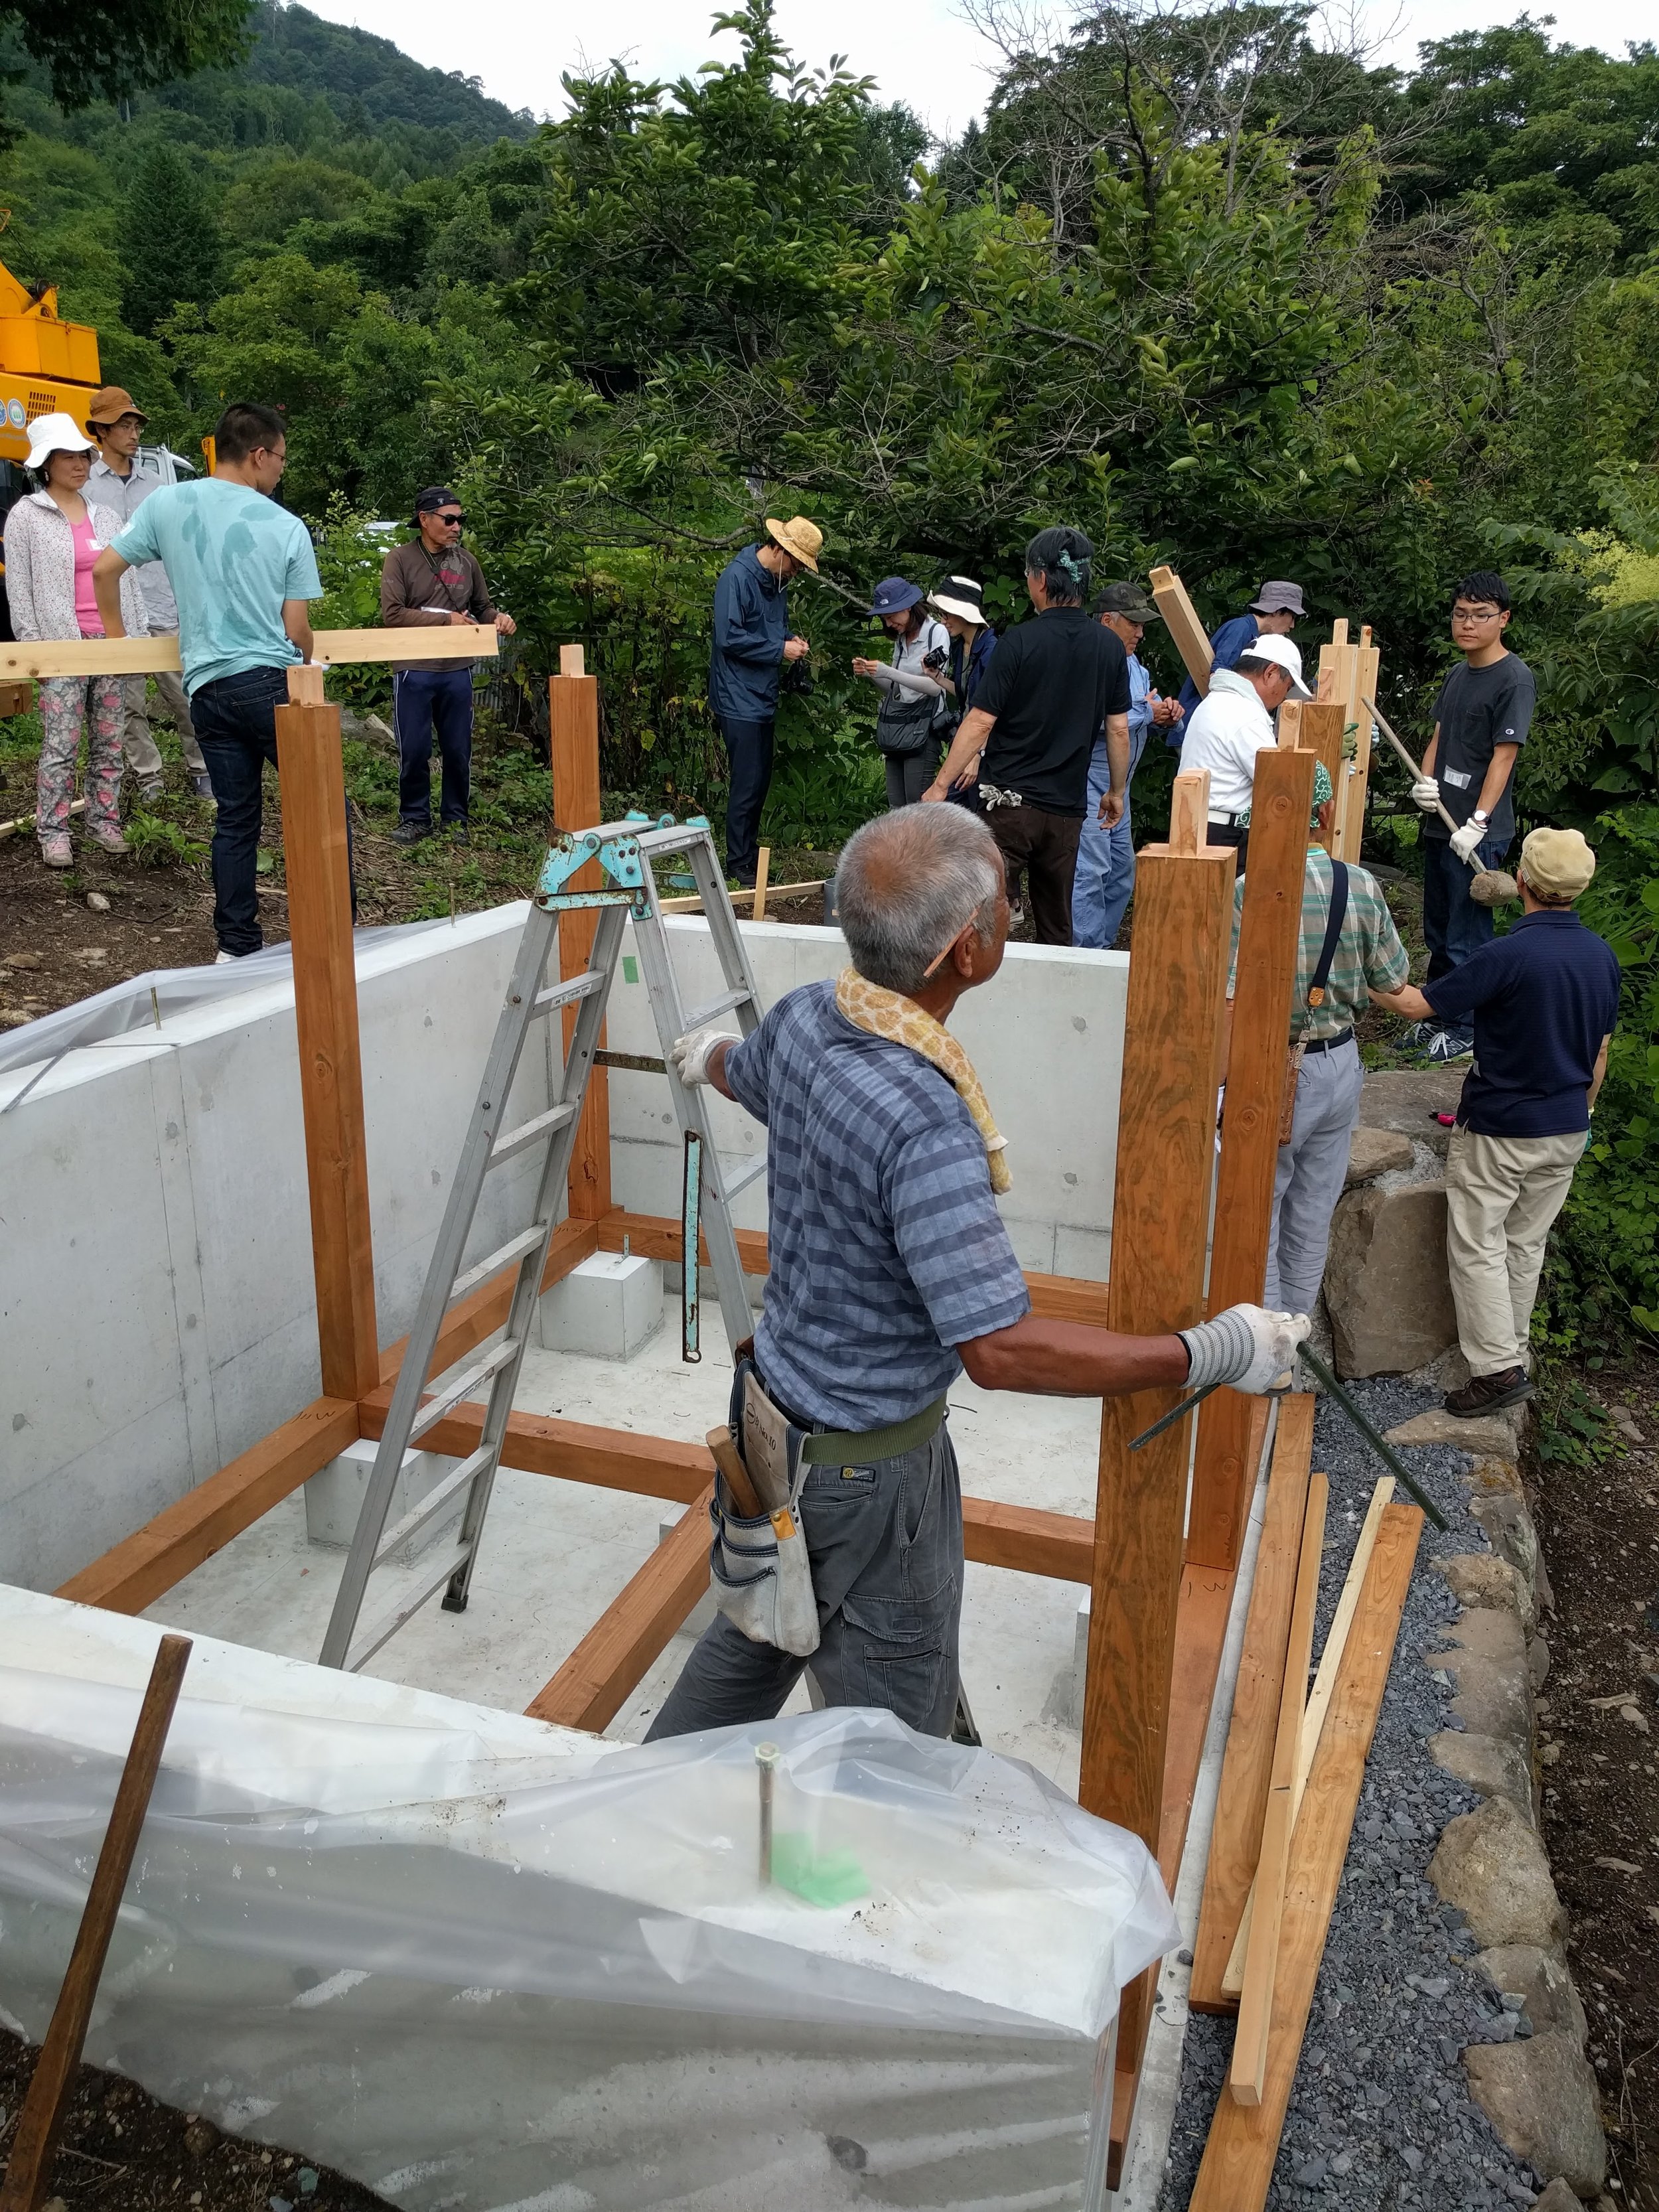
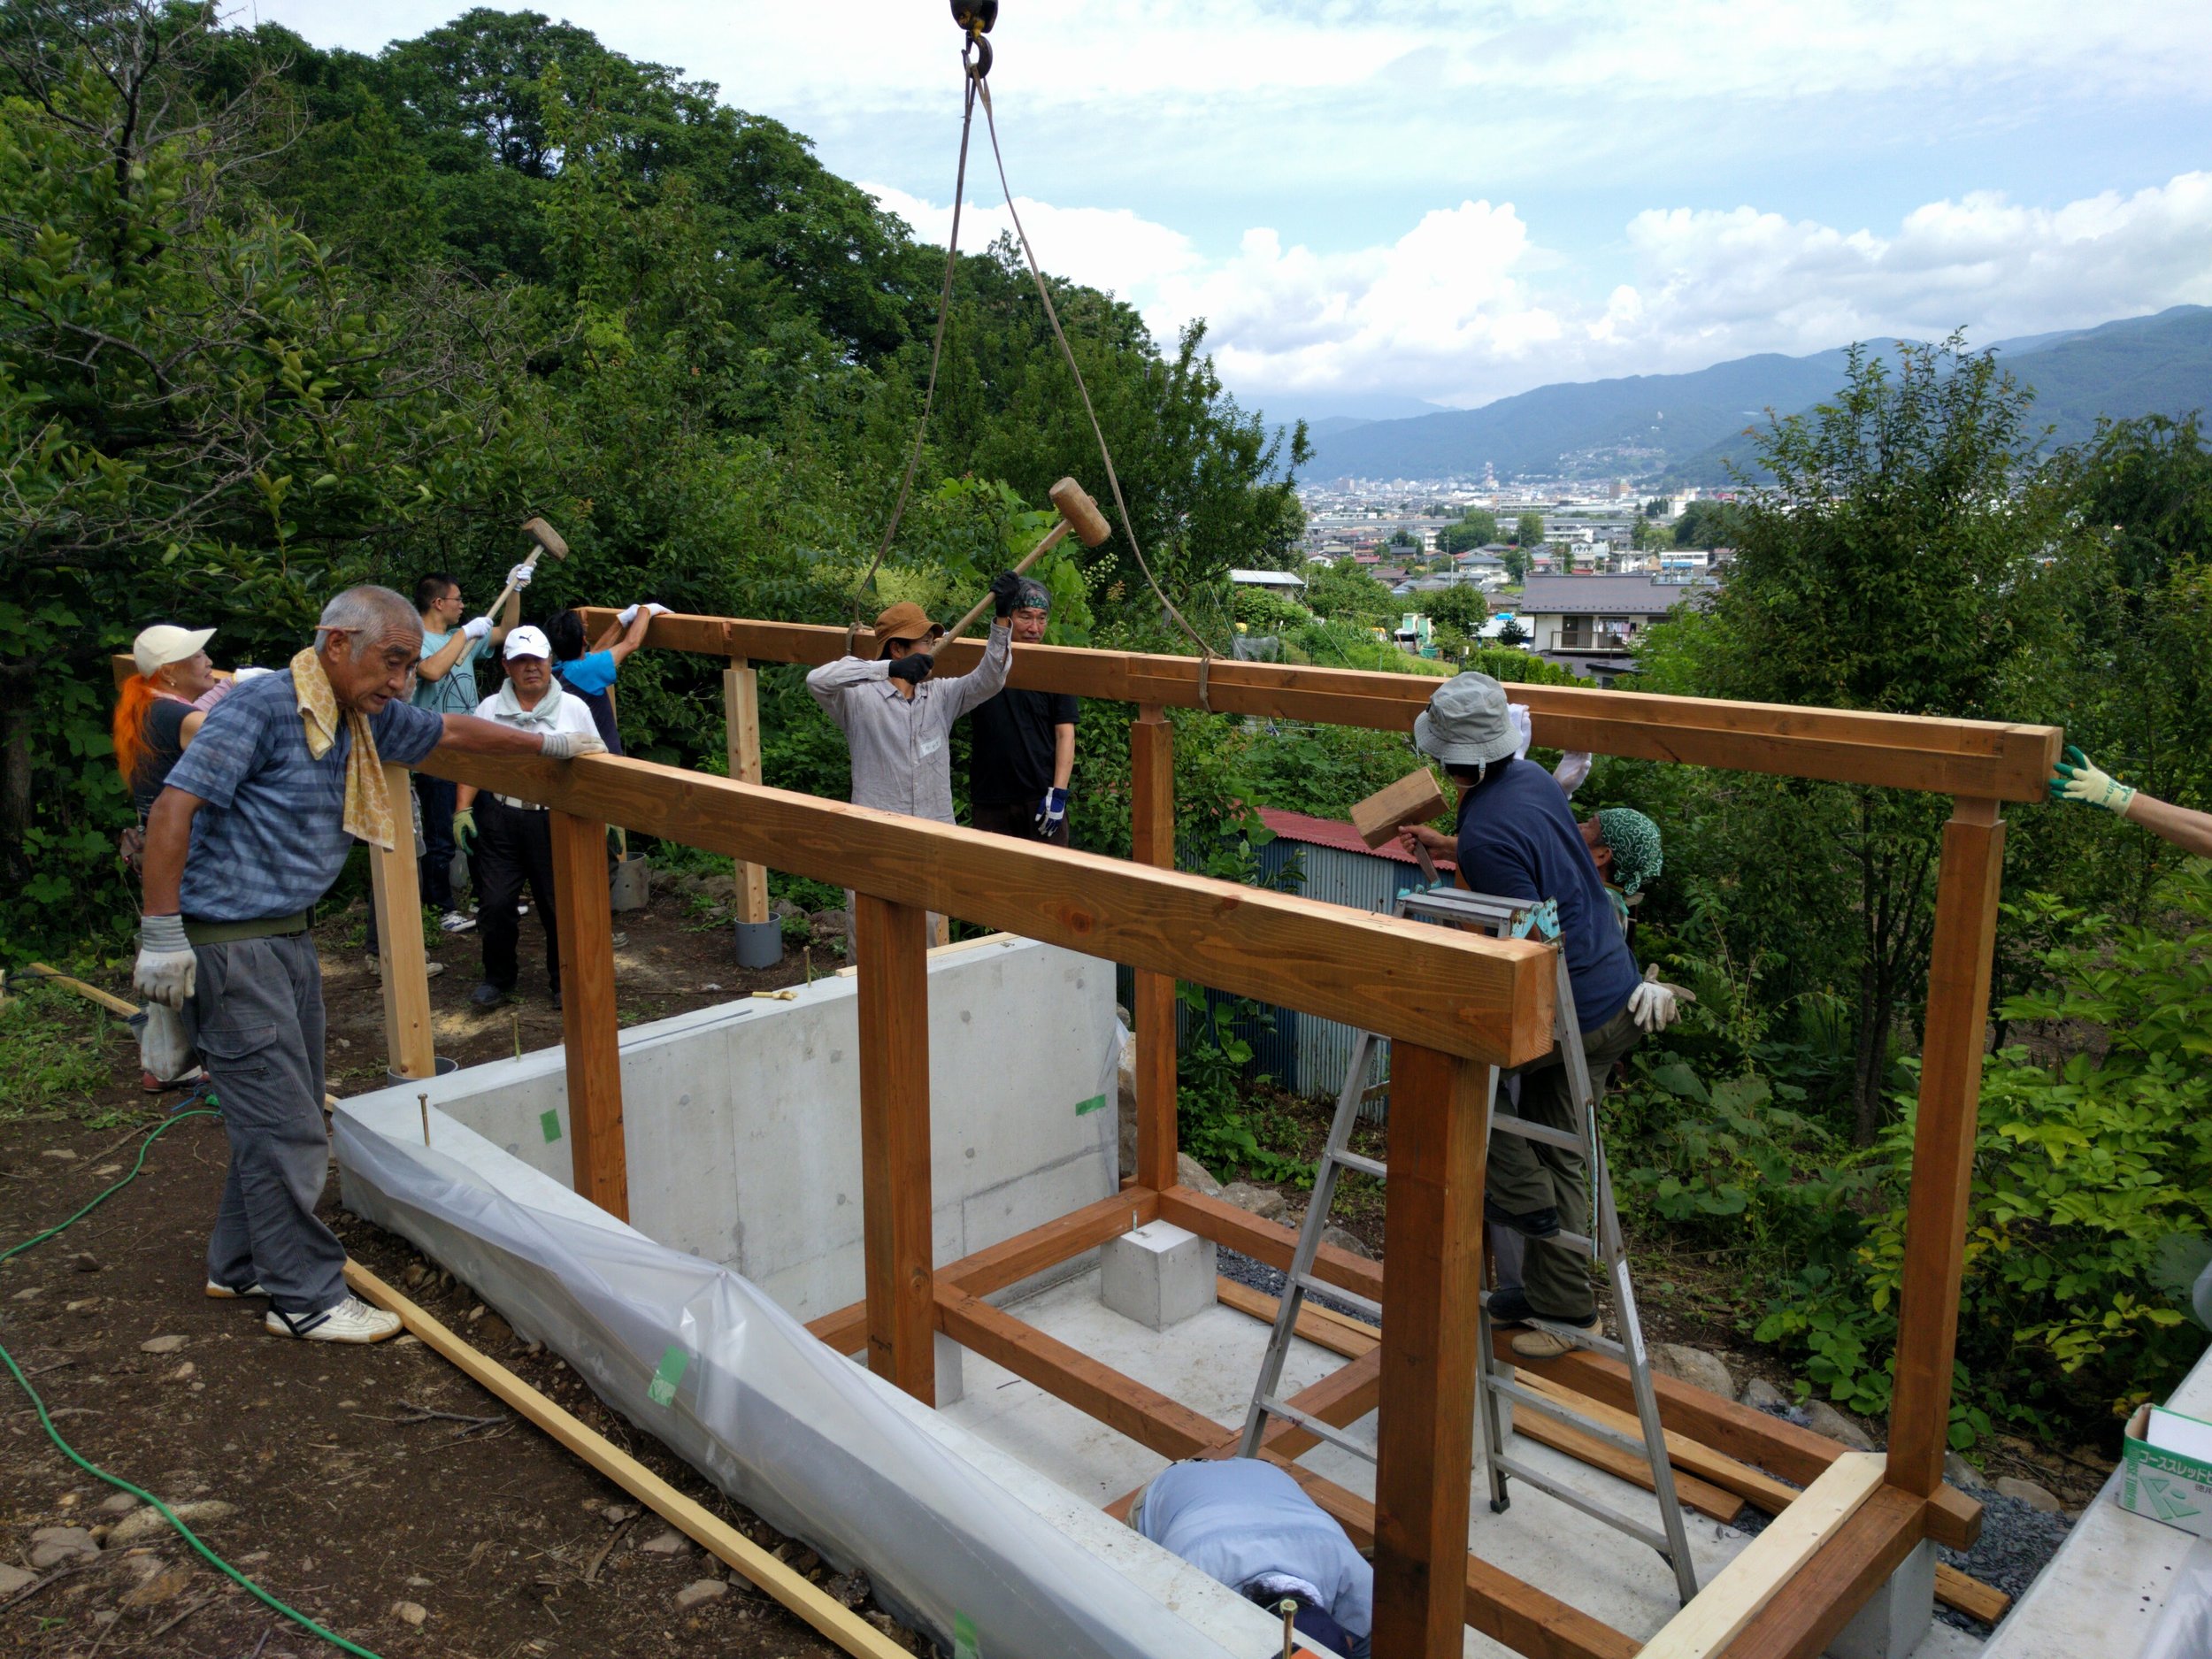
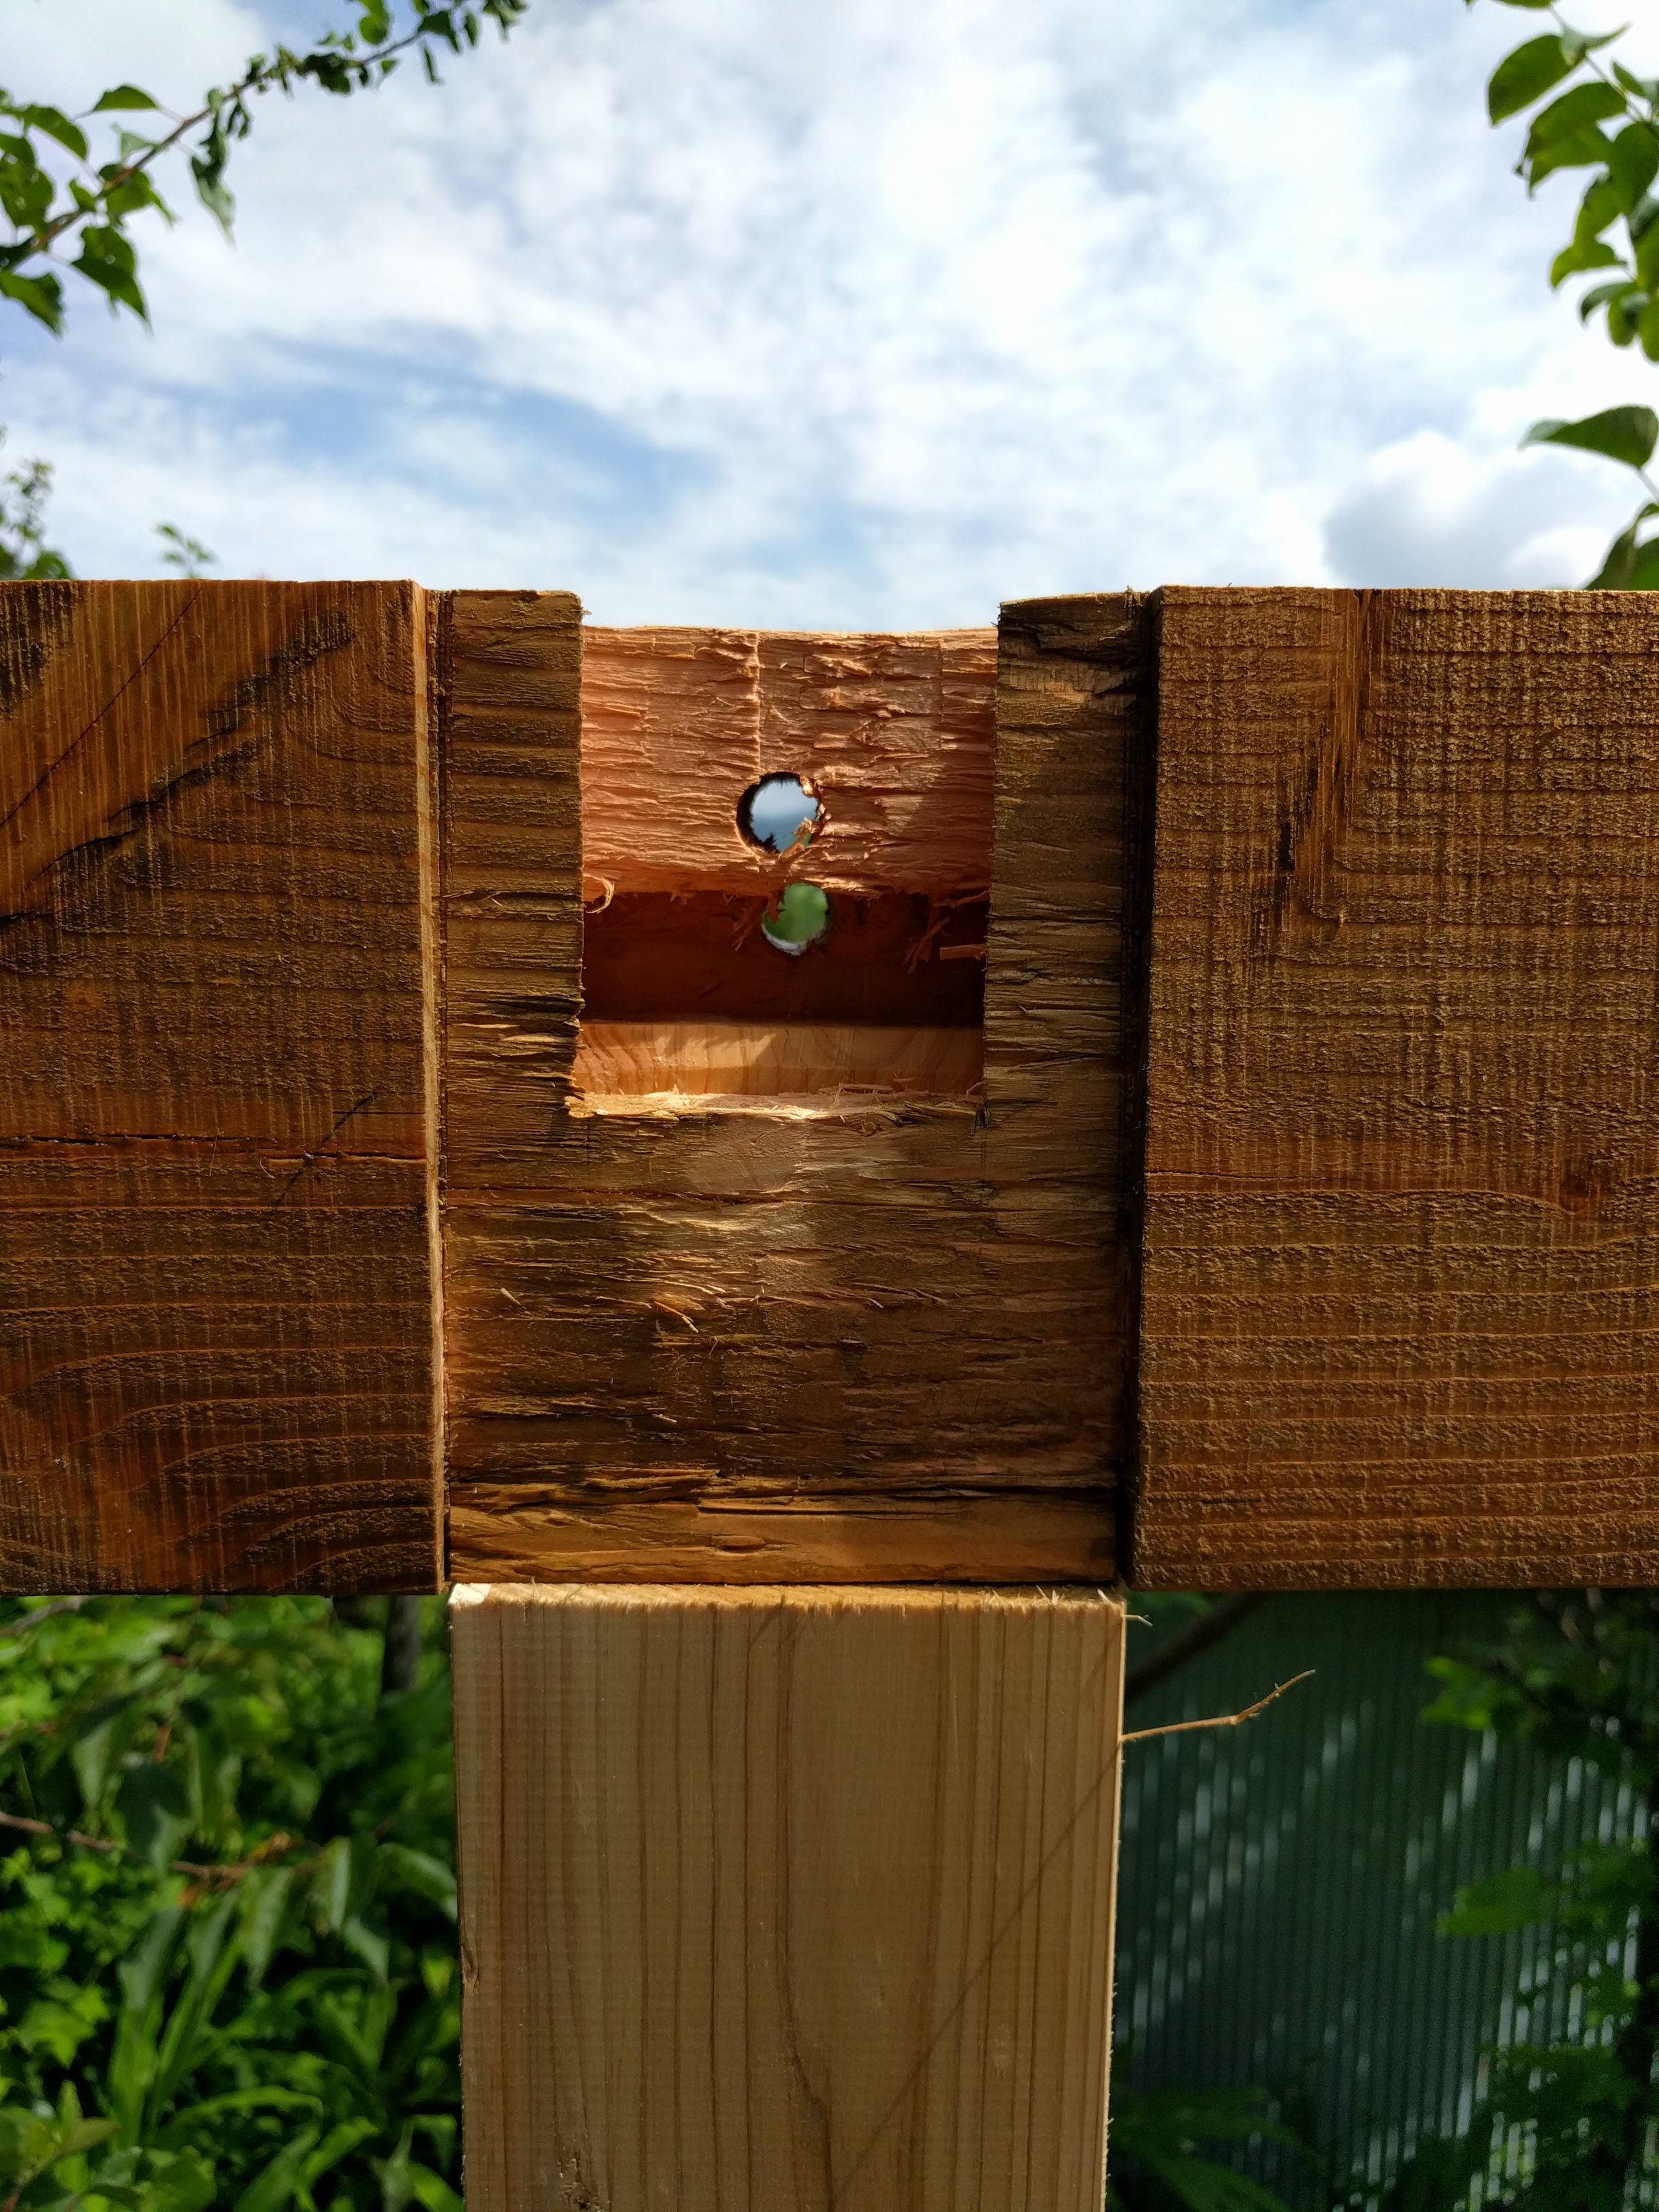
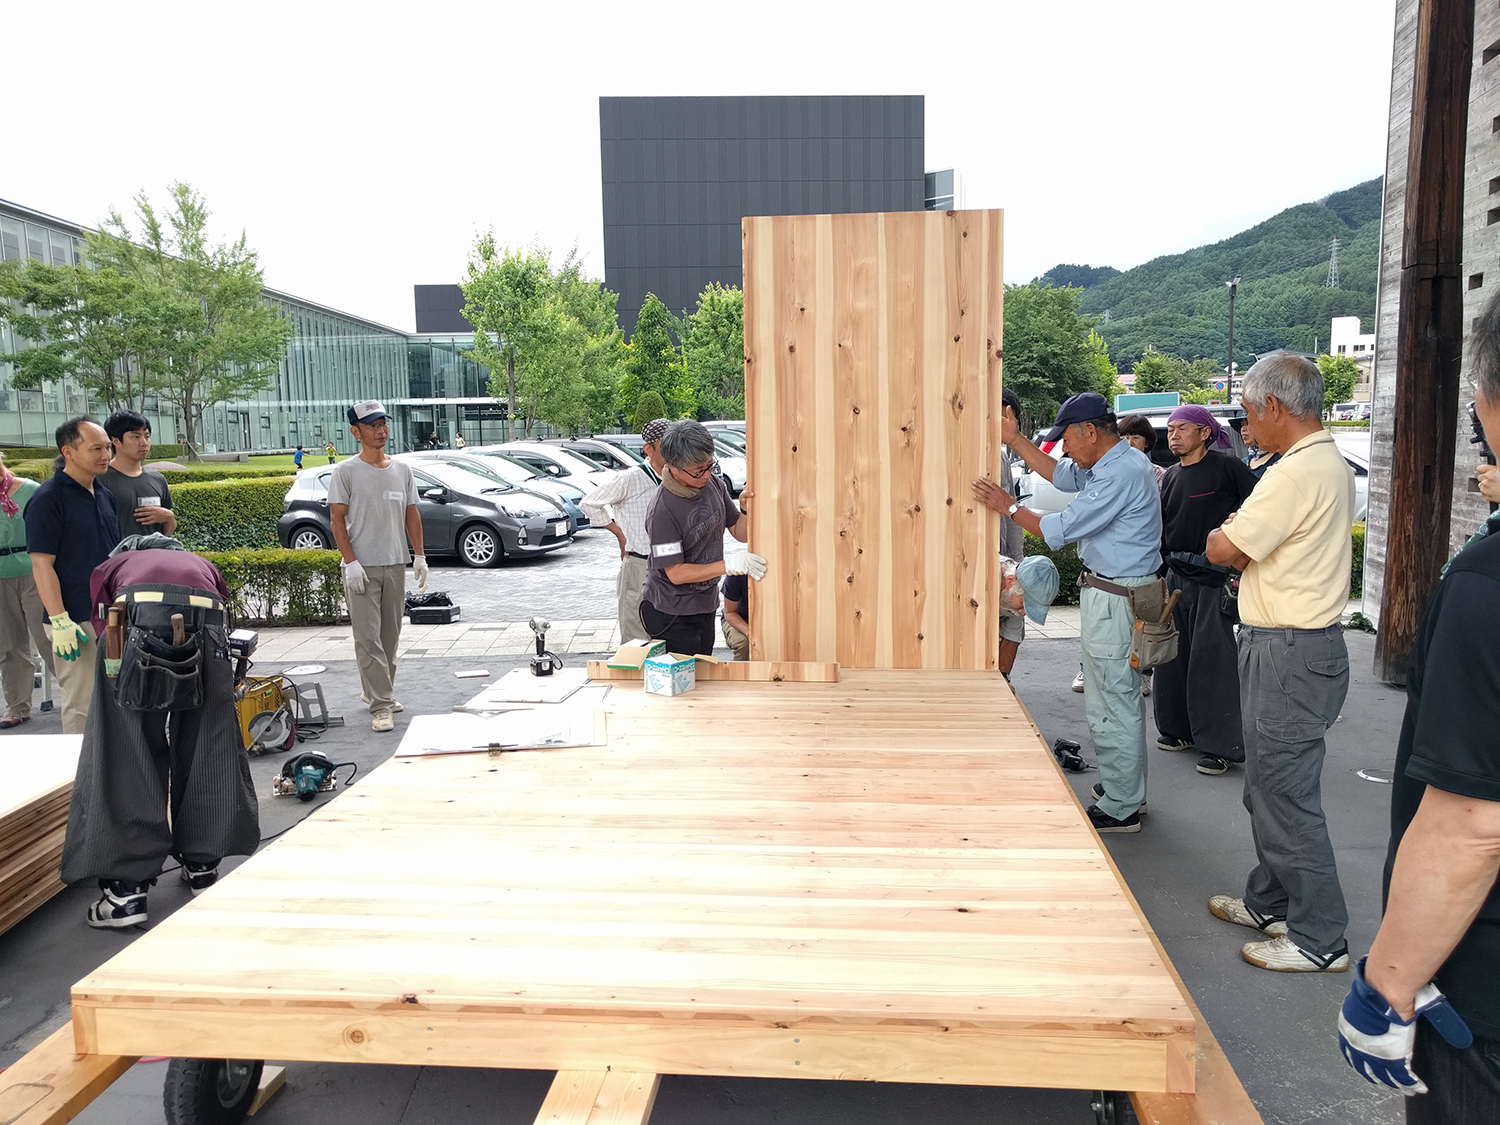
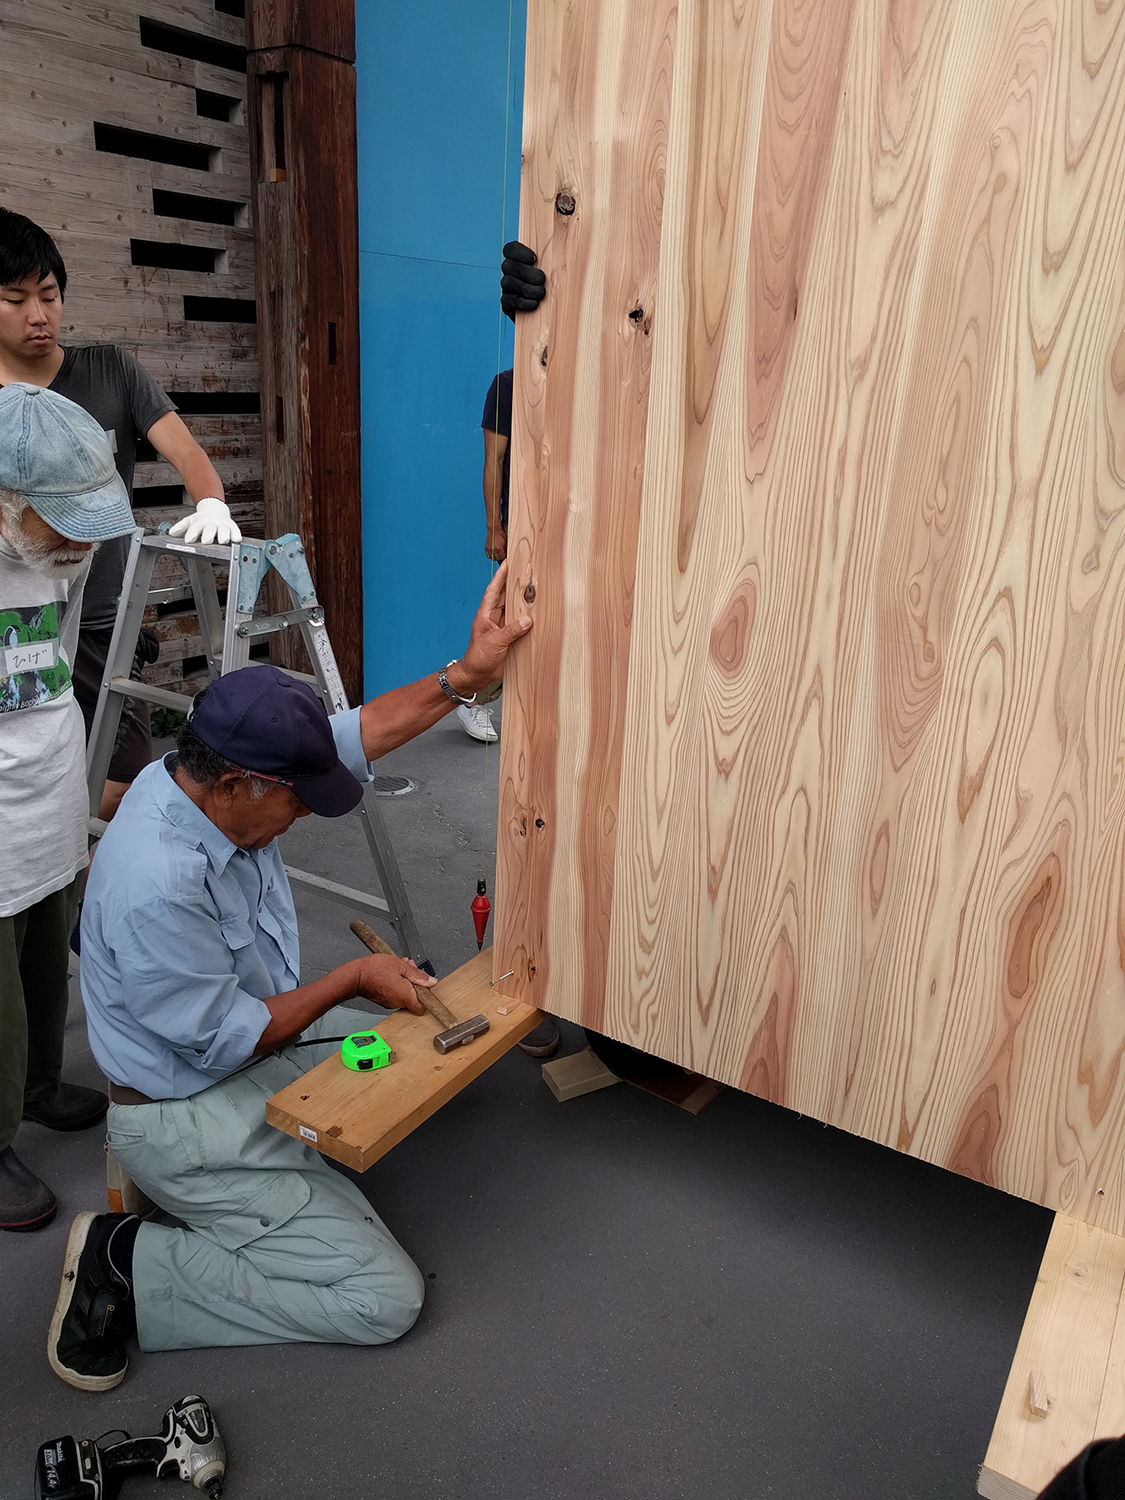
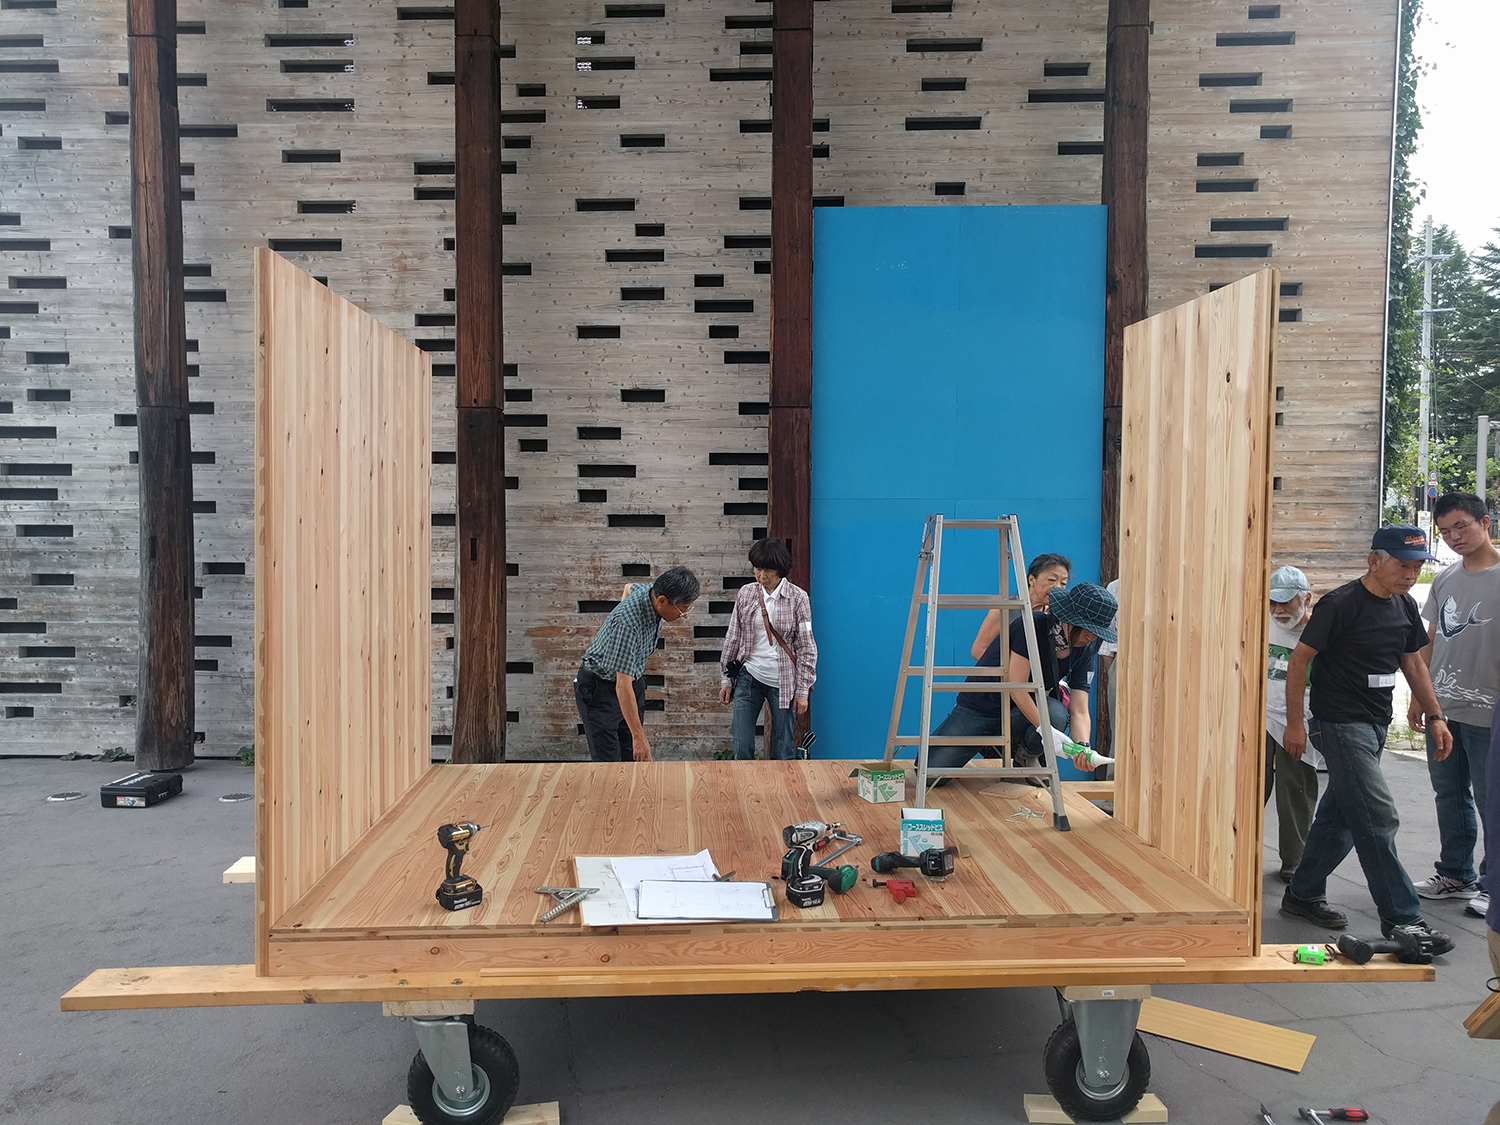
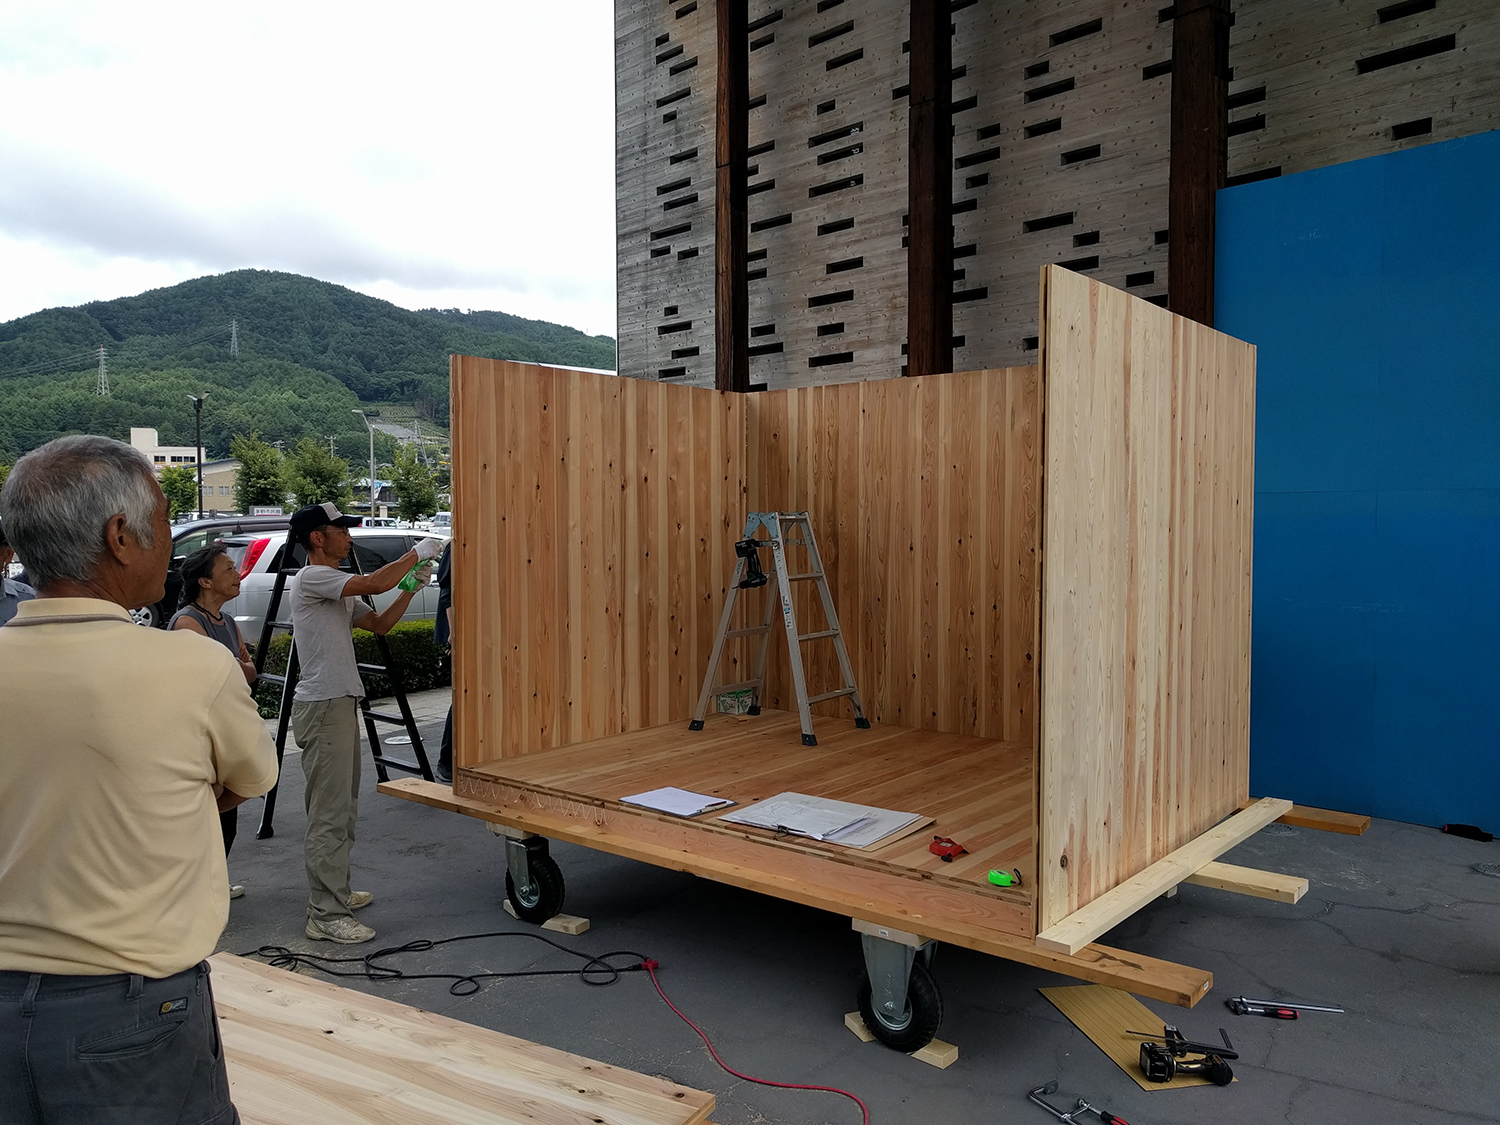
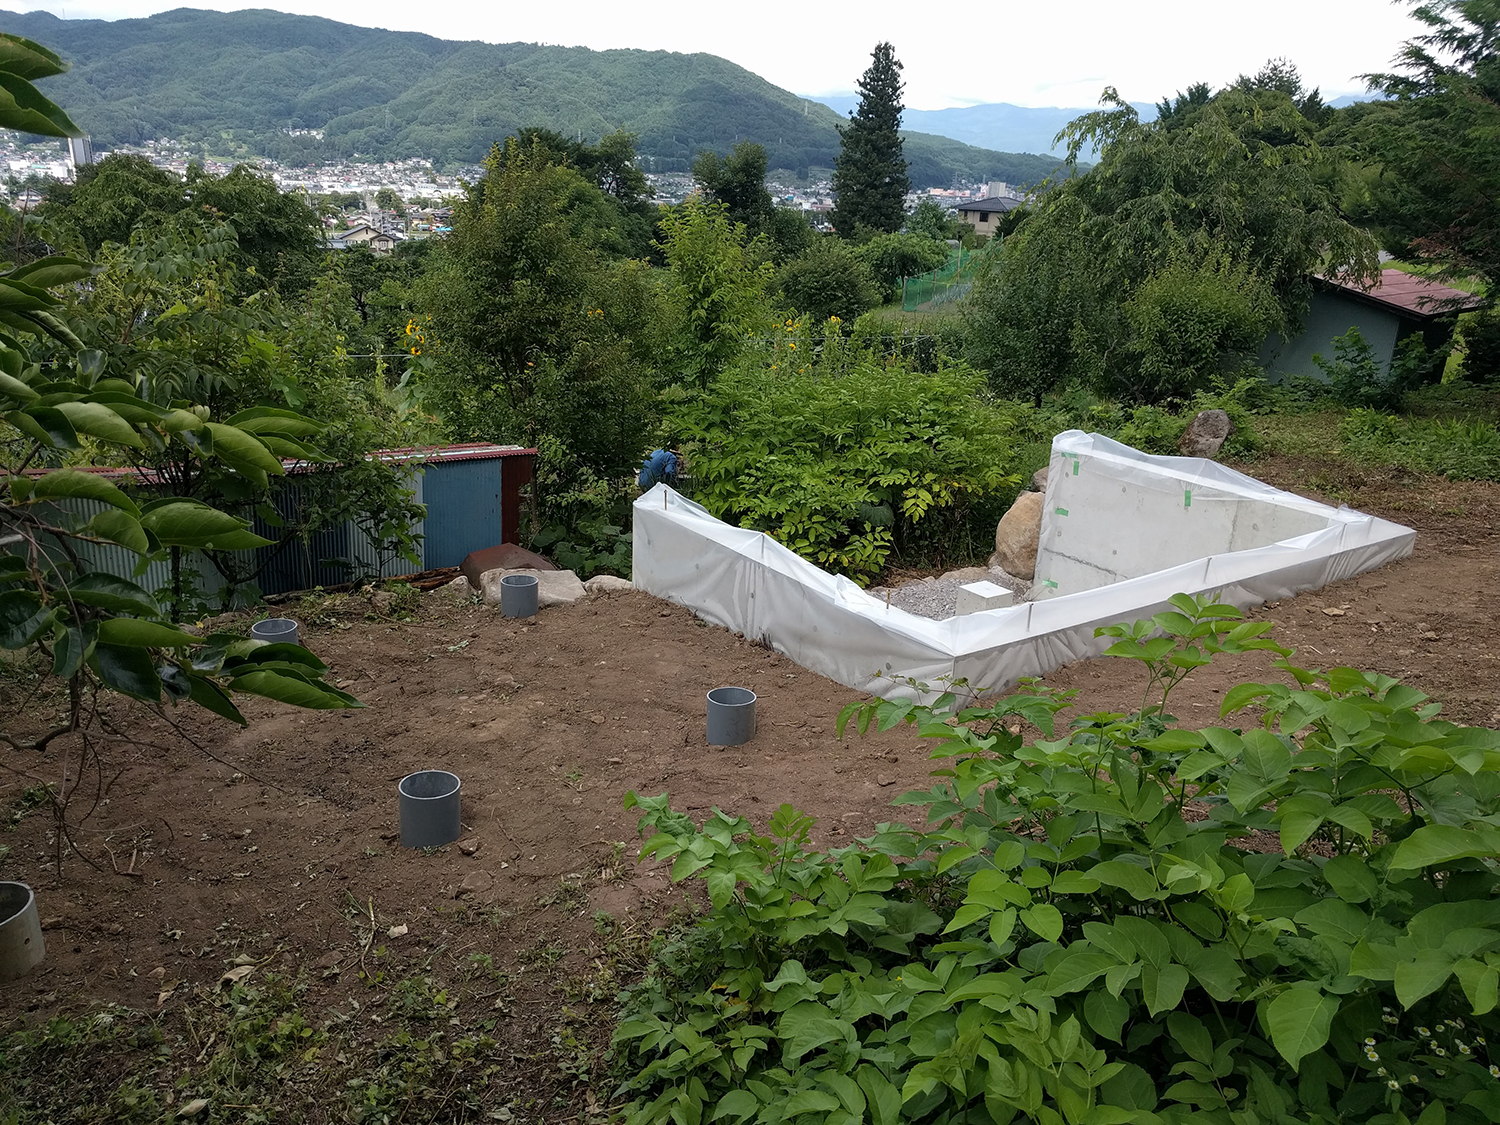
We moved on to the building site. There, we installed the columns and beams, then slid the interior box into the concrete foundation and wood strcture.
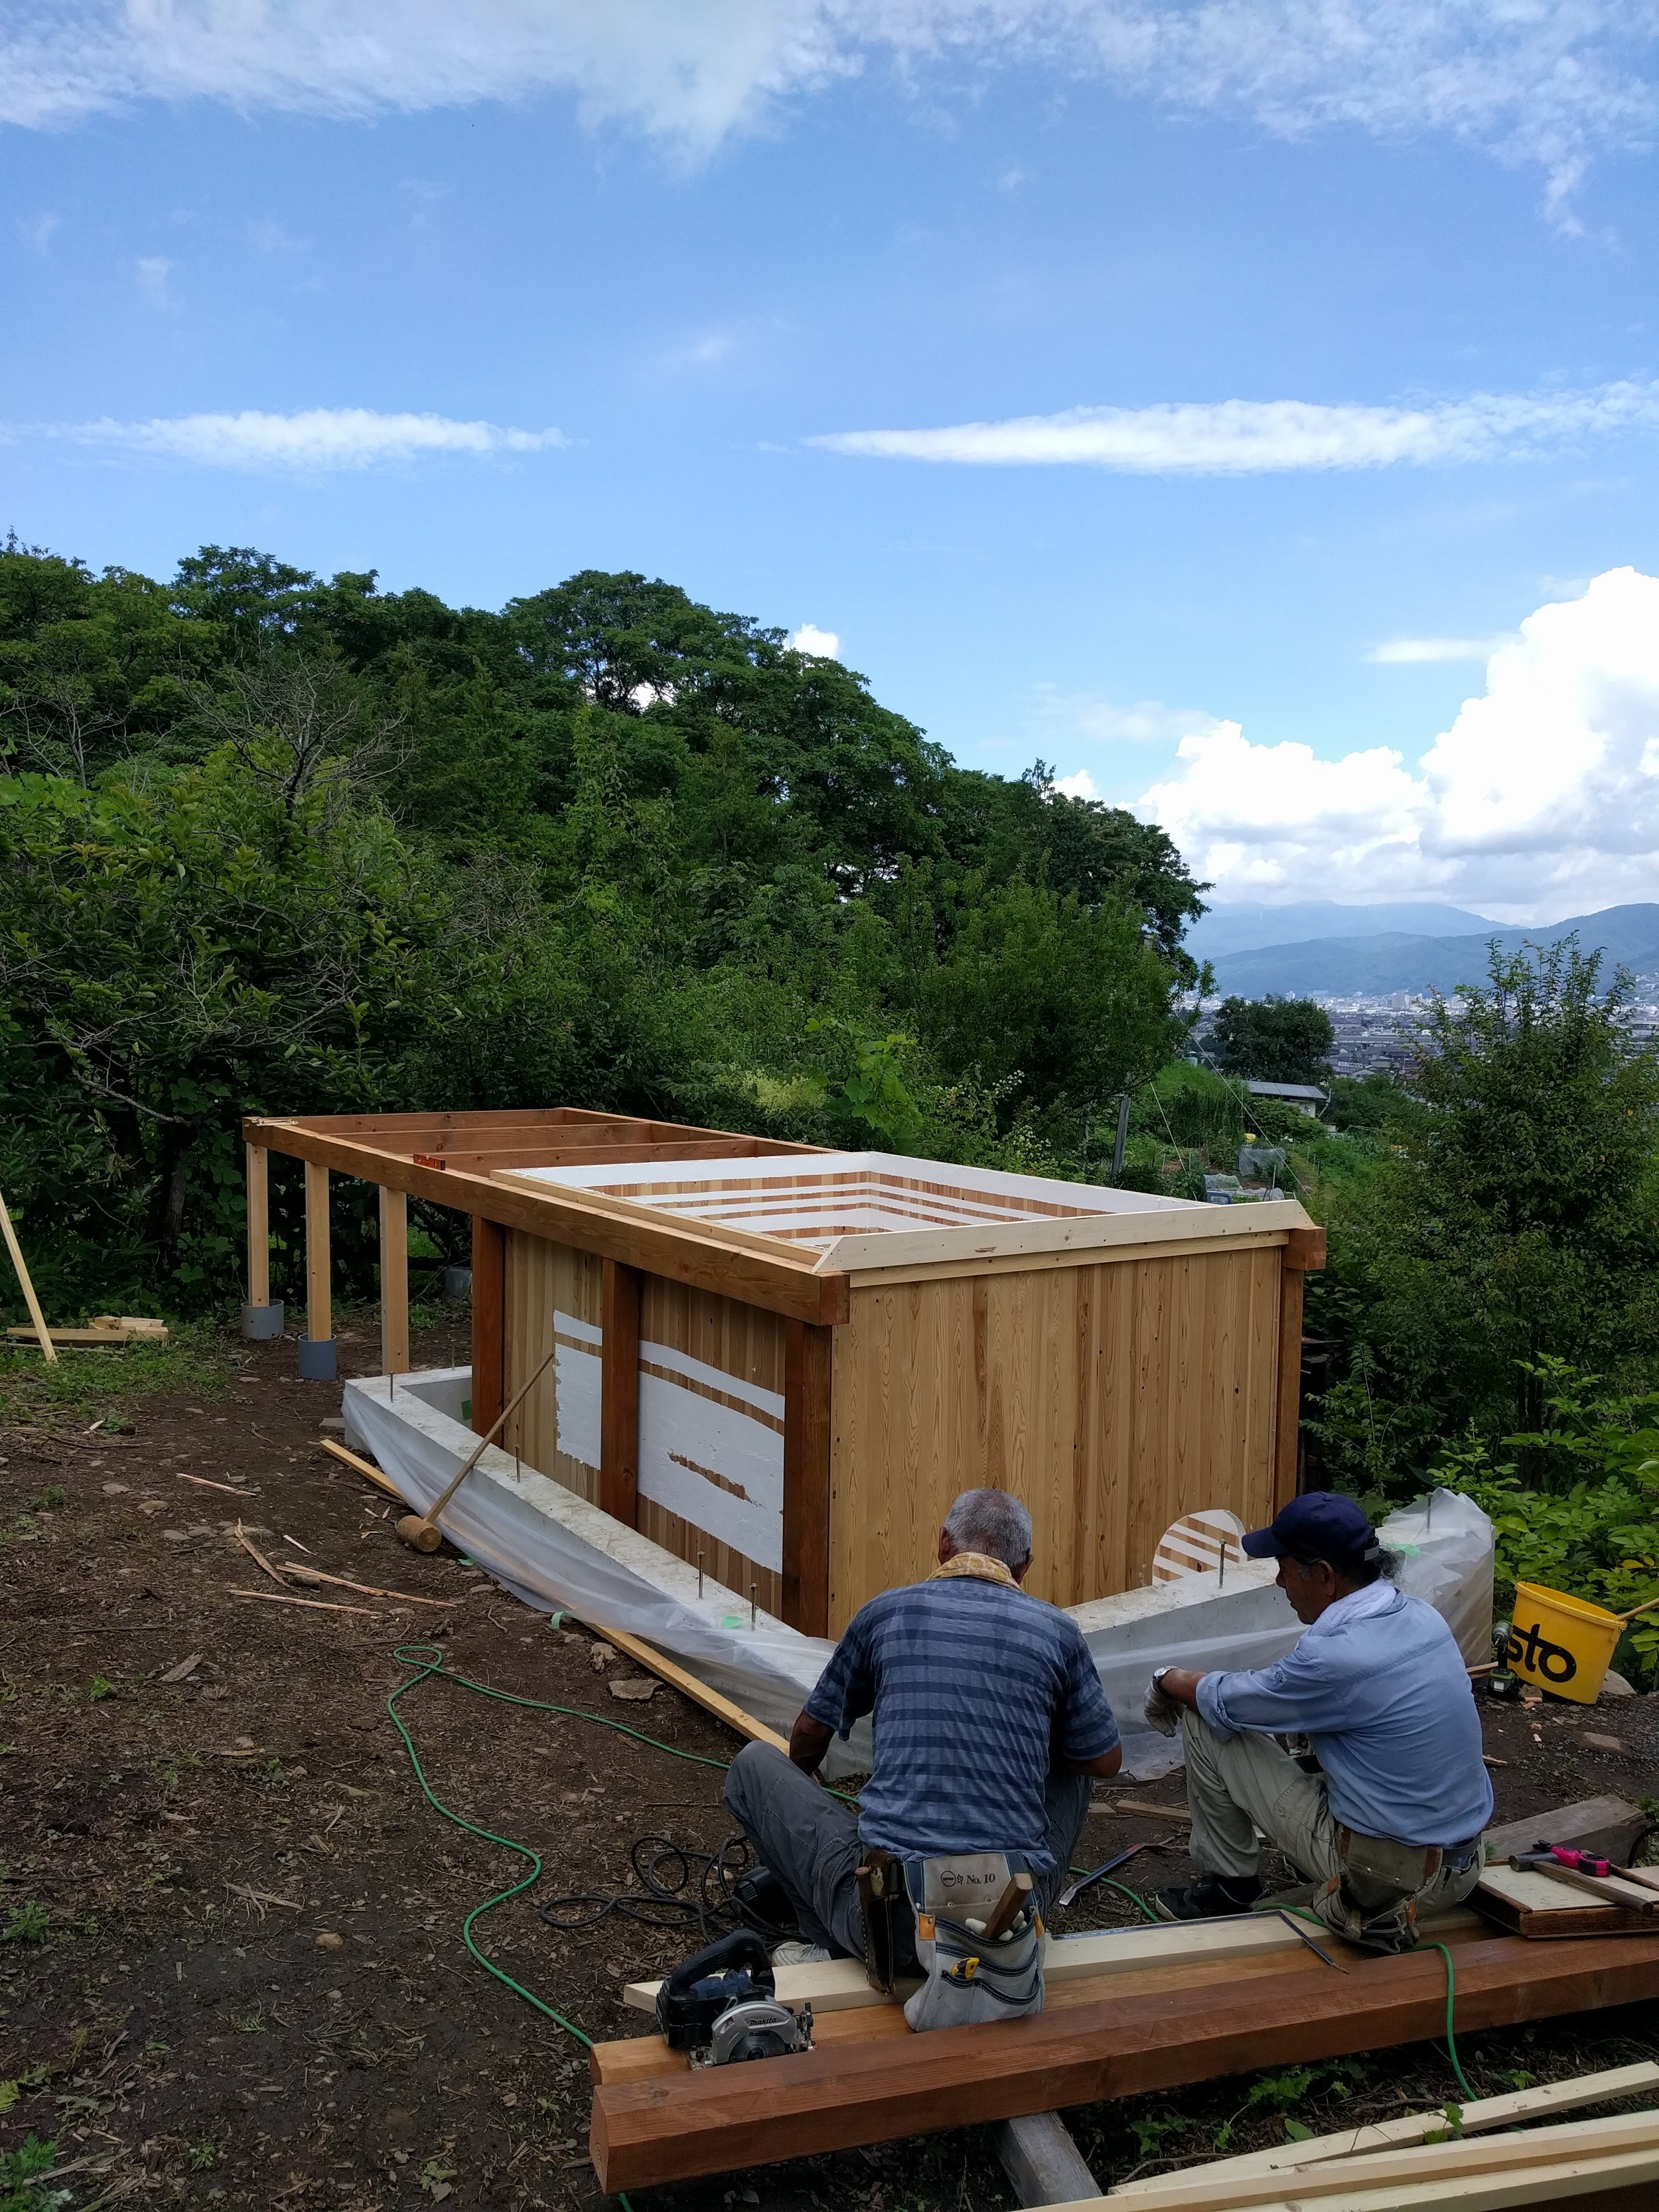
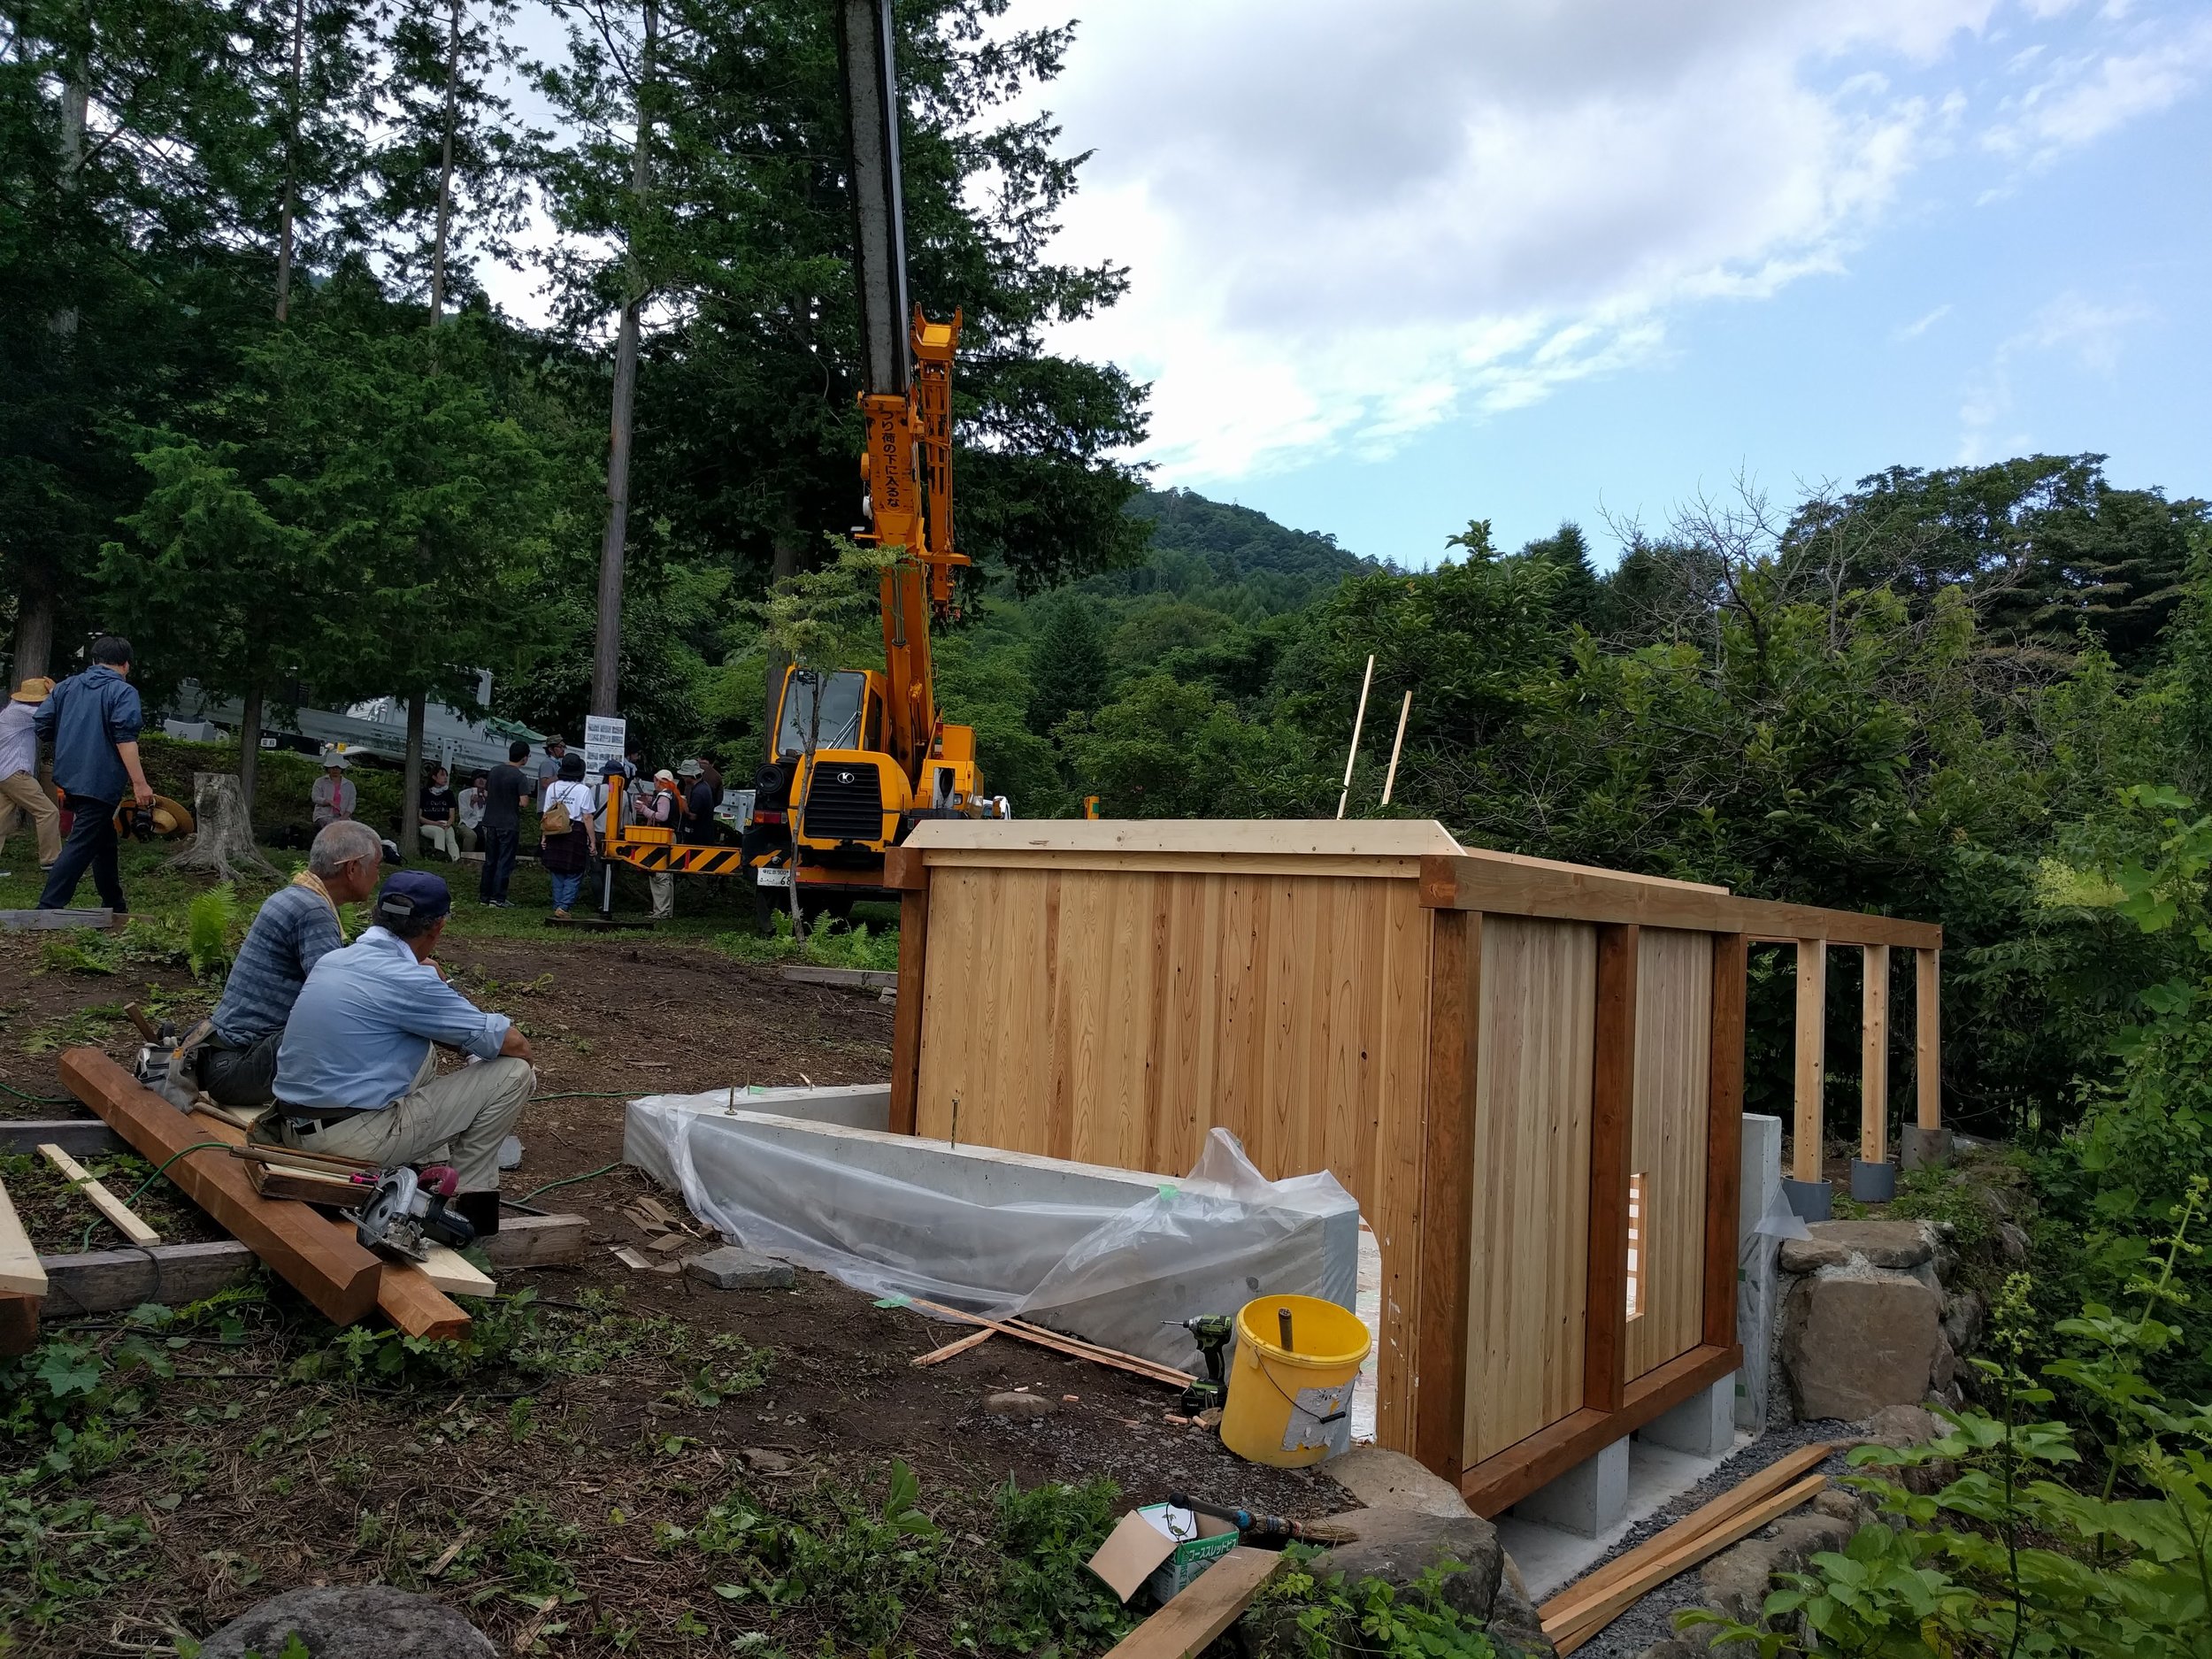
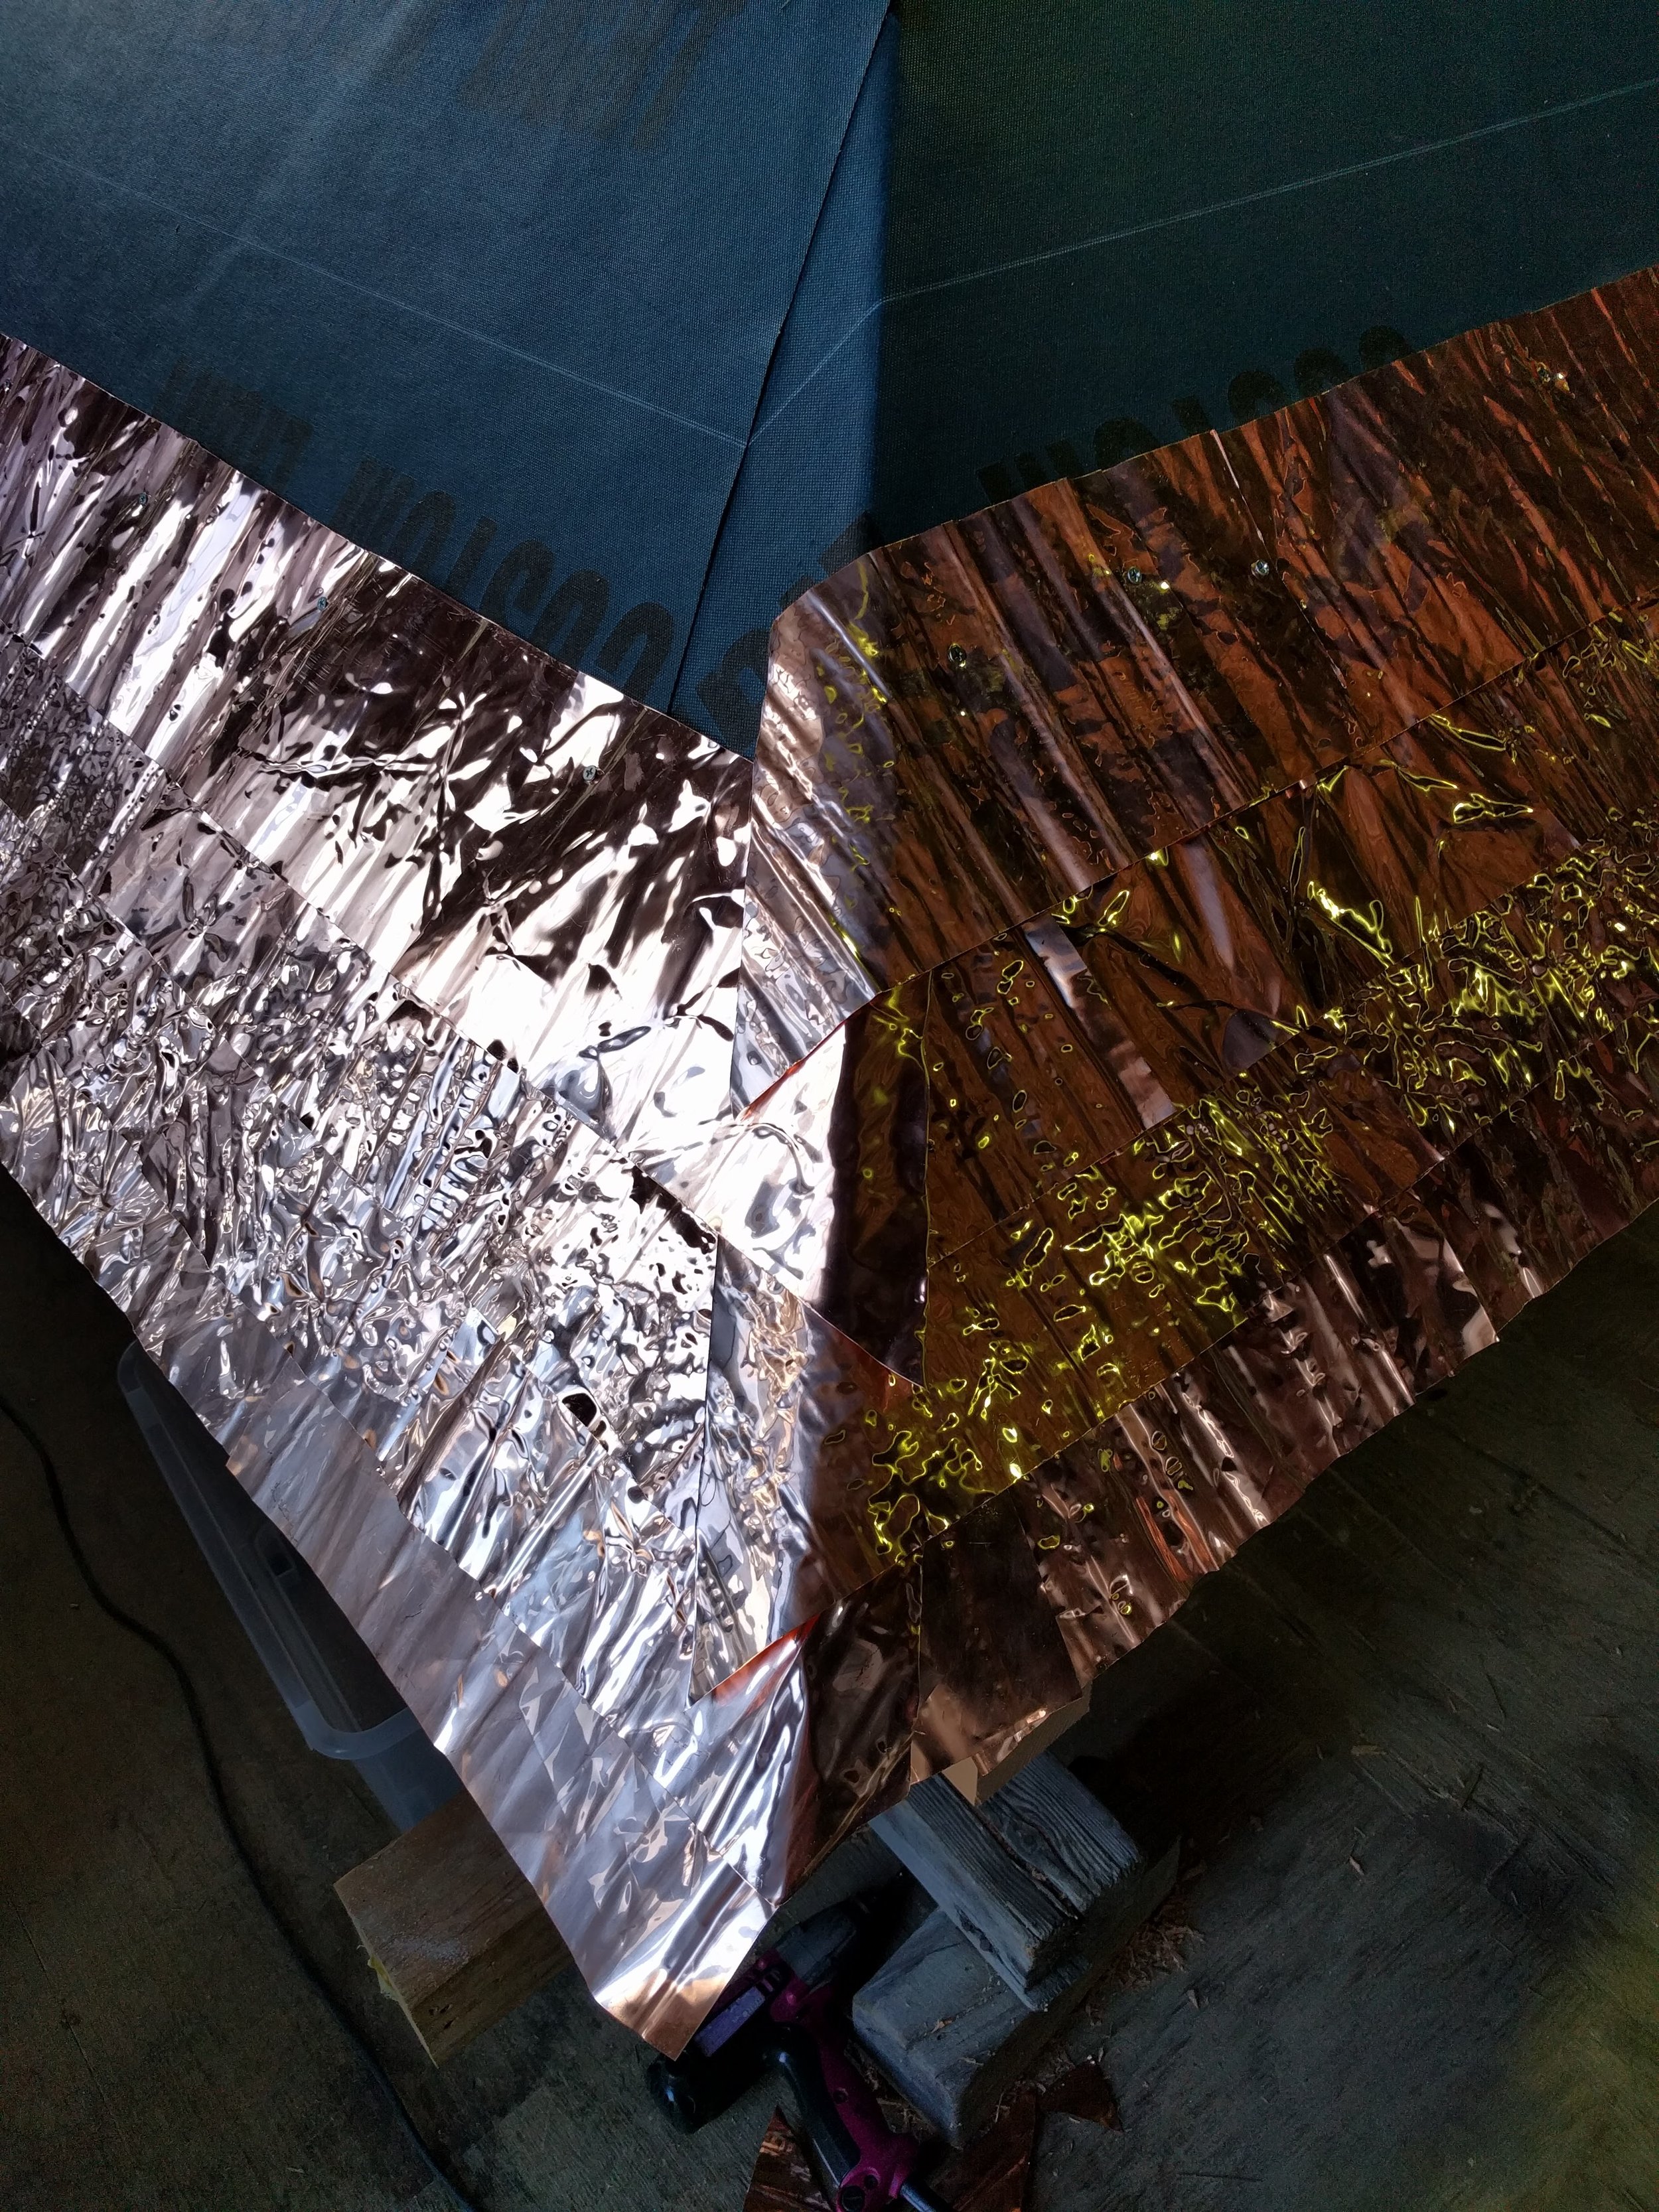
We are moving to roof building. Base shape is made with J-panel. First, we needed to apply waterproof sheet over the structure. Then we put on klinkled copper shingles.
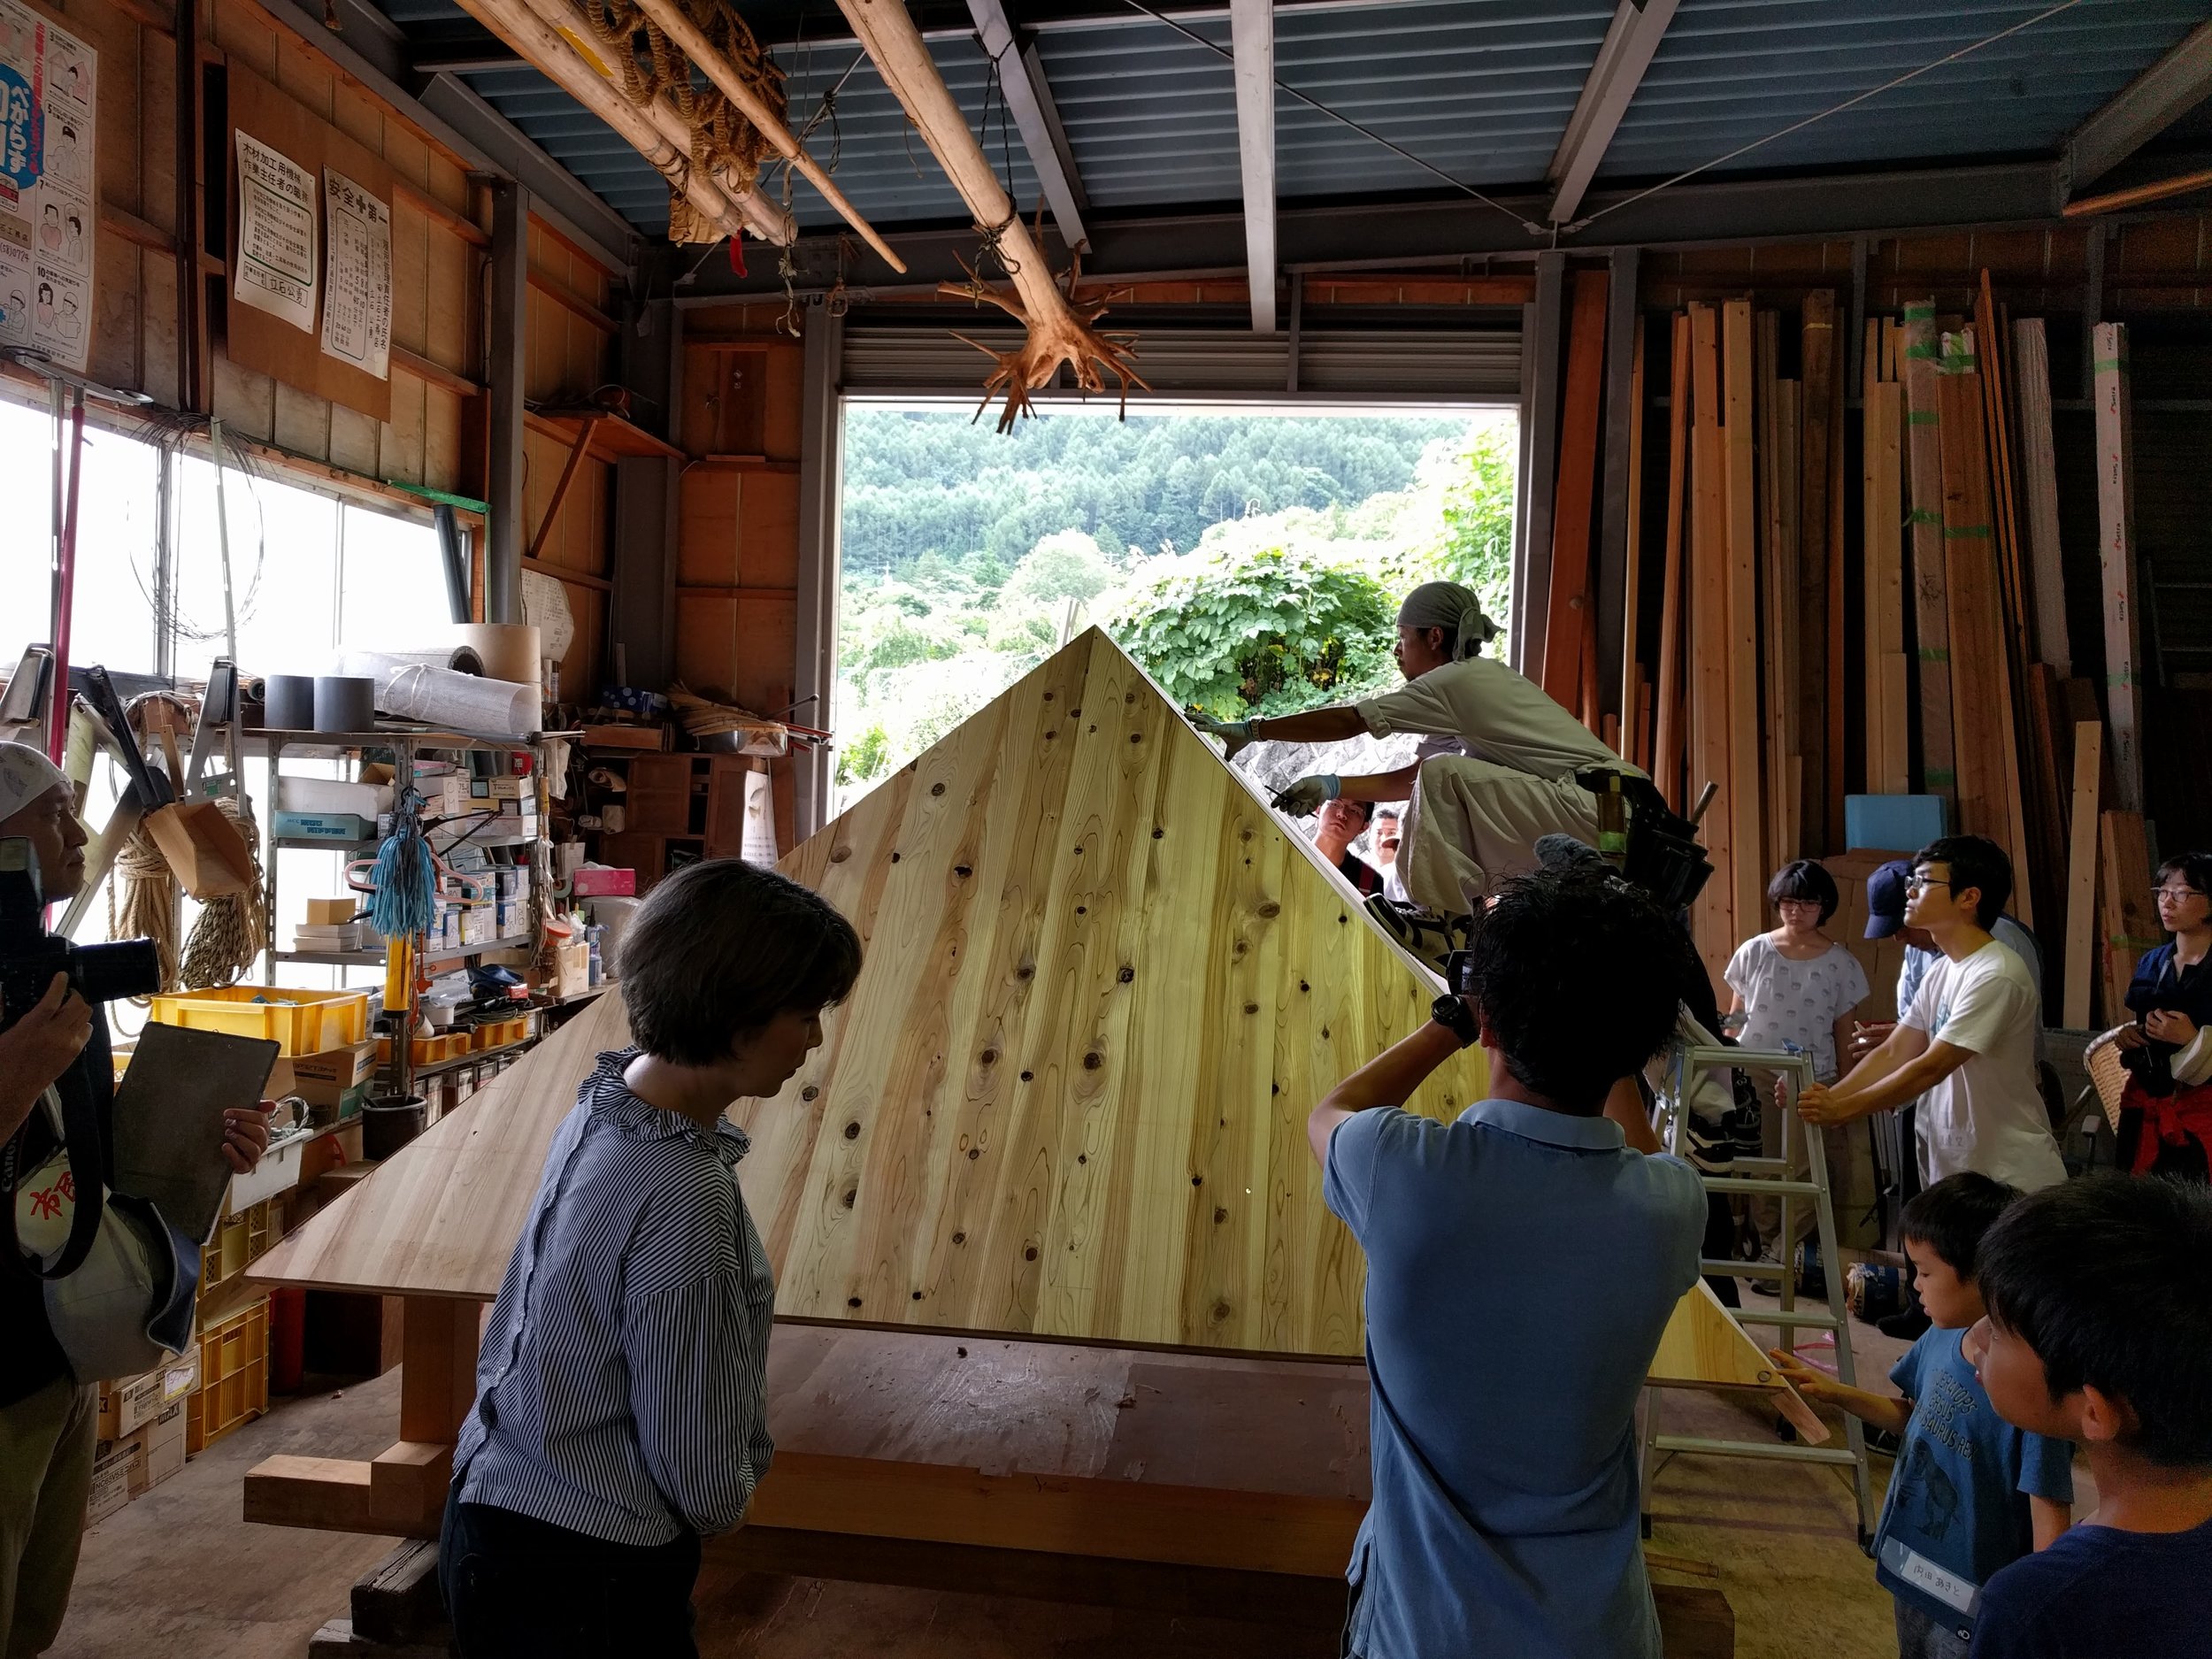

Meanwhile, others are starting to construct a kettle which has structure of thin tin sheets.
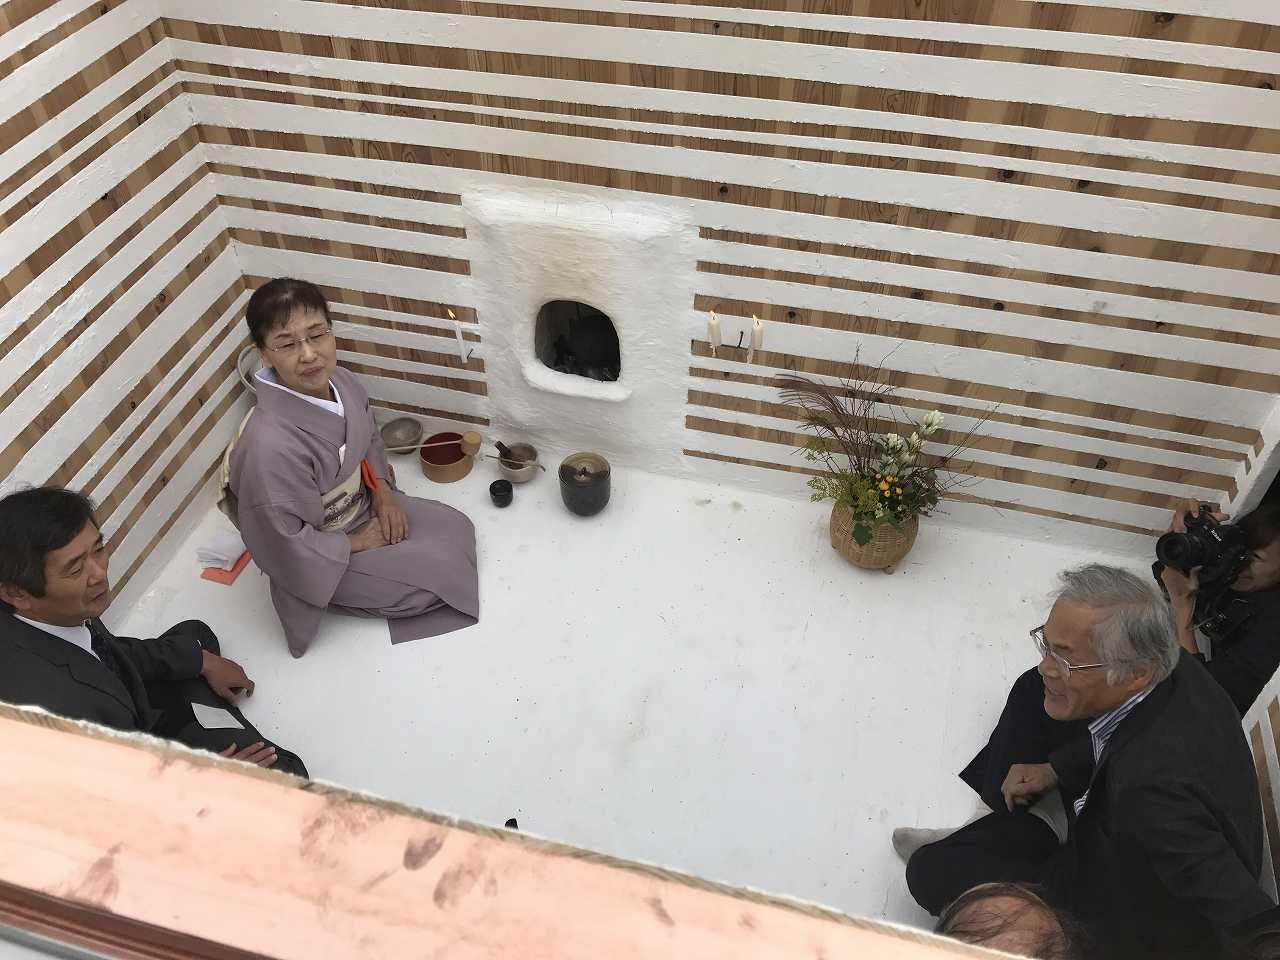
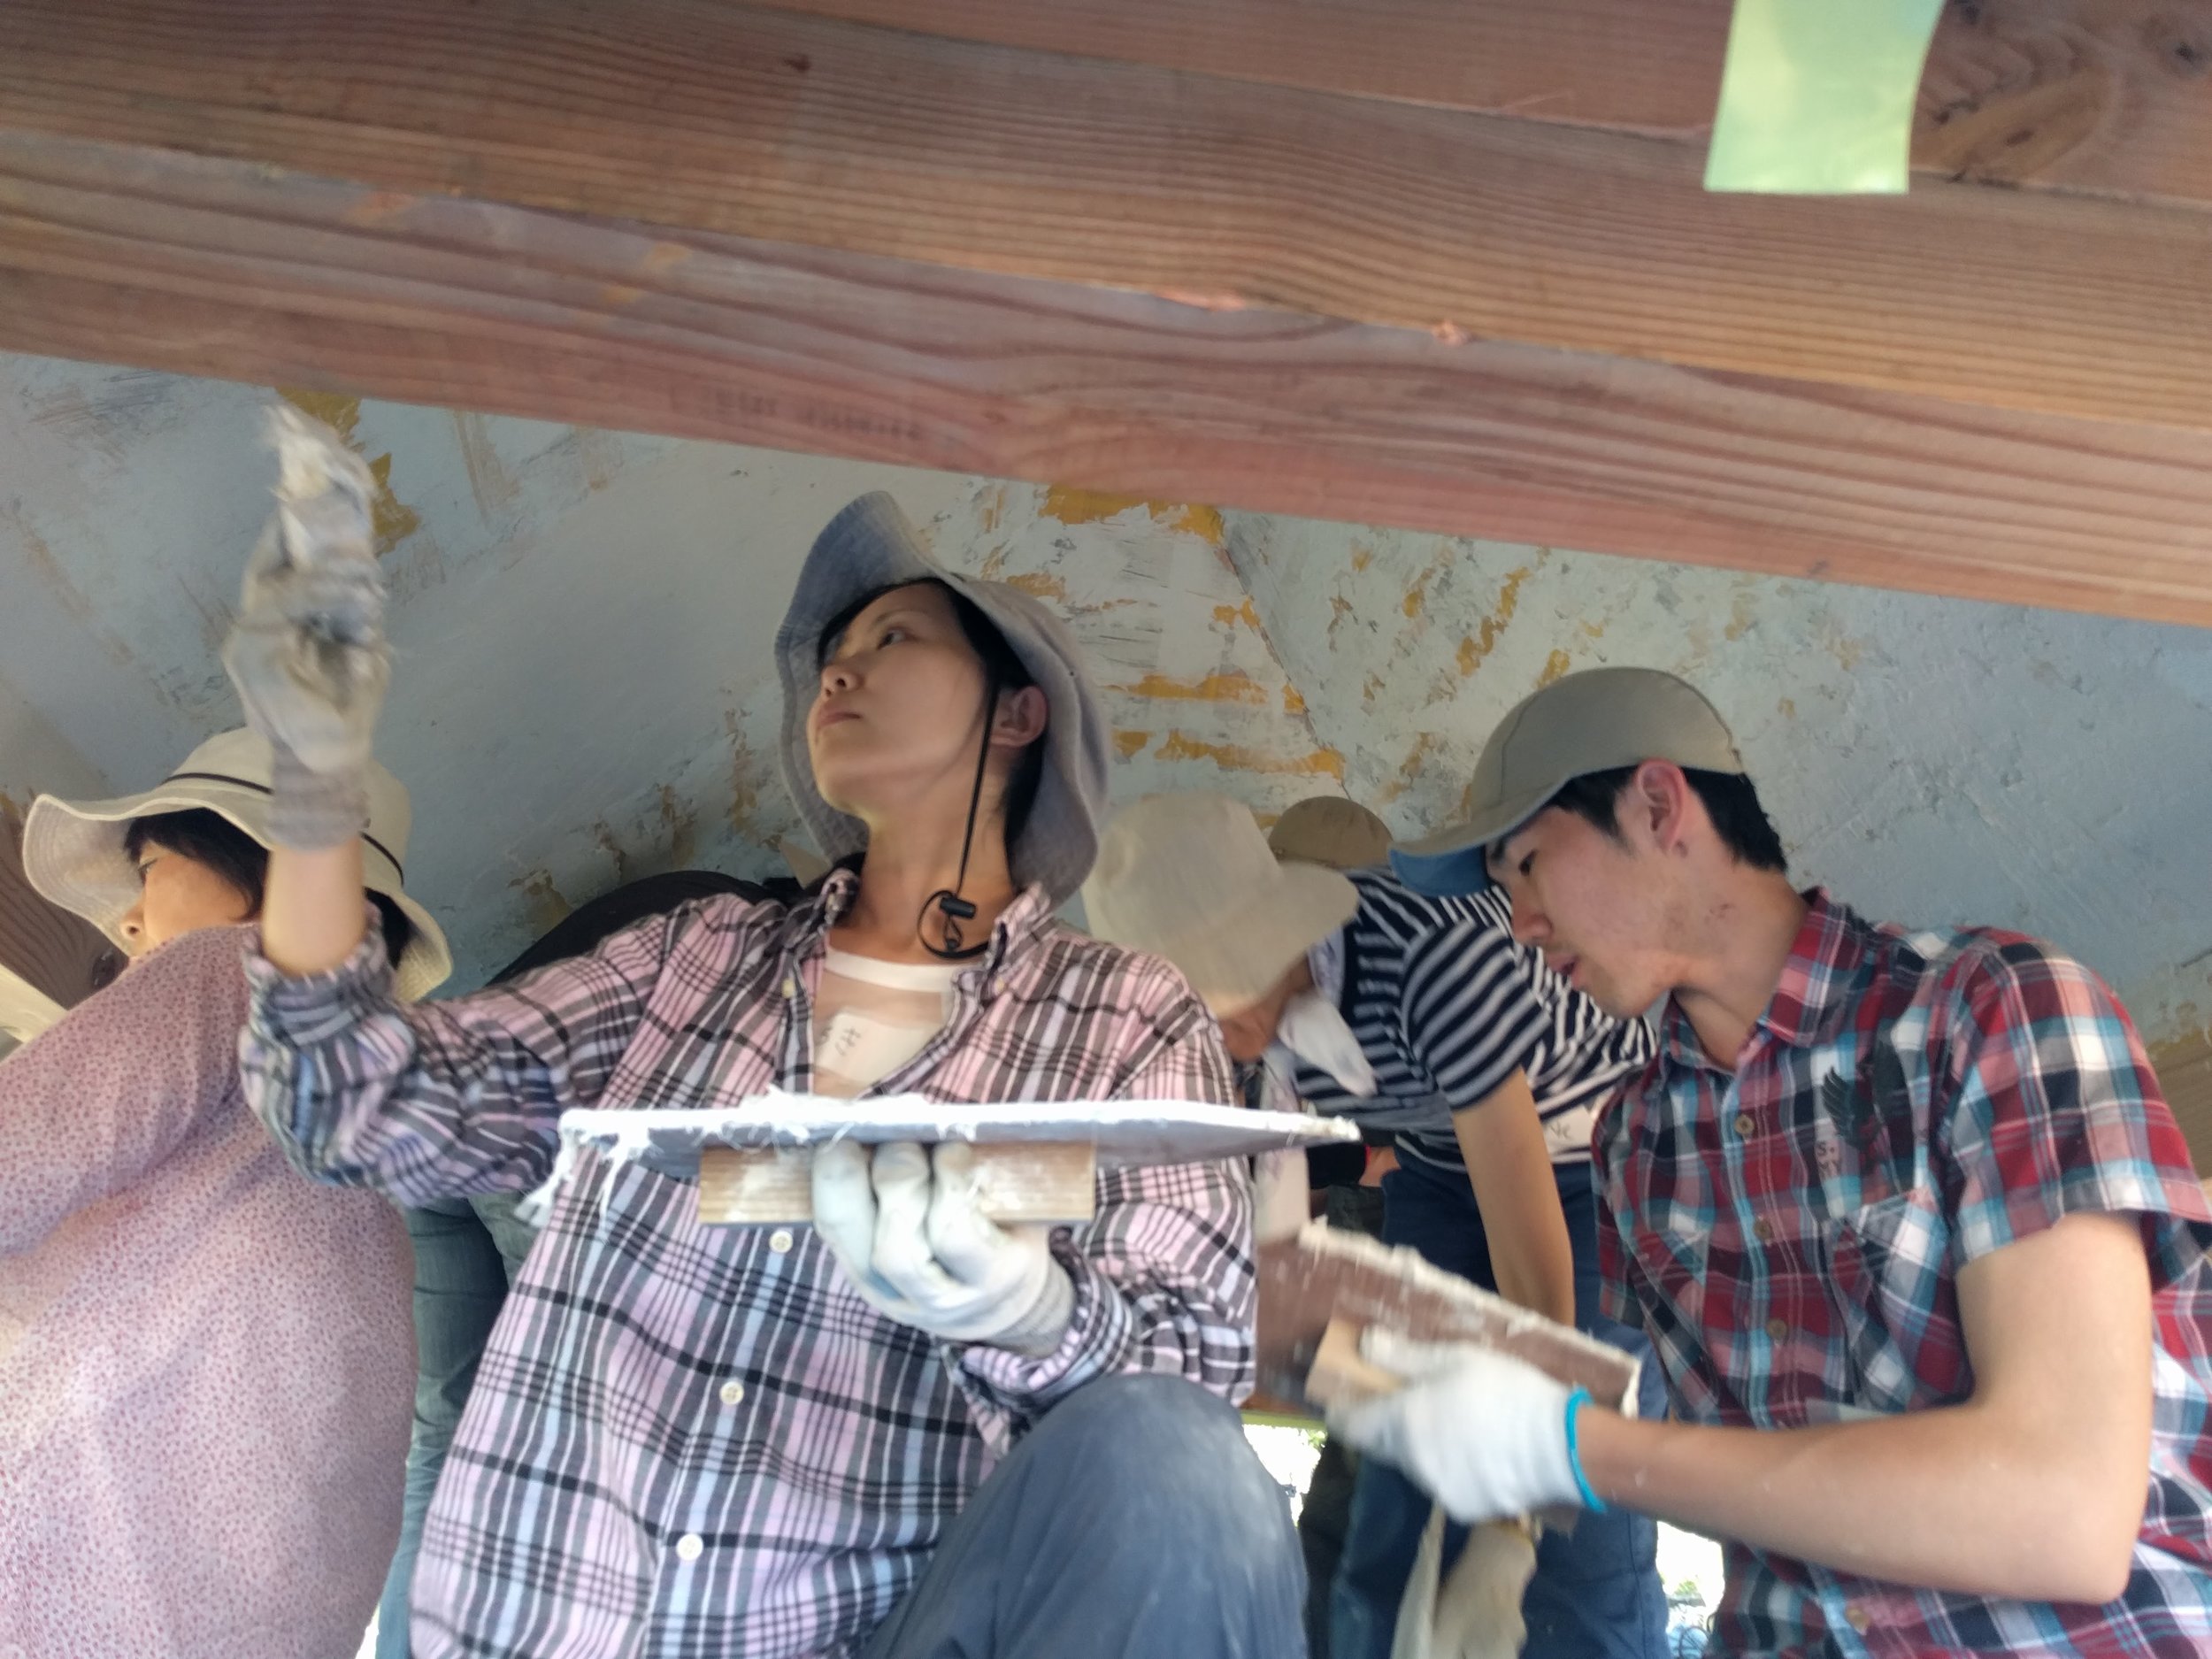
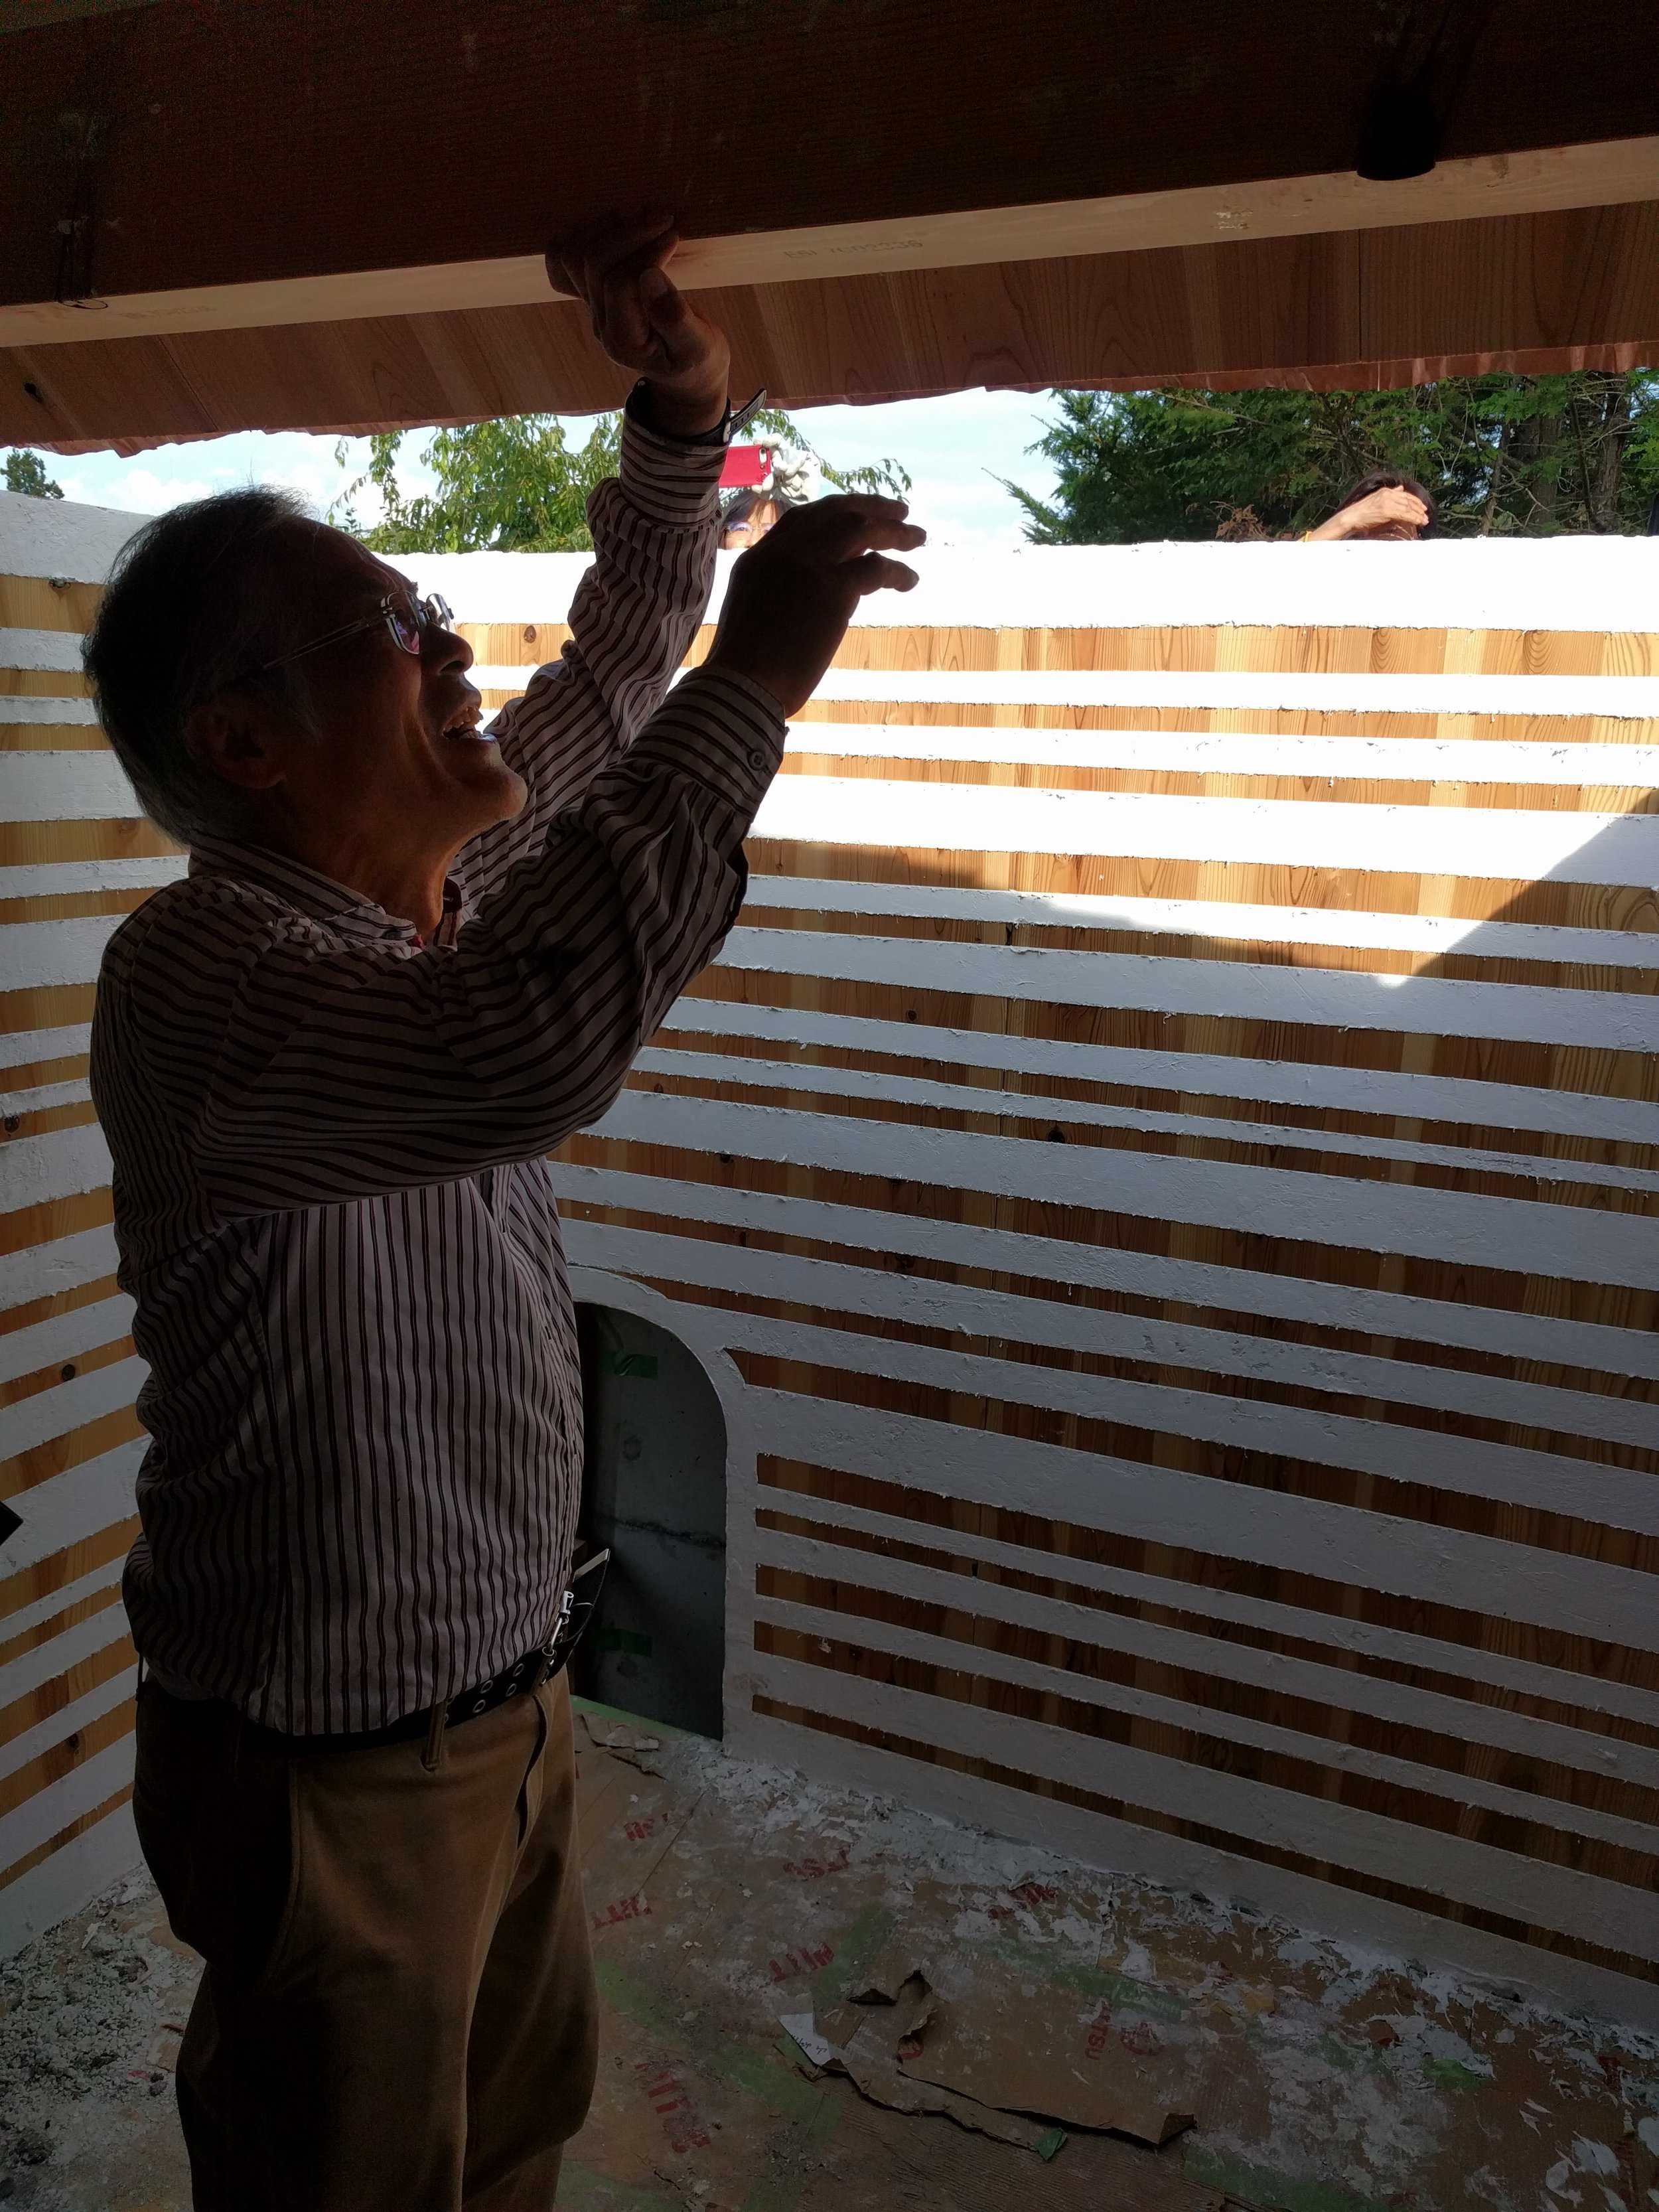
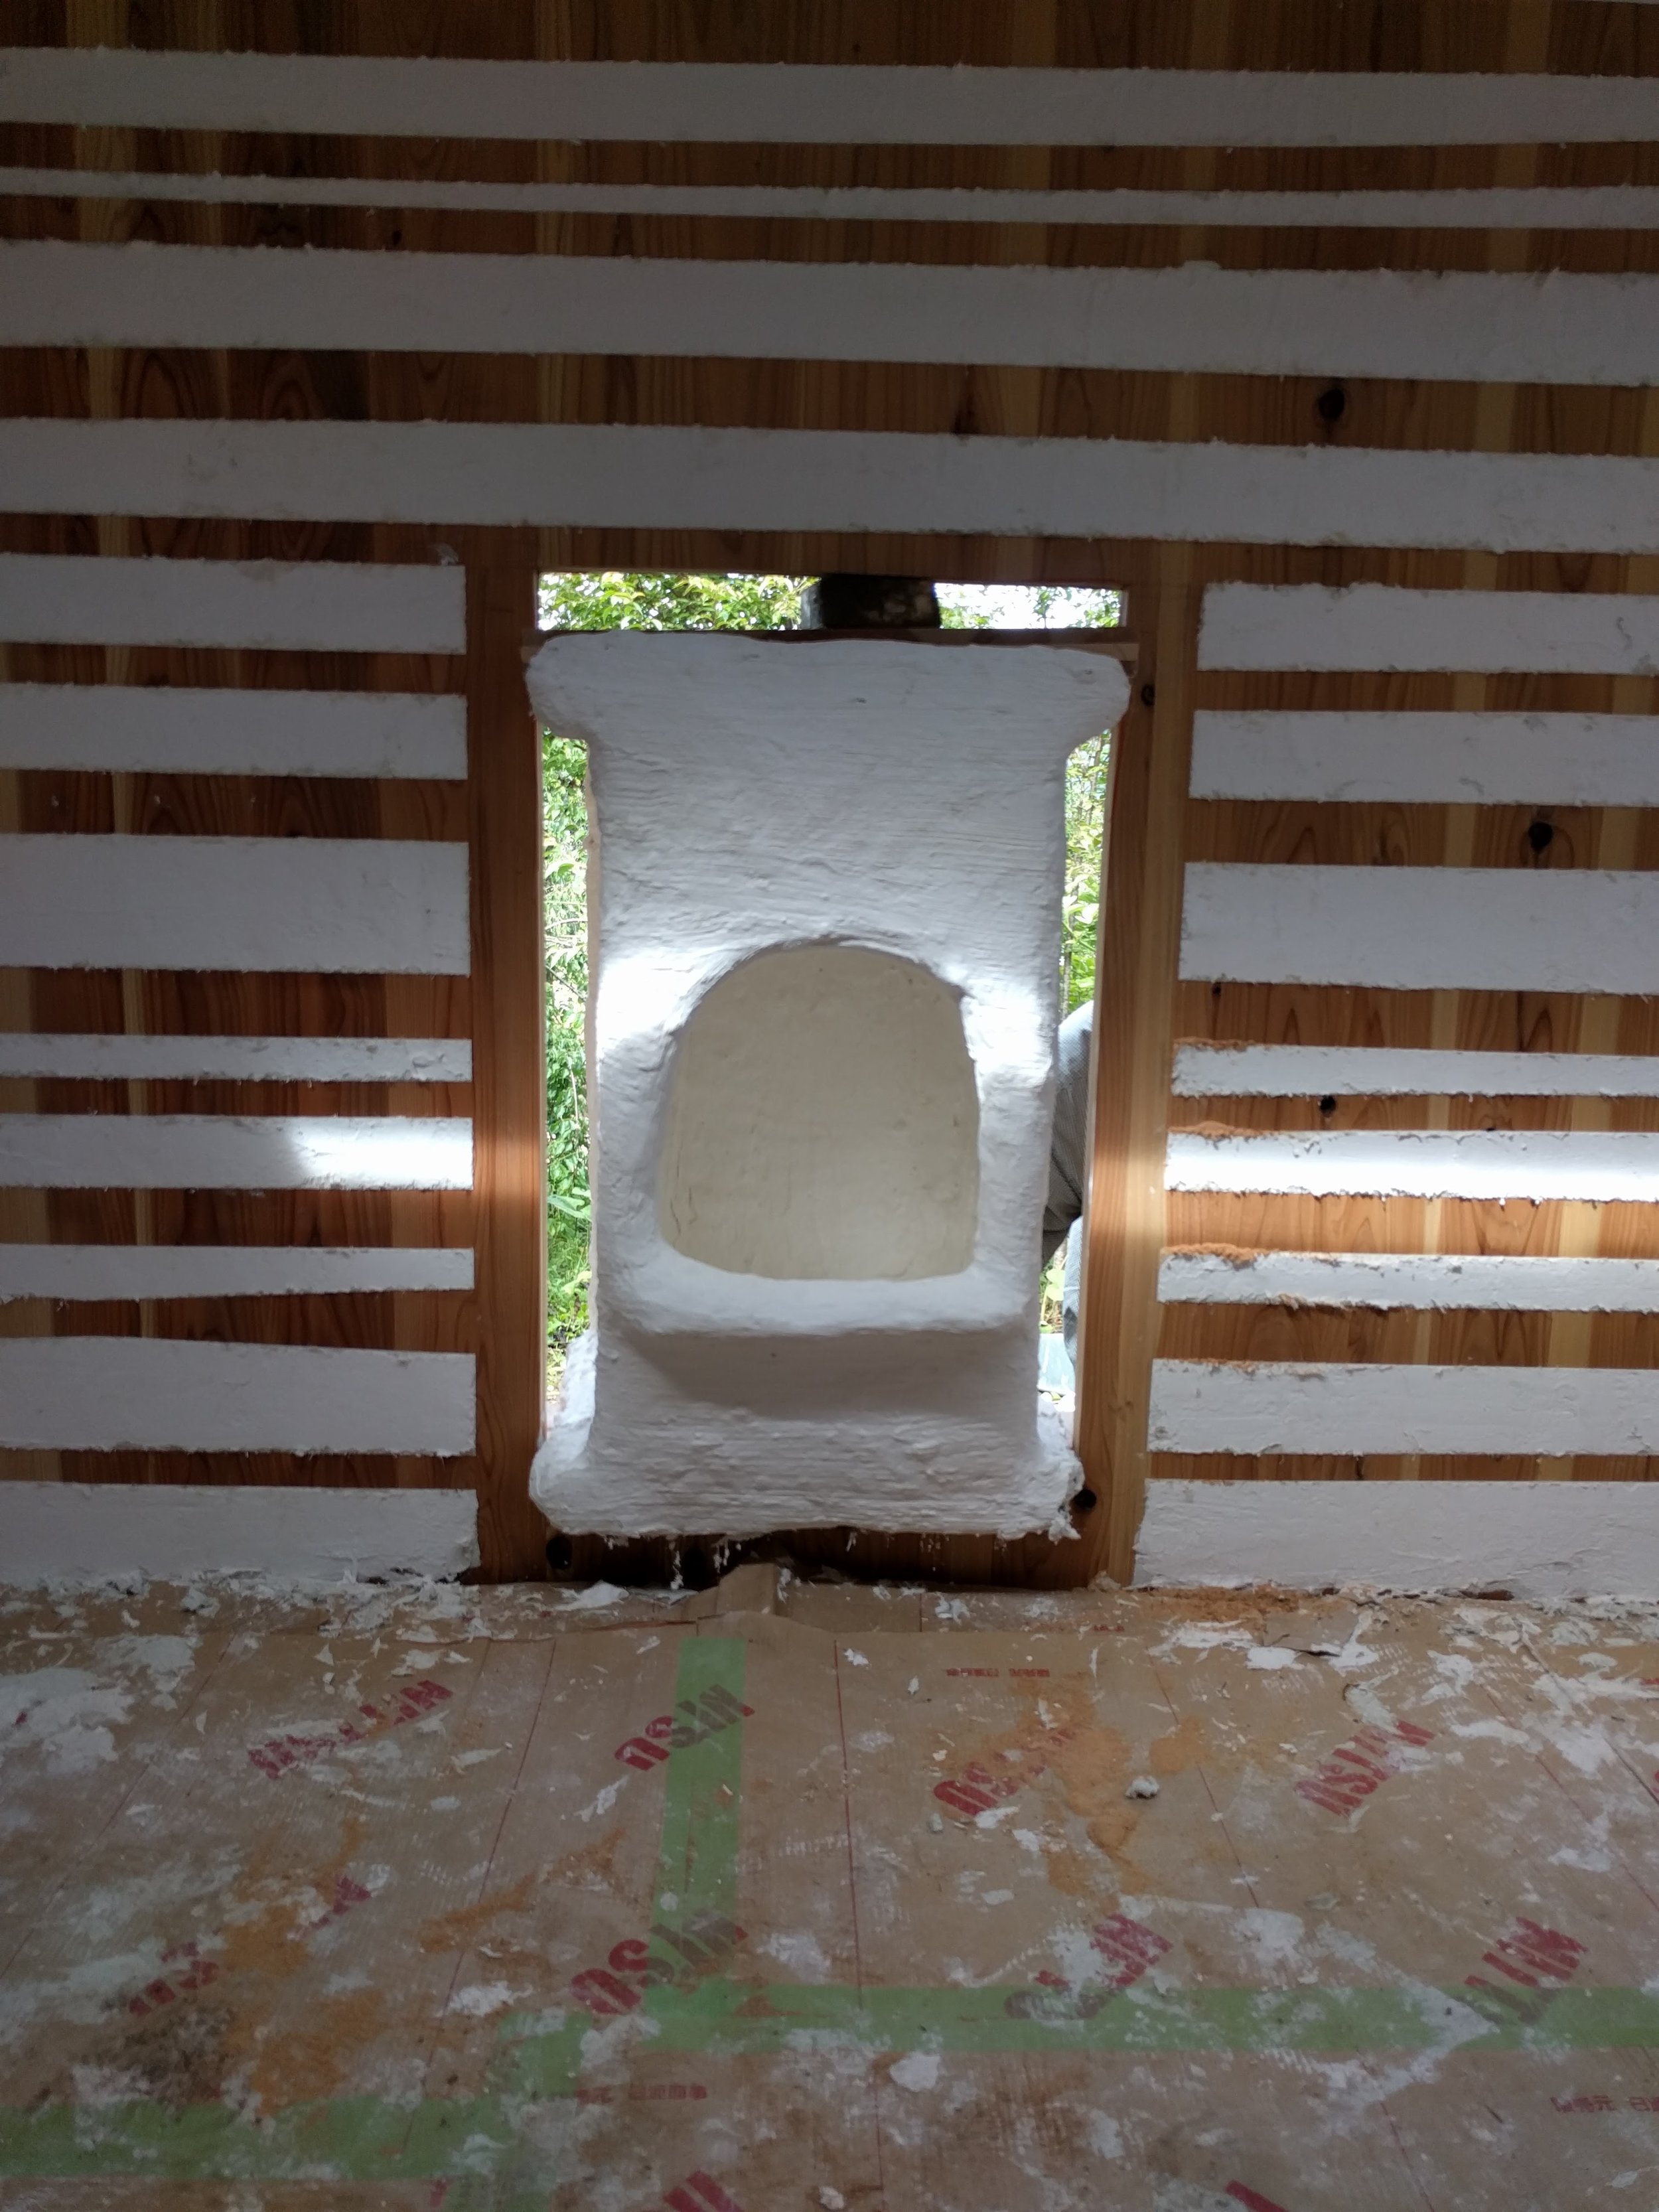
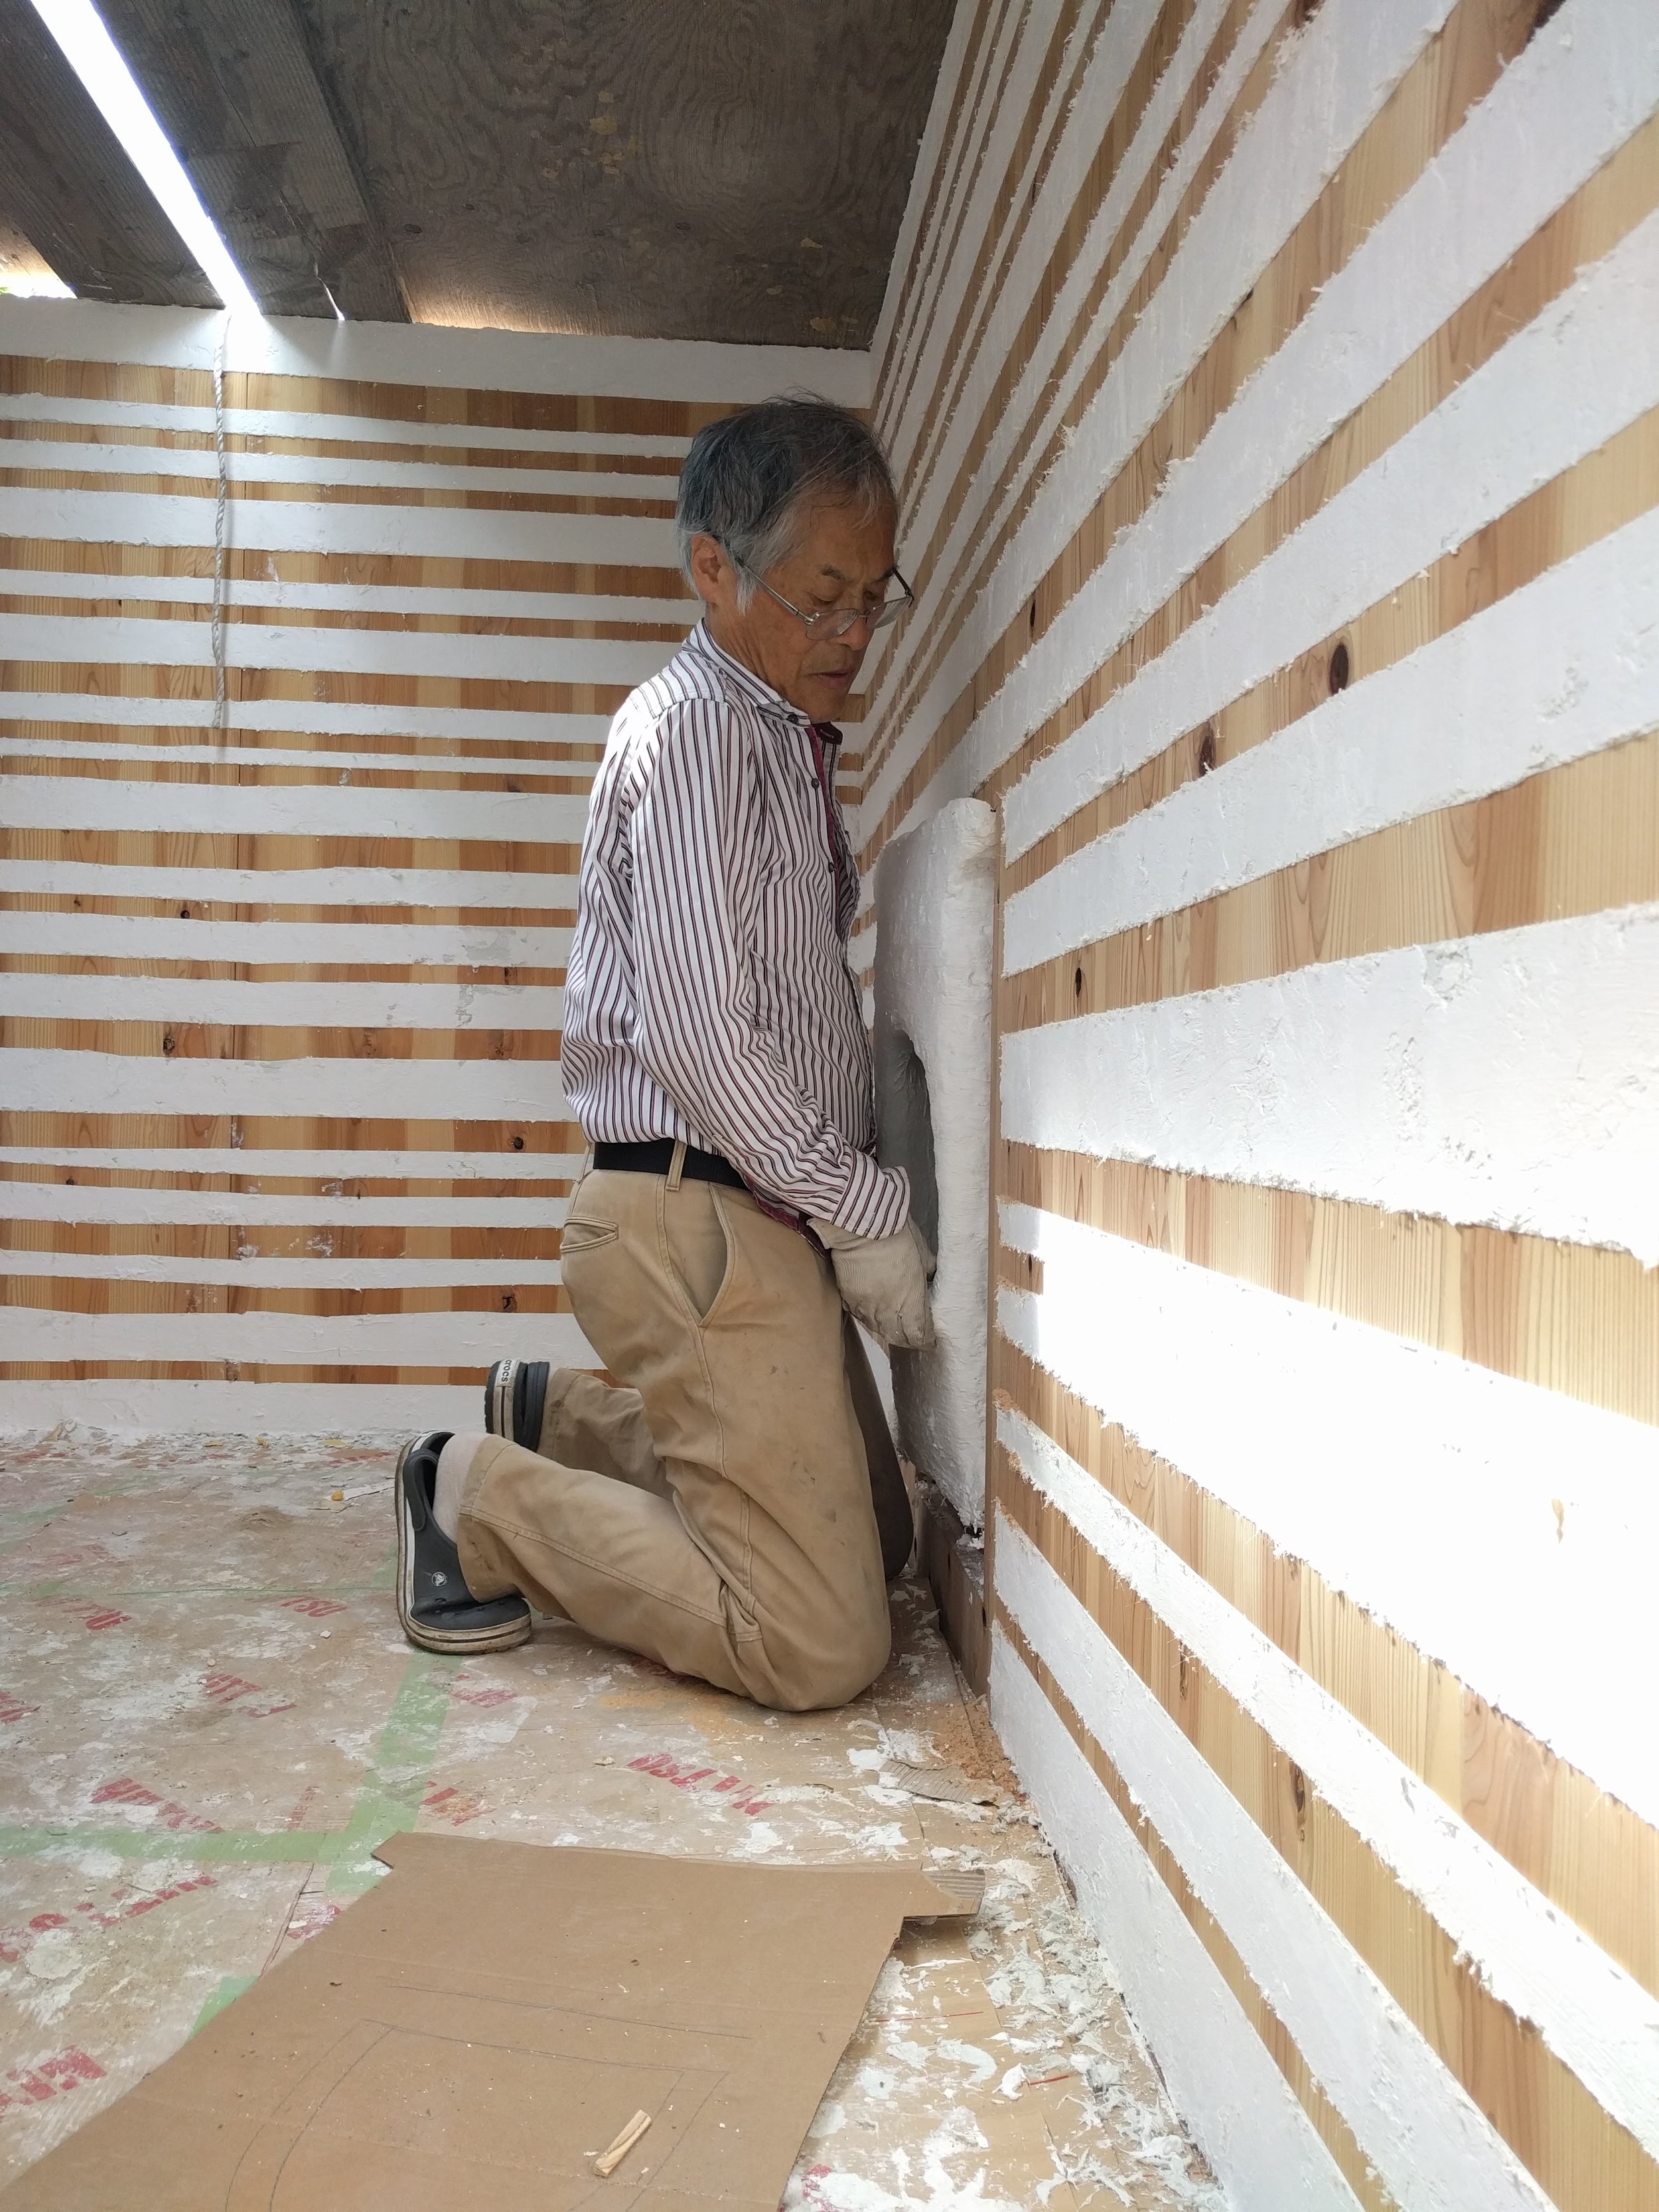
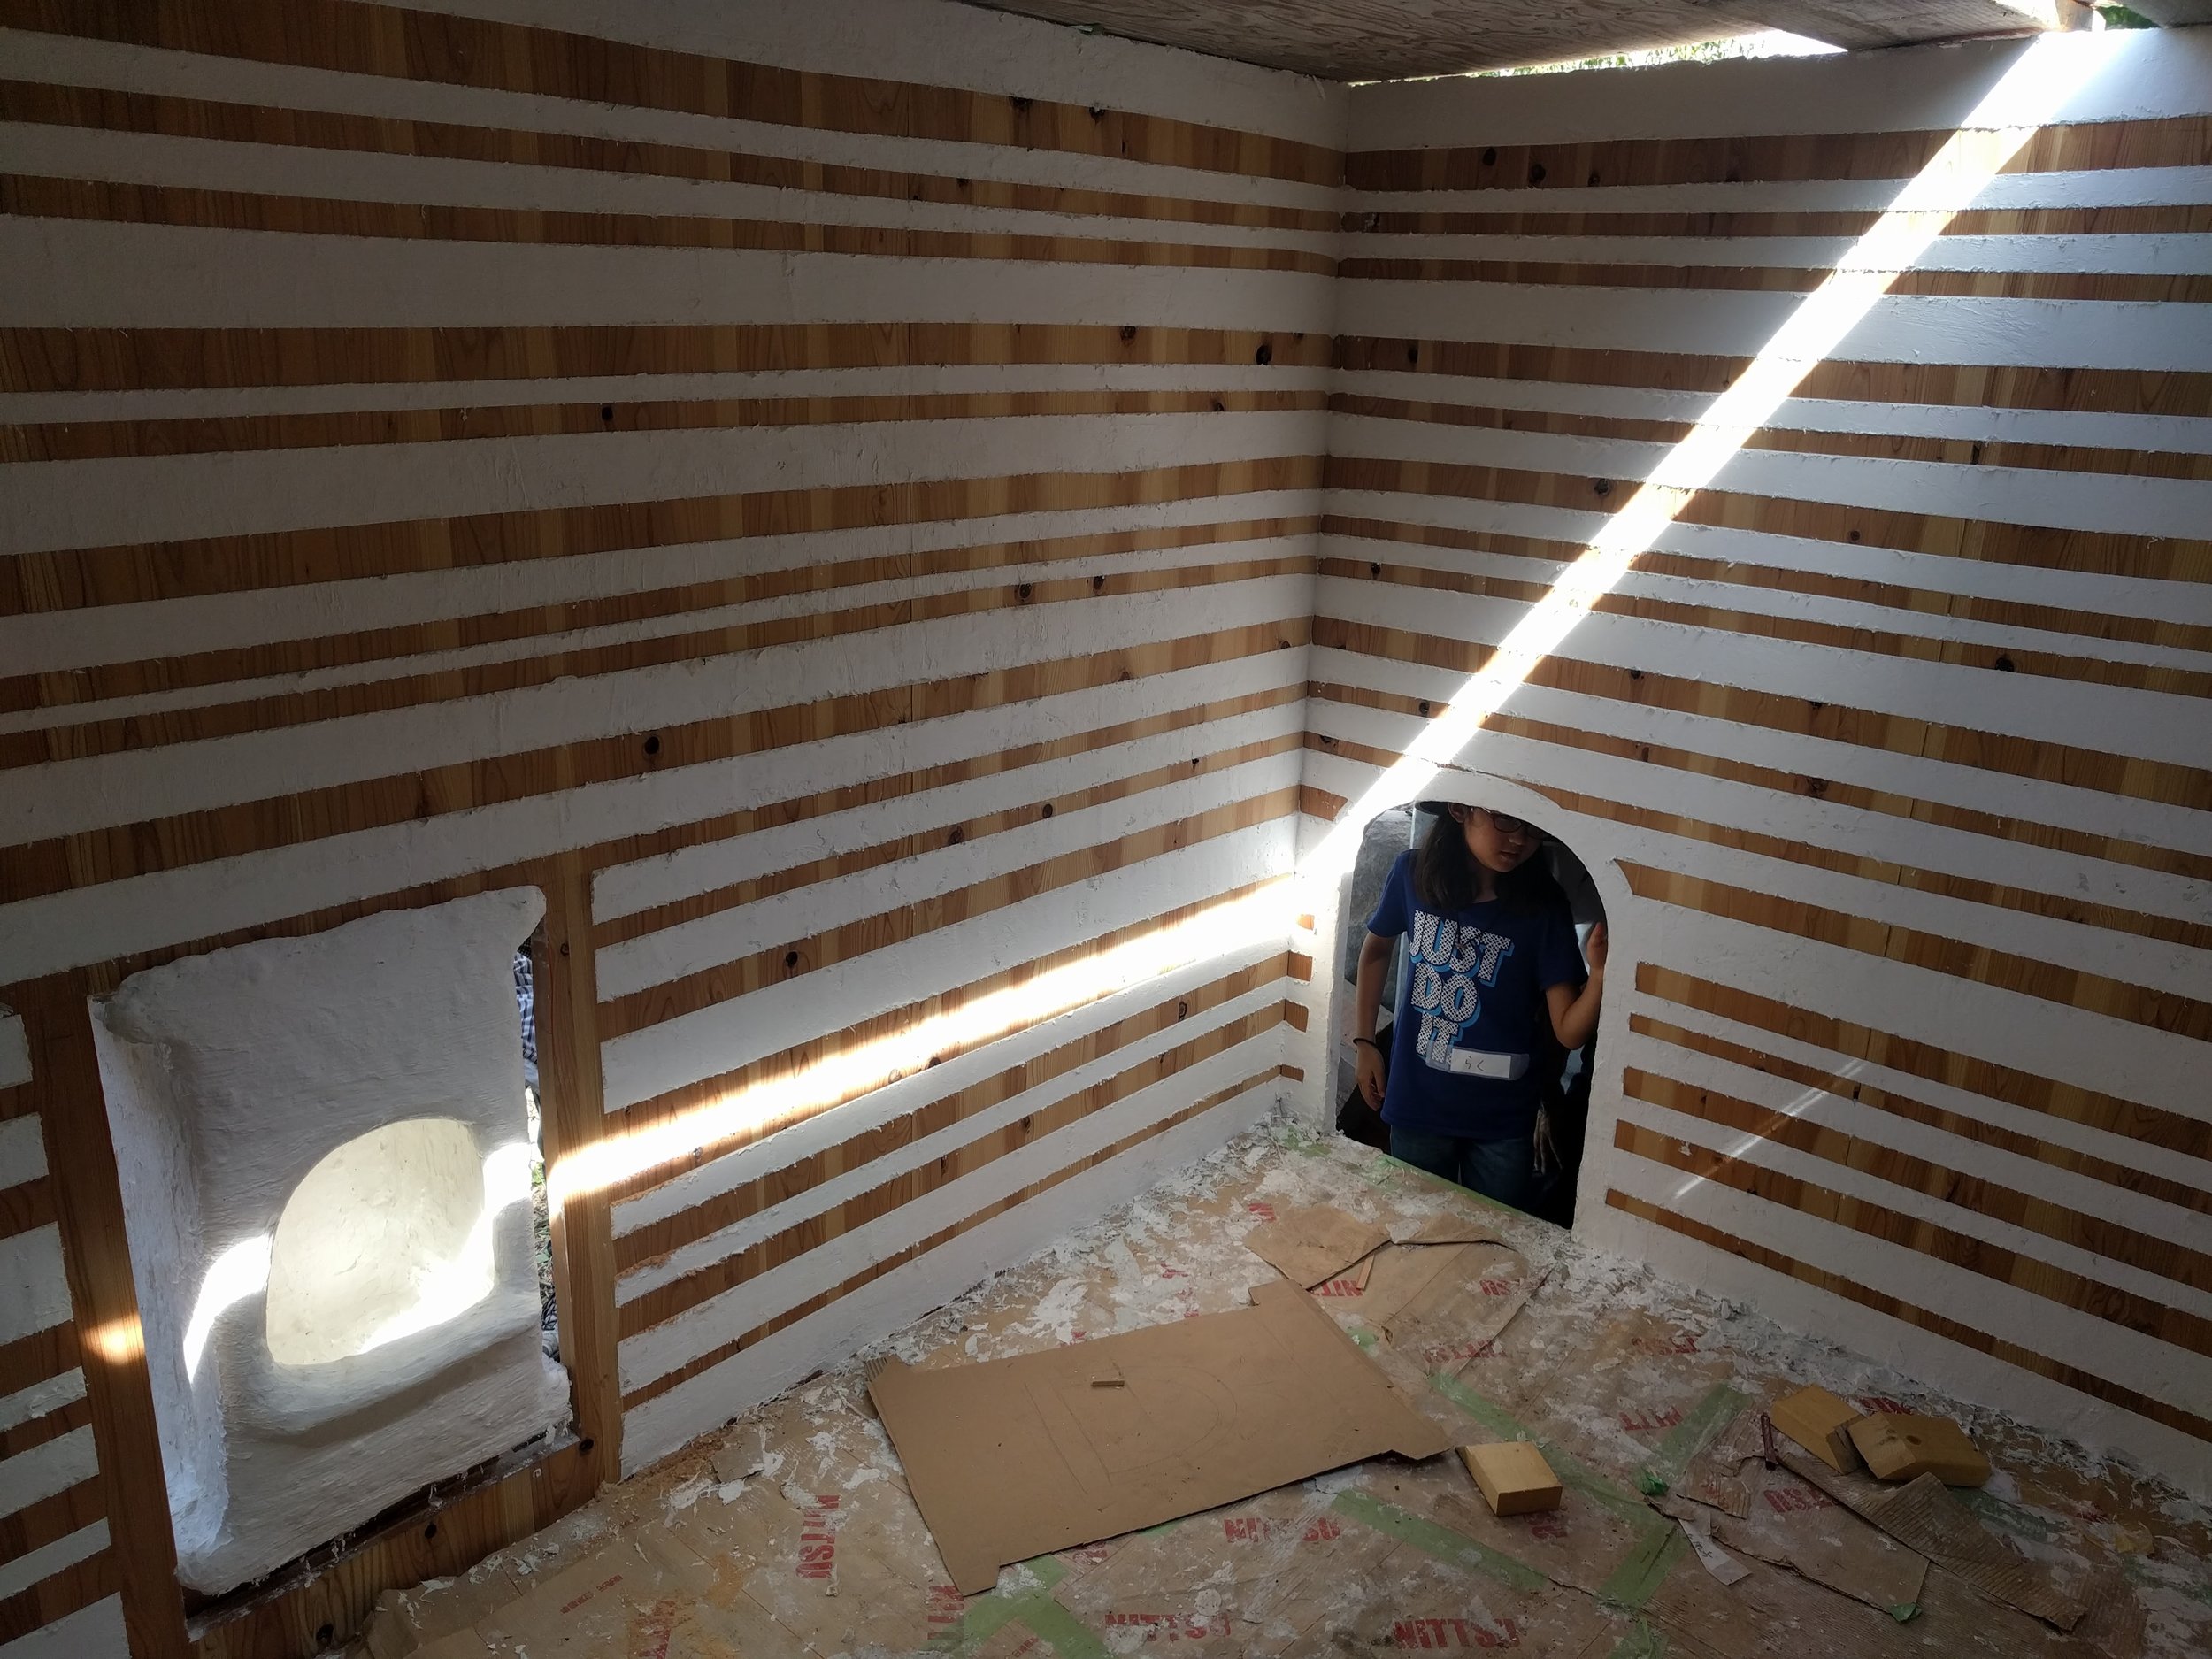
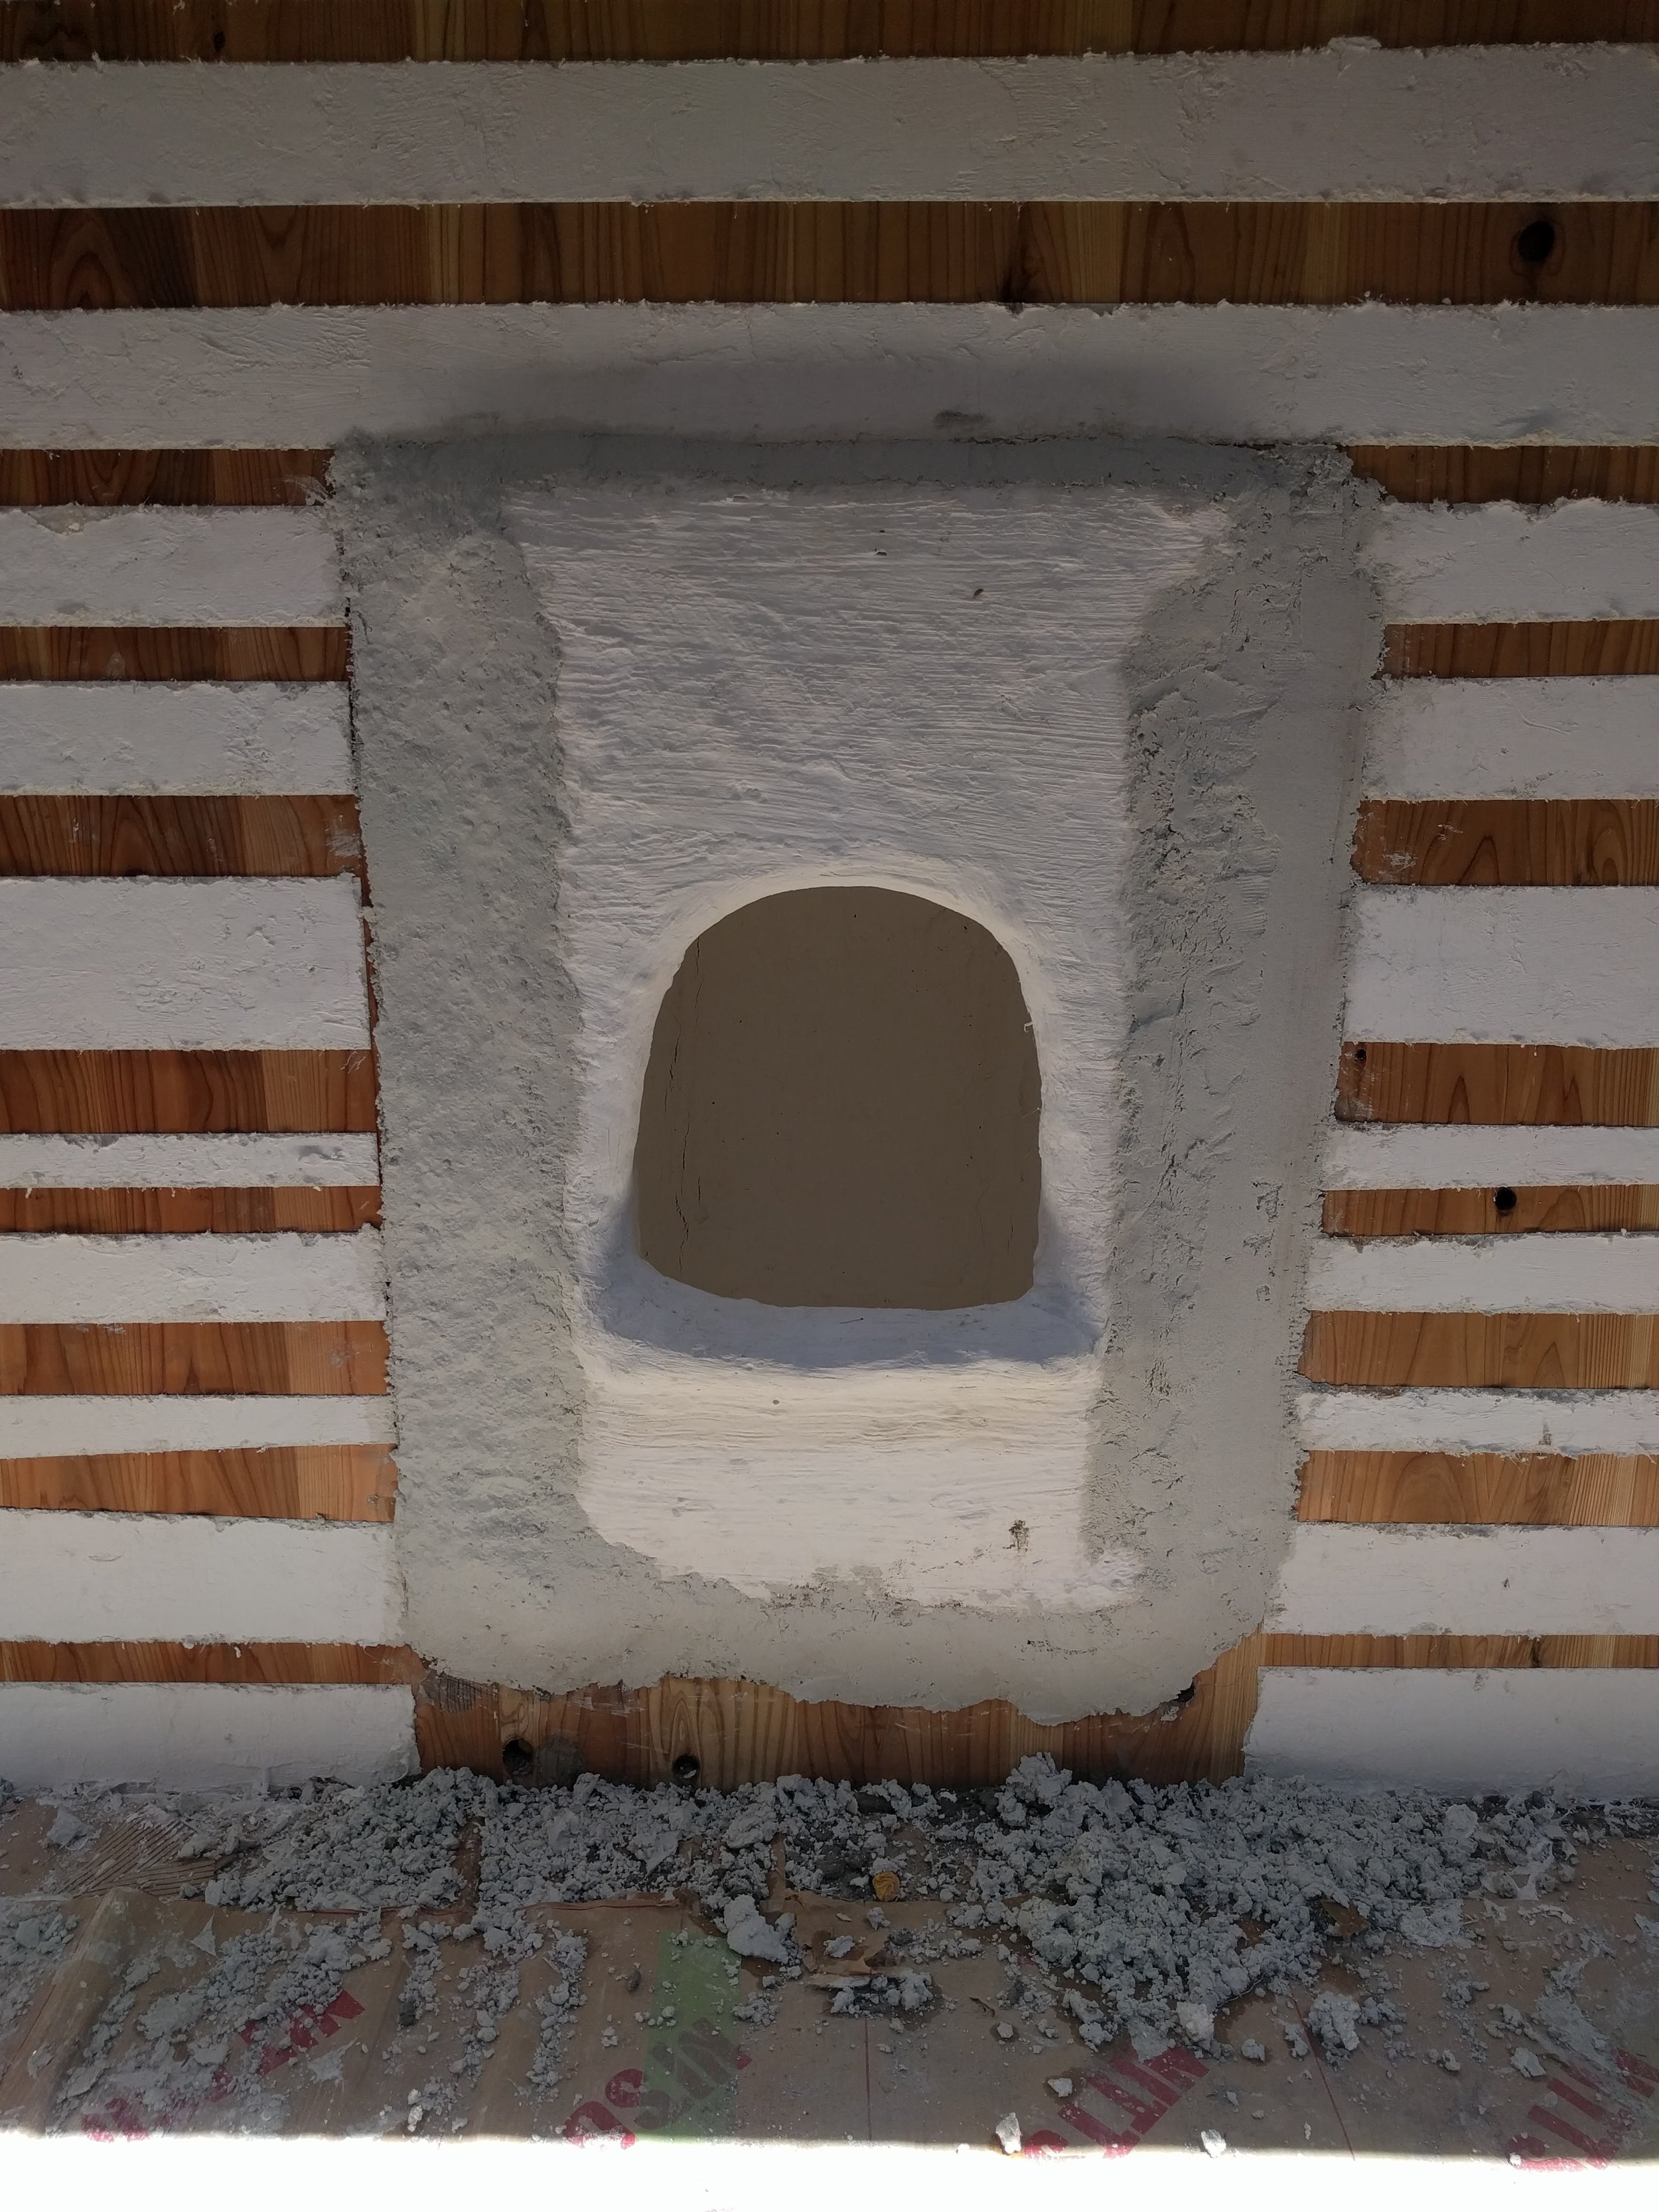
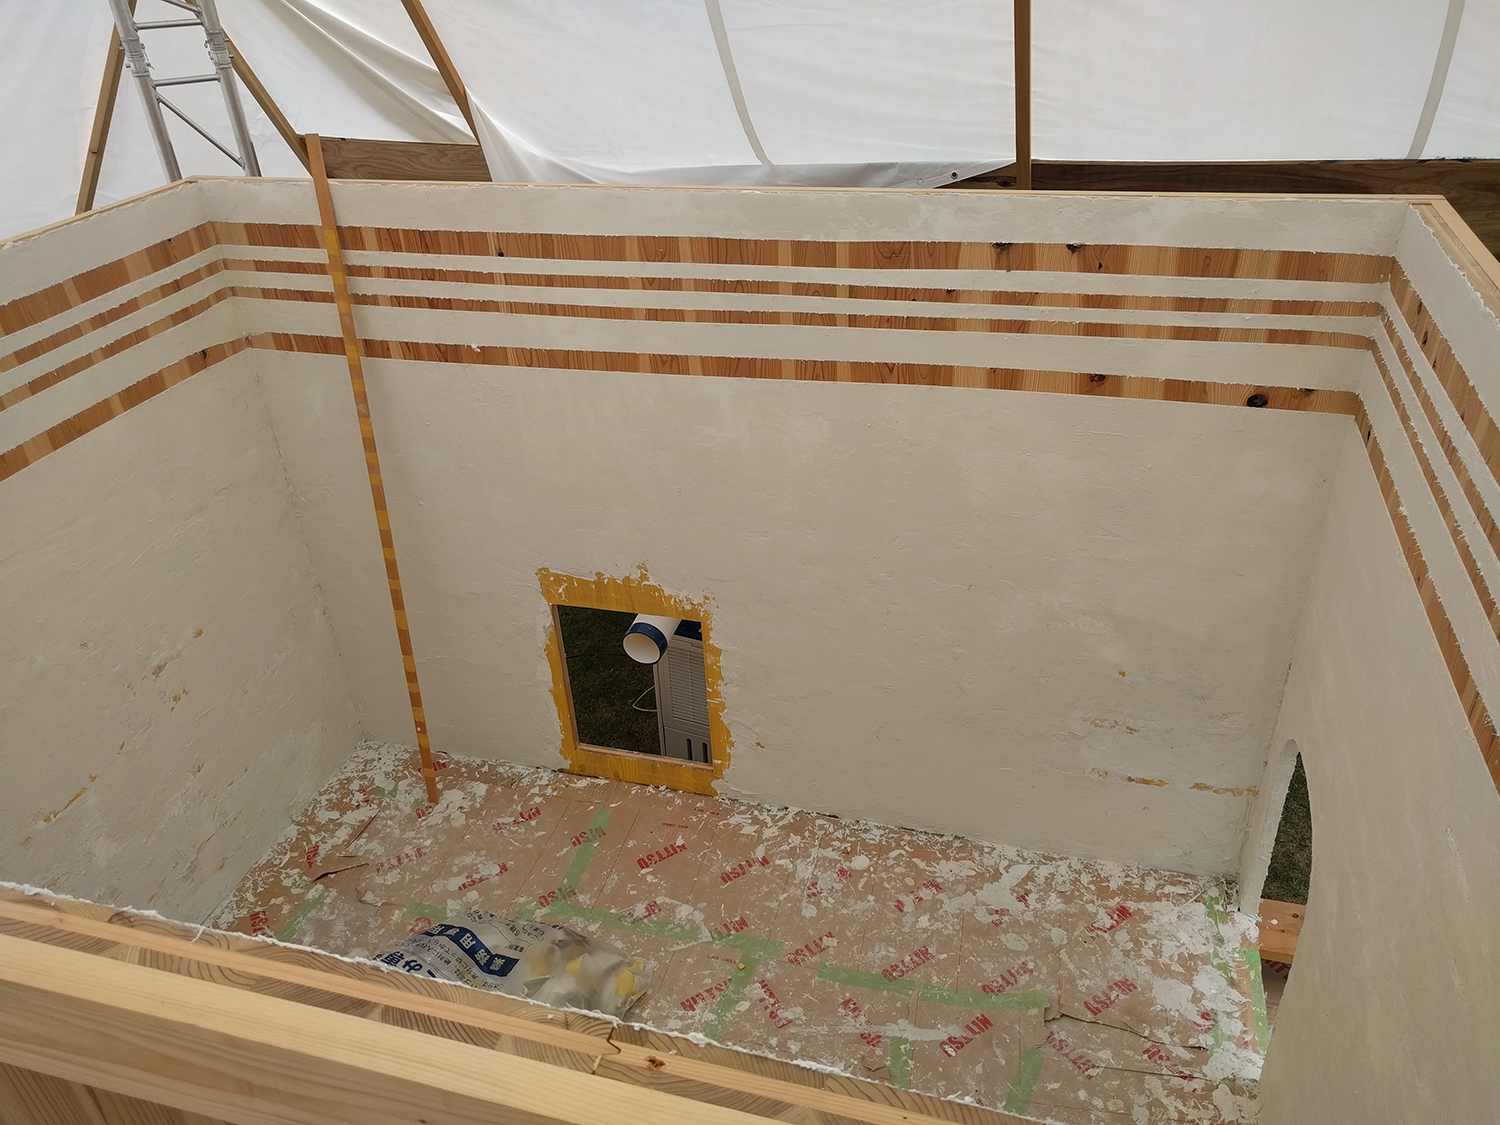
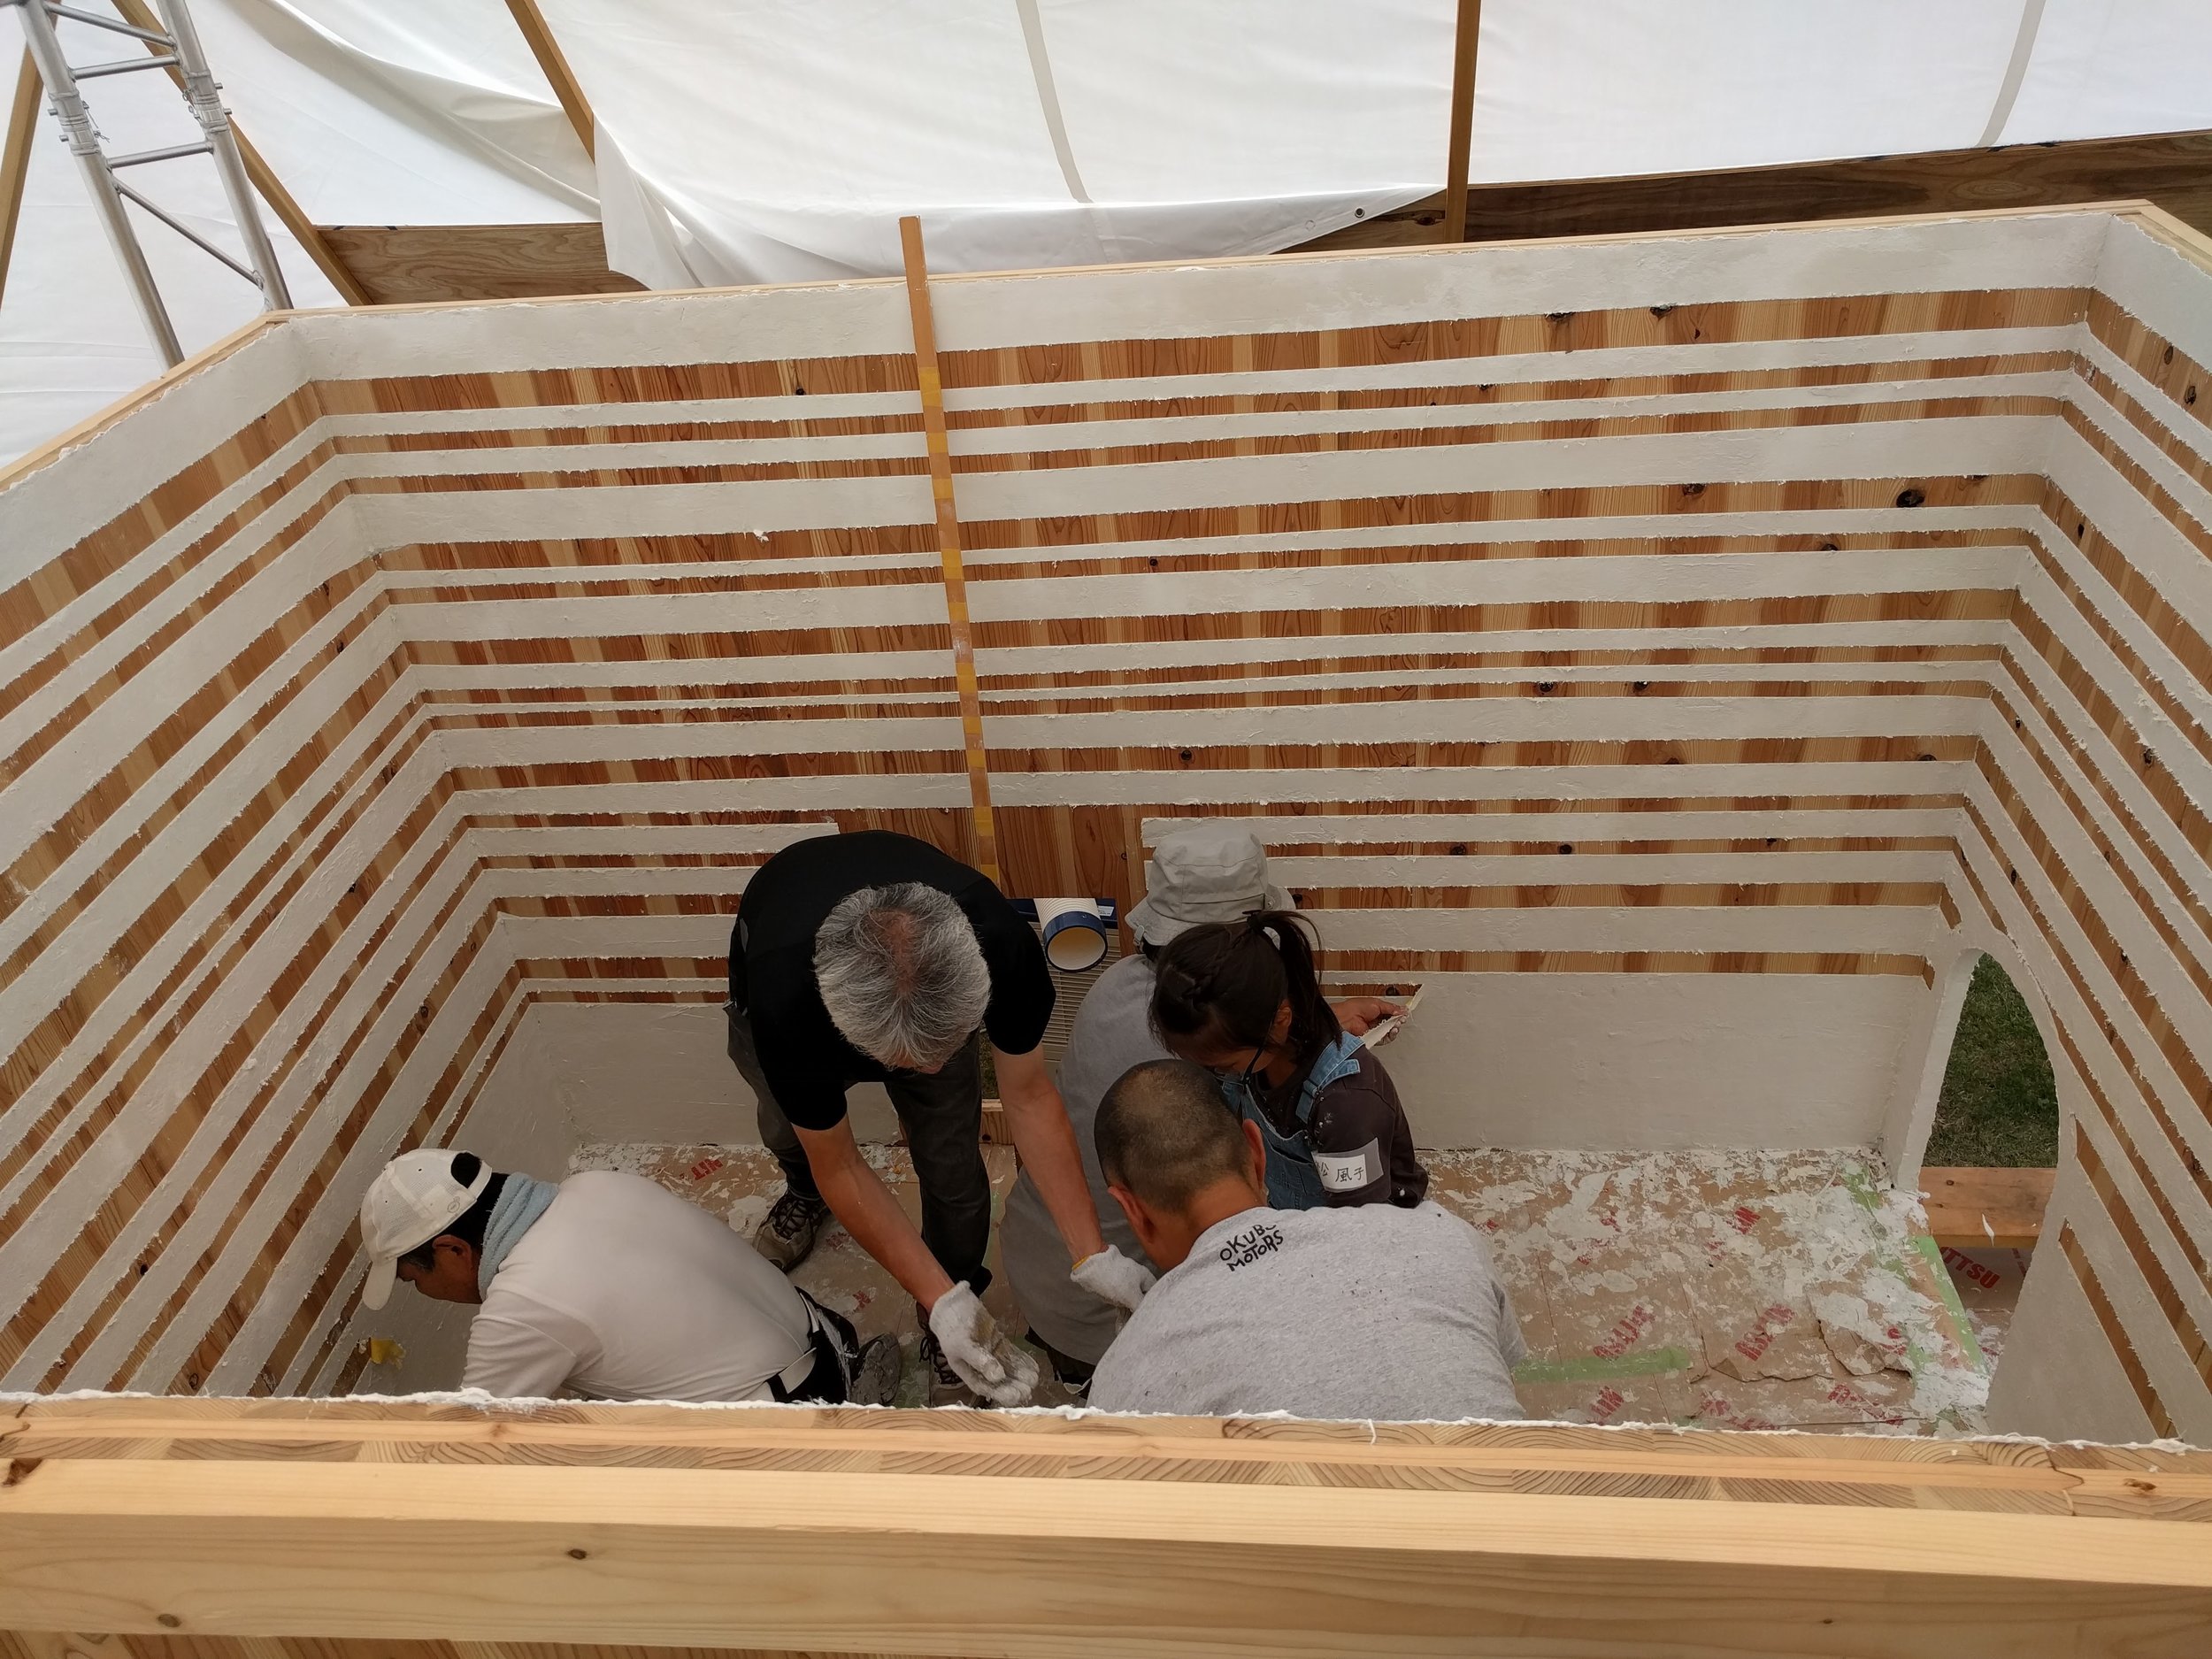
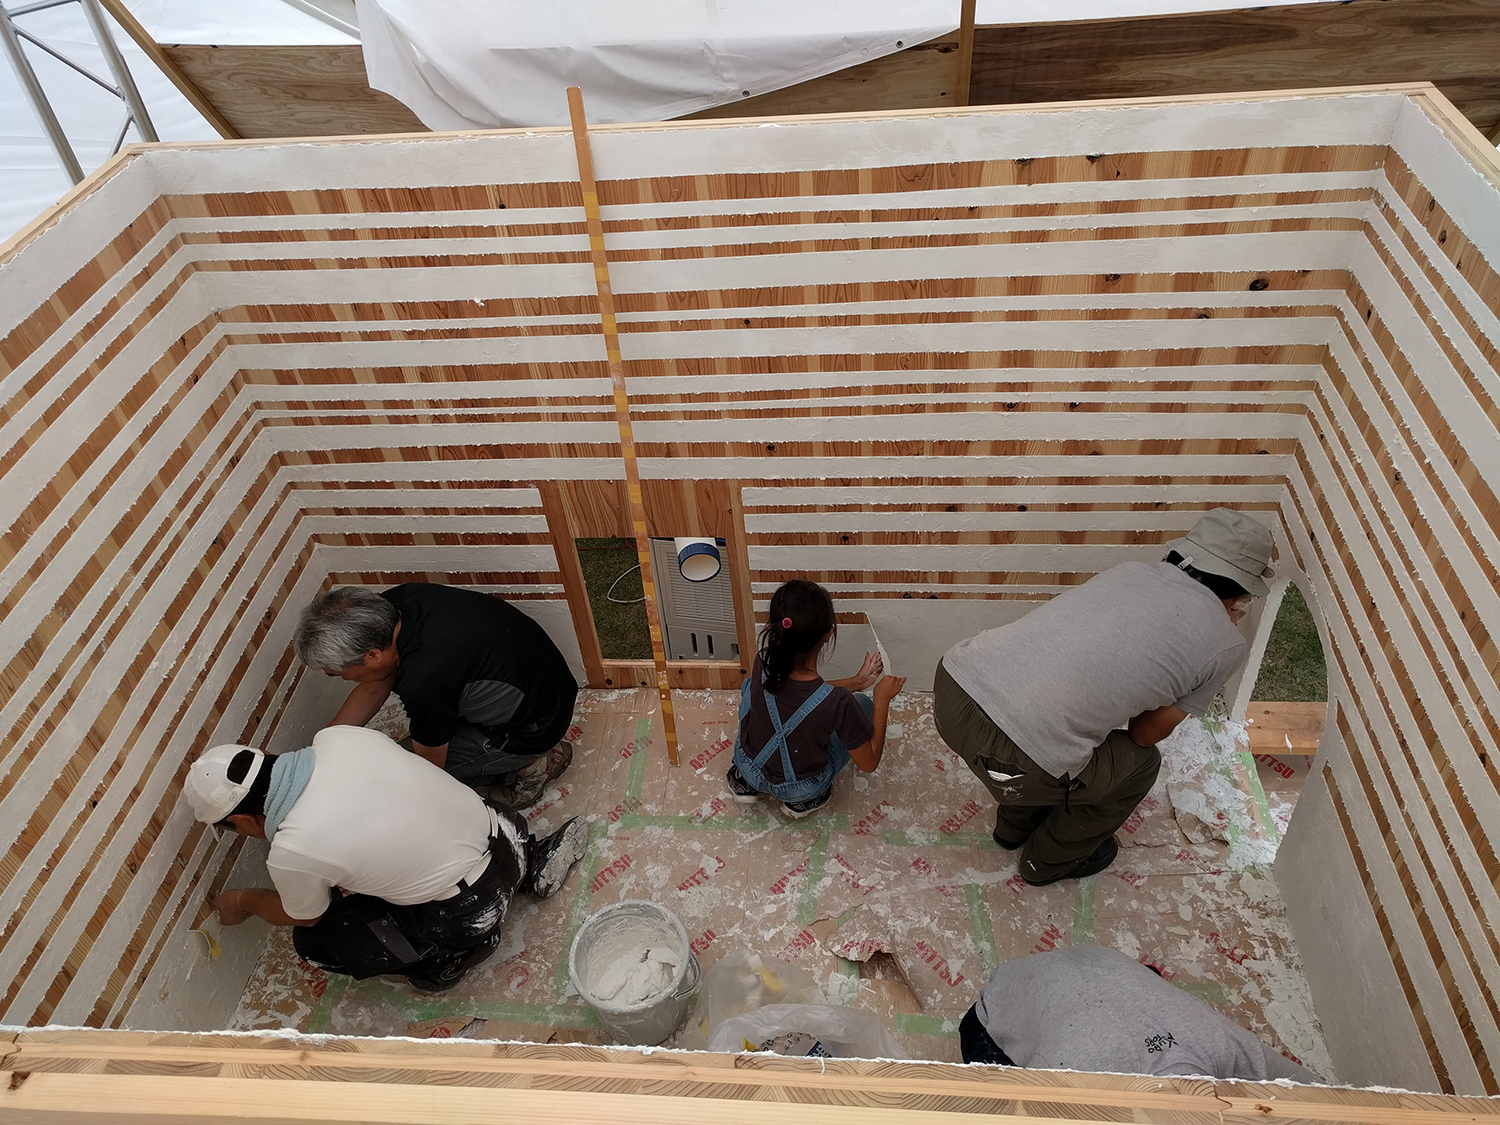
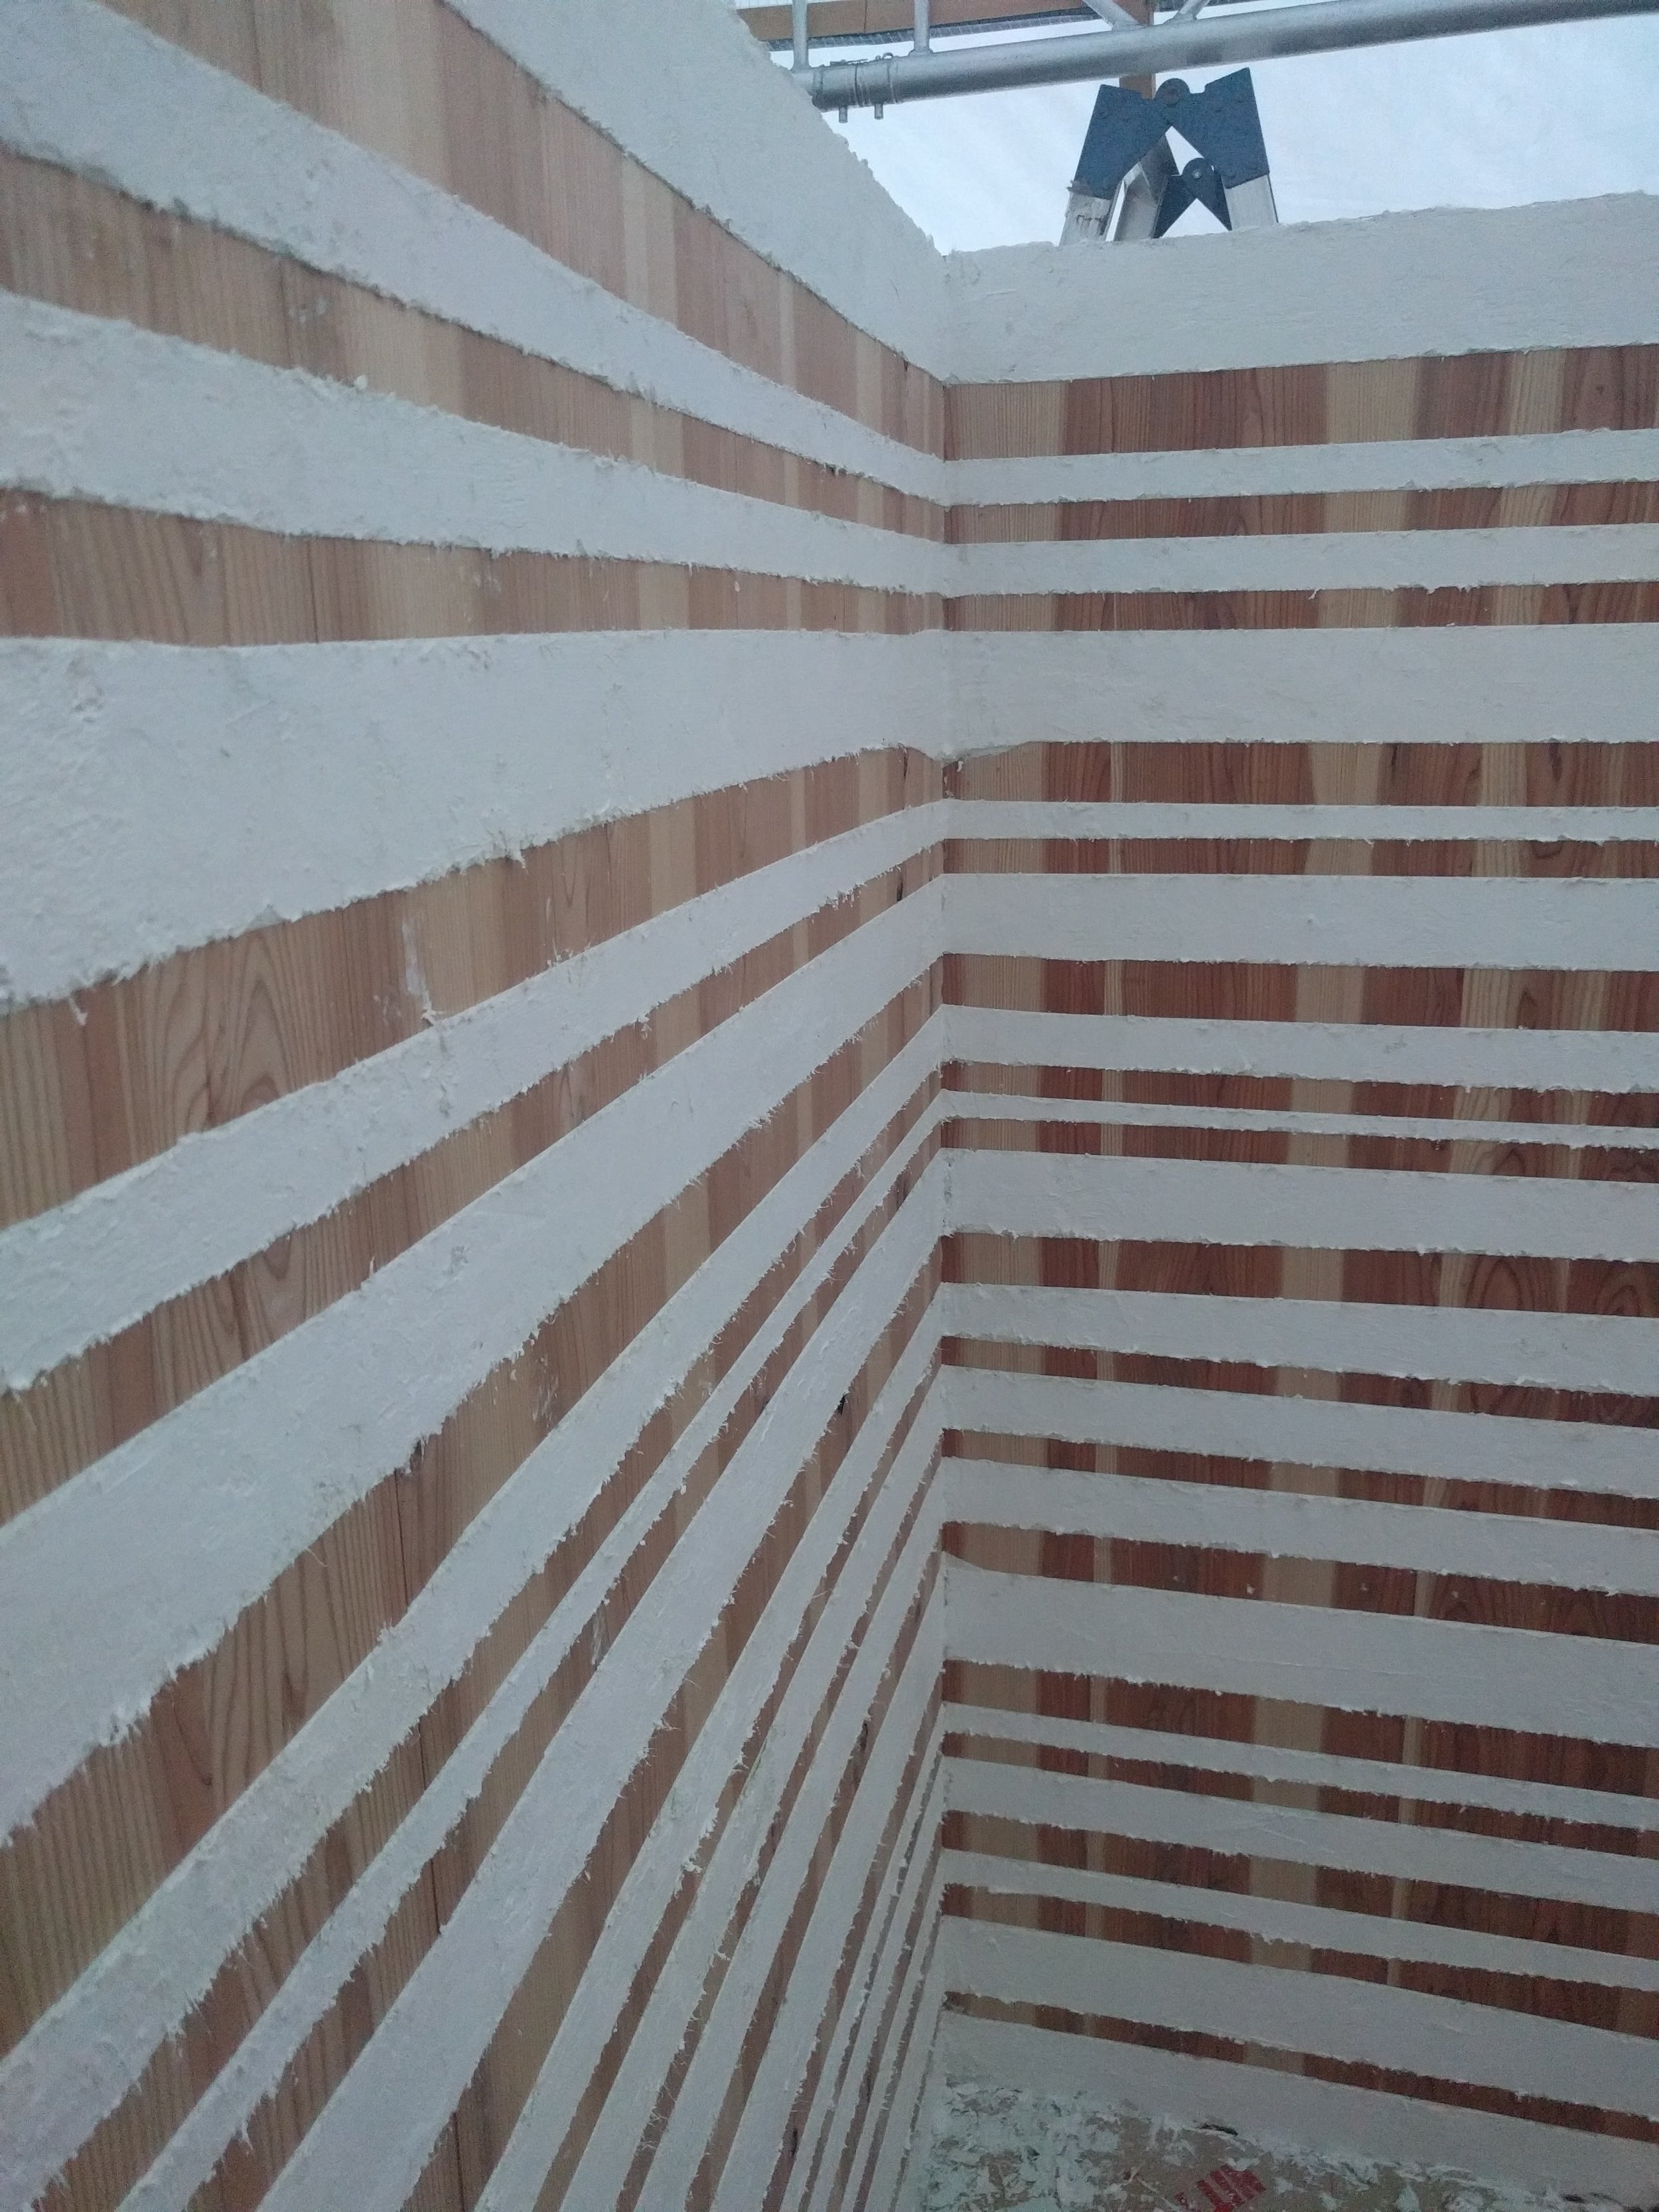
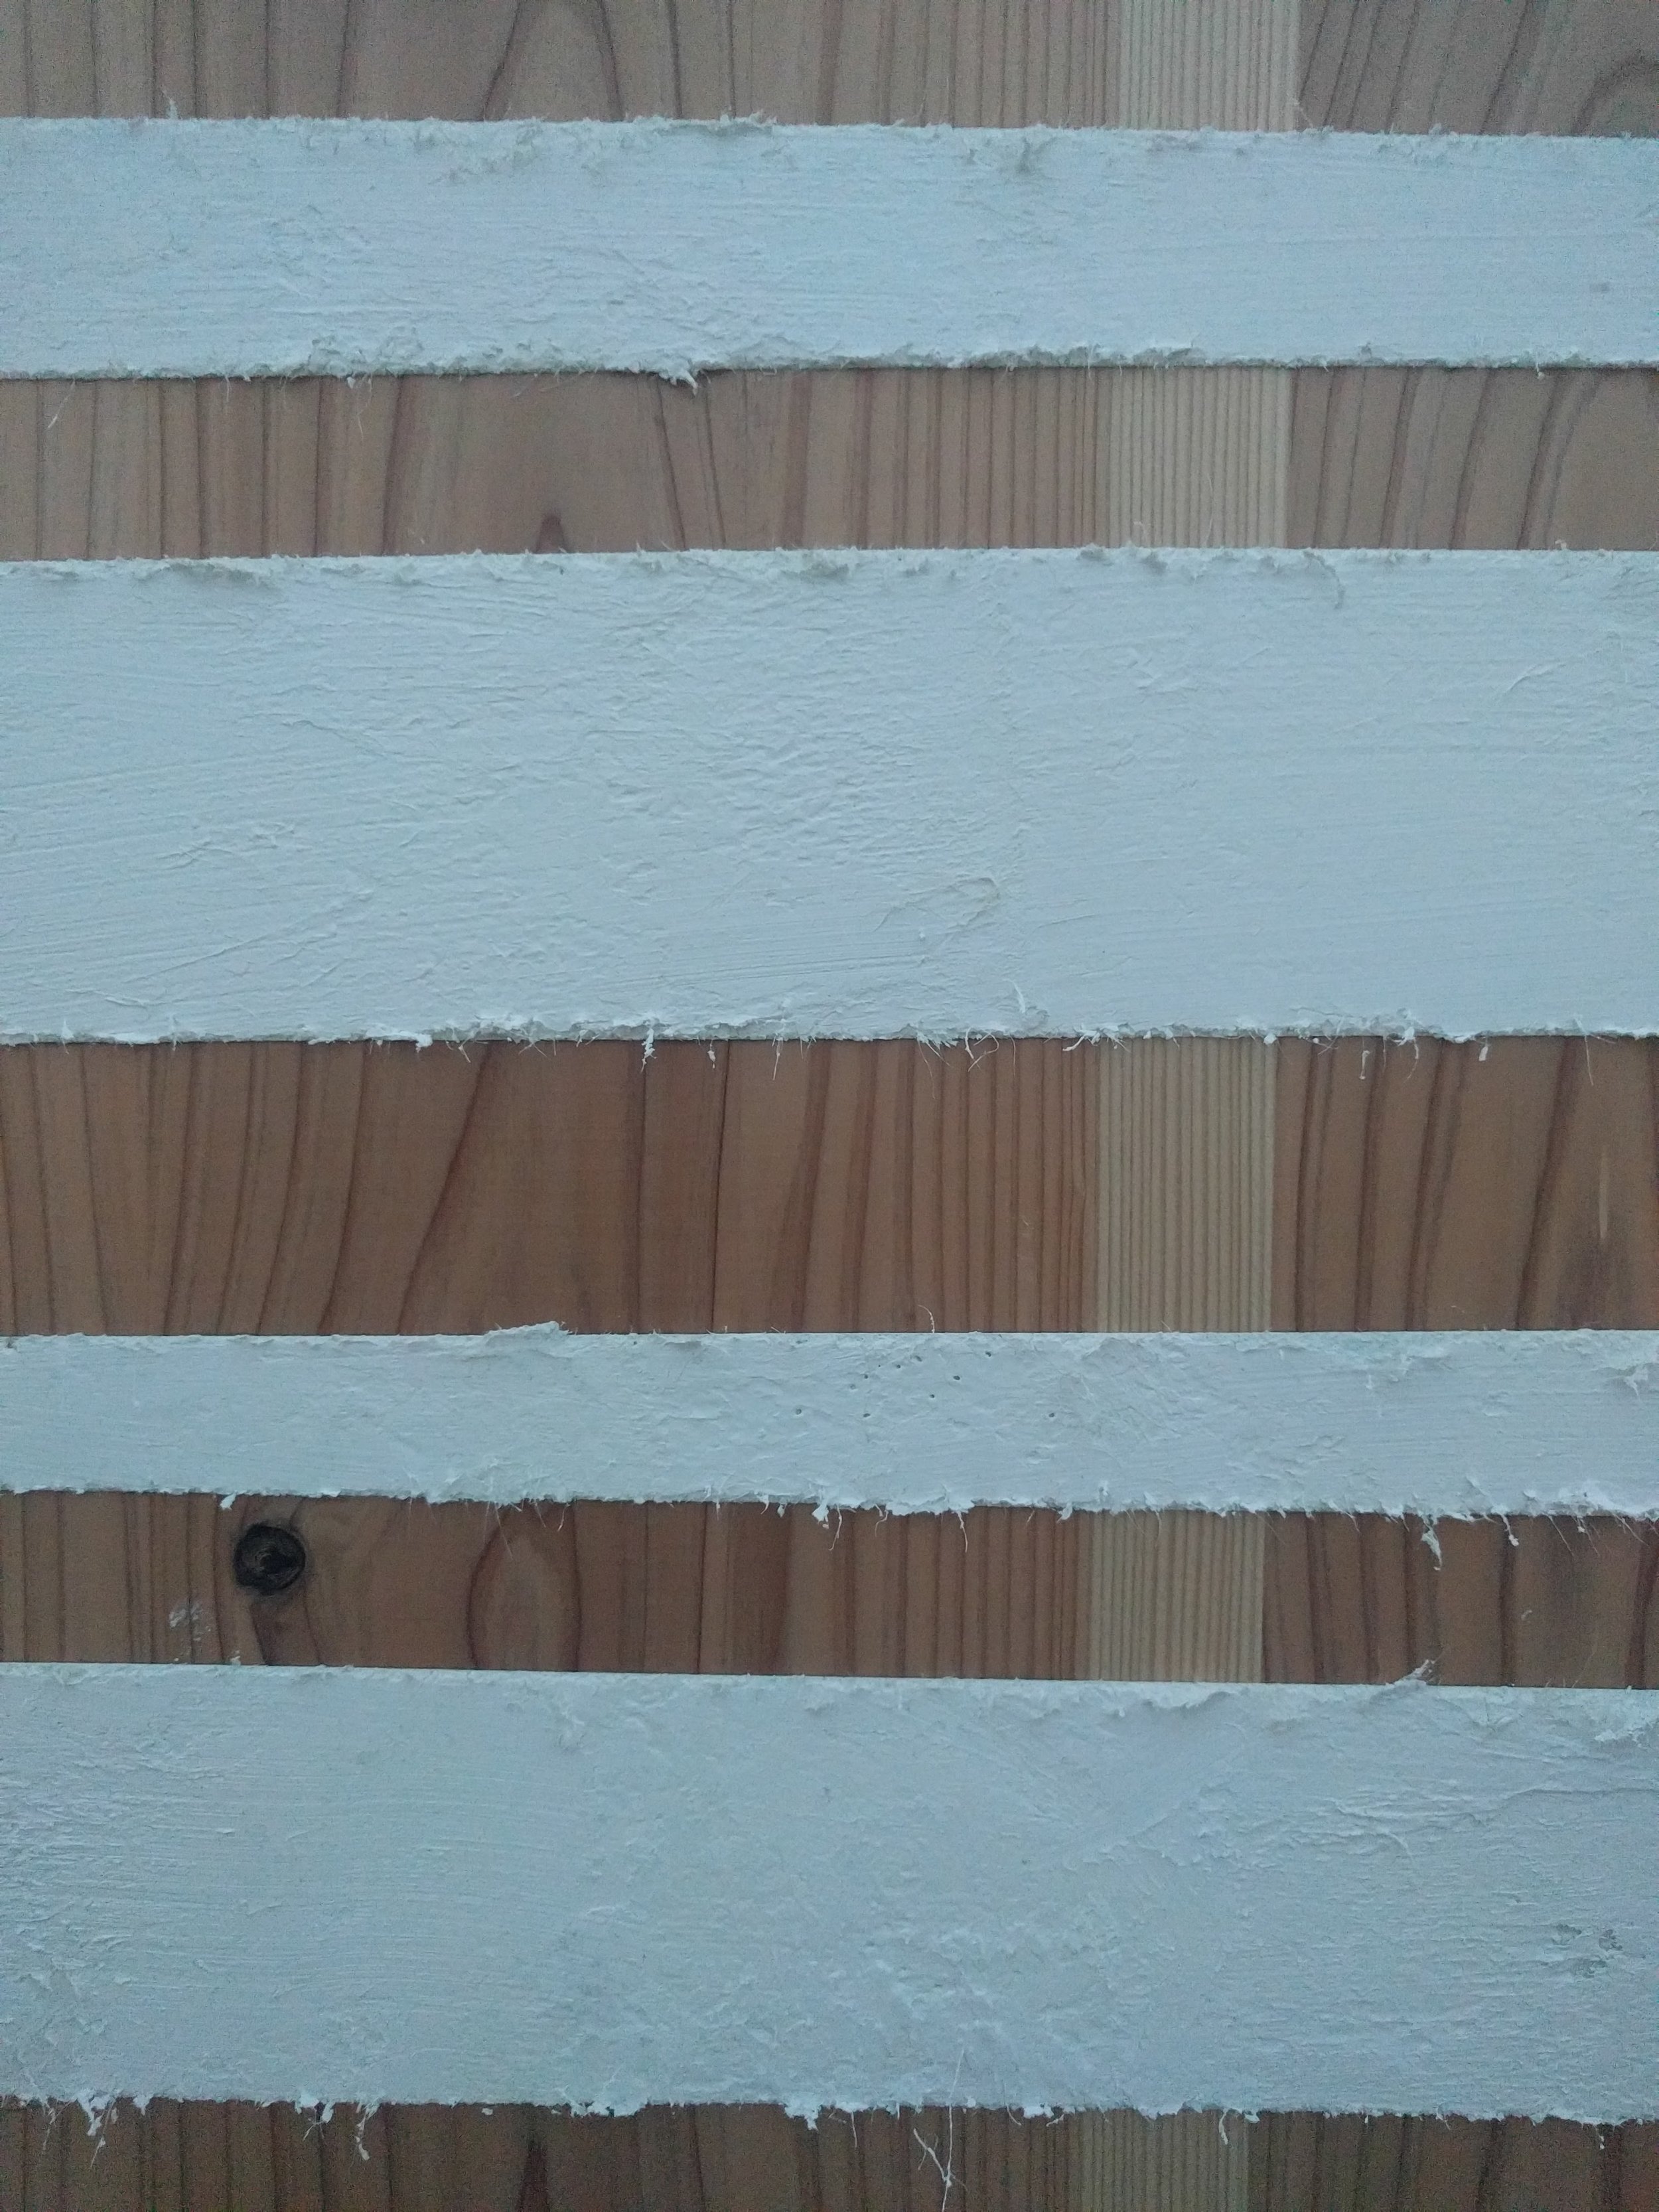
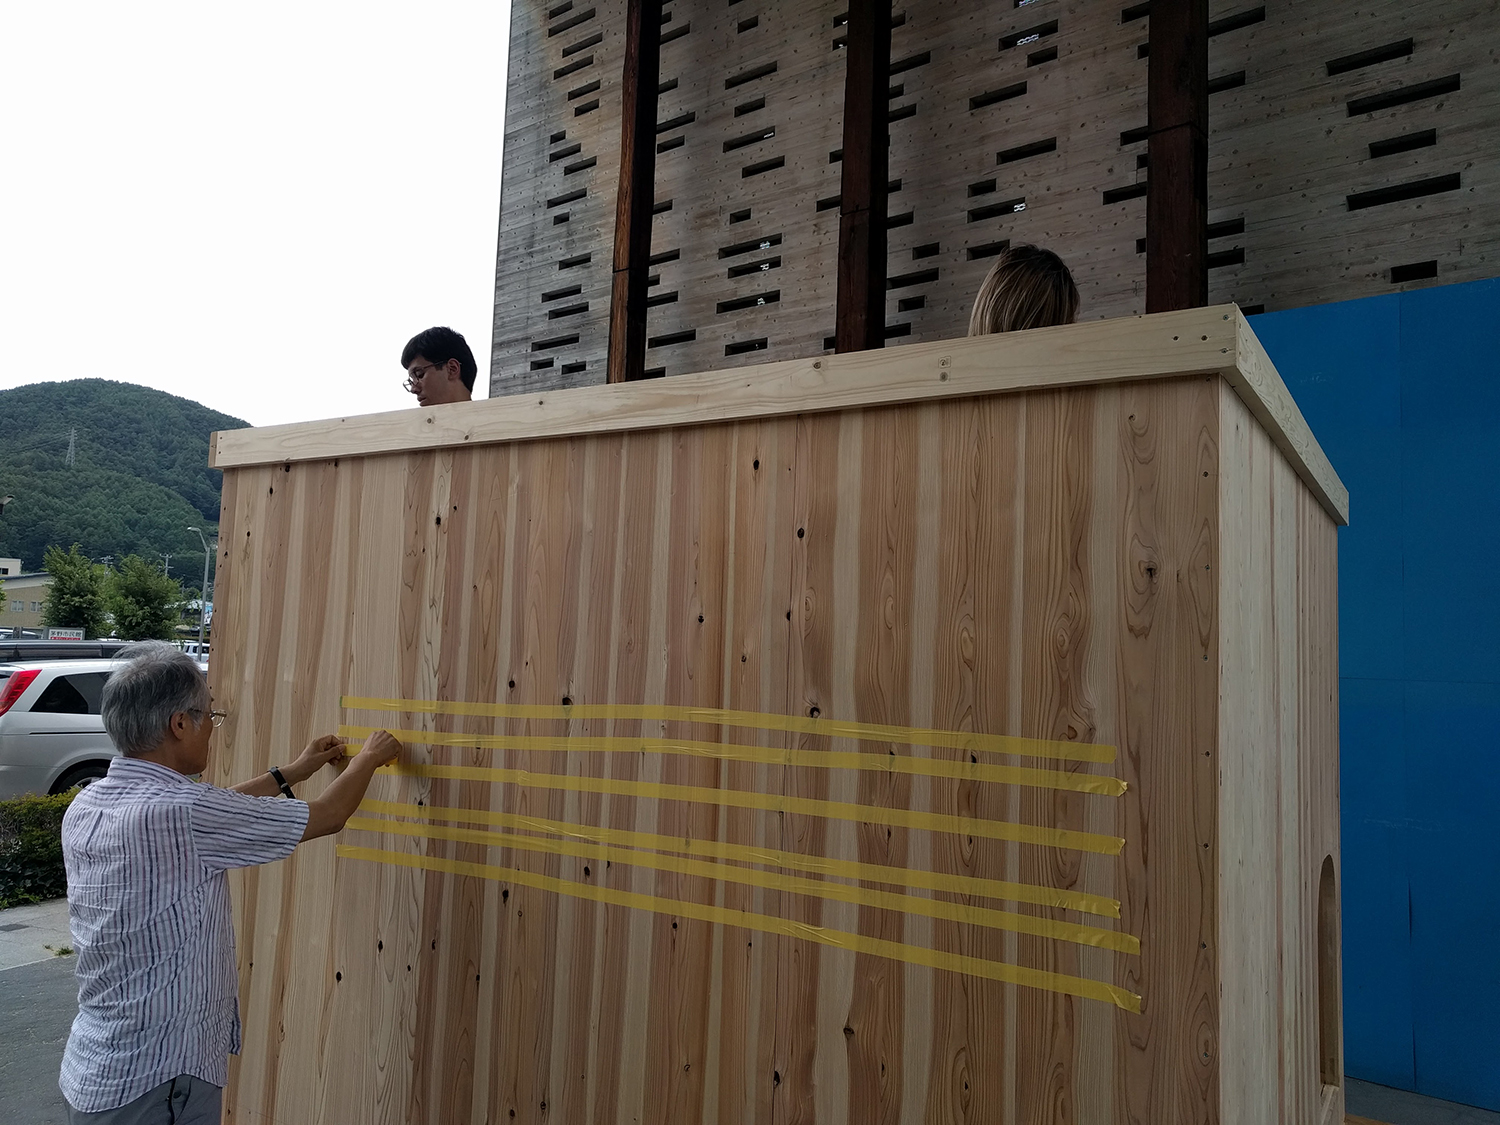
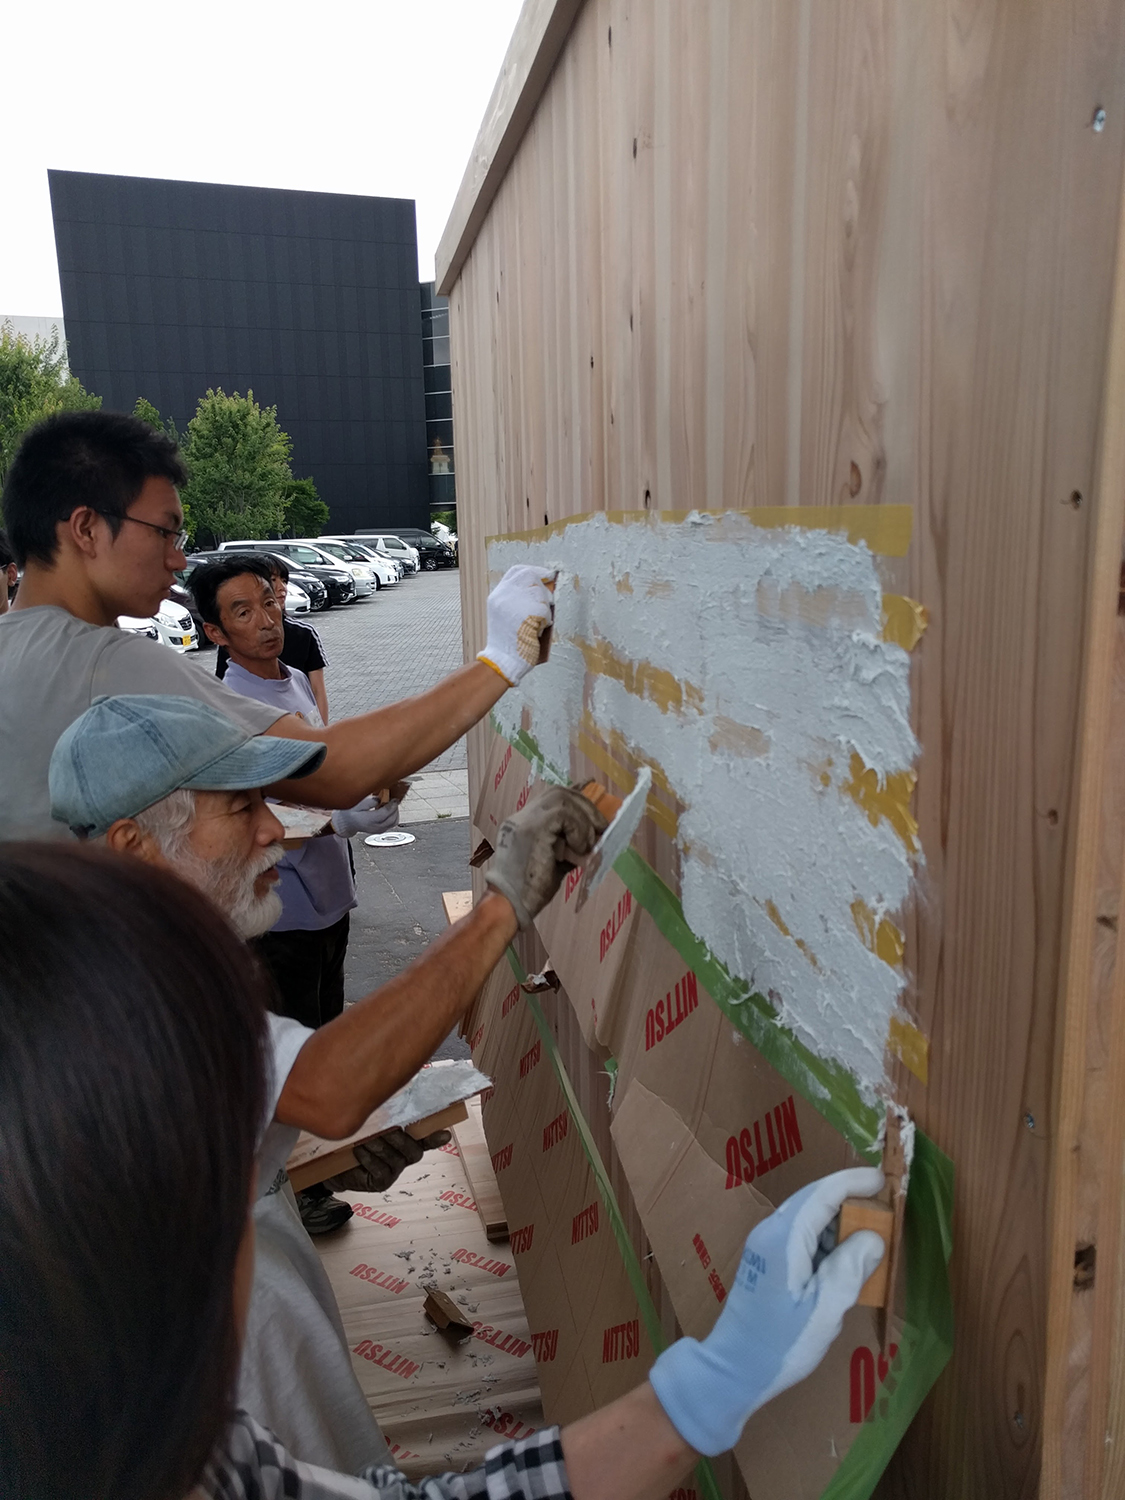
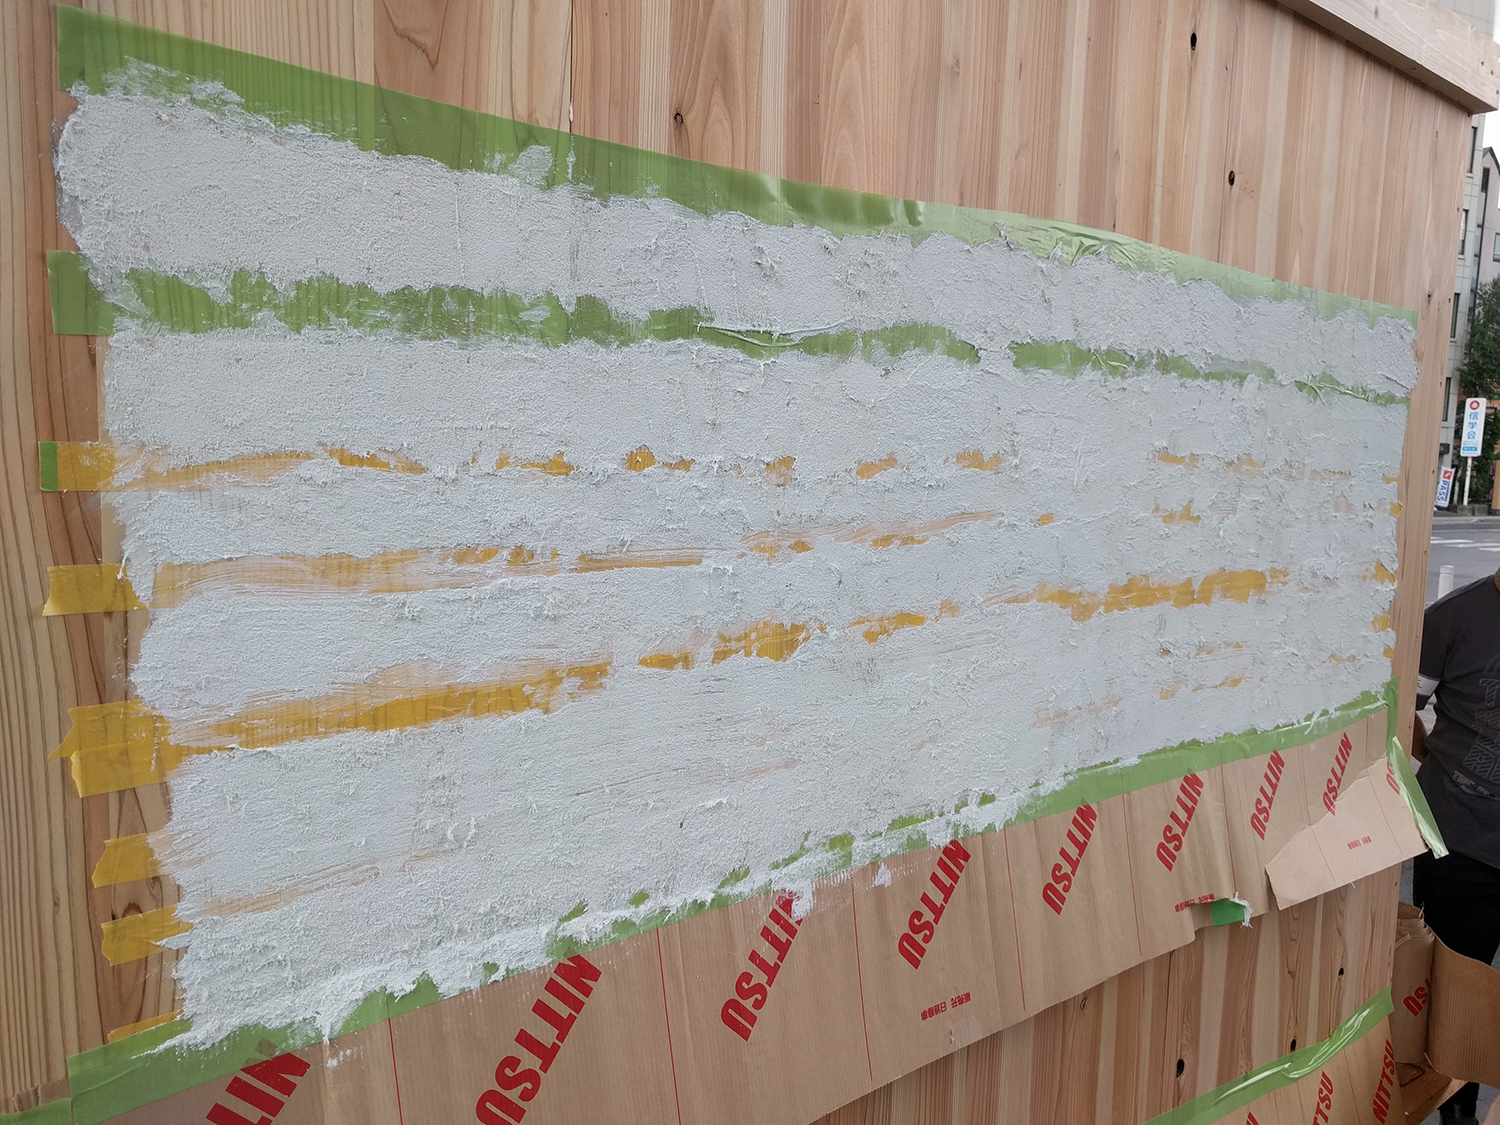
We are now working on interior finish. First, Dr. Fujimori applied masking tapes horizontally to create striping pattern.
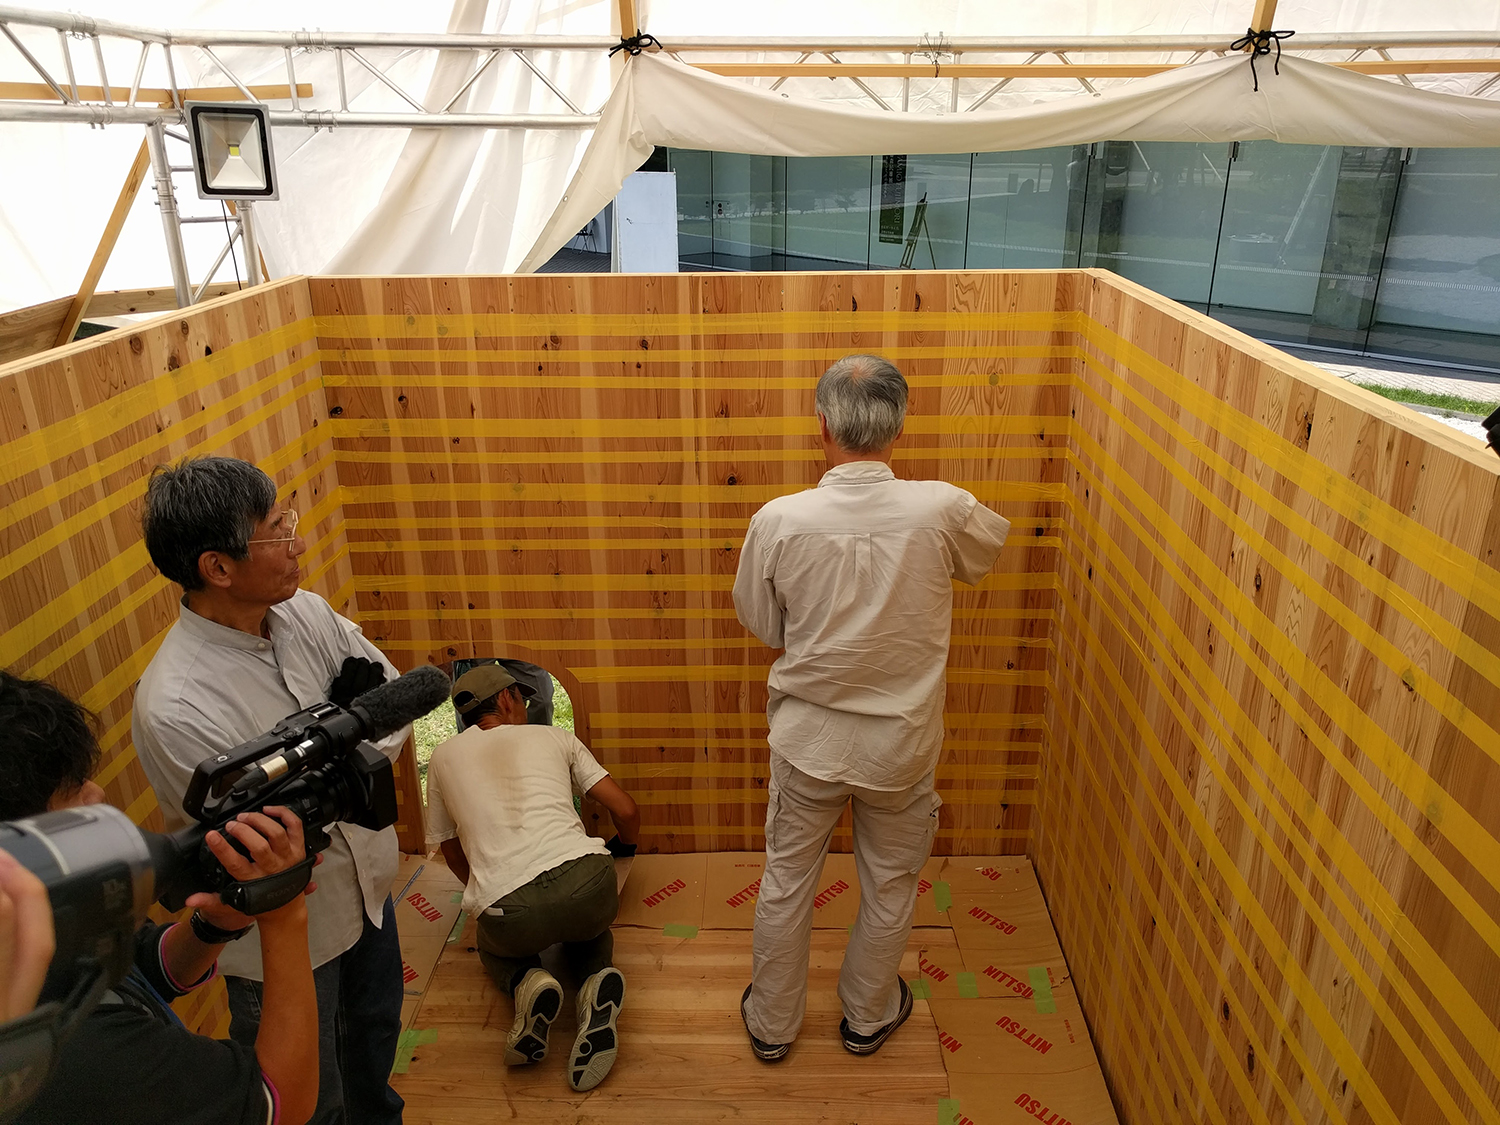
Then we applied layer of Excel Joint over the wall, then we applied Japanese white plaster.
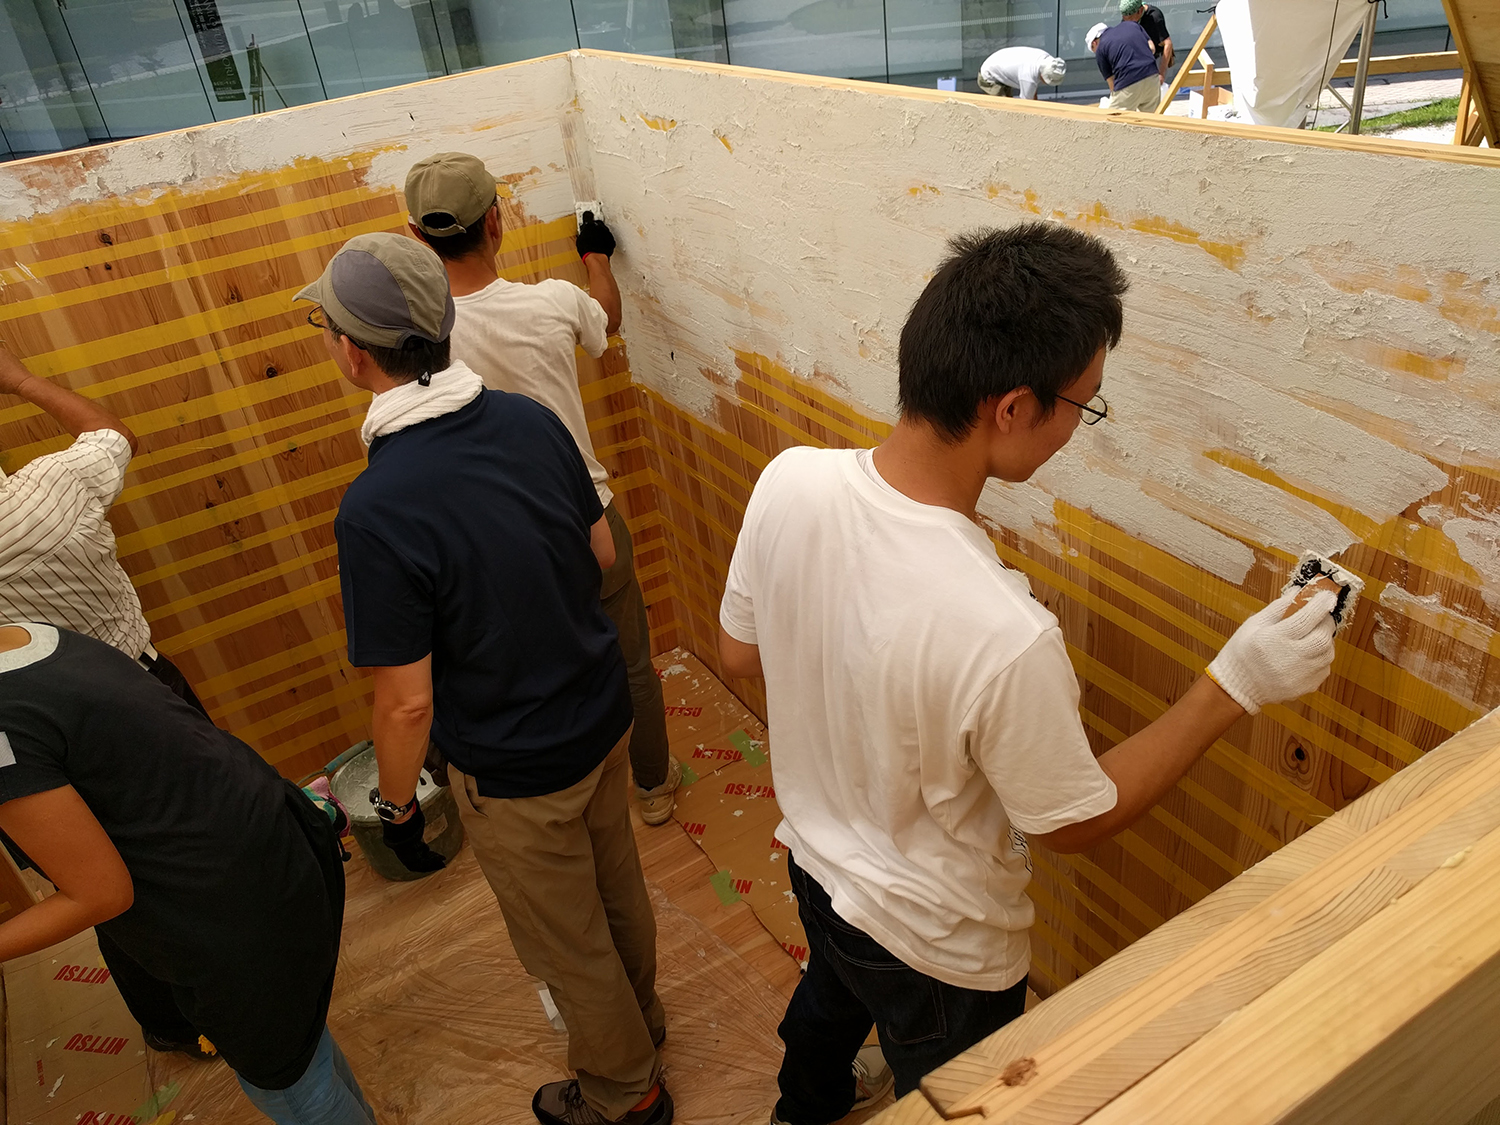
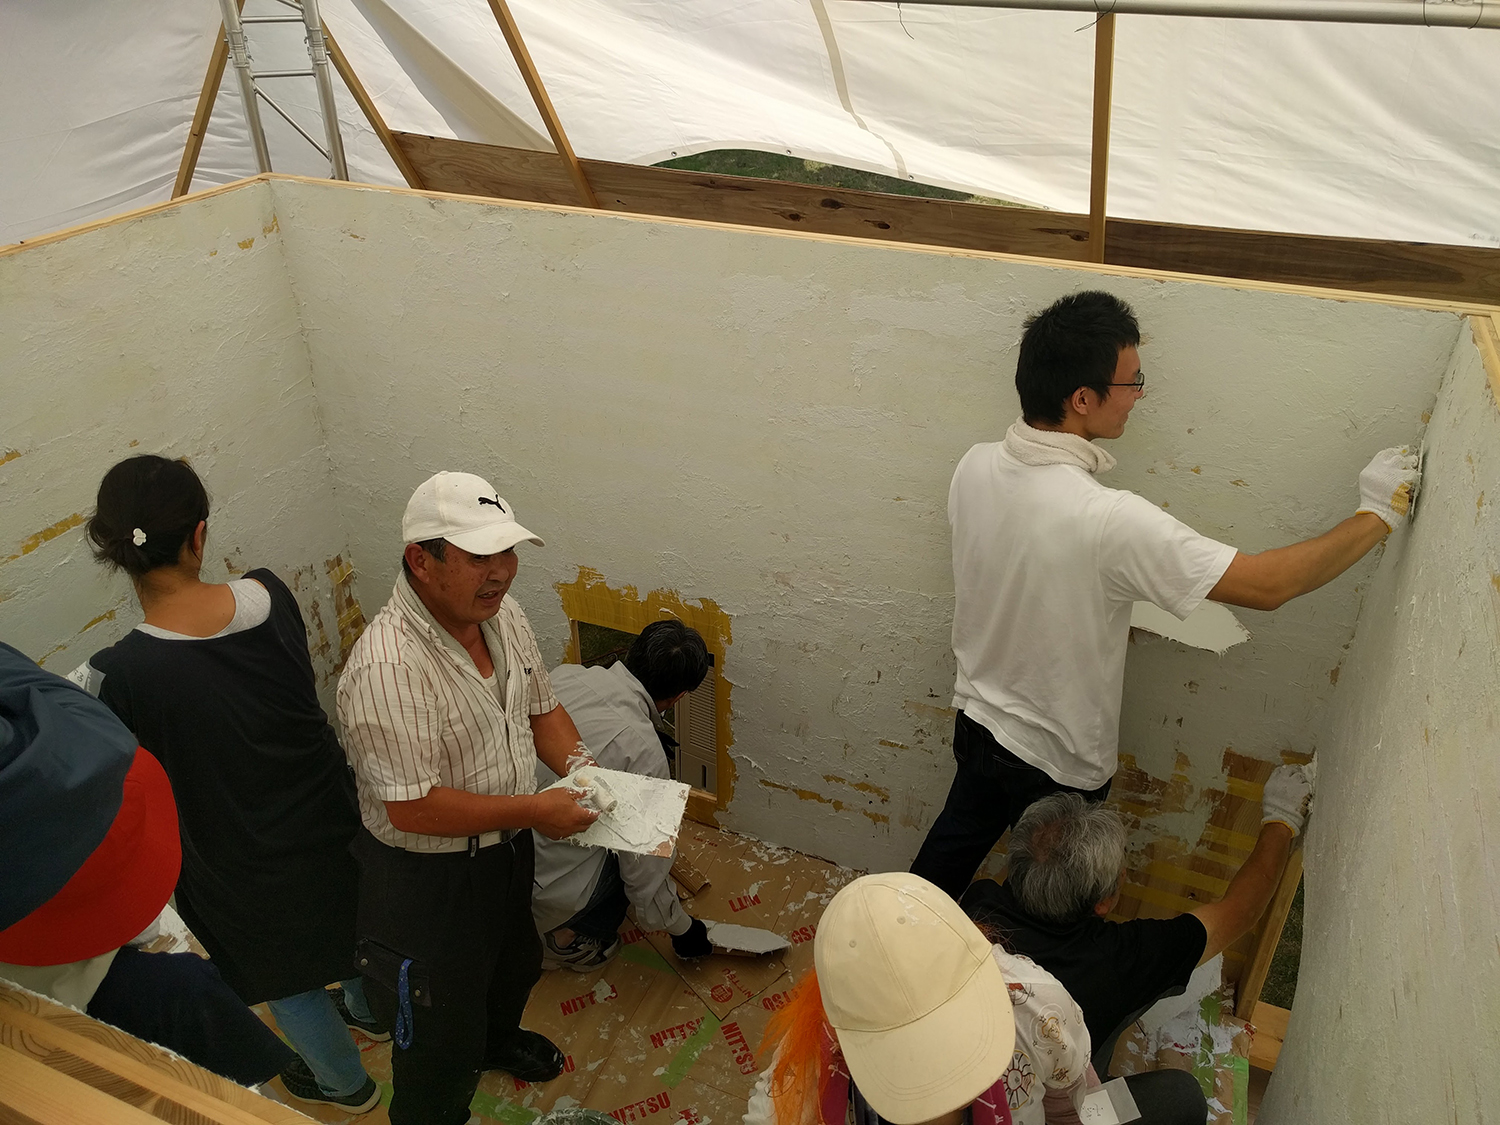
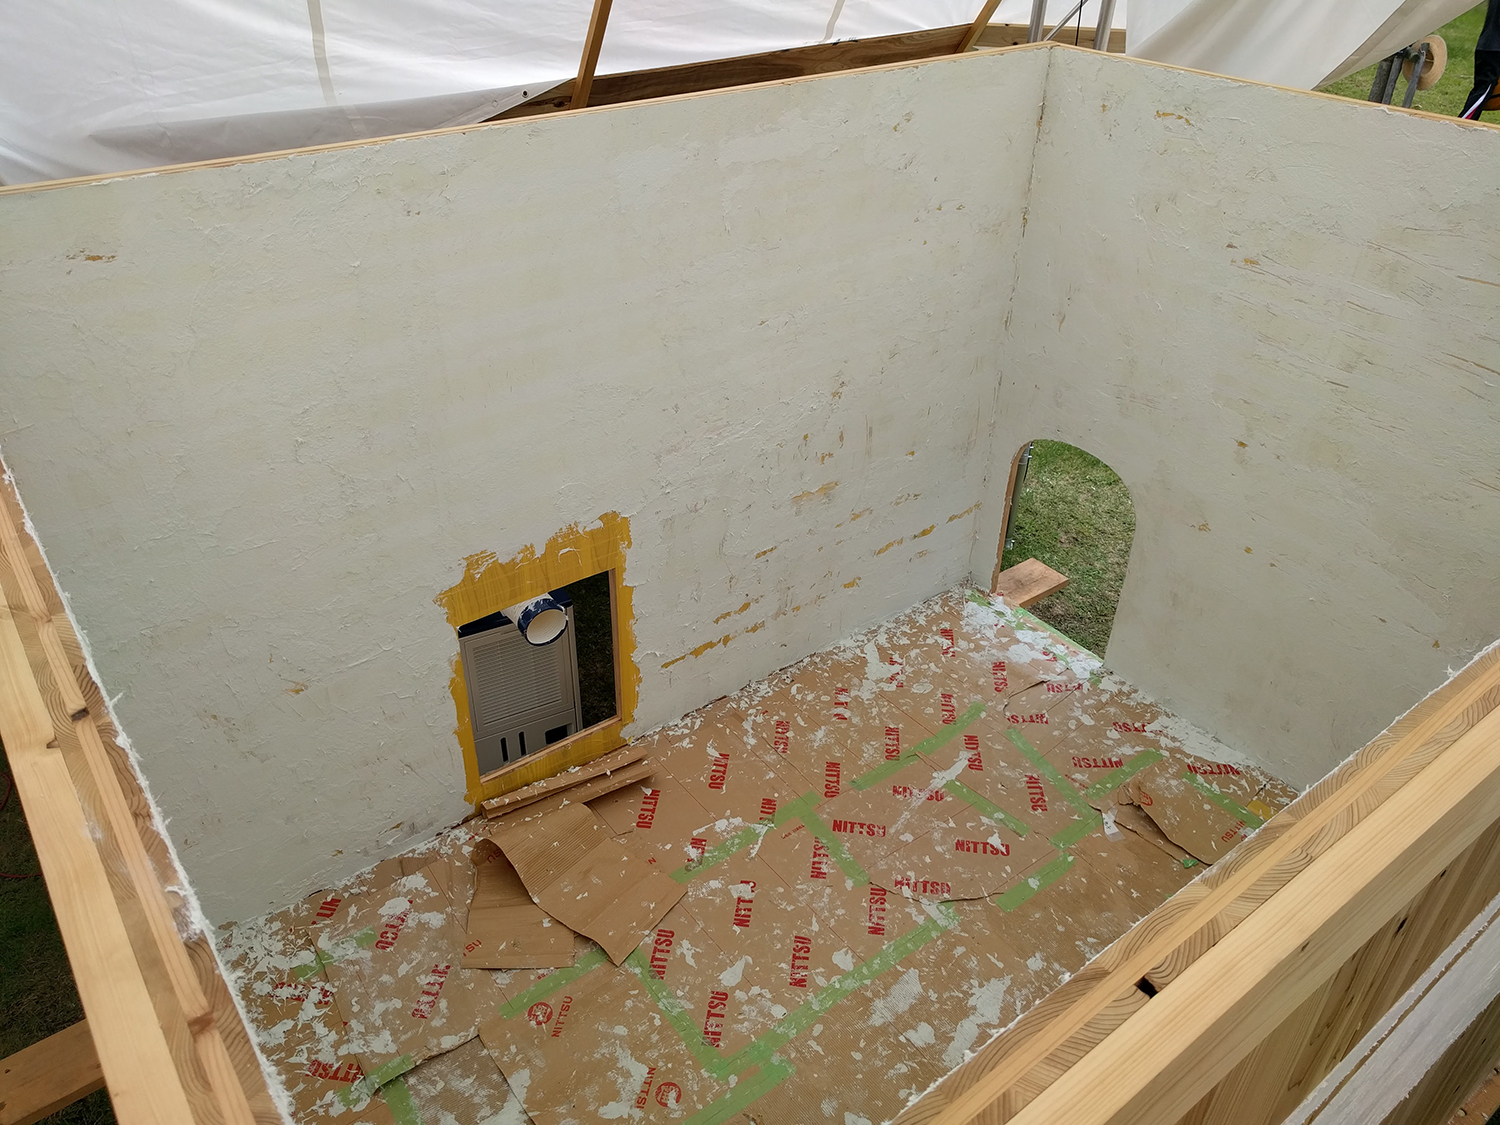
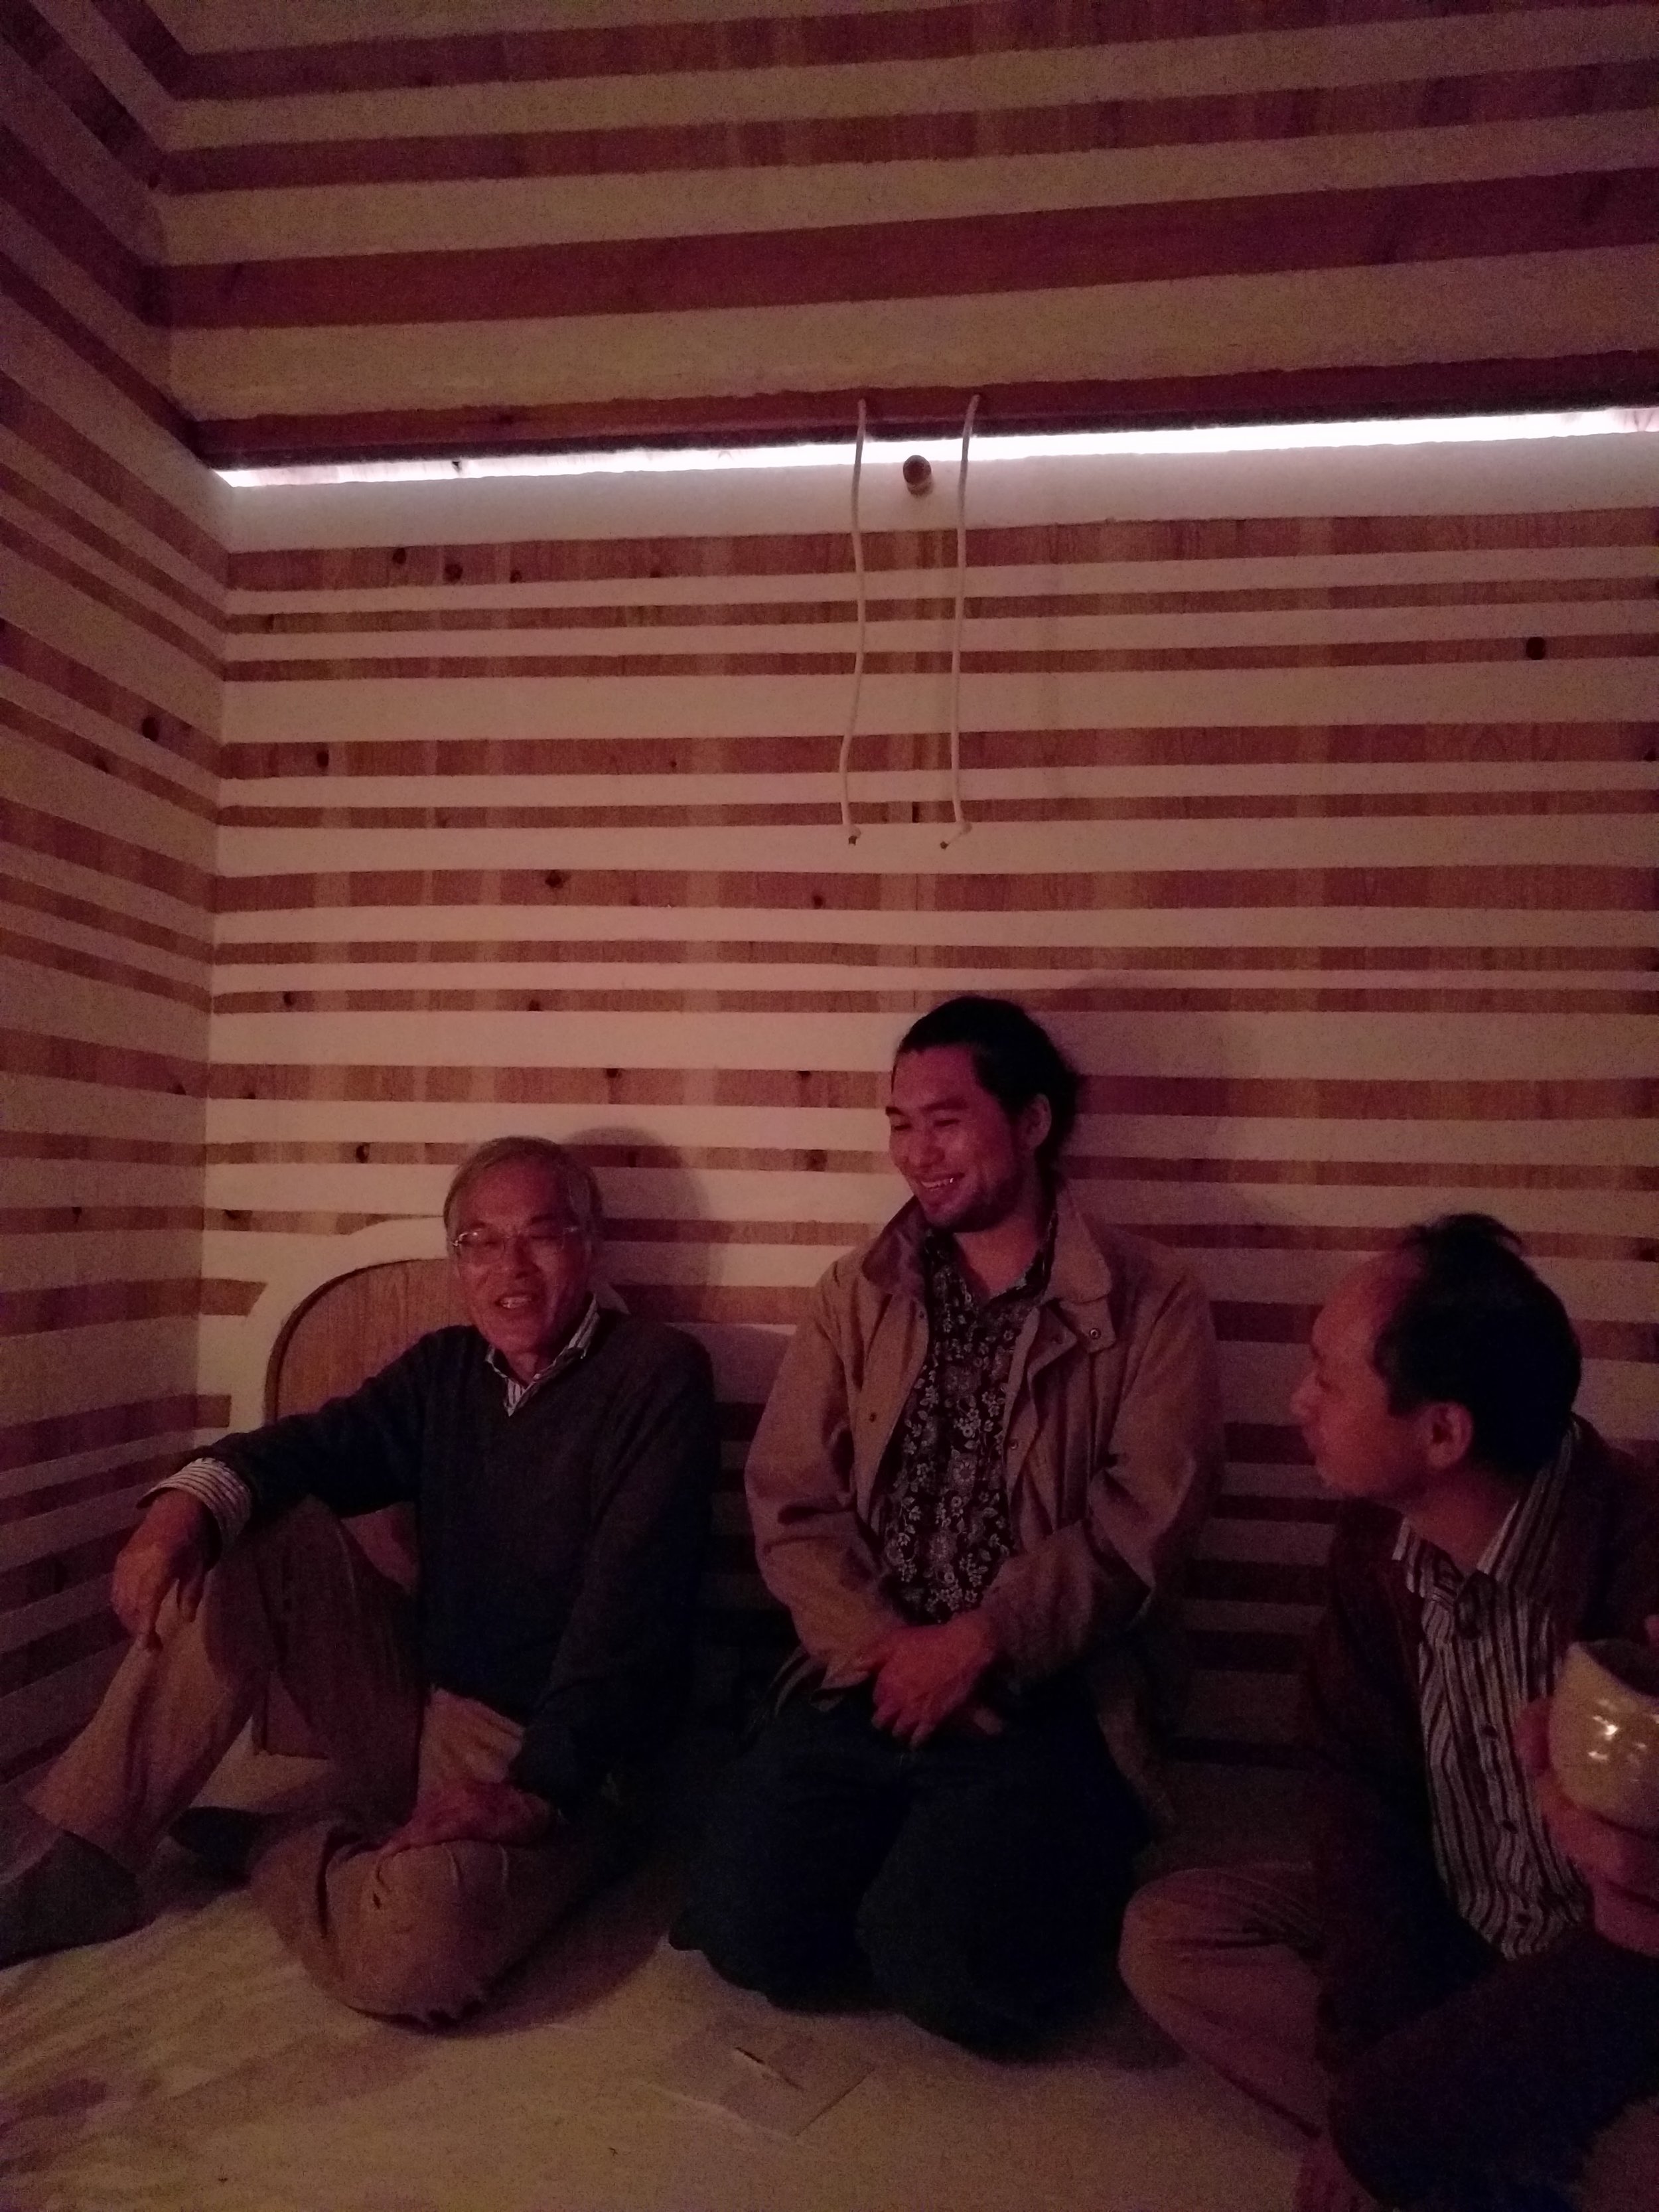
Then we pealed the tapes. The grain of wood and texture of the white plaster gave the wall striking yet, very natural look.
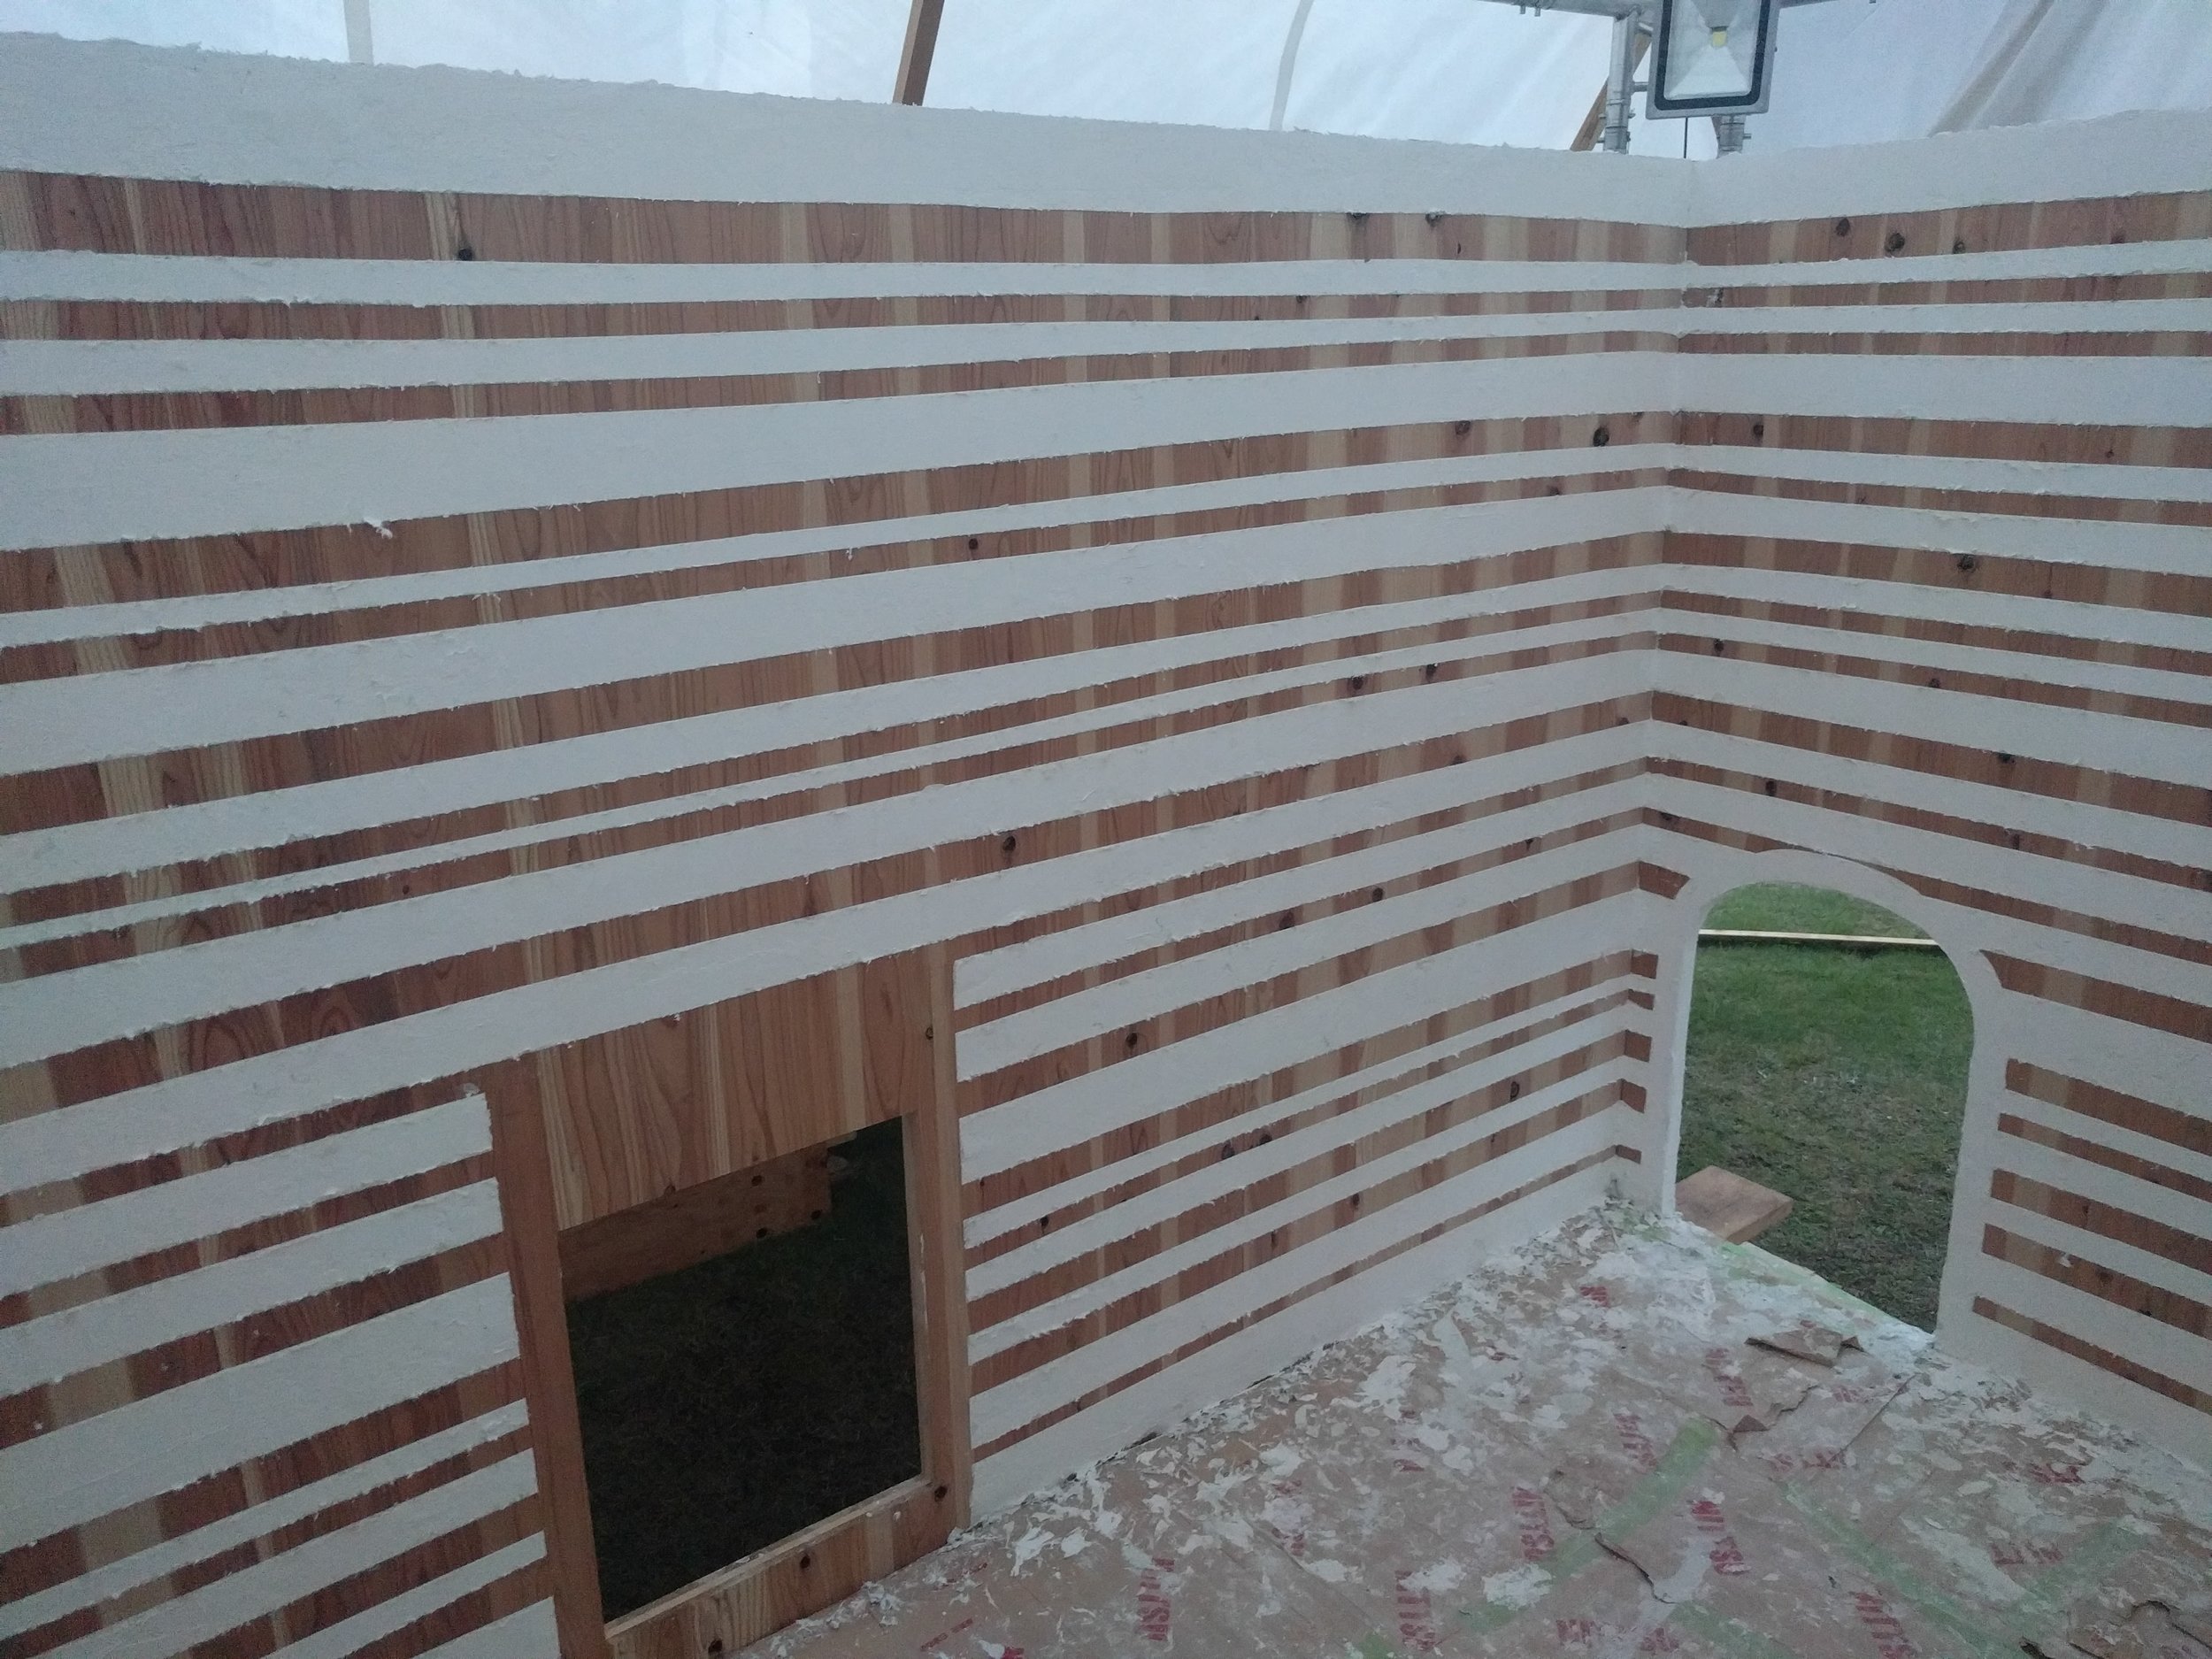
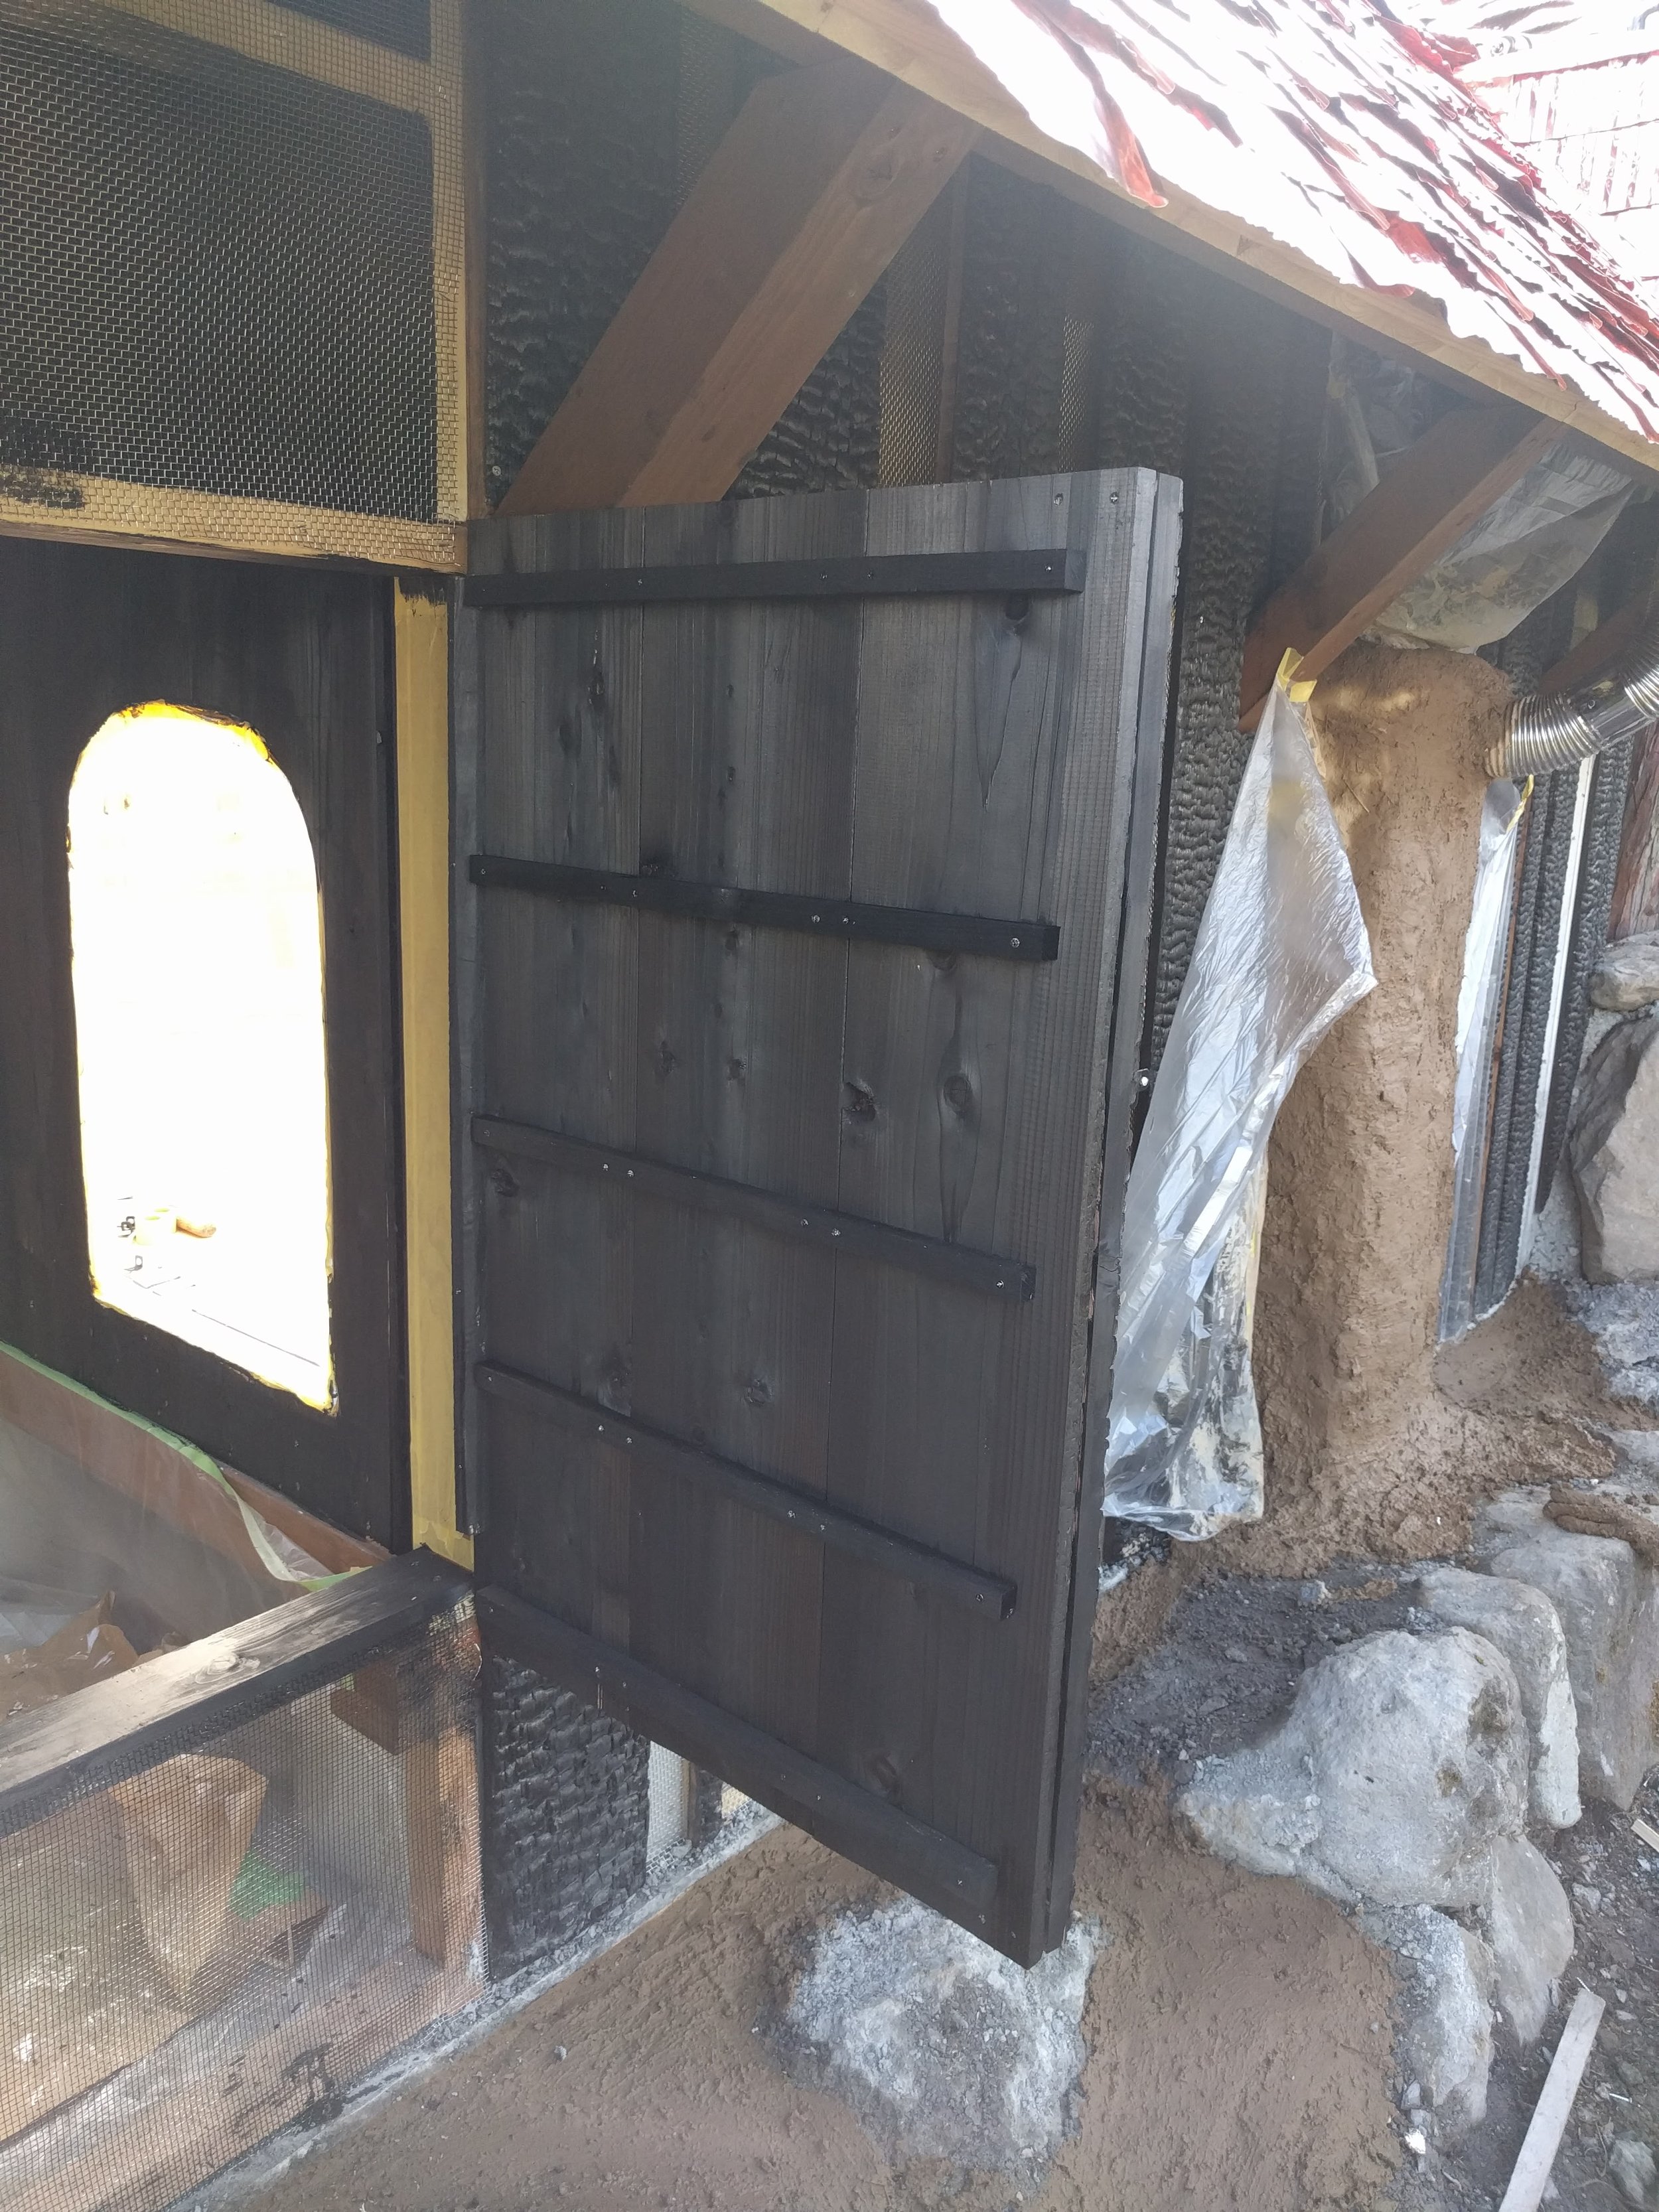
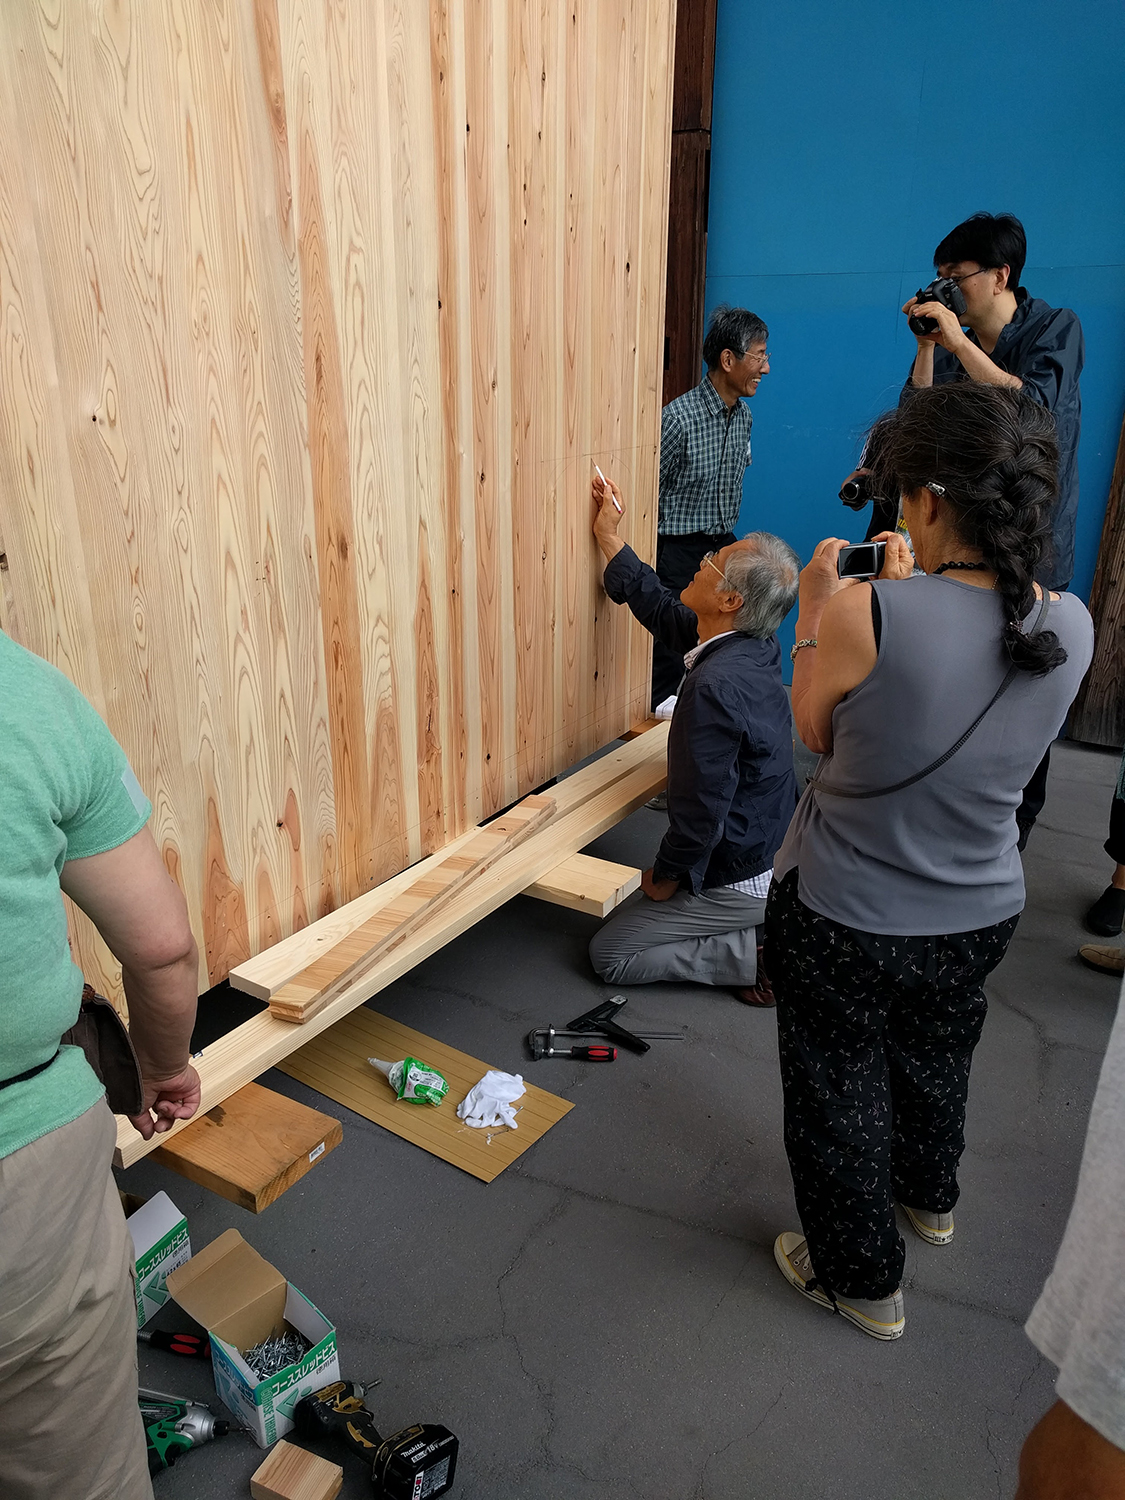
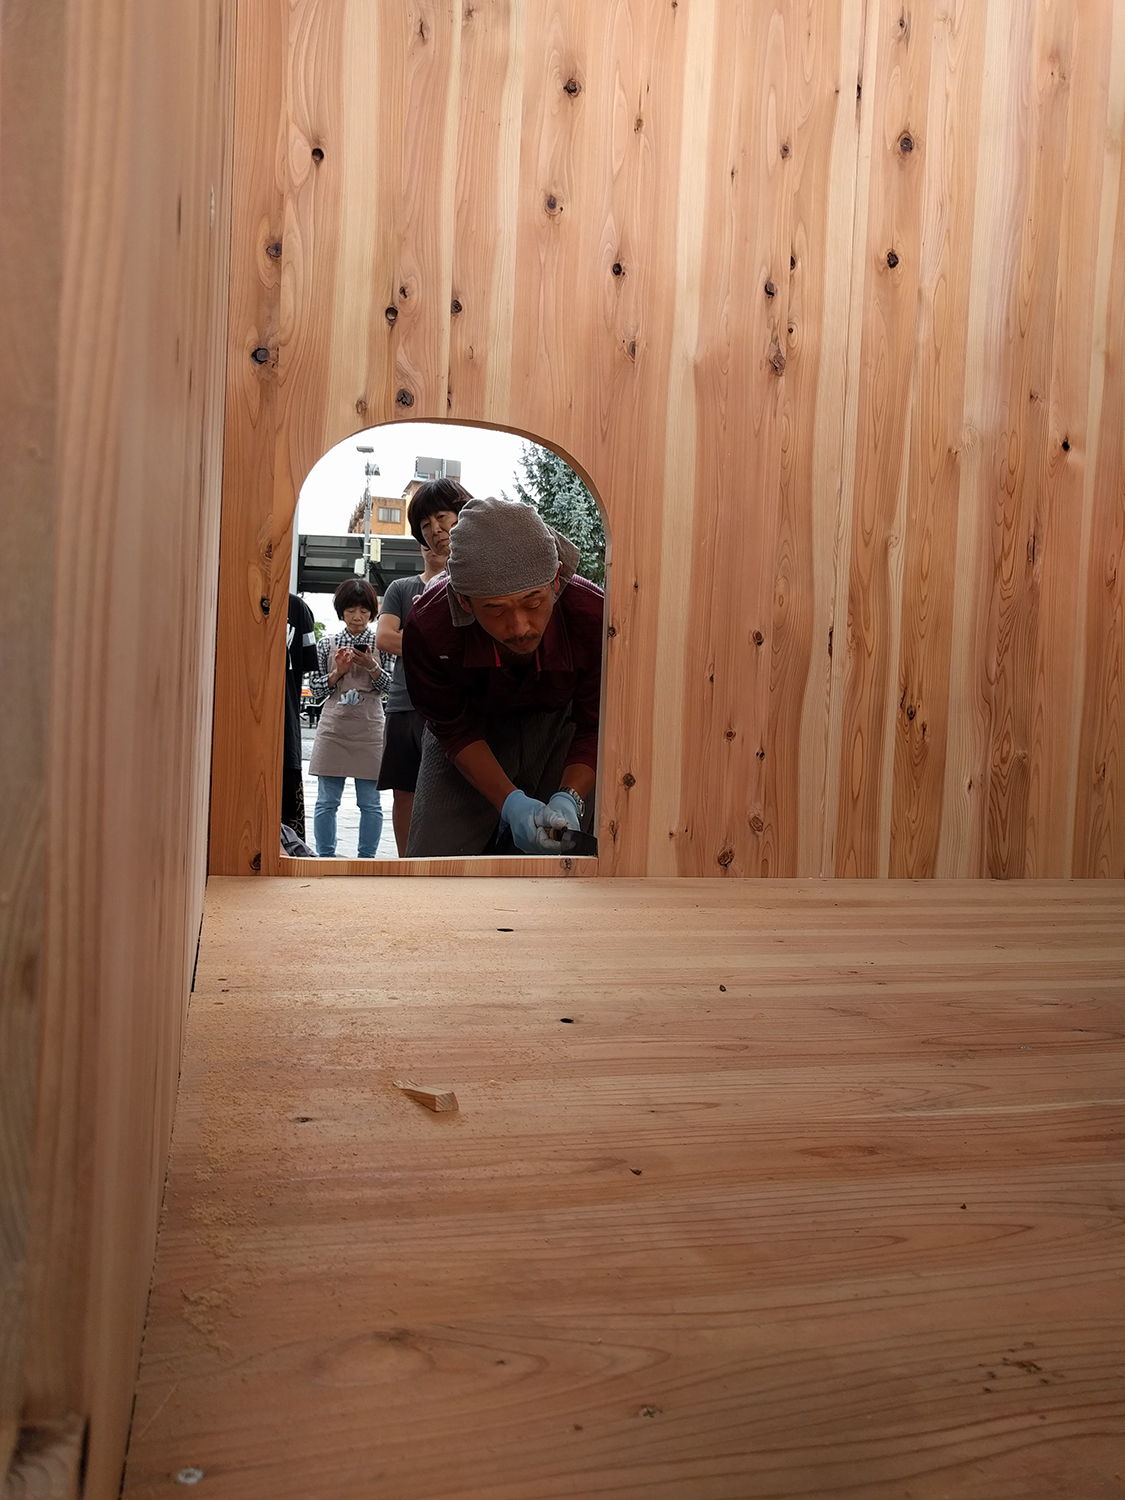
We started to erect walls. Also, we made a tiny entrance! We tested out new wall finish pattern, shikkui (lime plaster) stripes over wood wall.
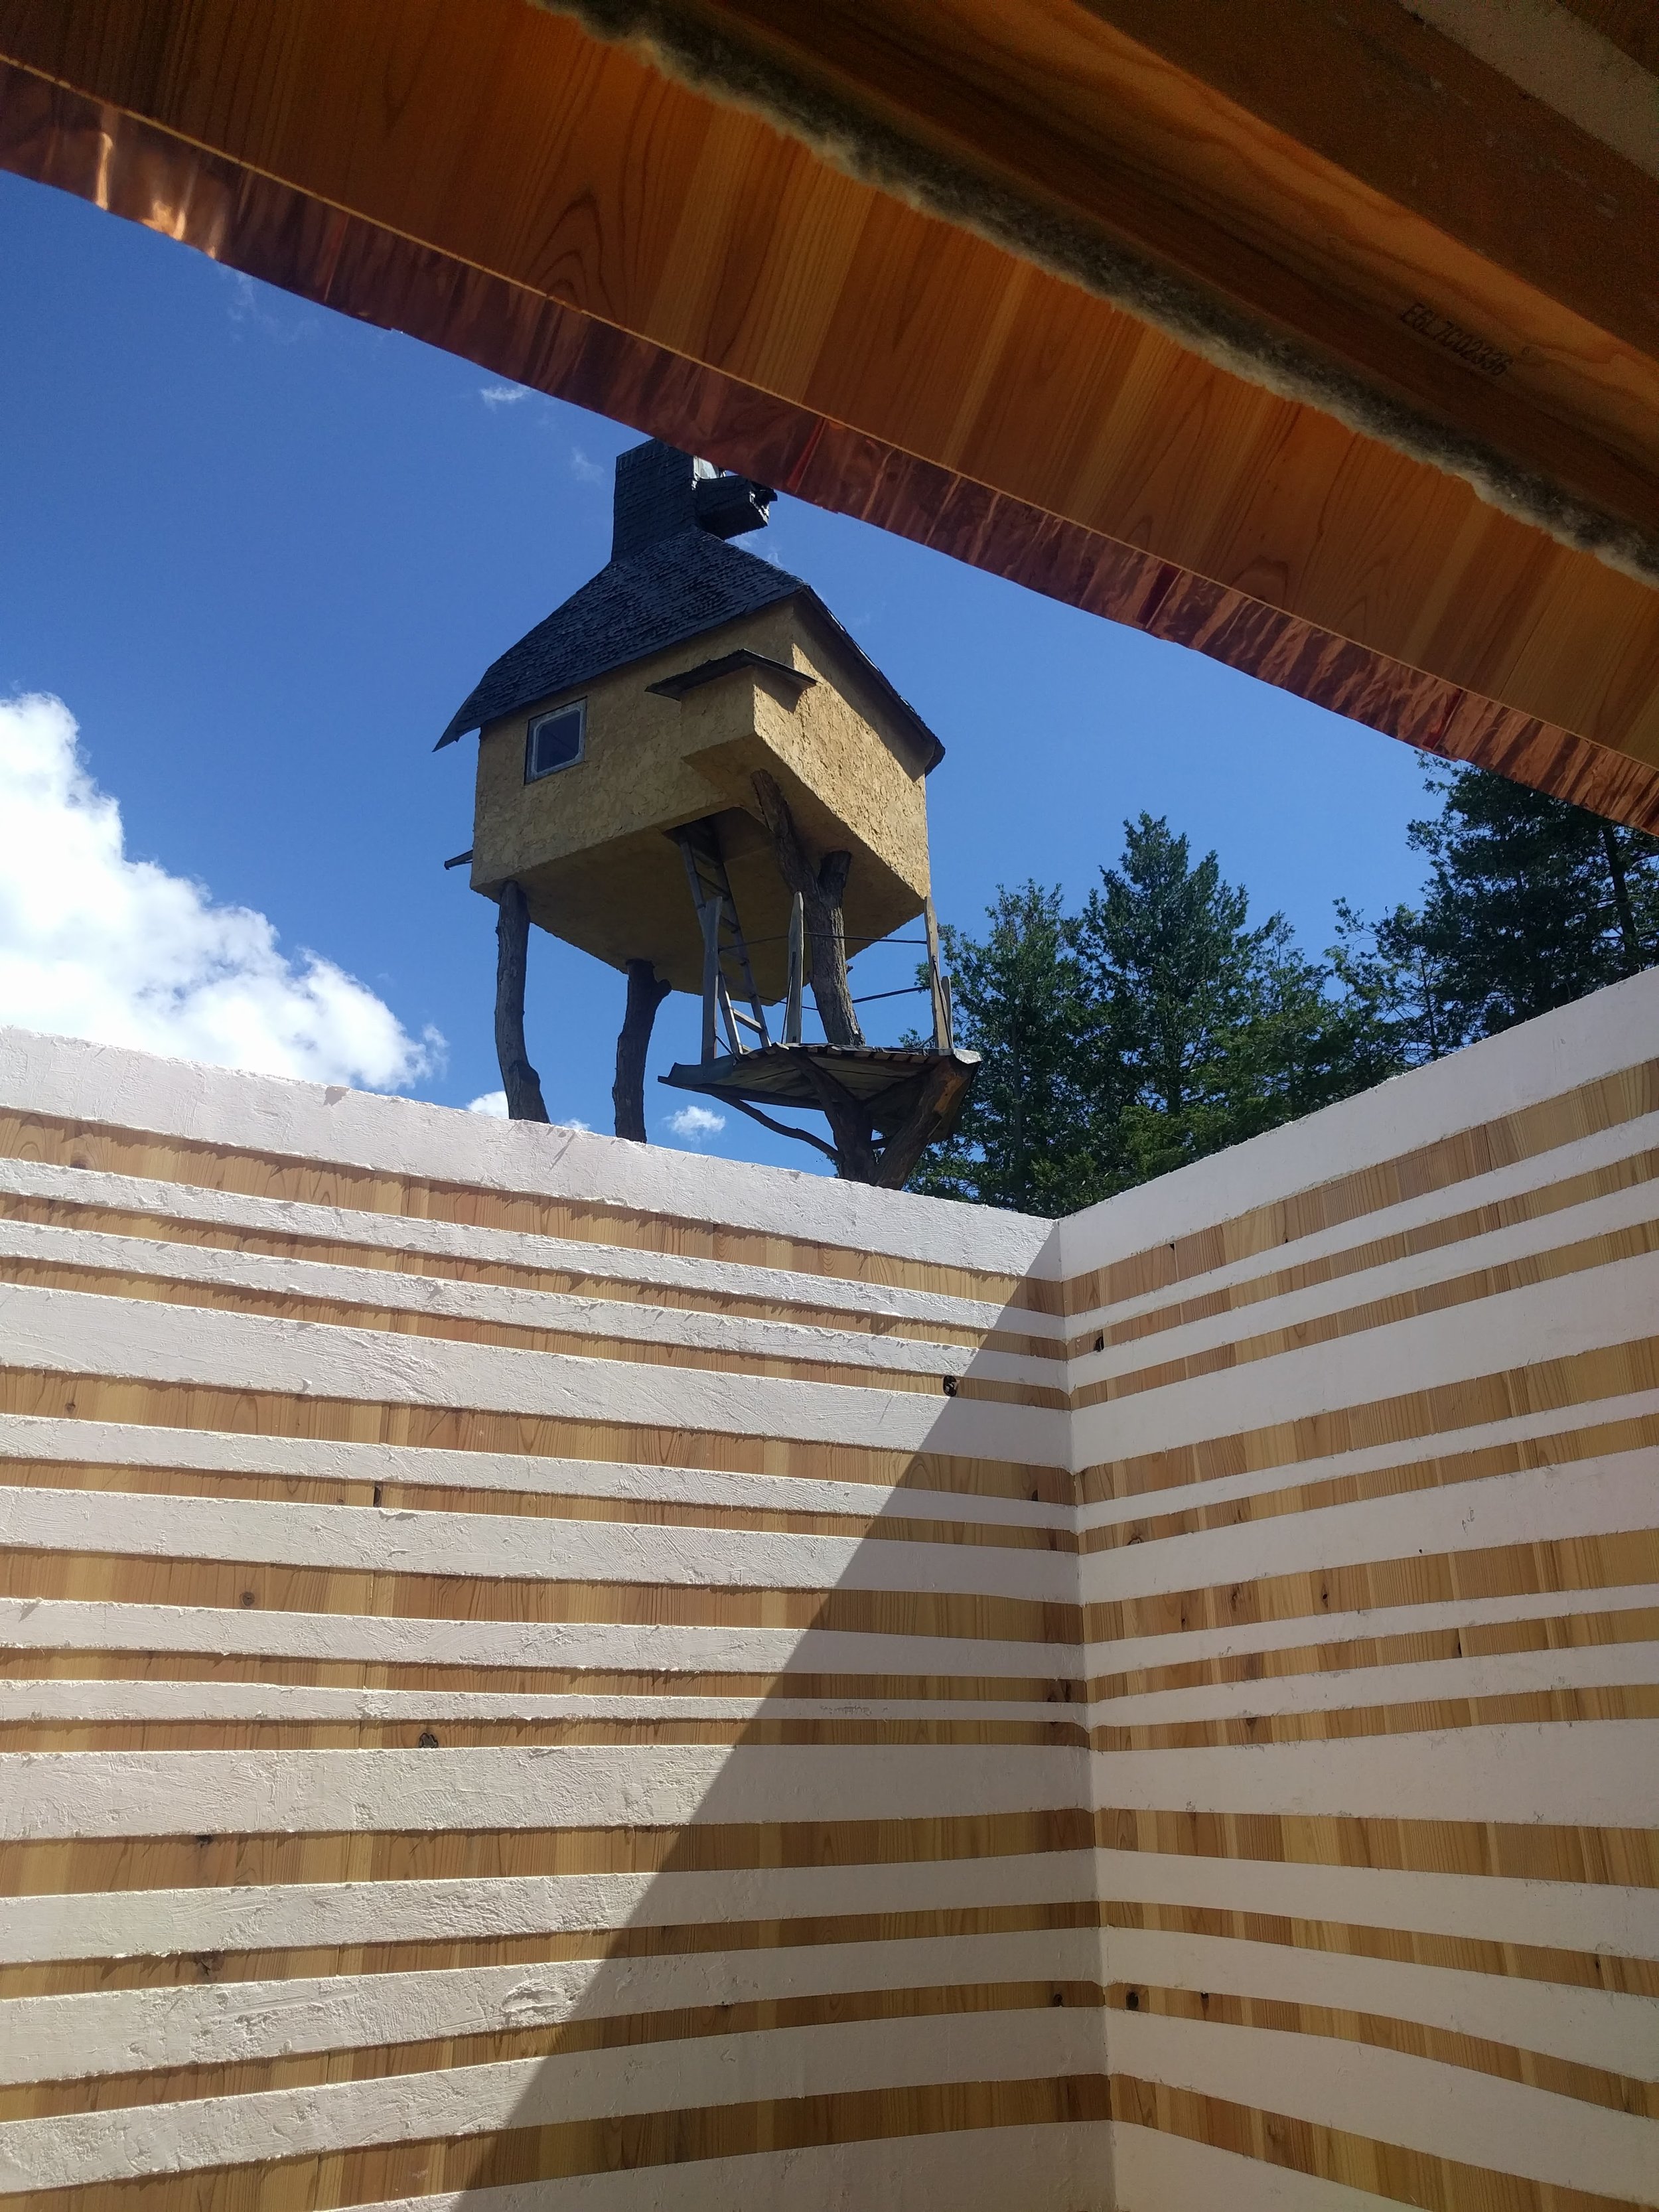
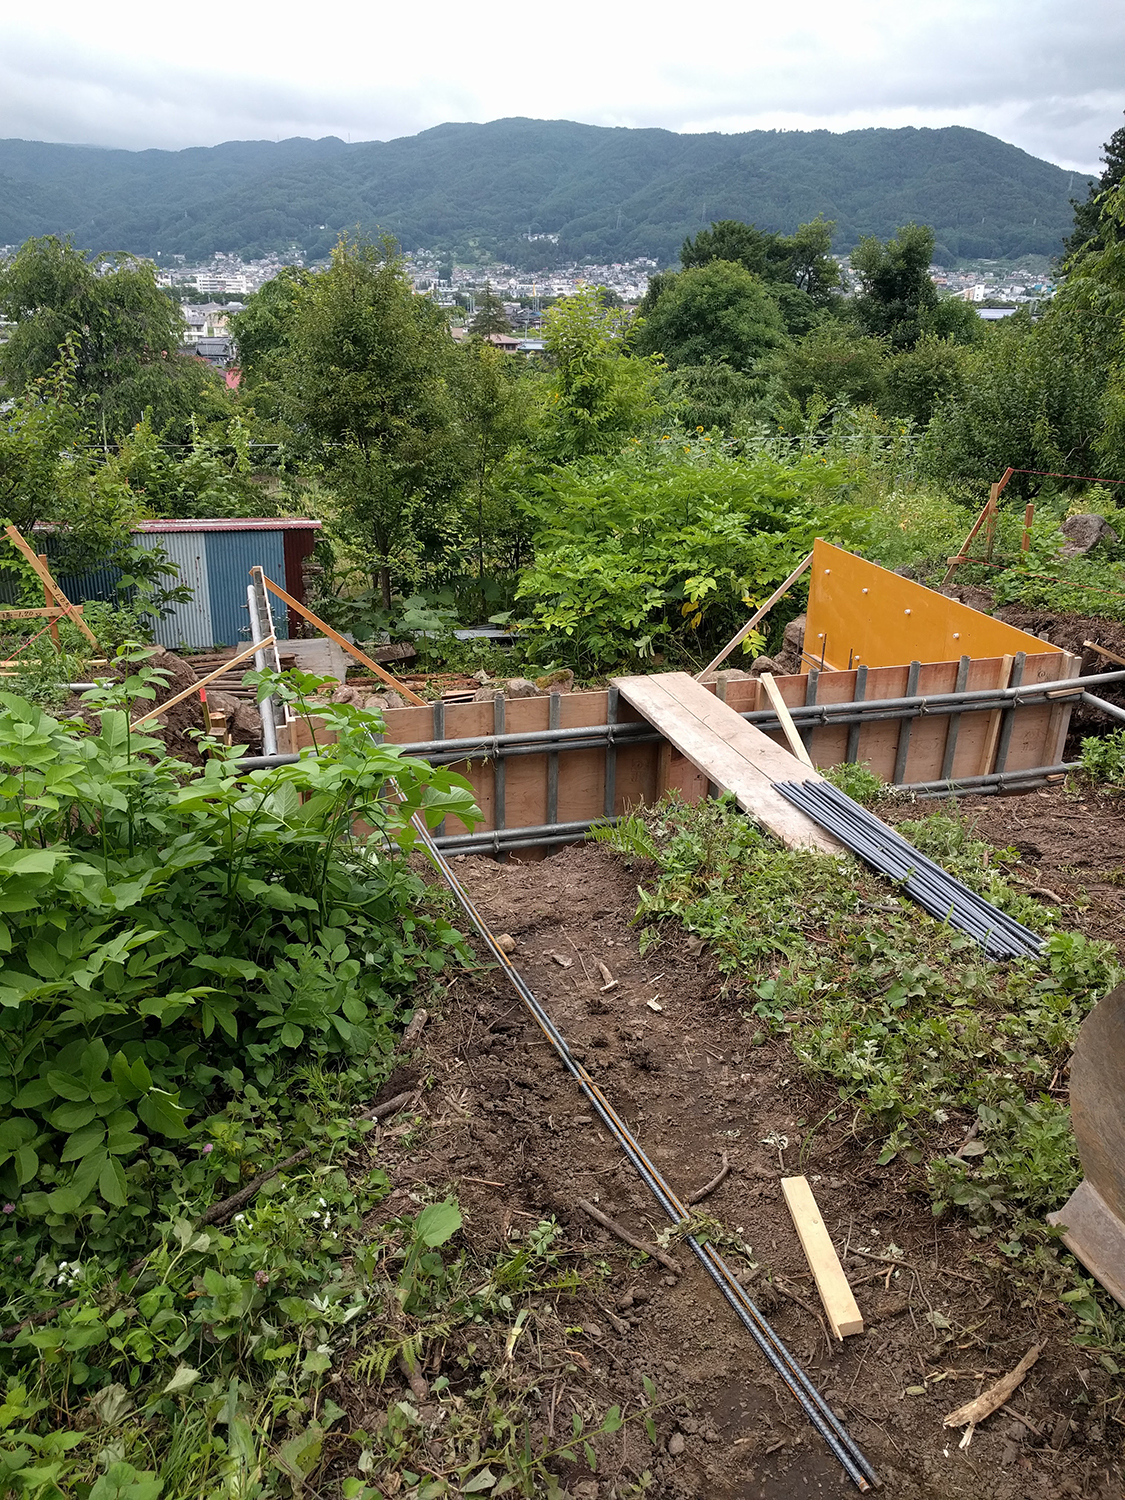
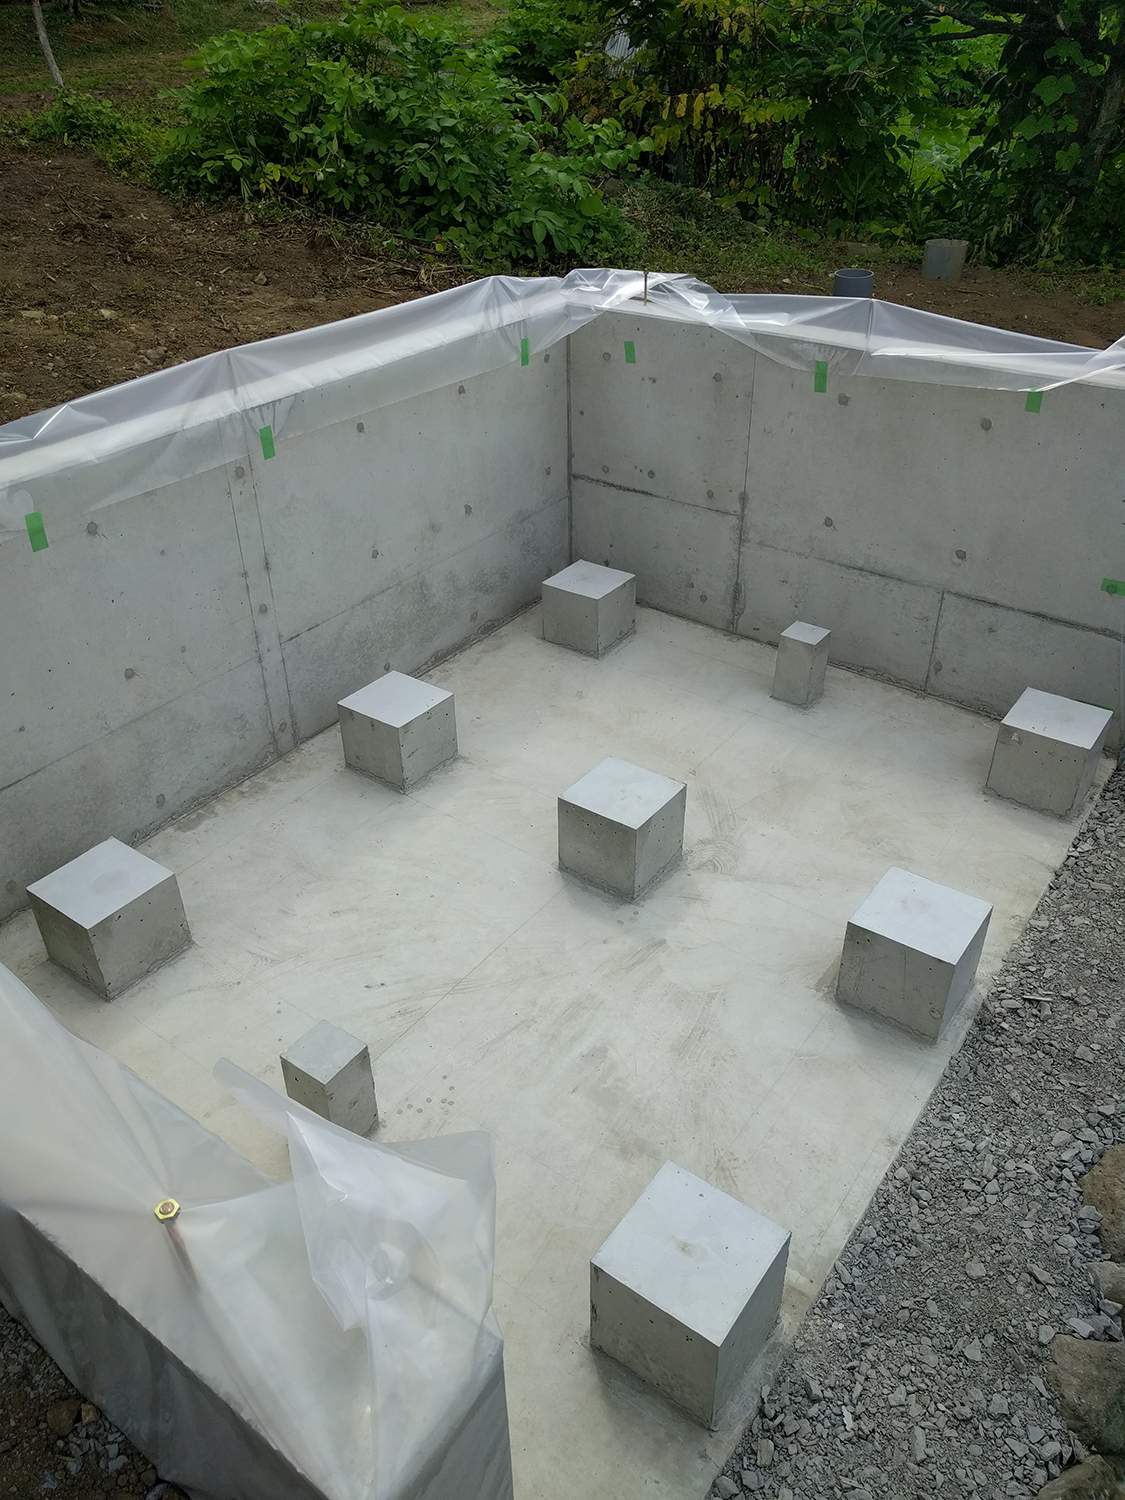
While we were making the floor and roof shingles, another construction was going on at the project site. The site was excavated and footing for the tea hut was poured. Form work for concrete retaining walls are erected. The famous Takasugi An (Too High Hut) is right next to the new tea hut.
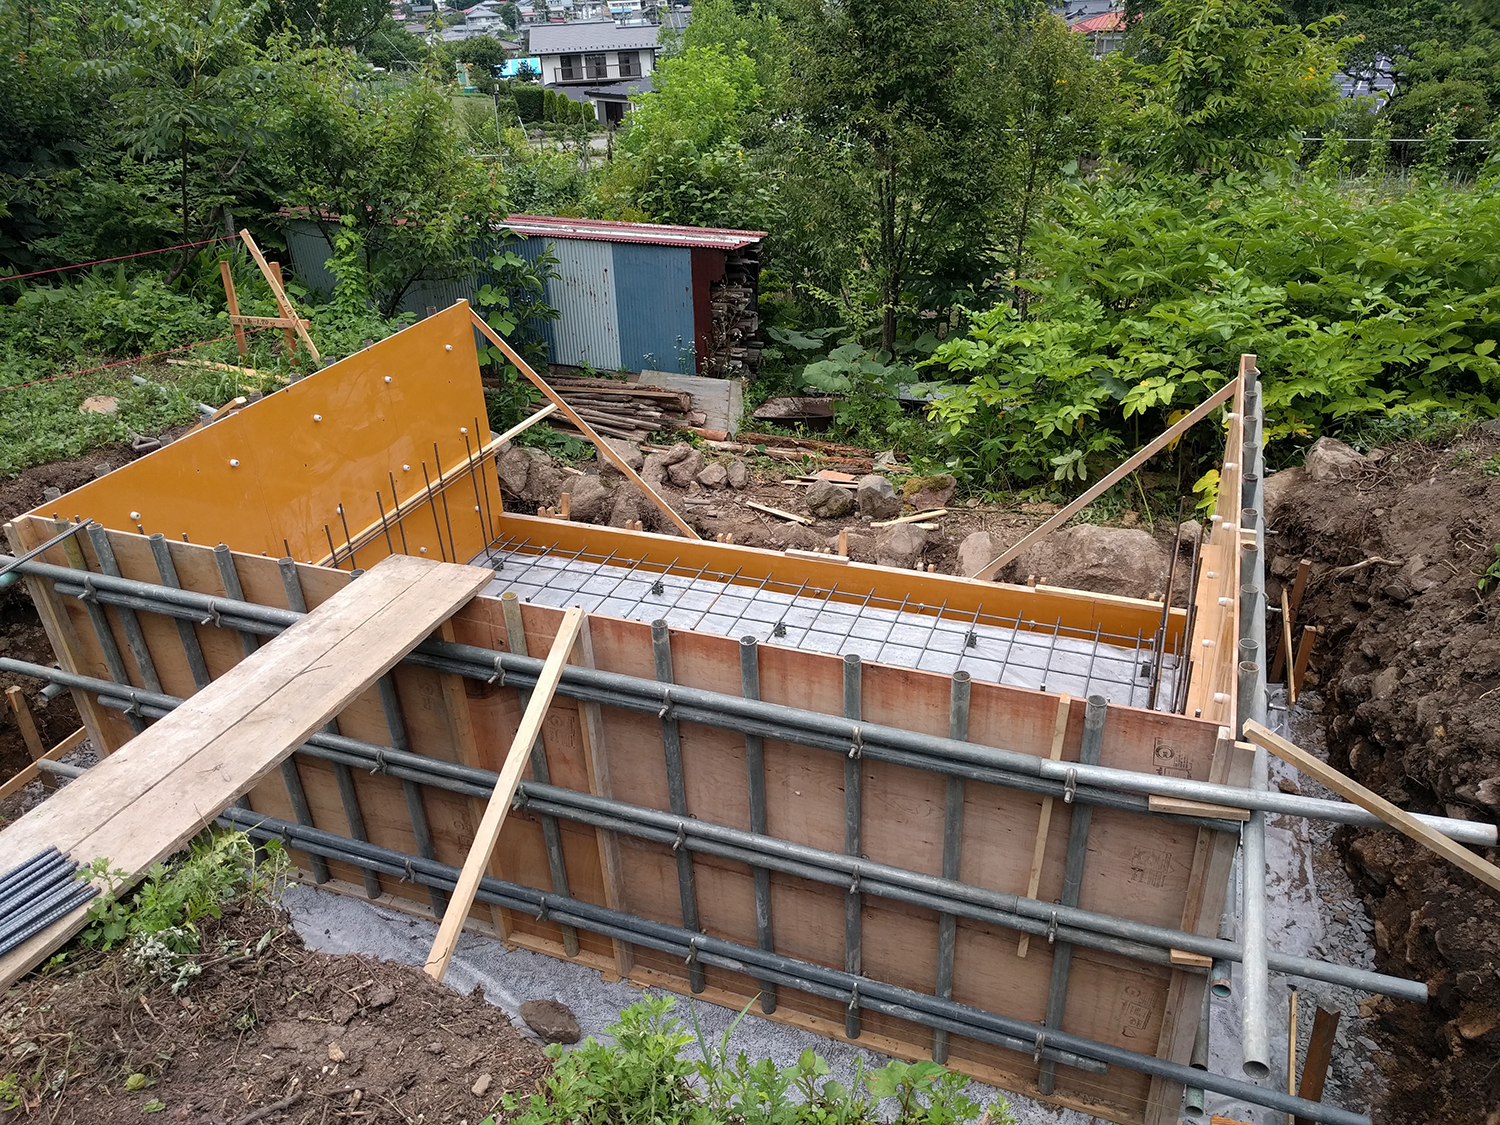
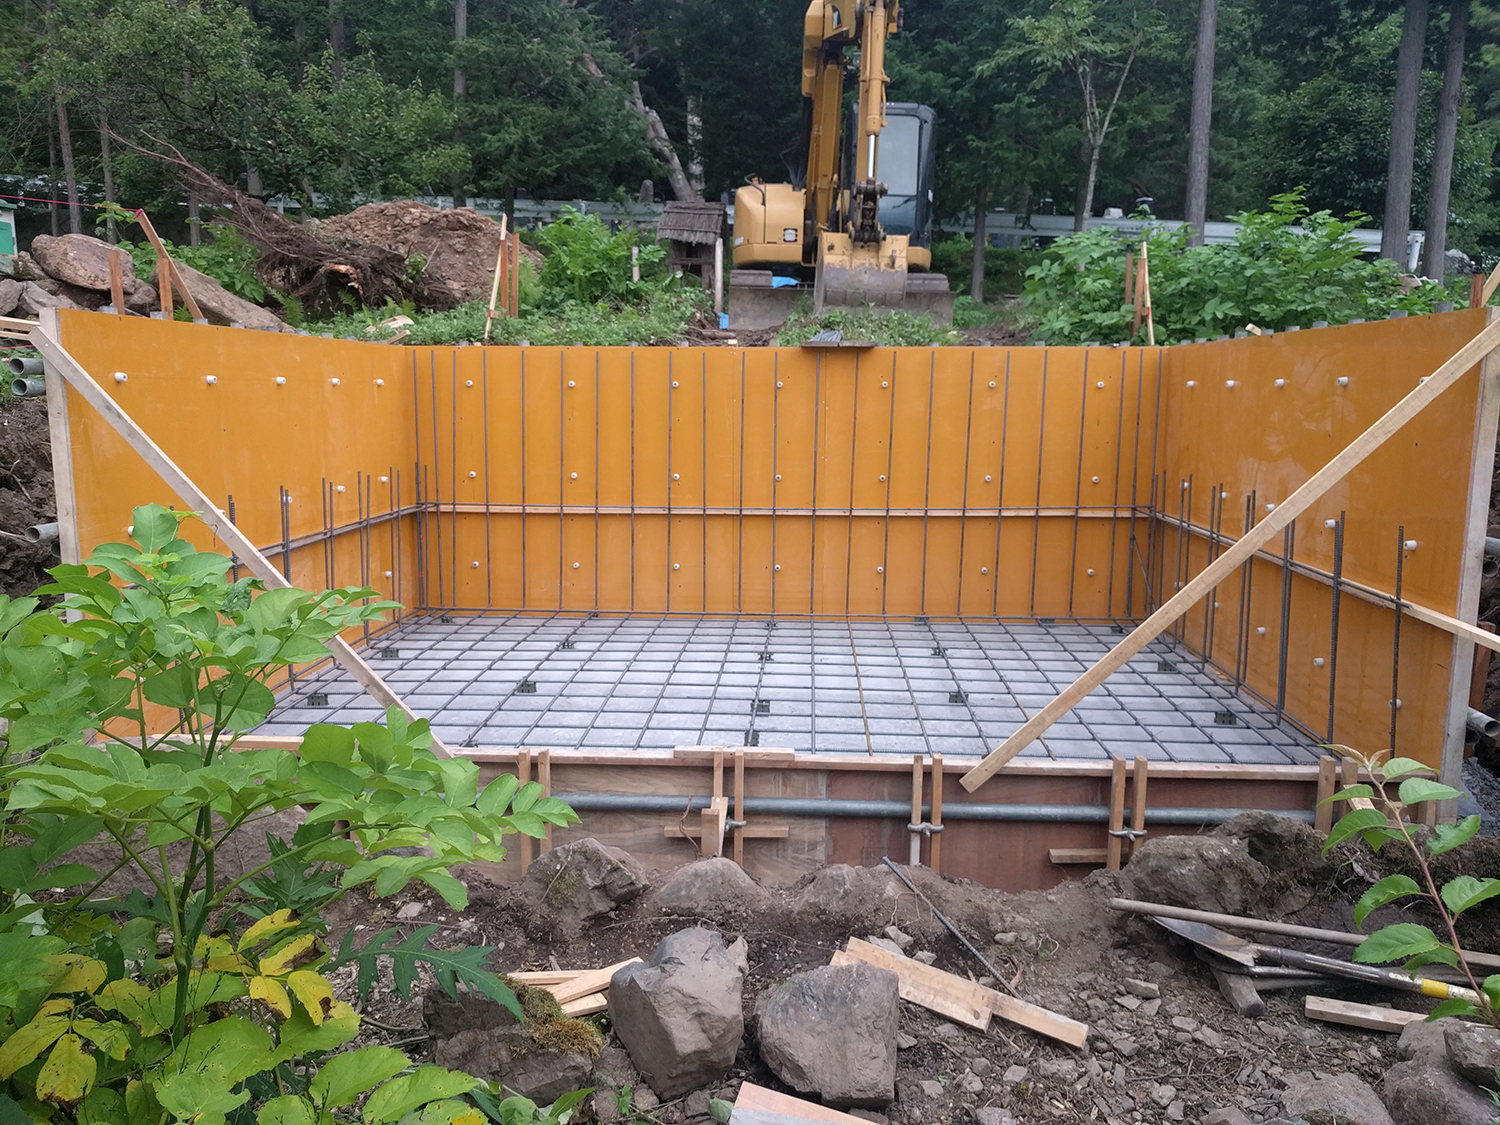
Here are images of the form work off.
In May of 2017, I learned about a workshop to build a tea hut designed by Terunobu Fujimori in Chino City, Nagano Japan. I called the office and told them I was interested in participating. They asked me which date I could come. I said "I can come every single day available."
On the first day, Dr. Fujimori taught us how to make crinkled copper roof shingle. The Chino Art Museum director, Mr. Tsyjino explaining where the copper shingle will be used.
We folded the copper shingles using a jig, then we beat them using wooden sticks until it looked like crinkled paper.
Read More